
✨ Introduction: The Timeless Accessory
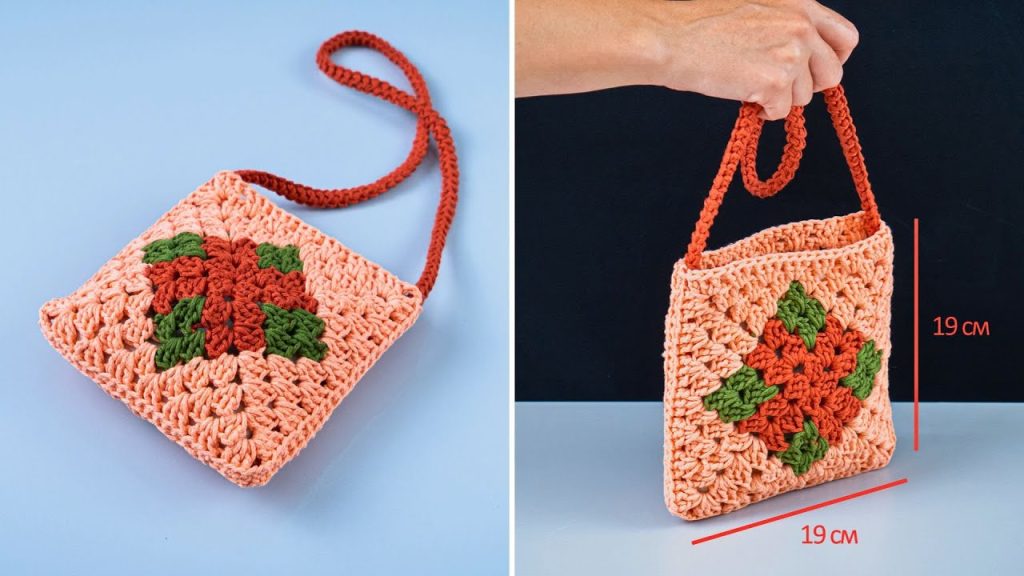
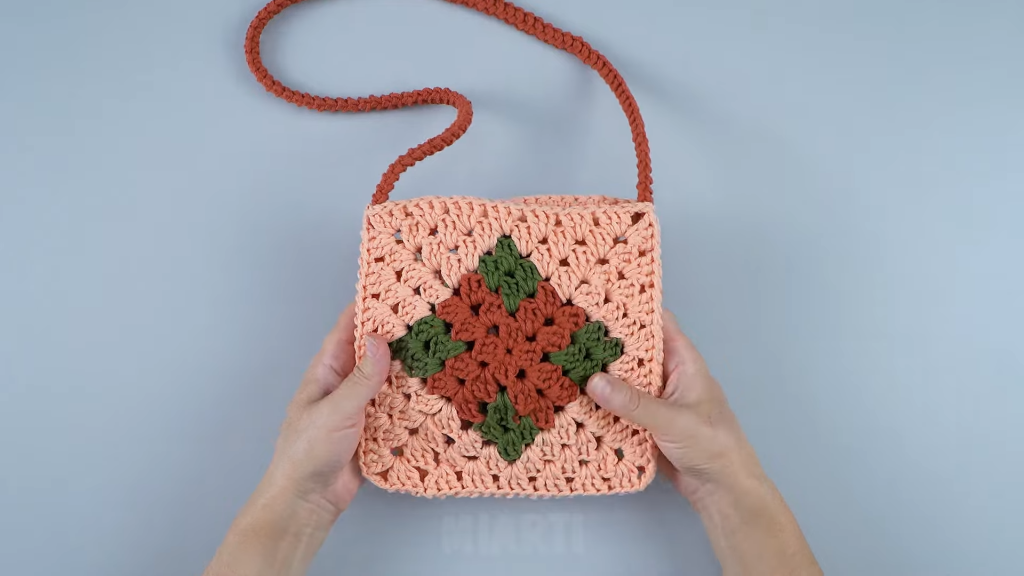
Welcome to the detailed pattern for the Retro Chic Solid Granny Square Tote Bag! This beautiful, structured bag is inspired by the fashionable granny square projects popular in the video, providing a sturdy and stylish accessory perfect for everyday errands, market trips, or as a vibrant stash-buster.
Unlike traditional granny squares with their open, lacy gaps, this pattern uses the Solid Granny Square construction. This method creates a dense, durable fabric that is ideal for bags, ensuring your finished tote holds its shape and keeps your contents secure. By incorporating multiple color changes, you can achieve a stunning, high-contrast block effect, giving your bag a professional, vintage-inspired finish.
Key Features of the Design
- Solid Construction: Uses Double Crochet (DC) blocks to eliminate gaps, making the bag sturdy and suitable for lining (though lining is optional).
- Structured Shape: The assembly method creates a boxed bottom, allowing the bag to stand up on its own.
- Color Blocking: The design is broken into multiple color sections per square, perfect for utilizing yarn scraps in complementary or contrasting shades.
- Simple Assembly: The bag is constructed from five squares: four for the sides and one for the base.
📚 Materials & Terminology
| Abbreviation | Meaning |
| ch | Chain |
| st(s) | Stitch(es) |
| sl st | Slip Stitch |
| sc | Single Crochet |
| dc | Double Crochet |
| ch-sp | Chain space |
| rep | Repeat |
| MR | Magic Ring |
| ( ) | Repeat instructions inside parentheses |
Materials Needed
- Yarn: Worsted Weight (#4) Cotton or Acrylic yarn in four contrasting or complementary colors.
- Color A (Center): Light color (e.g., White or Cream)
- Color B (Mid-Block): Accent color (e.g., Green or Teal)
- Color C (Outer-Block): Dark color (e.g., Black or Navy)
- Color D (Border/Strap): Pop color (e.g., Mustard Yellow or Orange)
- Hook: 4.0 mm to 5.0 mm (G/6 to H/8), depending on your yarn choice. Use a hook that creates a dense fabric.
- Tools: Scissors, tapestry needle for weaving in ends, and stitch markers (optional).
📐 Gauge & Sizing
- Gauge: The gauge is determined by the size of your finished motif. Consistency is more important than a specific measurement.
- Motif Size: Aim for your finished 7-Round Solid Granny Square to measure approximately 6 to 8 inches (15–20 cm) across.
- Finished Bag Dimensions (Approximate, based on 7-inch squares):
- Height: ~14 inches (2 motifs tall)
- Width: ~14 inches (2 motifs wide)
- Base Depth: ~7 inches
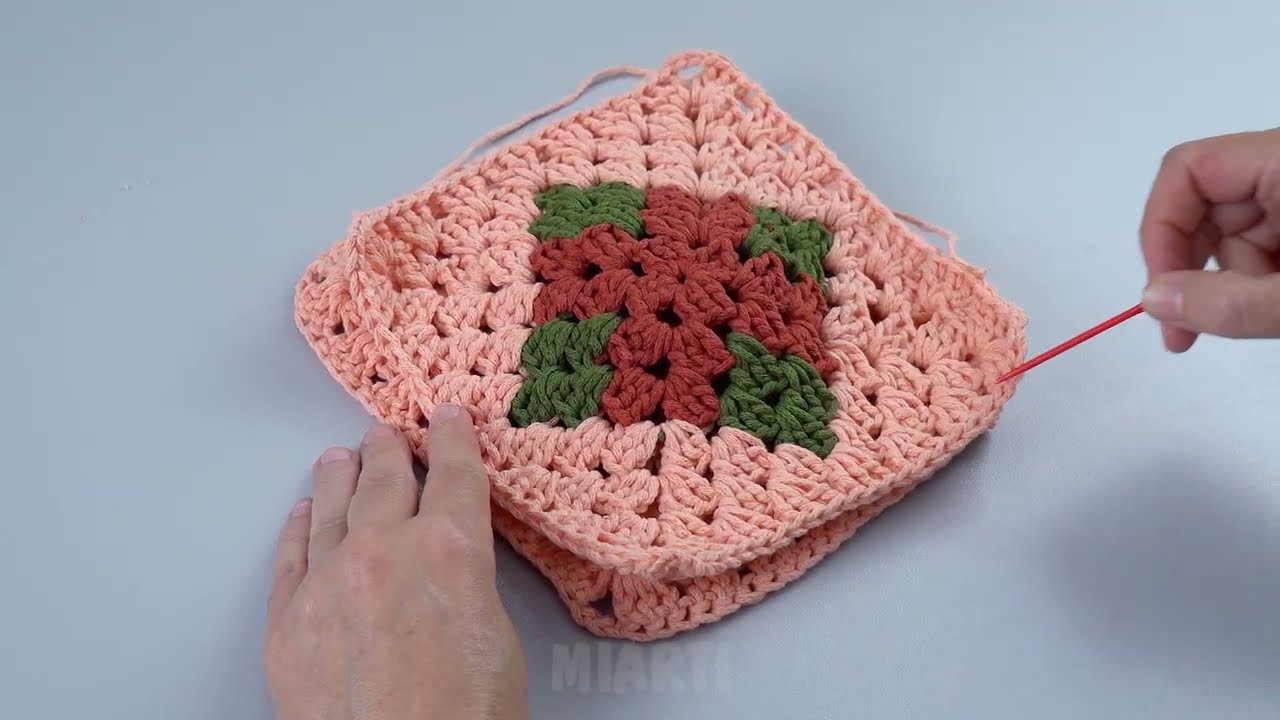
🟩 The Solid Granny Square Motif (Make 5)
This square is the building block of the bag. You will work in rounds, increasing the stitch count on the sides and creating a consistent corner space.
Color Key: R1-R2 in Color A, R3-R4 in Color B, R5 in Color C, R6-R7 in Color D.

Round 1: Center Block (Color A)
- Start with a Magic Ring (MR) or Ch 4 and sl st to join.
- Ch 3 (counts as 1 DC). Work 2 DC into the ring.
- Ch 2.
- *(Work 3 DC into the ring. Ch 2).* Rep from * 2 more times. (You should have 4 groups of 3 DC, separated by Ch 2).
- Sl st to the top of the beg Ch 3 to join.
- [12 DC, 4 Ch-2 spaces]
Round 2: Extending the Block (Color A)
- Sl st into the next 2 DC to reach the corner Ch-2 space.
- Ch 3 (counts as 1 DC). Work 2 DC, Ch 2, 3 DC into the corner space. (This is your first corner).
- Side: DC into each of the 3 DC from the previous round.
- Corner: Work (3 DC, Ch 2, 3 DC) into the next Ch-2 corner space.
- Rep Step 3 and 4 twice more.
- Work 3 DC across the final side.
- Sl st to the top of the beg Ch 3 to join.
- [36 DC, 4 Ch-2 spaces] Cut Color A and secure.
Round 3: Color Block Two (Color B)
- Join Color B with a sl st in any corner Ch-2 space.
- Ch 3 (counts as 1 DC). Work 2 DC, Ch 2, 3 DC into the same corner space.
- Side: DC into each DC along the side.
- Corner: Work (3 DC, Ch 2, 3 DC) into the next Ch-2 corner space.
- Rep Step 3 and 4 twice more. Finish the last side with DC in each st.
- Sl st to the top of the beg Ch 3 to join.
Round 4: Finalizing Block Two (Color B)

- Sl st into the next 2 DC to reach the corner Ch-2 space.
- Ch 3 (counts as 1 DC). Work 2 DC, Ch 2, 3 DC into the corner space.
- Side: DC into each DC along the side.
- Corner: Work (3 DC, Ch 2, 3 DC) into the next Ch-2 corner space.
- Rep Step 3 and 4 twice more. Finish the last side with DC in each st.
- Sl st to the top of the beg Ch 3 to join. Cut Color B and secure.
Round 5: Color Block Three (Color C)
- Join Color C with a sl st in any corner Ch-2 space.
- Ch 3 (counts as 1 DC). Work 2 DC, Ch 2, 3 DC into the same corner space.
- Side: DC into each DC along the side.
- Corner: Work (3 DC, Ch 2, 3 DC) into the next Ch-2 corner space.
- Rep Step 3 and 4 twice more. Finish the last side with DC in each st.
- Sl st to the top of the beg Ch 3 to join. Cut Color C and secure.
Round 6: Joining Prep (Color D)
- Join Color D with a sl st in any corner Ch-2 space.
- Ch 1 (does not count as st). Work (SC, Ch 1, SC) into the corner space. (This creates a sharp corner).
- Side: SC in each DC along the side.
- Corner: Work (SC, Ch 1, SC) into the next Ch-2 corner space.
- Rep Step 3 and 4 twice more. Finish the last side with SC in each st.
- Sl st to the first SC to join.
🔗 Assembly and Joining
You will need 5 Motifs total: 4 for the sides and 1 for the base. Use the Single Crochet Join (SC) for a strong, neat seam.
Round 7: Joining the Motifs (Color D)
- Take two motifs and place them right sides together.
- Join Color D with a sl st through the corresponding corner stitches (or Ch-1 spaces) of both motifs.
- Ch 1. SC through both loops of the corresponding stitches on both squares all the way across the edge.
- Work 3 SC through the corner stitches/spaces.
- Fasten off and repeat until you have joined the four side motifs into a strip (end-to-end, forming a loop).
Attaching the Base
- Place the 5th motif (the base) flat.
- Align one side of the base motif with the bottom edge of one of the side motifs.
- Using Color D, SC join these two edges together.
- Continue SC joining the base motif to the remaining three side motifs, boxing the bottom of the bag.
- Turn the bag right side out.
👜 Strap and Finishing
Edging and Reinforcement
- Join Color D with a sl st to any stitch on the top edge of the bag.
- Round 1: Ch 1. SC evenly around the entire top edge of the bag, working through the joining seams as normal. Sl st to first SC.
- Round 2: Ch 1. SC in each SC around. Sl st to first SC.
Creating the Strap
The strap should be worked flat and then sewn to the bag. Adjust the starting chain length for your desired strap length (approx. 40–50 inches for a shoulder strap).
- Start: Using Color D, Ch 120 (or desired length).
- Row 1: SC in the 2nd ch from the hook and in each ch across. Ch 1, turn.
- Row 2–4: SC in each st across. Ch 1, turn.
- Fasten off, leaving a long tail for sewing.
Attaching the Strap
- Lay the bag flat and center the strap over the side seams.
- Use the long tails and a tapestry needle to firmly sew the ends of the strap to the top edge of the bag, reinforcing the connection with multiple passes.
Video Tutorial:
Final Touches
- Weave in all remaining yarn tails from the motif color changes and the seams using a tapestry needle. Ensure all knots are secure.
- (Optional) Steam block the finished bag lightly to help the seams relax and the square shape define itself.


