
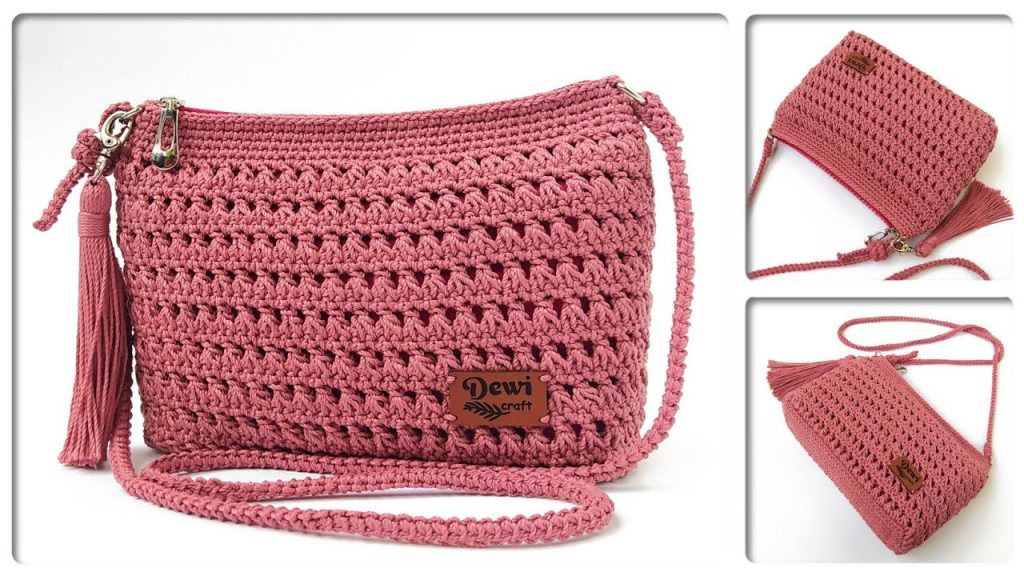
Welcome, crocheters! Are you ready to create a chic, structured handbag that looks complicated but uses a surprisingly simple cluster stitch? This detailed pattern, inspired by the elegant work of SANG DEWI CRAFT, will guide you through crafting the Coastal Cord Bag, a sturdy and stylish accessory perfect for any occasion.
This bag features a flat, rigid base for structure, a textured body worked in turned rounds to create a continuous, woven-like pattern, and a neat single crochet top border with integrated D-rings for an adjustable strap. The seamless body construction, combined with durable yarn like nylon, ensures a professional and long-lasting finish.
The finished bag boasts practical dimensions, measuring approximately 23 cm in length and 15 cm in height, with a solid feel thanks to the dense stitch work. Let’s dive into the details!
🧶 Materials & Key Tools
To achieve the best structure and durability for this bag, the suggested materials are:
| Icon | Item | Details |
| Hook | Crochet Hook | 4.0 mm (or size needed to achieve very firm tension). |
| Yarn | Main Yarn | Approximately 200 grams of a sturdy, non-stretchy yarn (e.g., Nylon cord, High-quality Polyester Cord, or firm Cotton T-Shirt yarn). |
| Hardware | D-Rings (2) | 1.5 cm size is ideal for attaching the strap. |
| Notions | Markers & Needle | Stitch Markers (essential for the base and attachment points), Scissors, and a Yarn Needle. |
| Size | Finished Dimensions | Approx. 23 cm (Length) x 15 cm (Height) x 6 cm (Depth). |
| Weight | Finished Weight | Approx. 200 grams. |
📝 Abbreviations (U.S. Crochet Terms)
Familiarize yourself with these standard U.S. crochet terms before beginning:
| Abbreviation | U.S. Terminology | Description |
| ch | Chain | |
| sl st | Slip Stitch | |
| sc | Single Crochet | |
| st(s) | Stitch(es) | |
| rep | Repeat | |
| yo | Yarn Over | |
| lp | Loop | |
| pu | Pull Up |
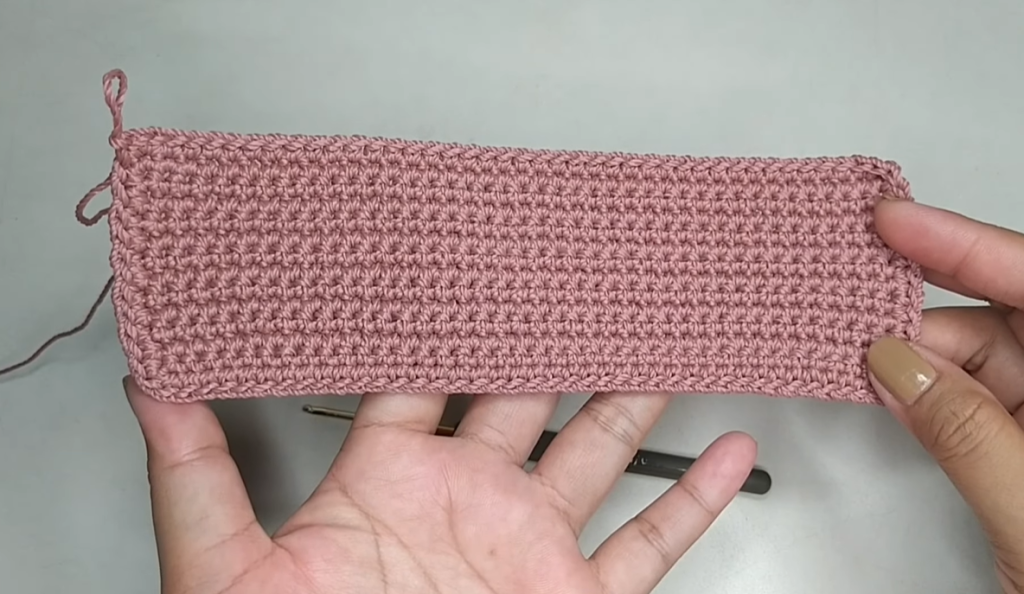
📐 Pattern: The Solid Foundation Base
The base is worked in back-and-forth rows to create a flat rectangle, then edged in the round to set up the body’s stitch count.
Initial Chain:
Using your Main Yarn, make a slip knot and ch 40 (plus one ch for turning).
Row 1:
Sc in the 2nd ch from the hook, and sc in each ch across. (40 sc).
Row 2:
Ch 1 (does not count as st), turn. Sc in the first st and in each st across. (40 sc).
Rows 3 – 12:
Repeat Row 2 until you have completed a total of 12 rows.
Edging (Single Crochet in the Round):
After Row 12, do not turn. We will now single crochet around the entire perimeter to transition into the bag body. The final count must be a multiple of 2.
- First Corner: Work 2 sc into the last stitch of Row 12.
- Long Side: Sc evenly down the side edge, placing 1 sc per row end. (12 sc total).
- Second Corner: Work 2 sc into the corner space (the end of the foundation chain).
- Bottom Edge: Sc across the bottom of the foundation chain stitches. (40 sc).
- Third Corner: Work 2 sc into the next corner space.
- Second Long Side: Sc evenly up the second side edge. (12 sc total).
- Fourth Corner: Work 2 sc into the final corner space.
- Completion: Sc across the remaining stitches of Row 12 to meet the first stitch of the round.
- Join: Sl st to the first sc of the round.
Count Check: Your final stitch count should be an even number (e.g., 40 + 40 + 12 + 12 + 8 corners = 112 sts).

🌟 Pattern: The Continuous Texture Body Motif
This is the main, elegant stitch pattern for the body, worked in turned rounds for continuity and strength. We will call this the Continuous Triple SC Cluster (TSC Cluster). The motif involves alternating a textured round with a plain SC round.
Round 1 (TSC Cluster Round):
- Ch 1 (does not count as st), turn the work.
- First Cluster (Setup):
- Insert hook into the same st, pu a lp.
- Insert hook into the next st, pu a lp.
- Insert hook into the st after that, pu a lp. (4 lps on hook).
- Yo, pull through all 4 lps. Ch 1 (to lock the cluster).
- Continuing Cluster (Repeat):
- Insert hook into the ch-1 space just made, pu a lp.
- Insert hook into the last stitch worked (the third st of the previous cluster), pu a lp.
- Insert hook into the next unworked st, pu a lp. (4 lps on hook).
- Yo, pull through all 4 lps. Ch 1.
- Repeat the Continuing Cluster process around the entire round.
- Join: Sl st into the first cluster’s locking chain (the first ch-1 space made in this round).
Round 2 (SC Transition Round):
- Ch 1 (does not count as st), turn the work.
- Sc in the same stitch (the same ch-1 space you just joined into).
- Sc in each ch-1 space (the top of each cluster) and each cluster center around.
- Join: Sl st to the first sc of the round.
Body Motif Repetition:
Repeat the TSC Cluster Round (Round 1) and the SC Transition Round (Round 2) sequence a total of 9 times for the suggested height.

⛓️ Pattern: Top Border & Hardware Integration
Once the motif section is complete, we stabilize the top edge with solid single crochet rows and attach the D-rings.
Solid SC Border Rounds:
- Ch 1 (does not count as st), turn. Sc in the same st and in each st around. Sl st to join.
- Repeat Round 1 for a total of 4 rounds of single crochet. This creates a sturdy, finished edge.
Attaching the D-Rings (Round 5):
Before starting the 5th and final SC round, locate the exact center of both narrow ends of the bag. The D-ring will be secured over 4 single crochet stitches centered at this point.
- Continue the final SC round until you reach 2 stitches before the center point on the first side.
- Secure D-Ring: Place the D-ring (1.5 cm) flat against the top edge. Insert your hook into the next stitch, passing it through the center of the metal ring, and complete a single crochet.
- Repeat this process for the next 3 stitches (totaling 4 sc worked over the ring).
- Continue SC in the following stitches until you reach 2 stitches before the center point on the second side.
- Repeat the D-Ring Attachment process (Steps 2-3).
- Complete the round with SC and sl st to the first SC.
- Fasten off and weave in ends.
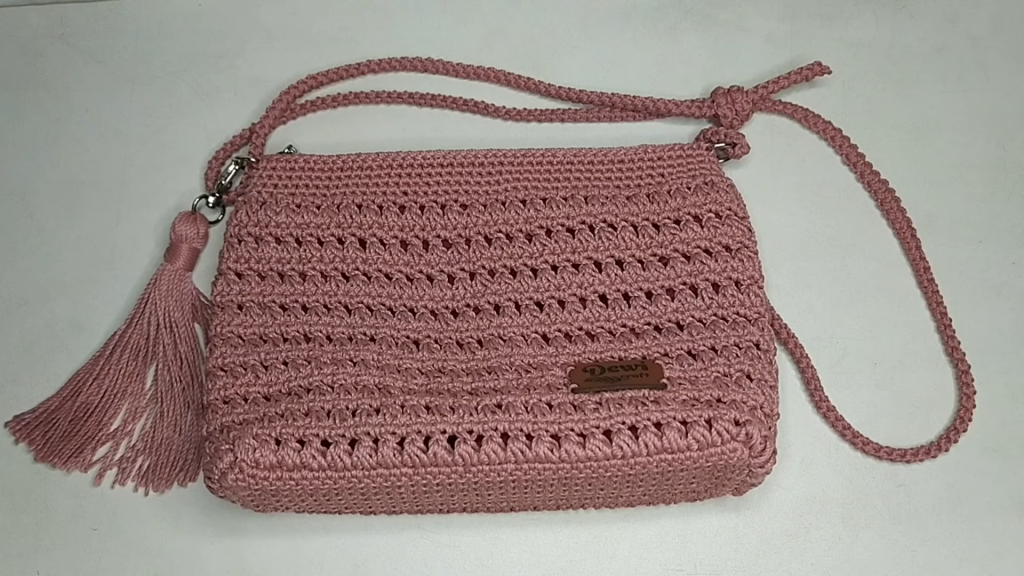
🔗 Pattern: The Adjustable Strap
The strap shown is a simple crocheted cord, which can be easily made adjustable.
Strap Construction:
The method for the strap is not detailed, so we will use a common, durable strap method:
- Chain a length of 110 cm (or your desired length for a crossbody/shoulder strap).
- Starting in the 2nd chain from the hook, work a Sl St in each chain back across the entire length.
- Fasten off, leaving a long tail for weaving.
Note on Adjustment: The strap is designed to be looped and knotted onto the D-rings, allowing the length to be easily modified.
Video Tutorial:
✅ Finishing & Assembly
- Weave in Ends: Use your yarn needle to securely weave in all remaining yarn tails.
- Strap Attachment: Thread each end of your strap through a D-ring and secure it with a strong knot or by neatly sewing the ends to the D-ring.
- Lining (Highly Recommended): For a polished, professional finish and to prevent the bag from stretching, it is strongly recommended to sew a custom fabric lining and a zipper into your bag.
Congratulations on completing your durable and elegant Coastal Cord Bag! Enjoy this beautiful, handmade accessory.


