
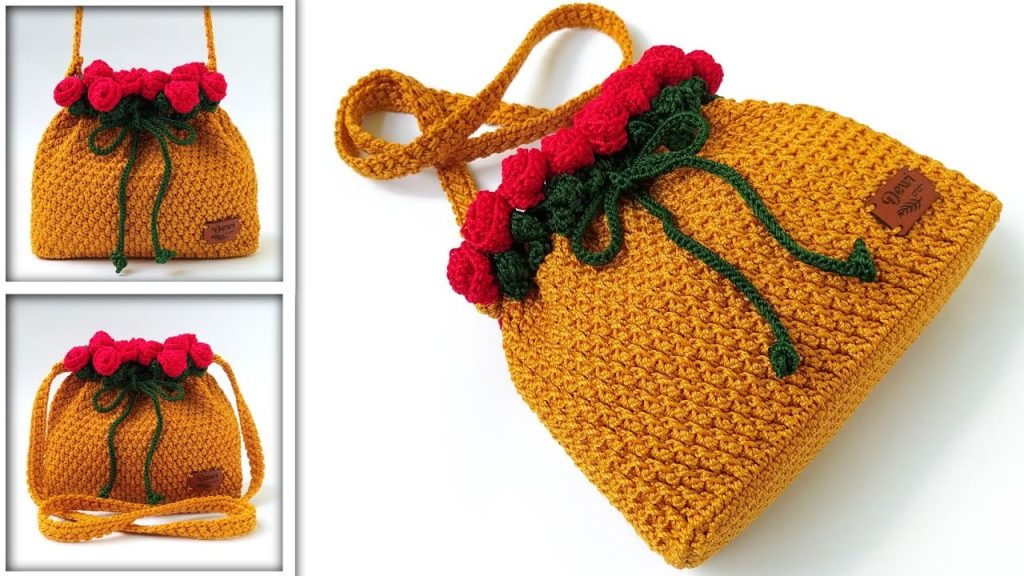
Welcome, dedicated crafters, to a beautiful project that combines sturdy structure with delicate floral artistry! Inspired by the intricate design from SANG DEWI CRAFT, this “Enchanted Meadow” Drawstring Bag features a basket-weave-like body, a delicate drawstring top, and stunning crocheted flower and leaf appliqués.
This pattern breaks down the construction into three main parts: a firm base, a textured body worked in turned rounds, and the decorative floral border. The seamless structure and use of durable cord yarn ensure a professional and long-lasting finish. The finished bag is approximately 24 cm wide by 16 cm high.
🧶 Materials & Key Tools
The structure of this bag relies on a firm cord yarn, such as nylon or polyester, for durability and shape retention.
| Icon | Item | Details |
| Hook | Crochet Hook | 4.0 mm (or size needed to achieve very firm tension). |
| Yarn | Main Yarn (MC) | Approximately 130g of sturdy cord yarn (Nylon or Polyester) for the base and body. |
| Yarn | Accent Yarn (CC1) | Small amount of green cord yarn for the leaves/drawstring border. |
| Yarn | Accent Yarn (CC2) | Small amount of pink/red cord yarn for the roses/flowers. |
| Hardware | Shoulder Strap | A separate crocheted cord or chain strap (approx. 110 cm long) with snap hooks (1.5 cm). |
| Hardware | Drawstring Cord | A separate cord (approx. 80 cm long) for the closure. |
| Notions | Markers & Needle | Stitch Markers, Scissors, and a Yarn Needle. |
| Size | Finished Bag | Approx. 24 cm (Length) x 16 cm (Height) x 6 cm (Depth). |
| Weight | Finished Weight | Approx. 180 grams. |
📝 Abbreviations & Special Stitches (U.S. Terms)
Familiarize yourself with these standard U.S. crochet terms. Note that the body motif uses the Front Post Double Crochet technique.
| Abbreviation | U.S. Terminology | Description |
| ch | Chain | |
| sl st | Slip Stitch | |
| sc | Single Crochet | |
| dc | Double Crochet | |
| hdc | Half Double Crochet | |
| st(s) | Stitch(es) | |
| rep | Repeat | |
| FPDC | Front Post Double Crochet | Double crochet worked around the post of the stitch below. |
| MC | Main Color | |
| CC1 | Contrast Color 1 (Green) | |
| CC2 | Contrast Color 2 (Rose) |
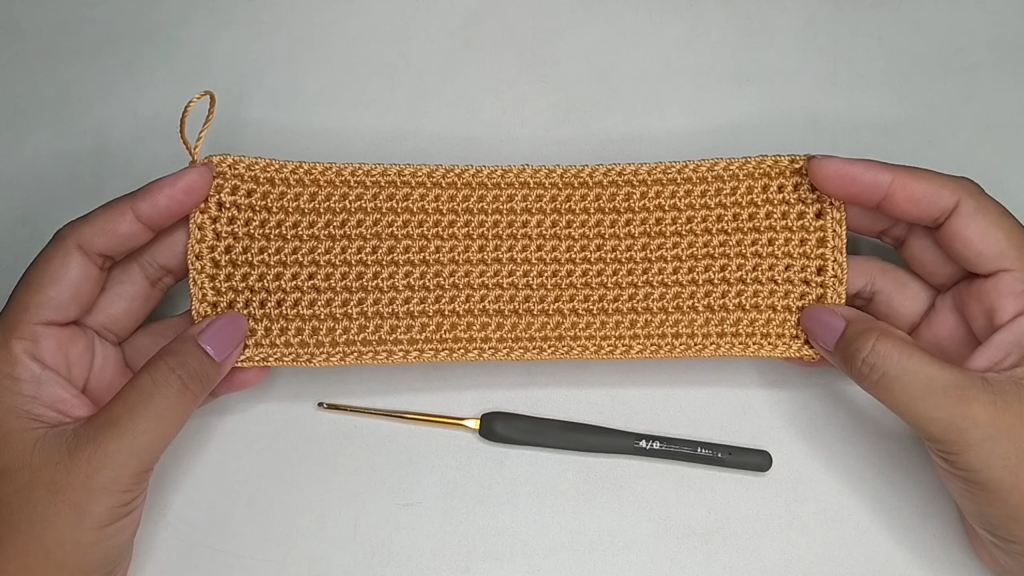
📐 Part 1: The Rigid Foundation Base
We start with a flat, rigid base worked in rows of Single Crochet, then edged in the round to set up the body’s stitch count (a multiple of 2).
Initial Chain:
Using MC, make a slip knot and ch 35. Chain 1 more for turning.
Rows 1 – 12 (Base Core):
- Sc in the 2nd ch from the hook, and sc in each ch across. (35 sc).
- Ch 1 (does not count as st), turn. Sc in the first st and in each st across. (35 sc).
- Repeat Row 2 until you have completed a total of 12 rows.
Edging (SC in the Round):
After Row 12, do not turn. We work SC around the entire perimeter. The final stitch count must be an even number (a multiple of 2).
- Work a smooth edge by placing 2 sc in the corners and 1 sc per row end along the sides. Ensure your final stitch count is even (e.g., approximately 98 sts).
- Sl st to the first sc to join.
🌟 Part 2: The Basketweave Body Motif
The body uses a simple, continuous stitch pattern that alternates DC with FPDC to create a subtle woven texture.
Round 1 (DC Setup – MC):
- Ch 3 (counts as 1 dc). Dc in each st around.
- Sl st to the top of the starting ch-3 to join.
Round 2 (FPDC/DC Alternation – MC):
- Ch 1 (does not count as st), turn.
- FPDC around the post of the first st (the starting ch-3 from R1).
- *Dc in the top of the next st. FPDC around the post of the next st***.
- Repeat from * to * around.
- Sl st to the top of the first FPDC to join.

Round 3 (Reversed Alternation – MC):
- Ch 3 (counts as 1 dc), turn.
- FPDC around the post of the first FPDC below.
- *Dc in the top of the next FPDC st (which was a DC in R2). FPDC around the post of the next DC st (which was a FPDC in R2)***.
- Repeat from * to * around.
- Sl st to the top of the starting ch-3 to join.
Body Motif Repetition:
Repeat Rounds 2 and 3 until you have reached your desired height, which is a total of 19 rounds of the motif (approximately 9 sets of the two-round repeat).
🔗 Part 3: Drawstring Casing & SC Border
This section prepares the top of the bag for the drawstring and sets the stage for the decorative border.
Round 20 (Final DC – MC):
- Ch 3 (counts as 1 dc), turn. Dc in each st around.
- Sl st to the top of the starting ch-3 to join.
Round 21 (Drawstring Mesh – CC1 – Green):
Join CC1 (Green) for the casing.
- Ch 1 (does not count as st), turn. Sc in the same st.
- *Ch 2, sk 2 sts, sc in the next st*.
- Repeat from * to * around.
- Sl st to the first sc to join.
Round 22 (Drawstring Stability – CC1):
- Ch 1, turn. Sc in the same st.
- Work 2 sc into each ch-2 space.
- Work 1 sc into each sc from the previous round.
- Sl st to the first sc to join. Fasten off CC1.

🌸 Part 4: The Floral Appliqué Border
We now work the distinctive leaf shapes and the rose bases along the top edge of the bag.
Leaf/Rose Placement (CC1 – Green):
The design features two layers of SC. The first layer creates a foundation, and the second layer adds the leaves and spaces for the roses.
Round 23 (SC Foundation – CC1):
Join CC1 (Green) to any stitch.
- Ch 1, sc in each st around. Sl st to join.
Round 24 (Leaves – CC1):
- Ch 1, sc in the same st. Sc in the next 1-2 sts. (Establish a spacing of 10-12 SC between leaves/roses).
- Leaf 1 Base: Ch 3. Sc into a stitch slightly behind the ch-3. Sc 1-2 times.
- Rose Base: Ch 3. Sc into a stitch slightly behind the ch-3. Sc 1-2 times.
- Continue around the bag, placing a Leaf Base and Rose Base in sequence, separated by 10-12 SCs, until you have approximately 4-5 sets of the motif.
- Sl st to the first sc to join. Fasten off CC1.
Detailed Leaf Construction:
Work the leaves separately and attach them to the Ch-3 spaces.
- Leaf 1: Attach CC1 to the first ch-3 space of a Leaf Base.
- Turn: Ch 1. Work into the ch-3 space: sc, hdc, 3 dc, hdc, sc.
- Fasten off and secure to the top of the bag.
Detailed Rose Construction:
Work the rose base separately and attach them to the Ch-3 spaces.
- Rose Base: Attach CC2 to the first ch-3 space of a Rose Base.
- Chain: Ch 15 (or your preferred length for the rosette).
- Rose Strip: Work 3 DC into the 3rd ch from the hook. Work 3 DC into every ch across the strip.
- Assembly: Fasten off, leaving a long tail. Roll the resulting wavy strip tightly to form a spiral rose shape and secure the base with the long tail, stitching it firmly to the bag at the Ch-3 Rose Base location.

Repeat these steps for all Leaf and Rose Base locations until the entire top border is decorated.
✅ Part 5: Final Touches & Assembly
Your “Enchanted Meadow” bag is almost complete!
- Weave in Ends: Securely weave in all loose ends from the color changes and appliqués.
- Drawstring Insertion: Weave the 80 cm cord through the mesh of Round 21 (the green mesh round). Start at the center back, weave in and out, and ensure the ends emerge together at the center front for cinching. Knot the ends.
- Strap Attachment: Use your snap hooks to attach the 110 cm shoulder strap to the sides of the bag’s body at the top, securing it firmly into the dense double crochet fabric just below the decorative border.
- Lining (Recommended): The video suggests adding a custom fabric lining and zipper for a polished, functional finish.
Video Tutorial:
Your final “Enchanted Meadow” Drawstring Bag should be a structured and beautiful piece, ready to carry your essentials!


