
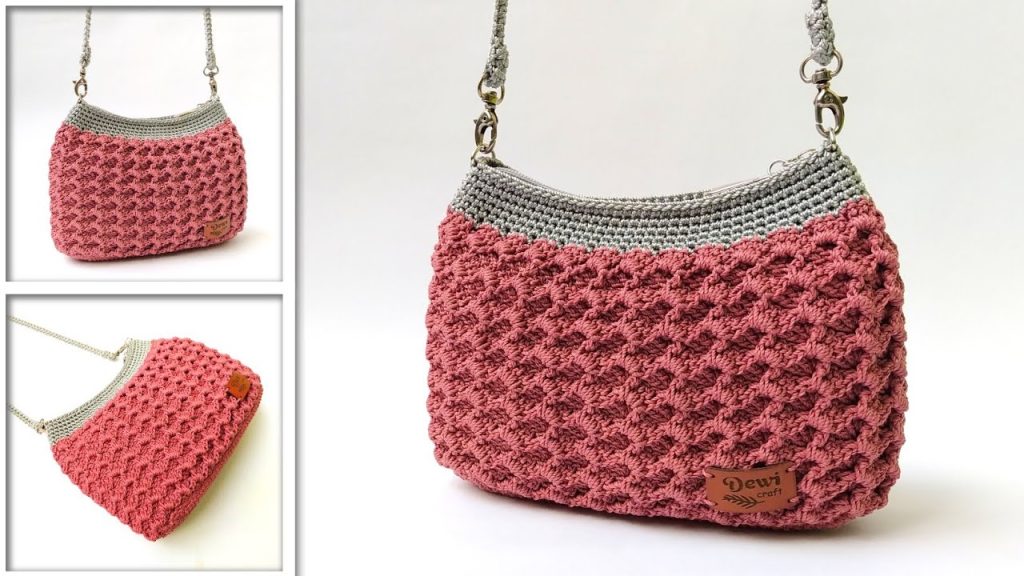
Welcome, crocheters, to a detailed pattern for creating a unique and structured handbag! Inspired by the fantastic texture and clear instructions from SANG DEWI CRAFT, this “Diamond Lattice” Box Bag uses a combination of Single Crochet and 3-DC Shells to form a distinct popcorn-like texture with negative space. This pattern is designed to be highly structured, resulting in a firm bag perfect for carrying essentials.
This is a comprehensive guide for an intermediate-level project worked in turned rounds, resulting in a seamless body and a finished bag approximately 22 cm wide by 14 cm high.
🧶 Materials & Key Tools
The rigidity of this bag relies on using a durable, non-stretchy cord yarn to maintain the shape of the motif.
| Icon | Item | Details |
| Hook | Crochet Hook | 4.0 mm (or size needed to achieve very firm tension). |
| Yarn | Main Color (MC) | Approximately 130g of sturdy cord yarn (Nylon or Polyester cord). |
| Hardware | D-Rings (2) | 1.5 cm size, for secure strap attachment. |
| Hardware | Shoulder Strap | A separate crocheted cord or leather strap (approx. 110 cm long) with snap hooks (1.5 cm). |
| Notions | Markers & Needle | Stitch Markers (especially for the base and D-ring placement), Scissors, and a Yarn Needle. |
| Size | Finished Bag | Approx. 22 cm (Length) x 14 cm (Height) x 6 cm (Depth). |
| Weight | Finished Weight | Approx. 180 grams. |
📝 Abbreviations & Special Stitches (U.S. Terms)
Familiarize yourself with these terms. Note that all body rounds are turned to eliminate a noticeable seam line.
| Abbreviation | U.S. Terminology | Description |
| ch | Chain | |
| sl st | Slip Stitch | |
| sc | Single Crochet | |
| dc | Double Crochet | |
| st(s) | Stitch(es) | |
| rep | Repeat | |
| SCFP | Single Crochet Front Post | SC worked around the post of the stitch below, from the front. |
| 3-DC Shell | 3 Double Crochet Shell | Three double crochets worked into the same stitch or space. |
📐 Part 1: The Rigid Foundation Base
We start with a flat, rigid base worked in rows of Single Crochet, then edged in the round. The final stitch count must be a multiple of 4.

Initial Chain:
Make a slip knot and ch 40. Chain 1 more for turning.
Rows 1 – 12 (Base Core):
- Sc in the 2nd ch from the hook, and sc in each ch across. (40 sc).
- Ch 1 (does not count as st), turn. Sc in the first st and in each st across. (40 sc).
- Repeat Row 2 until you have completed a total of 12 rows.
Edging (SC in the Round):
After Row 12, do not turn. We work SC around the entire perimeter.
- Corners: Work 2 sc into the corner stitches (total 4 corners).
- Long Sides (Row Ends): Sc evenly down the side edge, placing 1 sc per row end. (12 sc total per side).
- Top/Bottom Edges: Sc across the 40 SC of the top and bottom rows.
- Count & Adjust: Count your total stitches (e.g., approximately 104 sts). If necessary, evenly distribute increases on the long sides to ensure your final count is a multiple of 4 (e.g., 104 or 108 sts).
- Sl st to the first sc to join.
🌟 Part 2: The Diamond Lattice Body Motif
The body uses a four-round sequence to create the structured, textured pattern. The body is worked in turned rounds throughout.

Round 1 (Shell Setup – MC):
- Ch 1 (does not count as st), turn the work. Sc in the same st.
- *Ch 2 (counts as 1 DC + ch 1), work 2 dc into the same stitch (forming a 2-DC + Ch 2 + DC cluster).
- Sk 3 sts, sc into the next st.
- Ch 2, work 2 dc into the same sc st.
- Repeat Sk 3 sts, sc in the next st, Ch 2, 2 dc in the same sc st around.
- Sl st to the first sc to join.
Round 2 (SCFP Cluster – MC):
- Ch 1 (does not count as st), turn.
- Sl st twice into the next two stitches (the 2 DC from the previous shell), ending at the center of the shell cluster (at the previous Ch-2 space).
- SCFP around the post of the SC from Round 1 (this SC is behind the shell from R1).
- Ch 2, work a 3-DC Shell into the Ch-2 space of the shell from Round 1 (the space where the chain and 2 DCs originated).
- *SCFP around the post of the SC from the previous round (the one skipped in R1).
- Ch 2, work a 3-DC Shell into the center cluster/ch-space of the shell from R1*.
- Repeat from * to * around.
- Sl st to the first SCFP to join.

Round 3 (Shell Base Transition – MC):
- Ch 1 (does not count as st), turn.
- Sl st twice to move to the third stitch (the center DC of the 3-DC Shell).
- Sc in the center DC.
- *Ch 2, work 2 dc into the same sc st.
- Sk 3 sts (skipping the SCFP and the following Ch-2 space), sc in the center DC of the next 3-DC Shell*.
- Repeat from * to * around.
- Sl st to the first sc to join.
Round 4 (SCFP Cluster Alignment – MC):
- Ch 1 (does not count as st), turn.
- Sl st twice into the next two stitches (the 2 DC from the previous shell), ending at the center of the shell cluster (at the previous Ch-2 space).
- SCFP around the post of the SCFP from Round 2 (this aligns the raised stitch).
- Ch 2, work a 3-DC Shell into the center cluster/ch-space of the shell from R3.
- *SCFP around the post of the SCFP from Round 2.
- Ch 2, work a 3-DC Shell into the center cluster/ch-space of the shell from R3*.
- Repeat from * to * around.
- Sl st to the first SCFP to join.
Motif Repetition:
Repeat the sequence of Rounds 3 and 4 until you have worked a total of 18 rounds of the textured motif (including R1 and R2). This height gives the bag its structured shape.
⛓️ Part 3: Top Border & Hardware
We now finish the top with a smooth Single Crochet border and integrate the hardware.
SC Transition Round (CC):
Join CC (Contrast Color) at the start of the next round.
- Ch 1, turn. Sc in the same st (the SCFP).
- Sc in the next 3 stitches (the ch-2 space and the first DC of the shell).
- *Sc in the next SCFP. Sc in the next 3 sts*.
- Continue around, working a Single Crochet into every visible stitch and chain space. The final SC count should match your base multiple (or be close to it).
- Sl st to the first sc to join.
SC Border Rounds (CC):
- Ch 1, turn. Sc in the same st and in each st around. Sl st to join.
- Repeat for a total of 6 rounds of SC border using the Contrast Color. This creates a dense, sturdy rim.
Round 6 (D-Ring Integration):
Before starting the 6th SC round, locate the center of both narrow ends (sides) of the bag.
- Continue the SC round until you reach the center side. Mark a 4-stitch wide area.
- D-Ring Attachment: Place the D-ring (1.5 cm) flat against the top edge. Work 4 SC over the metal ring, ensuring the ring is secured tightly.
- Continue SC across the top.
- Repeat the D-Ring Attachment process on the opposite narrow end of the bag.
- Sl st to join. Fasten off and weave in ends securely.
Video Tutorial:
✅ Part 4: Final Touches & Assembly
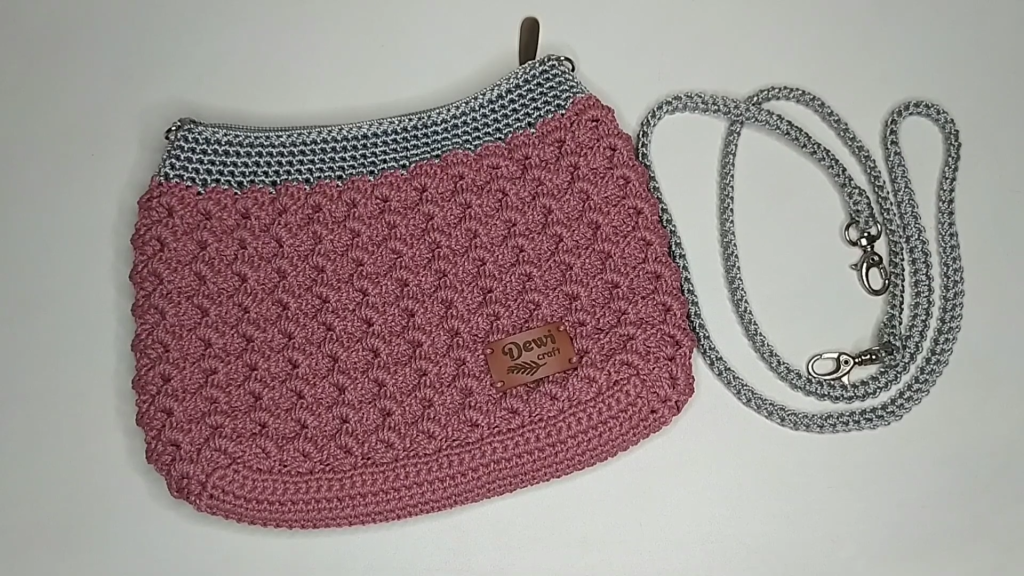
Your “Diamond Lattice” Bag is now complete!
- Strap Creation (MC): The shoulder strap uses a simple flat cord technique. Ch 2. Sc in the second chain. Turn, Sc into the stitch below. Continue turning and SCing into the stitch below until the desired length (110 cm) is reached.
- Strap Attachment: Use the snap hooks on your strap to attach to the integrated D-rings.
- Lining (Highly Recommended): The video stresses the importance of adding a custom fabric lining and zipper for a polished, functional finish and to ensure small items do not poke through the lattice texture.
Your finished “Diamond Lattice” Box Bag should measure:
- Length: 22 cm
- Height: 14 cm
- Weight: Approximately 180 grams.
Enjoy your durable, structured, and beautifully textured bag!


