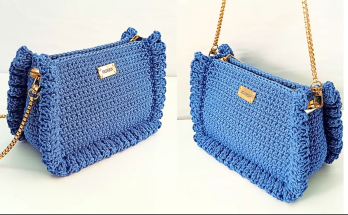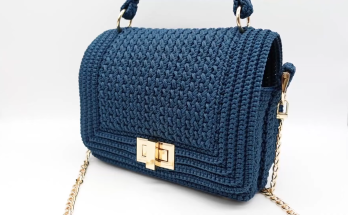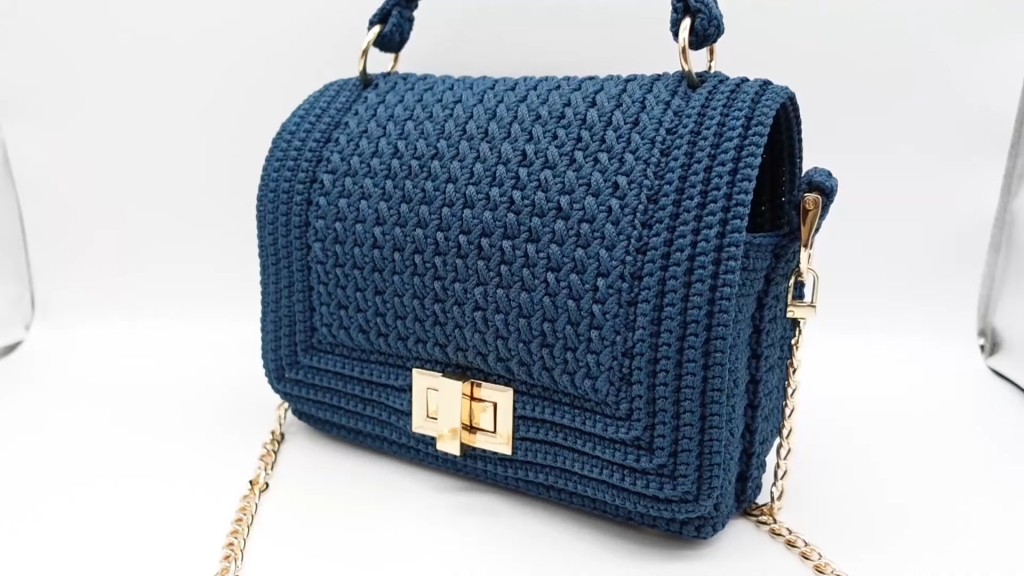
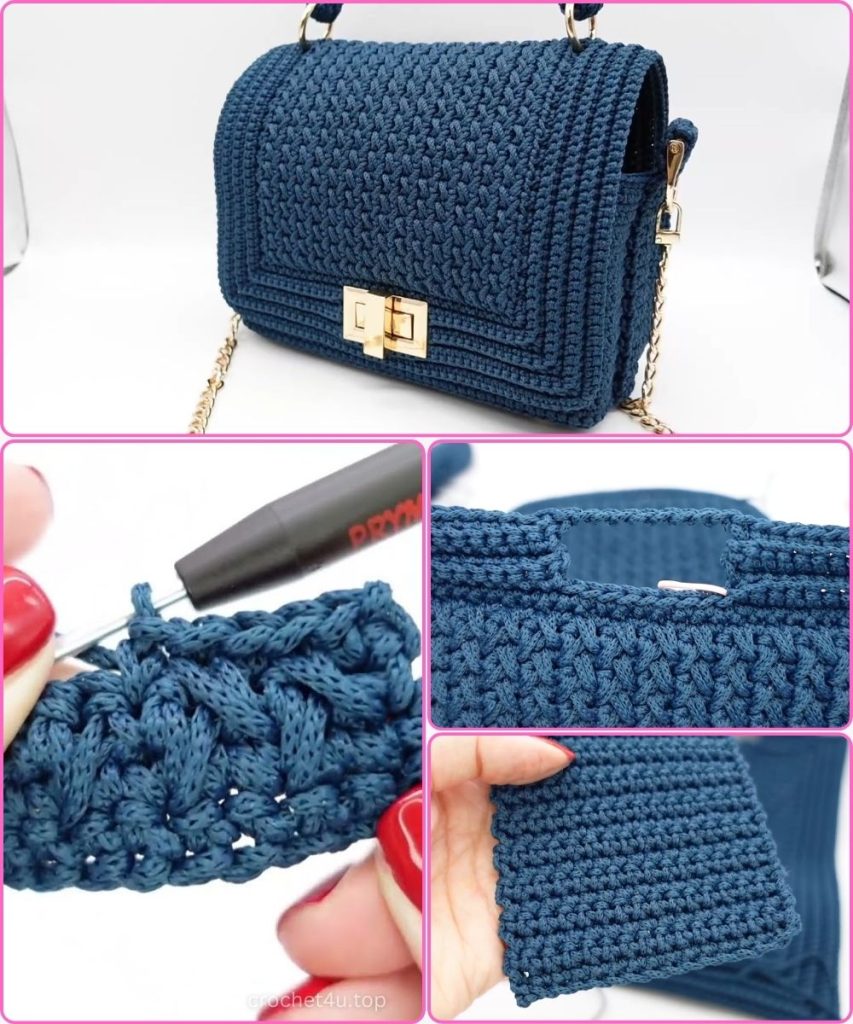
Welcome to your next favorite project! This Elegant Crochet Bag is more than just an accessory—it’s a statement of sophistication and craftsmanship. Featuring a unique “woven” texture and a professional-grade structure, this bag rivals high-end boutique finds. Whether you’re a seasoned pro or an ambitious beginner, this detailed guide will walk you through every loop and stitch.
🧶 Materials & Tools
Before we begin, gather your supplies. This bag requires materials that provide structure and a clean finish.
- Yarn: A sturdy, non-stretchy yarn (such as Cotton Macramé cord or a high-quality braided cord). Approximately 400-500g.
- Hook: 4.0mm (G) crochet hook (or size needed to obtain a stiff gauge).
- Hardware: * 1 Designer Press-Lock (Tongue lock style).
- 2 Large Metal Rings (for the handle).
- 2 D-Rings (for the shoulder strap).
- 4 Bag Feet (optional, for a professional base).
- Notions: Stitch markers, tapestry needle, scissors, and a small screwdriver for the lock.
📜 Stitch Key (US Terms)
- Ch: Chain
- SC: Single Crochet
- Spike-SC: Pattern stitch (Single crochet worked into the stitch of the row below).
- BLO: Back Loop Only
- FLO: Front Loop Only
- Sl St: Slip Stitch
- St(s): Stitch(es)
📐 Part 1: The Main “Woven” Panel
This panel serves as the front flap and the outer decorative layer. It uses a “Woven Single Crochet” technique to create a thick, durable fabric.

- Foundation: Ch 30.
- Rows 1-2: SC in the 2nd ch from hook and in each ch across. Ch 1, turn. (29 SC).
- Row 3 (Pattern Row): SC in the first st. Work a Spike-SC (poke the hook into the space directly below the next stitch in the previous row, pull up a long loop to the height of your current row, and close). Sk the stitch behind the Spike-SC. SC in the next st. Repeat from * across. Ch 1, turn.
- Row 4-60: Repeat the pattern. Ensure your Spike-SCs are stacked directly on top of the Spike-SCs from the previous row for a clean “column” effect.
- Final Panel Size: Approximately 31 cm long and 16.5 cm wide.
🐚 Part 2: The Decorative Edging
To prepare the main panel for assembly, we need a clean border.
- Sides: Work SC along the raw edges of your 60 rows. You will notice “upper” and “lower” loops along the side of the rows; place one SC into each of these loops.
- Corners: In each corner, work (SC, Ch 1, SC) to turn the corner smoothly.
- Finish: Join with a “Fake Stitch” (Invisible Finish) to keep the edge perfectly seamless. Weave in ends.
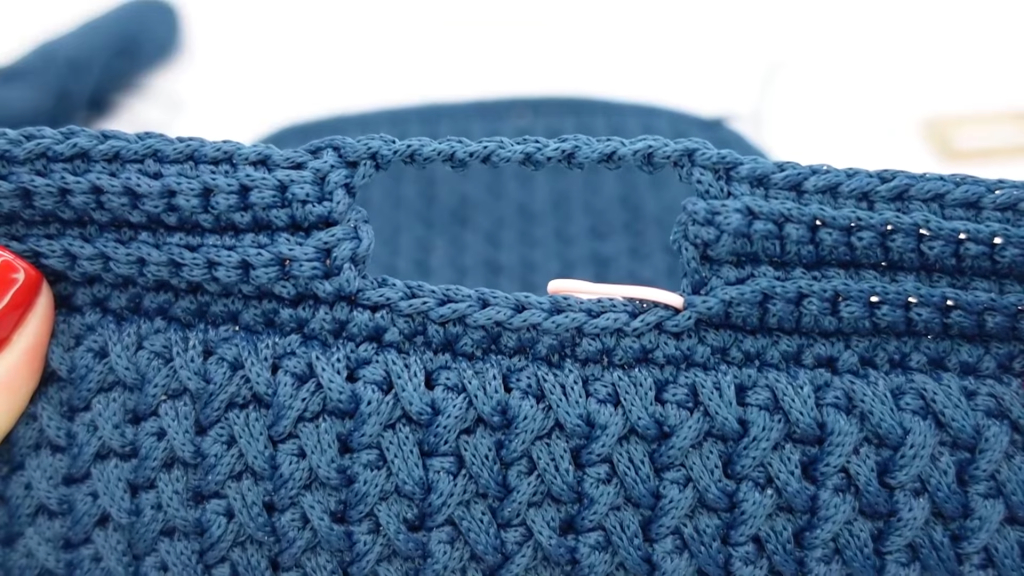
🖼️ Part 3: The Frame & Lock Window
This section adds a “frame” around the main panel and leaves a specific window for your hardware.
- Marking: Identify the center of your flap. Place stitch markers 10 stitches apart (about 5 cm) where your lock will sit.
- Row 1 (BLO): Attach yarn in the Back Loop of the first marker. SC in BLO around the entire panel until you reach the second marker.
- The Window (Rows 2-4): Continue working in BLO back and forth (leaving the 10-stitch gap open). Work the corner pattern (SC, Ch 1, SC) in every corner Ch-1 space.
- Closing the Window: On Row 5, Ch 8 (or enough to bridge the gap) and join to the other side with a Sl St.
- Final Rounds: Work 2-3 more rounds of SC in BLO around the entire piece, including the new bridge. Your frame should now be 7-8 rows deep.
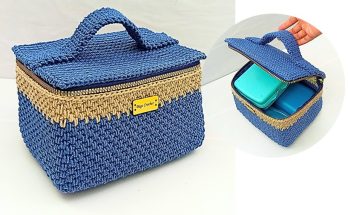
📦 Part 4: The Inner Body & Base
Now we create the “bucket” part of the bag that holds all your essentials.
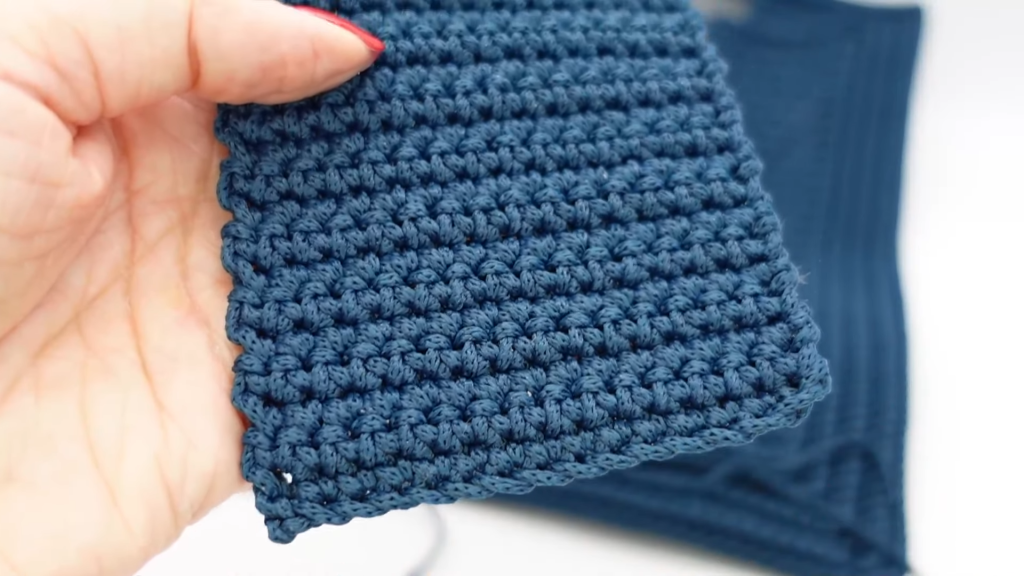
- Base: Ch 16. Work 15 SC per row for 43 rows. (Base should be approx. 8 cm deep).
- Transitioning to Sides: Do not fasten off. Work SC around three sides of the base (long side, short side, long side).
- The Bend (FLO Row): To make the walls stand up, work one row of SC in the Front Loop Only. This creates a natural “crease” for the bag’s depth.
- The Body Walls: Continue working normal SC (both loops) in rows for 24 rows total. This creates the inner compartment of the bag.
🪡 Part 5: Assembly (Merging the Pieces)
- Alignment: Place the inner body inside the main decorative panel. Use stitch markers to align the corners perfectly.
- The Join: Using Sl Sts, join the “upper/lower” loops of the inner body rows to the Back Loops of the main frame.
- Pro Tip: Don’t overthink the loop alignment—poke your hook where it feels natural and keeps the fabric flat. Use a 1-stitch-to-2-row ratio if necessary to keep the join even.
💍 Part 6: Handle & Hardware Straps
- The Handle: * Ch 4, work 3 SC for 2 rows.
- Switch to the “Woven Pattern” (SC, Spike-SC, SC) for the desired length.
- Sew the ends around your large metal rings.
- D-Ring Connectors: * Ch 5, work 4 SC per row for 32 rows.
- Fold the strip over your D-ring and sew the unit to the side of the bag body.
🛠️ Part 7: Final Hardware Installation
- The Lock: Unscrew the backplate of your tongue lock. Position the top half in the “window” we created and tighten the screws. For the bottom half, push the metal spikes through the crochet fabric, place the metal washer over them on the inside, and bend the spikes outward to secure.
- Bag Feet: Push the spikes of the feet through the four corners of the base and secure them on the inside with the provided metal plates.
- The Handle: Push the large rings through the crochet flap between the main panel and the frame.
Video Tutorial:
✨ Finishing Touches
Check all your joins and ensure the lock clicks smoothly. You now have a structurally sound, elegantly textured bag that is ready for the world! This design is exceptionally sturdy, meaning you won’t need a fabric lining unless you prefer the extra detail.
Happy Crocheting! If you loved this long-form pattern, feel free to experiment with different colors or metallic yarns for a evening-glam version!