
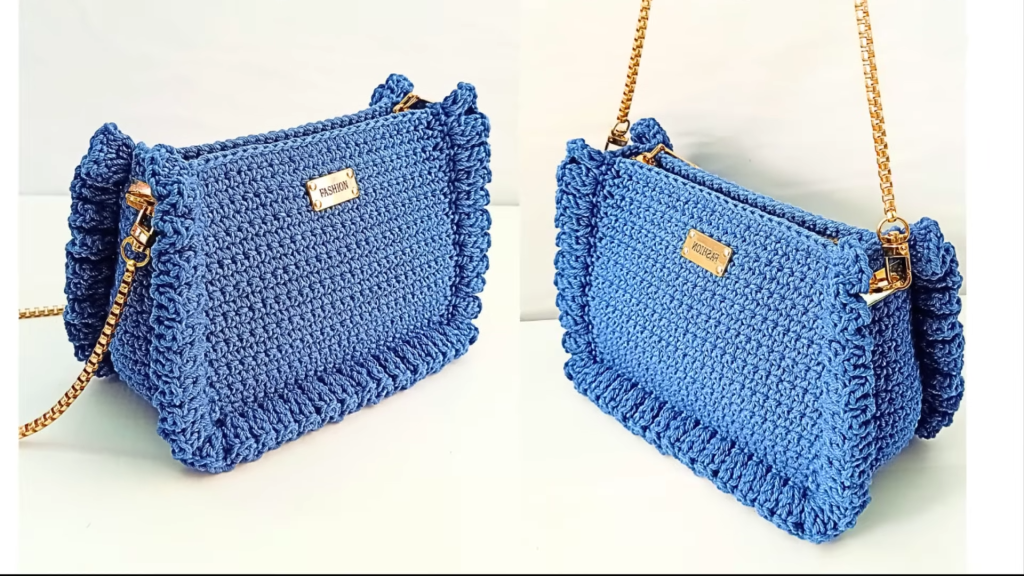
Welcome to this comprehensive guide on crafting one of the most elegant and unique crochet bags you’ll ever own! This design combines the sturdy structure of cotton macramé with a whimsical ruffle trim, making it the perfect accessory for a day out or an evening event.
In this blog, we will break down every stitch and row so you can recreate this boutique-style bag at home. Let’s pick up our hooks and get started!
🧶 Materials You’ll Need
Before we dive into the stitches, ensure you have the following supplies ready:
- Yarn: Approximately 300 grams of Cotton Macramé yarn. This provides the necessary weight and stitch definition.
- Hook: A 5 mm crochet hook to keep the tension firm but manageable.
- Hardware: A zipper (slightly wider than the bag’s opening), two metal D-rings, and a decorative chain strap.
- Tools: Stitch markers, a tapestry needle for sewing the zipper, and sharp scissors.
📏 Abbreviations (US Terms)
- Ch: Chain
- SC: Single Crochet
- DC: Double Crochet
- St(s): Stitch(es)
- Inc: Increase (2 SC in the same stitch)
- Dec: Decrease (SC 2 together)
- FL: Front Loop
- BL: Back Loop
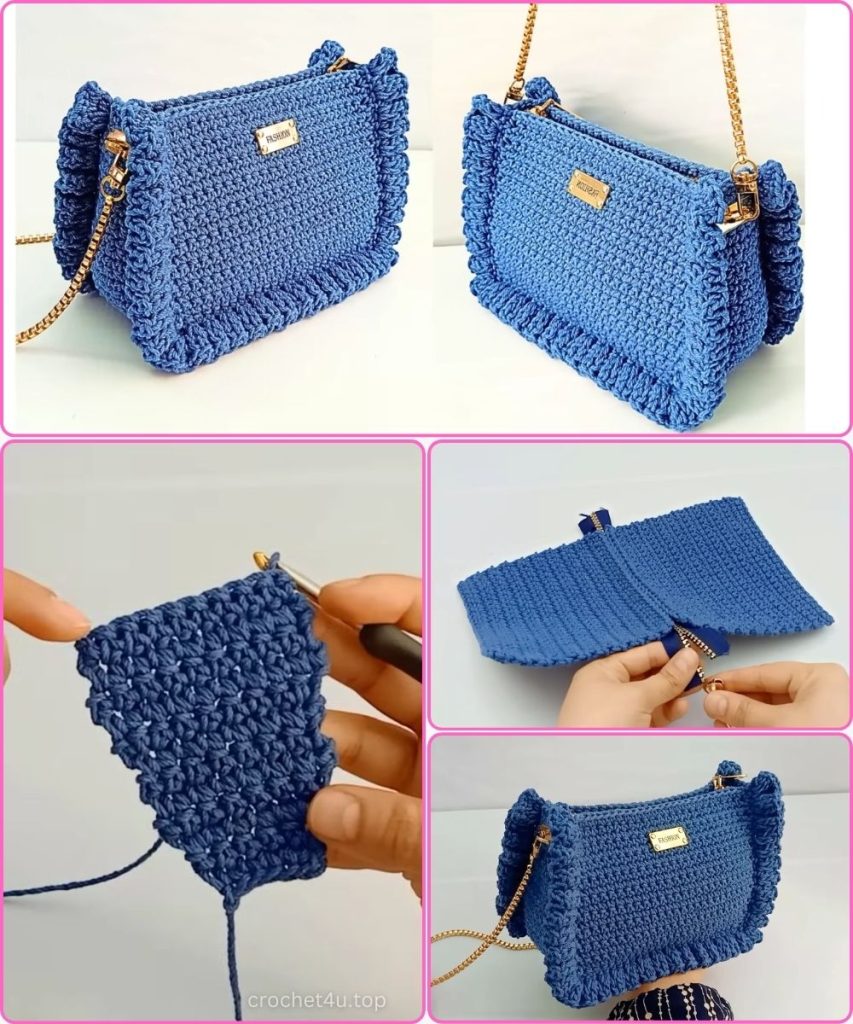
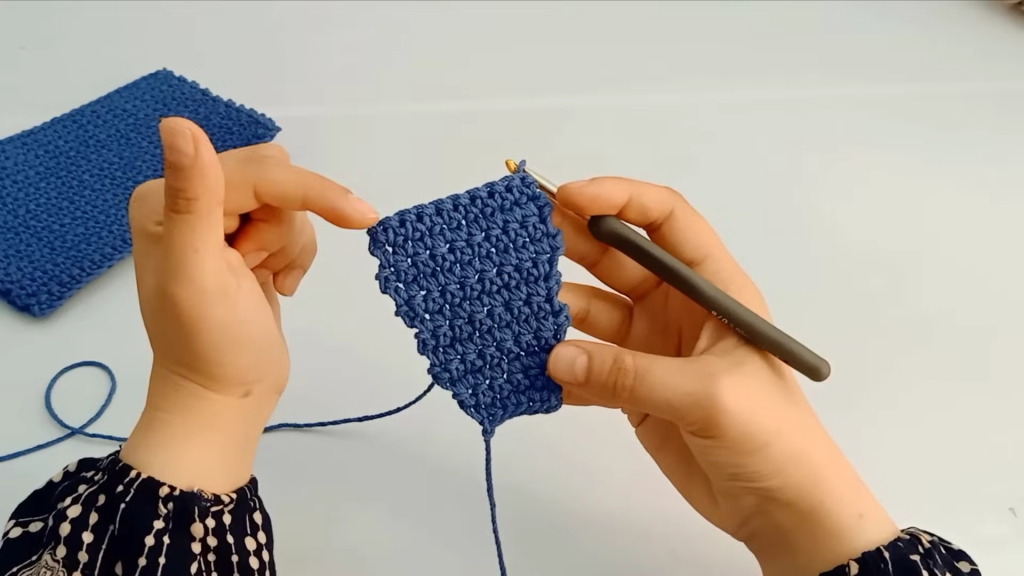
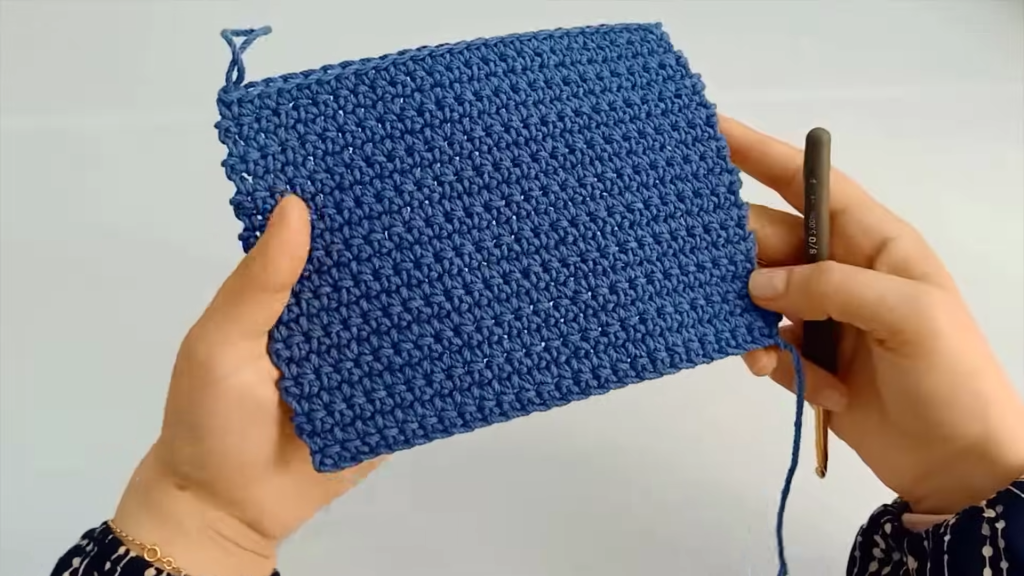
⏹️ The Front and Back Panels (Make 2)
The main body of the bag consists of two identical rectangular panels. We want a dense, sturdy fabric here.
- Foundation: Start with a slip knot and Ch 26.
- Row 1: Starting in the second chain from the hook, work 25 SC across. Ch 1 and turn.
- Rows 2 – 20: Work 25 SC in each row, making sure to go through both loops for maximum stability. Always Ch 1 and turn at the end of each row.
- Finish: Once you reach Row 20, fasten off. Repeat the process to create a second identical piece for the back.
⛓️ The Gusset (Sides and Base)
This is a single long piece that wraps around the sides and bottom of your panels. It features a tapered shape to give the bag a professional silhouette.
- Starting Width: Ch 6. From the second chain, work 5 SC. Work 2 rows total of 5 SC.
- First Expansion: In the 3rd row, Inc in the first and last stitches (7 sts). Crochet 4 rows of 7 SC.
- Second Expansion: In the 8th row, Inc in the first and last stitches (9 sts). Crochet 4 rows of 9 SC.
- Third Expansion: In the 13th row, Inc in the first and last stitches (11 sts).
- The Base: Crochet 43 rows of 11 SC. This forms the long bottom and side span of the bag.
- The Taper (Decreasing): Now we reverse the process to mirror the first side:
- Row 57: Dec at the beginning and end (9 sts). Work 4 rows of 9 SC.
- Row 62: Dec at the beginning and end (7 sts). Work 4 rows of 7 SC.
- Row 67: Dec at the beginning and end (5 sts). Work 2 rows of 5 SC.
- Total: You should have a total of 69 rows.
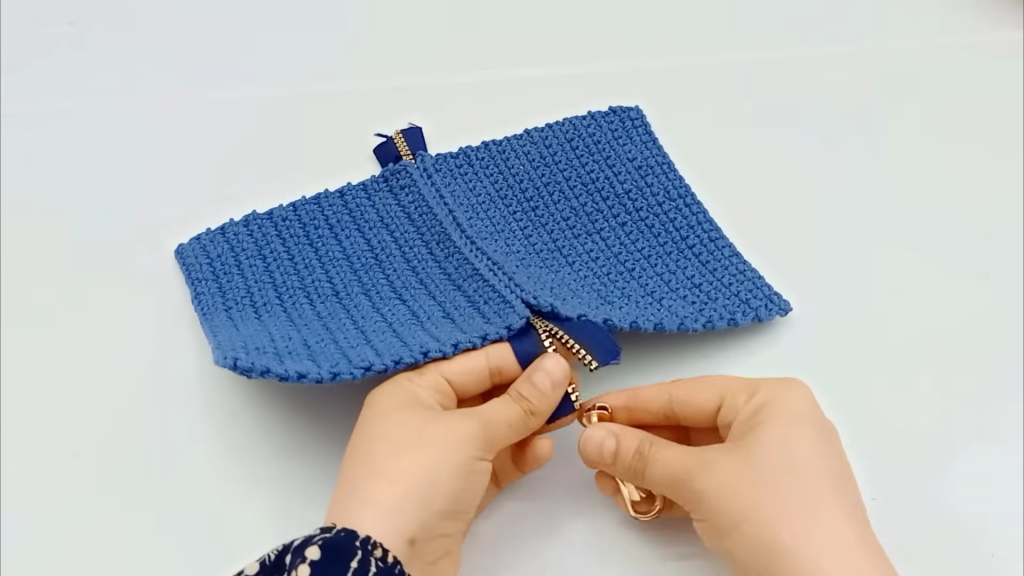
🤐 Preparing the Zipper
Before assembly, it is much easier to attach the zipper to the gusset piece.
- Measure your zipper against the top edge of your gusset (the 5-stitch wide ends).
- Using a needle and matching thread, sew the zipper tape to the edge, just below the first row of crochet.
- Fold and sew the ends of the zipper neatly to ensure they don’t snag or fray.
🧩 Assembly: Joining the Pieces
We will use SC to join the panels to the gusset. The “Magic Math” of this bag ensures the corners are rounded and beautiful.
- Alignment: Mark Row 20 on your gusset. This marks the end of the first side “wall.”
- Joining Side 1: Align the first 20 rows of the gusset with the 20 rows of your front panel. Join them using SC through both pieces, row-for-row.
- The Corner Logic: To round the corner:
- Join Gusset Rows 20 & 21 to the last row of the panel.
- Join Gusset Rows 22 & 23 to the first stitch of the panel’s foundation chain.
- This “skips” two extra rows on the gusset to allow the piece to bend without pulling.
- The Bottom: Continue joining the 25 stitches across the bottom of the panel to the 25 rows/stitches of the gusset.
- The Second Corner: Repeat the corner logic by skipping two rows again as you transition to the final vertical side.
- Repeat: Join the back panel to the other side of the gusset in the exact same manner.
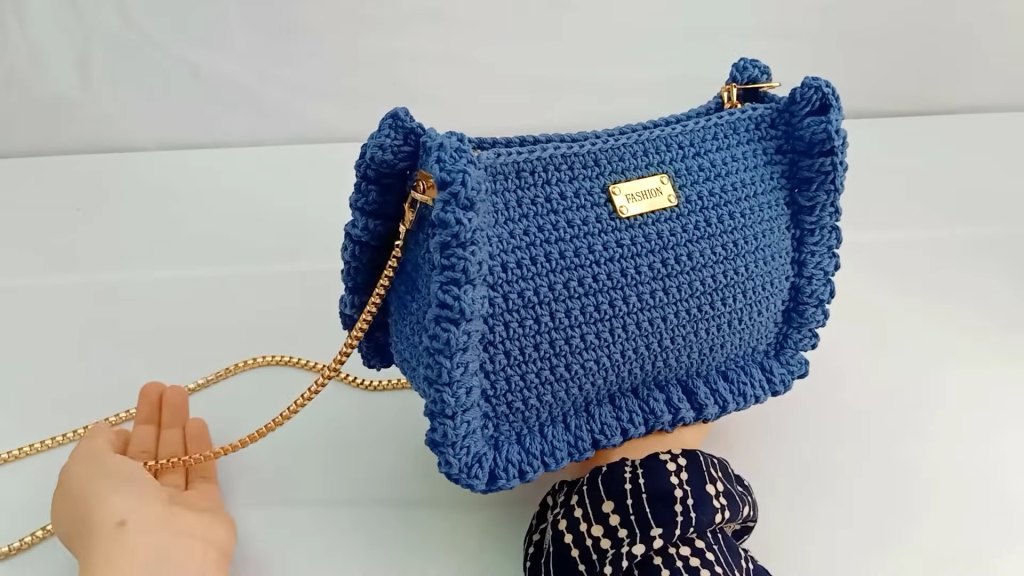
💃 The Signature Ruffle Trim
This is where the bag truly comes to life! We will add a voluminous ruffle around the seam where we joined the pieces.
- Set Up: Join your yarn at the top edge. Ch 3 (counts as first DC).
- The Pattern: In every single stitch around the bag’s perimeter, work 3 Double Crochets.
- The Texture: To create a wavy, dimensional look, alternate the loops:
- In St 1: 3 DC in the Front Loop.
- In St 2: 3 DC in the Back Loop.
- Result: This creates a dense, curly ruffle that frames the bag beautifully.
✨ Finishing Touches
- D-Rings: Sew your metal D-rings to the top sides of the gusset, near where the zipper starts and ends.
- Chain Strap: Clip your decorative chain to the D-rings.
- Cleaning Up: Weave in all loose ends securely using a tapestry needle. Cotton macramé can be slippery, so a few extra knots on the inside won’t hurt!
Video Tutorial:
🌟 Conclusion
You have just completed the Chic Macramé Ruffle Bag! This design is not only practical due to its sturdy base but also serves as a high-fashion statement piece. Whether you chose a classic cream, a bold black, or a vibrant summer color, your handmade creation is sure to turn heads.
Did you enjoy this pattern? Let us know in the comments below, and don’t forget to share photos of your finished masterpiece! Happy crocheting!


