
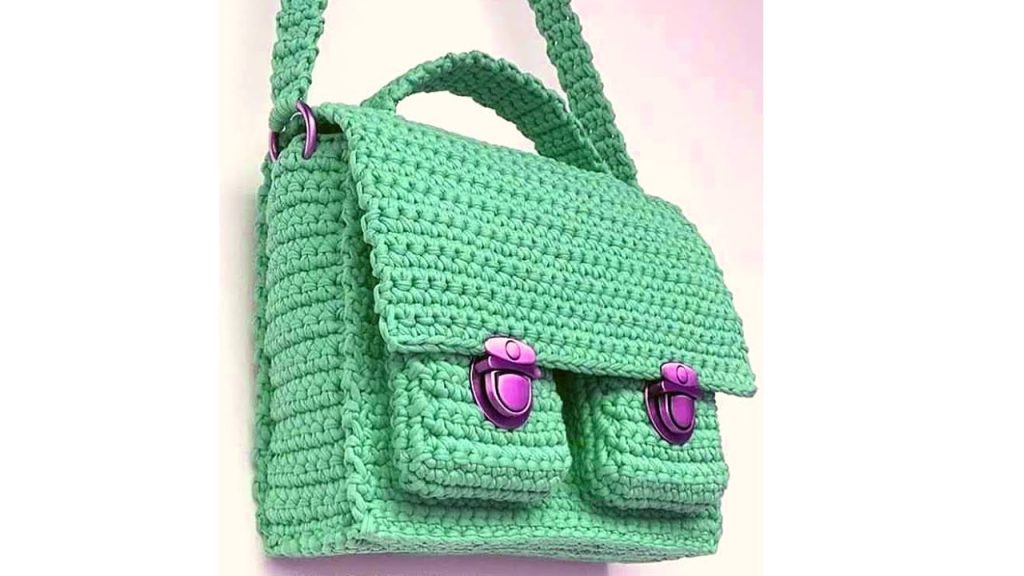
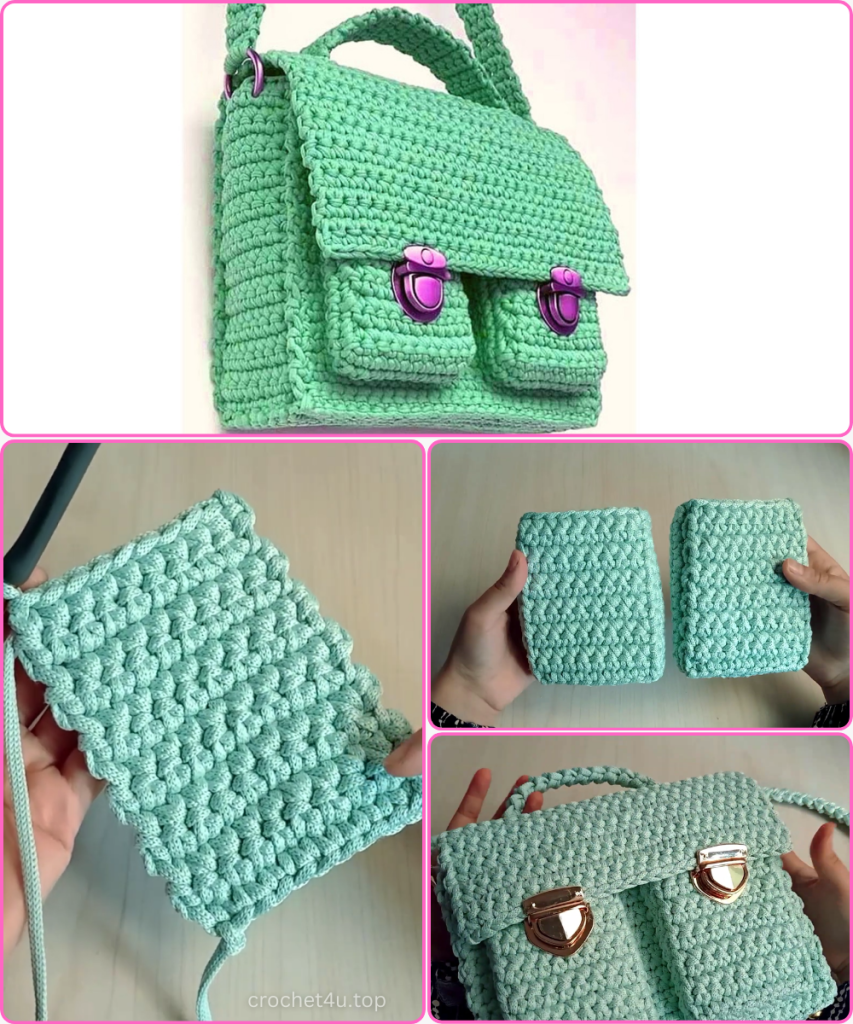
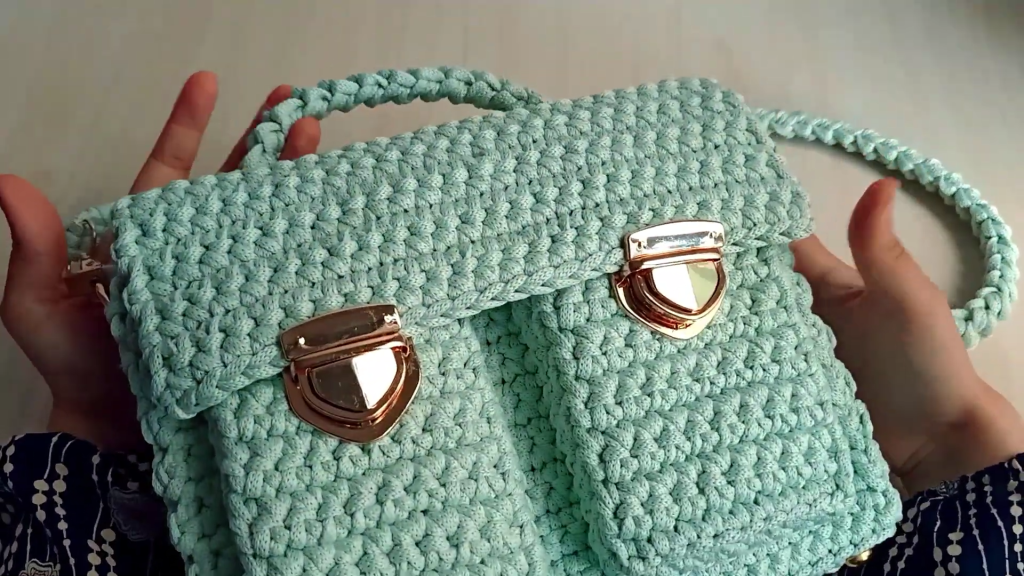
Welcome to this comprehensive guide on crafting the “Urban Voyager” handbag. This design is not only elegant but highly functional, featuring a secure zipper closure, a stylish cover flap, and two external pockets for your on-the-go essentials.
Using sturdy polyester macramé cord, this bag is built to hold its structure while looking like a high-end boutique find. Let’s dive into this long-form, step-by-step tutorial.
🧶 Section 1: Materials and Gear
To achieve the professional, structured look of the “Urban Voyager,” your choice of thread and tools is critical.
- Thread: 5mm Polyester Macramé Cord. You will need approximately 400 grams. This cord is chosen for its durability and its ability to hold a “sculpted” shape without sagging.
- Hook: 6.0 mm Crochet Hook.
- Hardware: * 2 Metal D-Rings (or snap rings).
- 1 Magnetic Lock for the cover flap.
- 1 Zipper (slightly longer than the bag width).
- 2 Swivel Snap Hooks (for the long shoulder strap).
- Notions: Plastic fishing line (monofilament) for sewing, a tapestry needle, stitch markers, and a lighter (to singe the ends of the polyester cord).
📏 Section 2: The Architectural Blueprint
The bag is constructed in one continuous piece that flows from the Front Panel, through the Base, and up into the Back Panel and Cover Flap.
Phase 1: The Front Panel
- Foundation: Start with a slip knot and chain 25.
- Row 1: Chain 1 (turning chain) and work 25 Single Crochet (SC) into the back loops of the foundation chain.
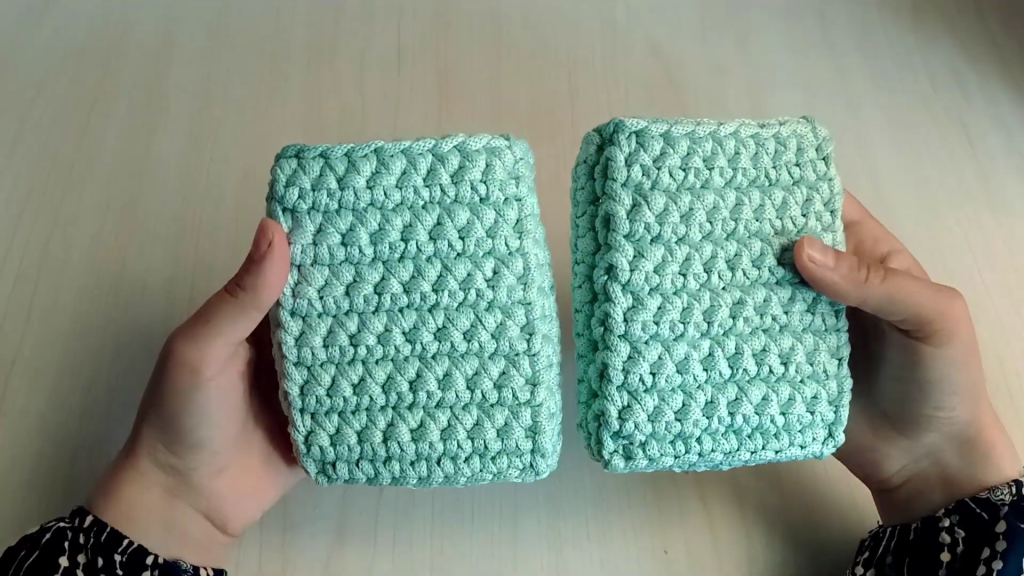
- Rows 2–21: Work rows of standard SC, inserting the hook into both loops. Continue until you have a rectangle that is 21 rows high.
Phase 2: Transitioning to the Base (Row 22) 4. Row 22: To change the direction of your work and create a sharp “fold” for the base, insert your hook into the front loop AND the lower loop (the horizontal bar behind the stitch). Work SC across. You will see a visible line formed by the unworked back loops—this is your base fold. 5. Rows 23–27: Work 5 more rows of standard SC. Your base is now exactly 6 rows deep (approx. 5.5 cm).
Phase 3: The Back Panel & Cover Flap 6. Row 28 (The Second Fold): Repeat the “front loop and lower loop” technique from Row 22. This turns the work upward for the back panel. 7. Rows 29–66: Continue working SC for 38 rows. This long section serves as the back of the bag (21 rows) plus the cover flap that will fold over the front (17 rows).
📐 Section 4: Side Panel Construction
We will now attach the sides directly to the base to create a 3D box shape.
- Setup: Re-attach your thread at the edge of the first row of the base (the 6-row section).
- Stitching: Work 1 SC into the edge of each of the 6 base rows.
- Building Height: Chain 1, turn, and work back and forth for 21 rows. This height must match the height of your front panel perfectly.
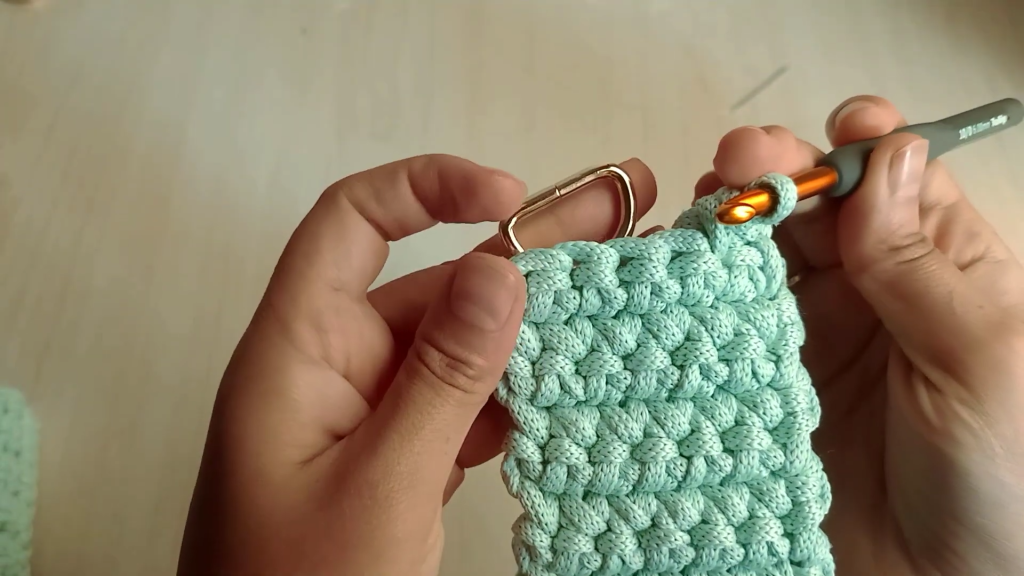
- Hardware Integration (Row 21):
- Work the first 2 SC.
- Place your Metal D-Ring against the work. Work the next 2 SC around the ring, securing it to the panel.
- Work the final 2 SC.
- Repeat: Do the exact same for the second side panel.
🤐 Section 5: The Internal Zipper Housing
For those who want a secure bag, we add a zipper track underneath where the cover flap sits.
- Attachment: Locate the row between your front panel and the top of your sides. Re-attach thread and work a row of SC across the opening.
- Depth: Work 2 rows of SC total to create a “lip” for the zipper. Repeat this on the back panel side, ensuring the two rows face each other.
- Sewing the Zipper: Use plastic fishing line. Fold the ends of the zipper tape downward at a 45-degree angle. Sew straight along the zipper fabric, catching the loops of your SC rows. The fishing line is invisible and incredibly strong.
📱 Section 6: The External Utility Pockets (Make 2)
These pockets are added to the front for style and convenience.
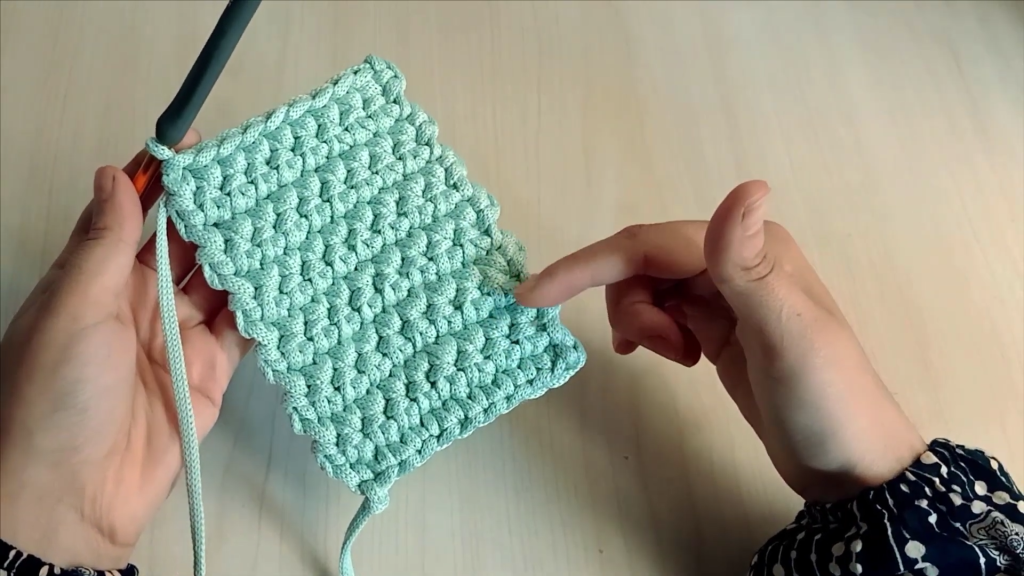
- Main Piece: Chain 10. Work 13 rows of 9 SC.
- The Border: * Work SC down the side (13 stitches).
- Across the bottom back-loops (9 stitches).
- Up the second side (13 stitches).
- The Depth Round: Work a second round of SC around the three sides, adding an increase (2 SC) in the two bottom corners. This gives the pocket “volume” so it doesn’t lay flat.
- Attachment: Position the pocket on the front panel, starting 2 rows from the bottom and 13 rows from the top. Sew with doubled fishing line, going through every stitch for maximum security.
🪡 Section 7: Final Assembly & The Magnetic Lock
- Closing the Gaps: Use the fishing line to sew the sides of your front and back panels to the side panels. Use a “row-to-row” whipstitch for a clean, professional finish.
- The Lock: Install the magnetic snap. The “male” part goes on the underside of the cover flap (centered), and the “female” part goes on the front panel, just above the pockets.
- The Handles:
- Short Handle: Crochet a 19 cm Roman Lace Cord (or a thick I-cord). Sew it securely to the top of the cover flap area.
- Long Strap: Create a 100 cm strap. Use swivel snap hooks on the ends so you can clip it to the D-rings we installed on the side panels.
✨ Section 8: Professional Finishing Touches
- Singeing: Check every single yarn tail. Trim them to 1cm, then carefully melt the tip with a lighter and press it against the inside of the bag.
- Alignment: Ensure your cover flap folds squarely over the front. If it feels stiff, you can “steam” the fold line with a steamer (do not touch the polyester cord with a hot iron directly!).
Congratulations! You have completed the Urban Voyager. This bag is a testament to the versatility of crochet—proving that with the right materials and techniques, you can create a piece of high-fashion utility.
Video Tutorial:
What color will you make yours? Tell us in the comments!


