
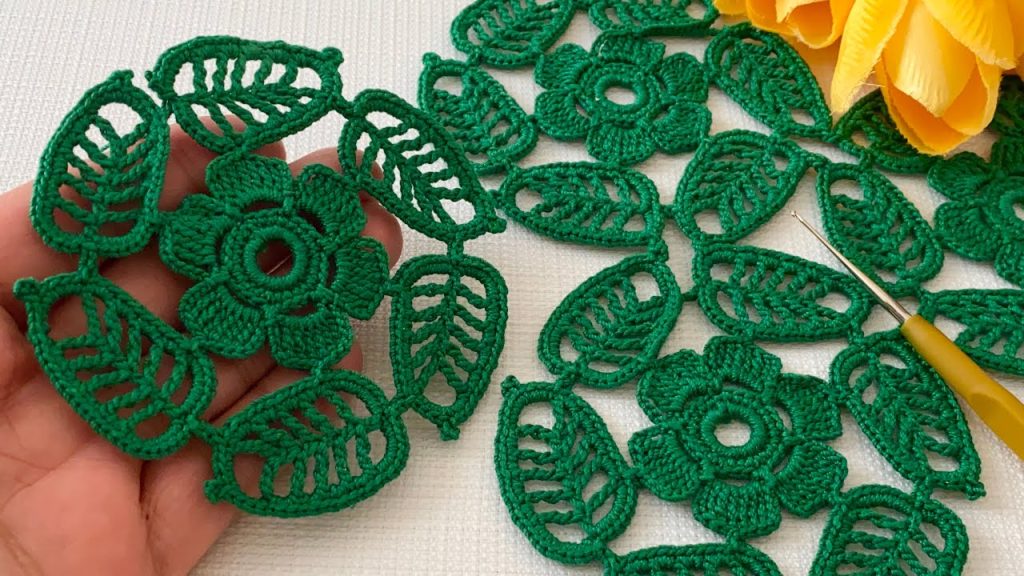
This pattern guides you in creating the beautiful, interconnected floral motifs often associated with lace work. You’ll crochet a solid flower and a delicate vein-leaf, then join them with chain loops to form a continuous garland, perfect for table runners, edging, or decorative bands.
⭐️ Project Overview and Techniques
| Feature | Detail |
| Skill Level | Intermediate. Requires focused stitch counting and working in the round. |
| Stitches Used | Chain (ch), Slip Stitch (sl st), Single Crochet (sc), Double Crochet (dc), Treble Crochet (tr), Picot. |
| Construction | Motif-based. Individual flowers and leaves are made first, then joined. |
| Yarn Type | Fine thread (cotton) for a crisp finish. |
| Final Product | A repeatable, continuous floral garland. |
Export to Sheets
🧵 Materials & Gauge
Yarn
- Weight: Lace/Fingering Weight (Category 1) or Crochet Thread Size 10 for the crisp, defined look shown in the image. Using a thicker yarn will result in a much larger, less delicate motif.
- Fiber: 100% Cotton is highly recommended for the best stitch definition and blocking results.
- Color: A rich, deep green is used in the example.
- Yardage: This is a low-yardage project. One small ball of thread should be enough for a generous garland.
Hook
- Size: 1.5 mm to 2.0 mm (Steel Hook US 8 to 4), depending on your thread thickness. Choose a hook that gives you a dense, firm stitch.
Notions
- Tapestry Needle for weaving in ends.
- Scissors.
- T-pins and blocking board (essential for shaping the finished motifs).
Gauge (Approximate)
The gauge is less about size and more about tension. The finished flower should measure approximately 1.5 inches across, and the finished leaf should be about 1 inch wide by 1.75 inches long. Your tension should be tight to prevent the work from looking loose or floppy.
🌸 Motif Pattern 1: The Six-Petal Flower (Make Many)
The flower is worked in the round.
Center
Round 1: ch 4, sl st to the first ch to form a ring. ch 1 (does not count as a stitch), 12 sc into the ring. sl st to the first sc to join. (12 sc)
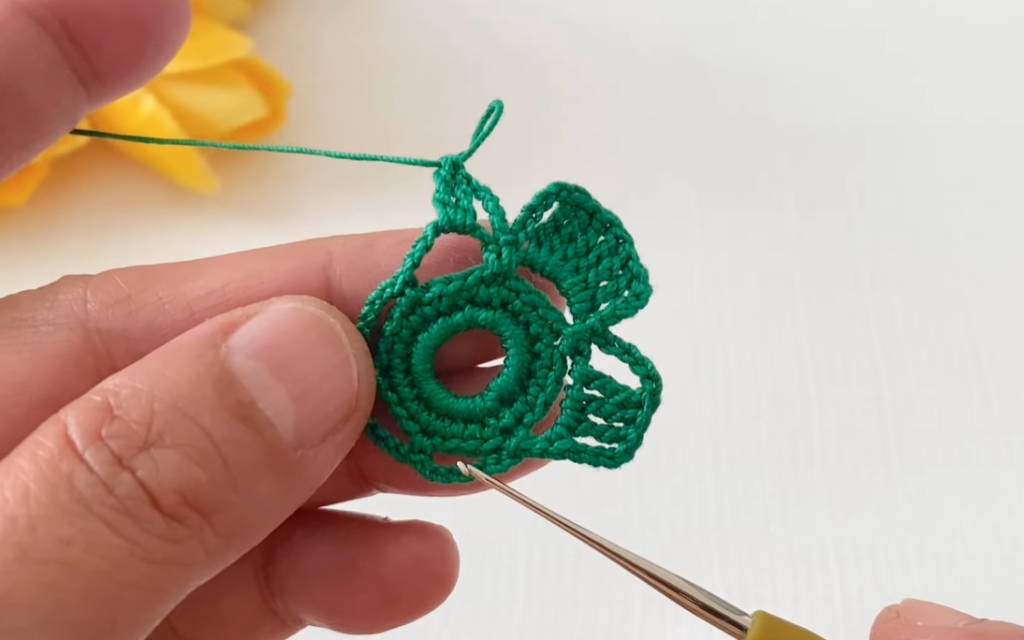
Petals
Round 2: (This round sets up the petals.) ch 1, sc into the first stitch. ch 3, sc into the 3rd sc from the hook. Repeat the sequence (ch 3,sc into the 3rd sc) 5 times more around the center. You should have 6 loops. sl st to the first sc to join. (6 loops)
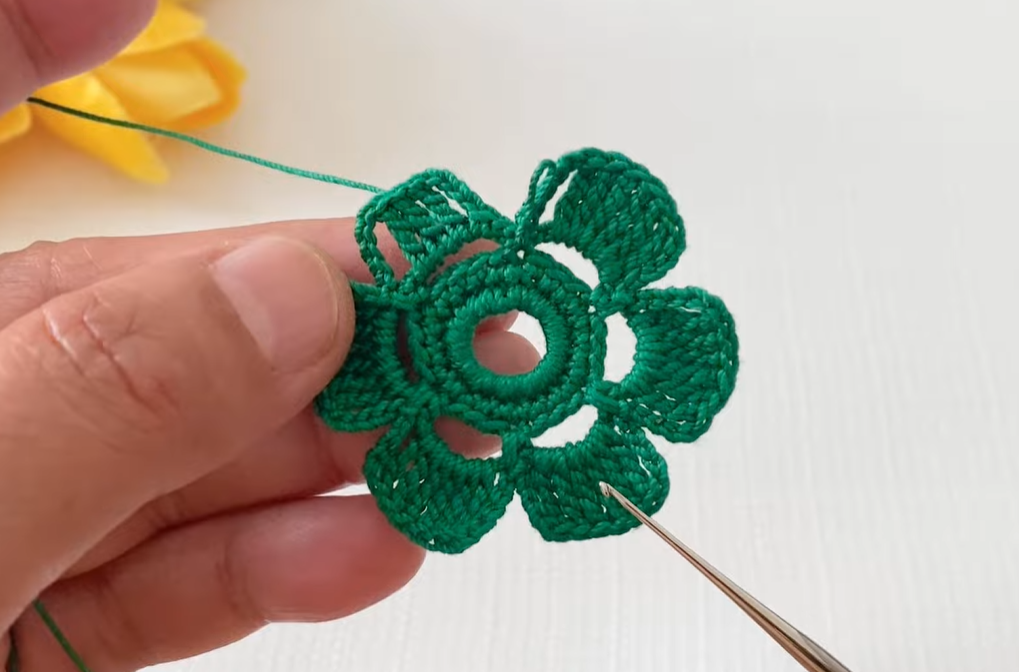
Round 3: (Working into the ch 3 loops.) sl st into the first ch 3 loop. In the same loop, work: ch 2 (does not count as a stitch), 4 dc,ch 2,sl st in the loop. This forms one petal. Repeat this sequence sl st into the next loop, 4 dc,ch 2,sl st in the loop 5 times more. sl st to the base of the first petal to join.
Fasten off and weave in the ends neatly at the back of the flower.
🍃 Motif Pattern 2: The Detailed Vein Leaf (Make Many)
The leaf is worked back and forth in rows, then edged.
Row 1 (Foundation): ch 10 (This chain forms the main spine/vein of the leaf.) sl st into the 2nd ch from the hook, sc in the next ch, dc in the next 3 ch, tr in the next 3 ch, dc in the last ch. (8 stitches along the chain, plus the final ch 1)
Edging (Side 1): ch 1, turn work so you can work down the opposite side of the chain. sc into the bottom of the dc from Row 1. ch 5 (creates an open lace edge). sl st into the center post of the next tr. ch 5. sl st into the center post of the next tr. ch 5. sl st into the center post of the next dc.
Tip (Joining Point): ch 1, turn work slightly to begin the other side. The tip of the leaf is the single ch 1 space.
Edging (Side 2): sl st into the post of the dc on this side. ch 5. sl st into the post of the next tr. ch 5. sl st into the post of the next tr. ch 5. sl st into the base of the final sc near the stem.
Stem: ch 5 (This forms the small stem). sl st into the 2nd ch from the hook and in the next 3 ch. sl st to join back at the base of the leaf.
Fasten off and weave in the end.

🔗 Assembly: Creating the Garland
The key to the look in the image is alternating one flower with four leaves, connecting them with simple ch 5 loops.
Sequence: Flower → Leaf → Leaf → Leaf → Leaf → Flower → …
Joining Method
Start with your first flower and leaf motifs ready.
- Attach Yarn: Join your yarn with a sl st to one of the ch 2 spaces on the side of a Flower petal (this point will be the connection point).
- Chain to First Leaf: ch 5. sl st into the tip of the Leaf (the single ch 1 space you made on the tip).
- Chain Back: ch 5. sl st back into the same ch 2 space on the Flower petal.
- Move to Next Petal/Leaf: sl st across the top of the petal to the next ch 2 space. Repeat Steps 2 and 3, attaching a new Leaf.

Connecting the Motifs
To connect a flower to a leaf cluster, you will join the leaves to the flower’s petals.
- Connect a total of 4 leaves around the perimeter of the flower, joining one leaf to every other petal (skipping one petal between joins). Use the ch 5 loops as described above.
Connecting Flower-to-Flower
Once you have 4 leaves around a flower, the 4th leaf leads directly to the next flower motif.
- After attaching the 4th Leaf to the first Flower, ch 5.
- Join the chain with a sl st to a petal on the next Flower motif.
- Continue the pattern, attaching leaves to the second flower.
Continue the sequence until your garland is the desired length.
Video Tutorial:
🔨 Finishing and Blocking
Blocking is non-negotiable for lace work! It relaxes the fibers, opens up the chain spaces, and defines the sharp points of the leaves and petals, giving the work the crisp, professional look seen in the image.
- Weave: Carefully weave in all remaining loose ends on the back of the work.
- Wet: Gently soak the finished garland in cool water with a small amount of wool wash or fabric softener for about 20 minutes. Squeeze out excess water—do NOT twist or wring.
- Pin: Lay the piece out on a foam blocking board or thick towel. Using rust-proof T-pins, carefully pin each petal, each leaf tip, and the connecting chain loops to hold them in a neat, open shape.
- Dry: Allow the piece to dry completely (this may take 24 hours).
- Enjoy: Once dry, unpin the garland. The motifs will hold their perfectly crisp shape.
This pattern requires patience but results in a beautiful, heirloom-quality piece of textile art. What project do you plan to use this floral garland for?


