
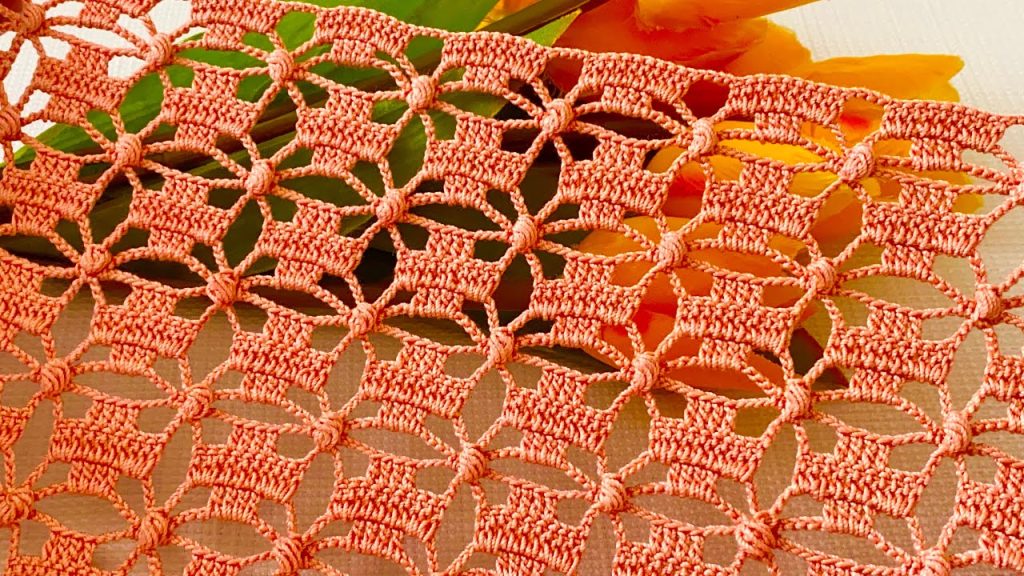
Unveil the elegance of the Desert Rose Lattice, a breathtaking border featuring interlocking geometric motifs. This pattern creates a sturdy yet airy fabric composed of small, dense squares framed by a delicate web of chains that form an eight-pointed star at every junction. The structured coral pink yarn highlights the rhythmic, repetitive nature of the design. This trim is perfect for shawls, curtains, or as a striking insert for garments.
⭐️ Project Blueprint and Advanced Techniques
| Feature | Detail |
| Skill Level | Advanced Intermediate. Requires excellent stitch counting, consistent tension, and working into specific chain spaces. |
| Stitches Used | Chain (ch), Slip Stitch (sl st), Single Crochet (sc), Double Crochet (dc), dc Cluster (dccl). |
| Construction | Worked flat in rows, building each row of motifs and connecting them to the previous row simultaneously. |
| Yarn Type | Fingering or Sport Weight cotton is best for crisp edges. |
| Pattern Repeat | The pattern is a 2-row repeat, creating a straight, uniform trim. |
Export to Sheets
🧵 Materials Selection & Precision Gauge
Yarn: Choosing for Structure
- Weight: Fingering Weight (Category 1) or Sport Weight (Category 2) yarn. The structure of this pattern requires a yarn with low stretch to hold the geometric shape.
- Fiber: 100% Cotton or a Cotton/Linen blend is highly recommended for its excellent stitch definition and stability during blocking.
- Color: A warm Coral or Terracotta (like the sample), or any solid color to make the geometry pop.
- Yardage: Approximately 180−250 yards for a 60-inch shawl border.
Hook: The Detailer
- Size: 2.0 mm to 2.5 mm (B/1 or C/2). Use a hook that gives a firm, tight tension. Loose stitches will cause the grid to lose its shape and definition.
Notions & Blocking
- Tapestry Needle: For seamless weaving in of ends.
- T-pins and Blocking Board: Essential. Blocking is necessary to square up the small boxes and define the connecting star points.
Precision Gauge
Gauge is measured across one full motif repeat (from star junction to star junction).
- One Horizontal Star-to-Star Repeat: Approximately 1.5 inches wide.
- Trim Height: The total height is approximately 2 inches.
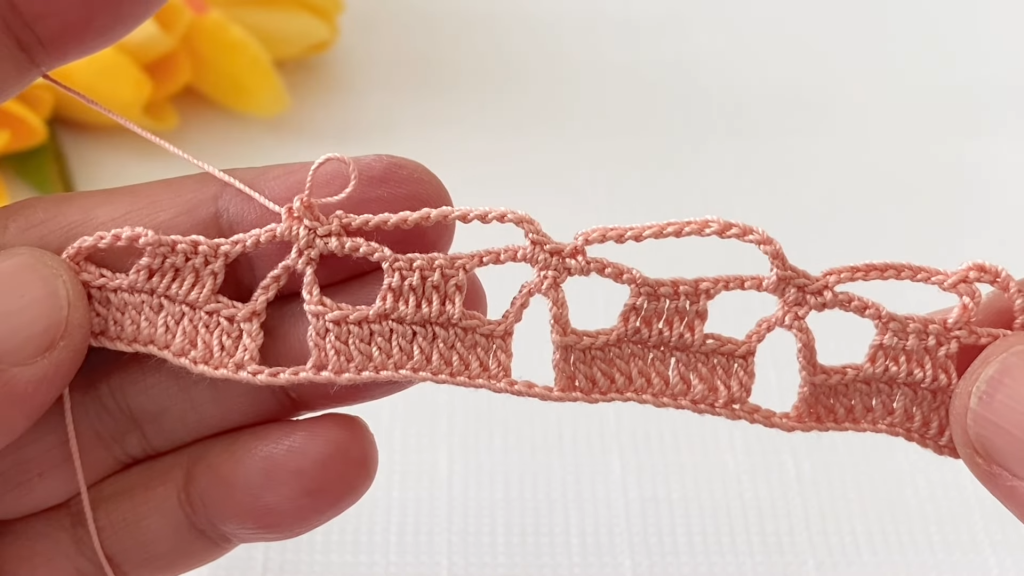
📝 Pattern Instructions: The Foundation Row
This row establishes the base and the first line of the dense, square motifs.
Skill Definition: dc Cluster (dccl) dccl (3 dc together): Yarn over, insert hook into stitch/space, yarn over, pull up loop, yarn over, pull through 2 loops (2 loops on hook). Repeat from * 2 more times in the same stitch/space (4 loops on hook). Yarn over, pull through all 4 loops.
Starting Chain Calculation: The pattern repeats every 10 chains. Use the formula: 10×(number of repeats)+4 ch
- Example: For 10 motifs across: 10×10+4=ch 104
Row 1 (Foundation – RS): dc in the 4th ch from the hook (ch 3 counts as dc). dc in the next 6 ch. (7 dc made).
- ch 4, sk 4 ch, dc in the next 7 ch. Repeat the sequence ch 4,sk 4 ch,dc in next 7 ch across the row. You will end with 7 dc in the last ch 7.
- Turn.
🔗 The 2-Row Interlocking Repeat
These two rows create the interlocking star and square pattern.
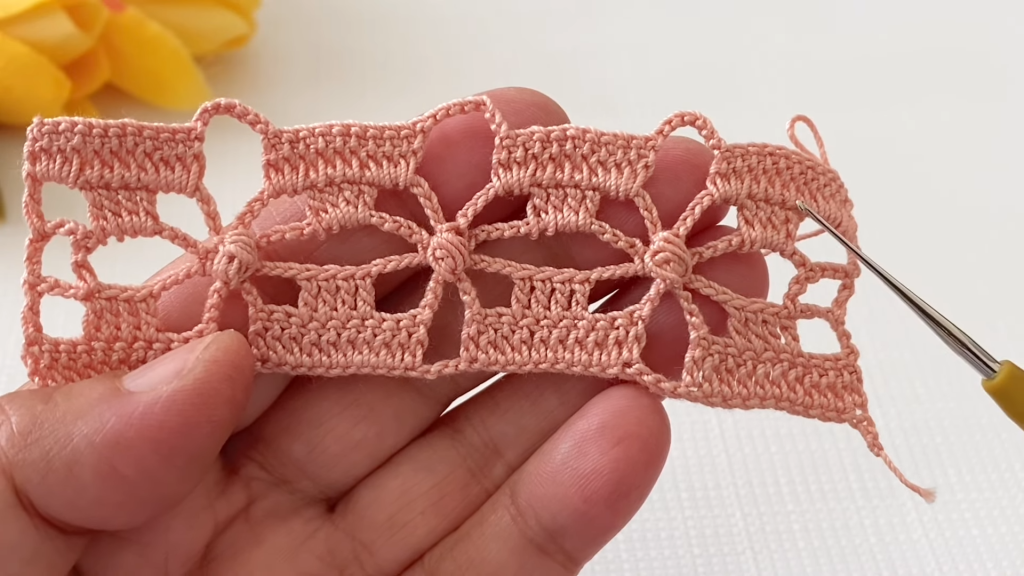
Row 2 (Connecting Stars – WS): ch 1 (sc in first dc). sc in the next 2 dc.
- ch 3, dccl into the center 4th dc of the group. ch 3.
- sc into the center 3rd ch of the ch 4 space from Row 1.
- ch3, dccl into the sc just made. ch 3.
- sc in the 1st dc of the next 7 dc group. sc in the next 2 dc.
- ch 3, dccl into the center 4th dc of the group. ch 3.
- sc into the center 3rd ch of the ch 4 space. Repeat across the row. You will end with sc in the last 3 dc.
- Turn.
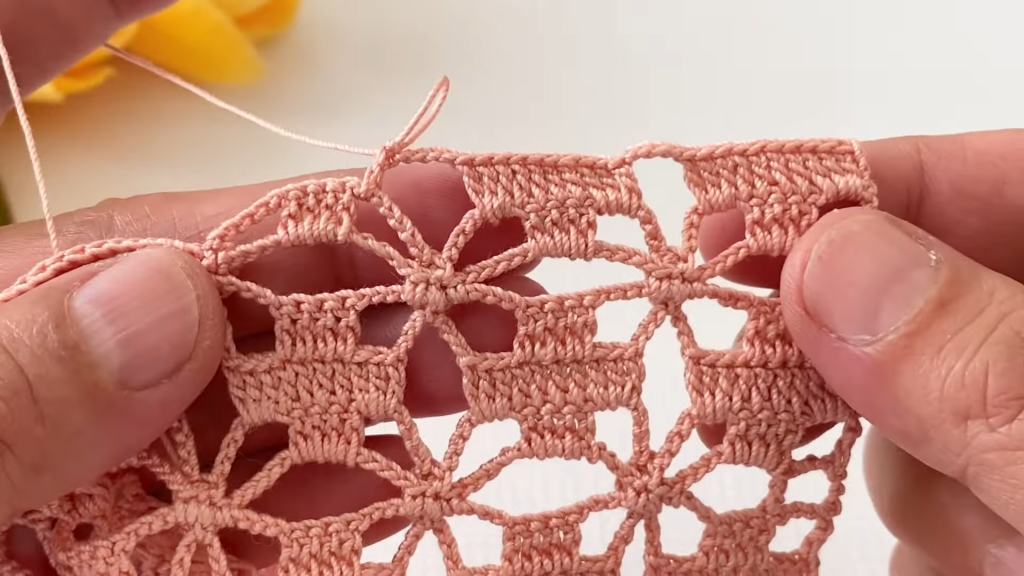
Row 3 (New Squares and Joining – RS): ch 3 (counts as dc). dc in the next 2 sc.
- ch 2, sc into the top of the dccl below. ch 2.
- 3 dc into the top of the next dccl (the one sitting over the arch). ch 2.
- sc into the top of the next dccl. ch 2.
- dc in the next 3 sc. dc in the next 4 ch (working over the star junction). dc in the next 3 sc. (7 dc made over the star junction).
- ch 2, sc into the top of the dccl below. ch 2. Repeat across the row. You will end with 3 dc in the last 3 sc.
- Turn.
Continue repeating Row 2 and Row 3 until your piece reaches the desired length.
🔚 Finishing and Edging
For a finished look, you can add a simple edging along the two long straight sides.
Final Row (Simple Edge – RS): Attach yarn to the long, straight edge (the starting chain edge). ch 1 (sc in same stitch). sc evenly across the entire edge, placing 2 sc over each ch 2 space and 1 sc in the top of each dc.
- ch 3 (Picot), sl st into the sc just made. sc in the next 2 stitches. Repeat the sequence ch 3,sl st into base, sc in next 2 stitches across the entire edge.
Fasten off and weave in the ends.
Video Tutorial:
🔨 Final Shaping and Heirloom Blocking
Blocking is absolutely essential for the Desert Rose Lattice; it ensures the little squares are perfectly flat and the interconnecting star points are defined.
- Preparation: Weave in all loose ends securely.
- Soak: Submerge the trim in cool water with a mild detergent or liquid starch (for extra crispness). Gently squeeze out excess water.
- Tension Pinning: Lay the damp fabric on a blocking mat. Using rust-proof T-pins:
- Pin the top and bottom edges straight, ensuring the dc groups are aligned vertically.
- Pin out the center of every dccl junction (the star points) and the corners of every dc square to maximize the geometric shape.
- Dry: Allow the piece to dry completely flat for 12−24 hours.
Your stunning Desert Rose Lattice trim is complete! What project will this elegant geometric border finish?


