
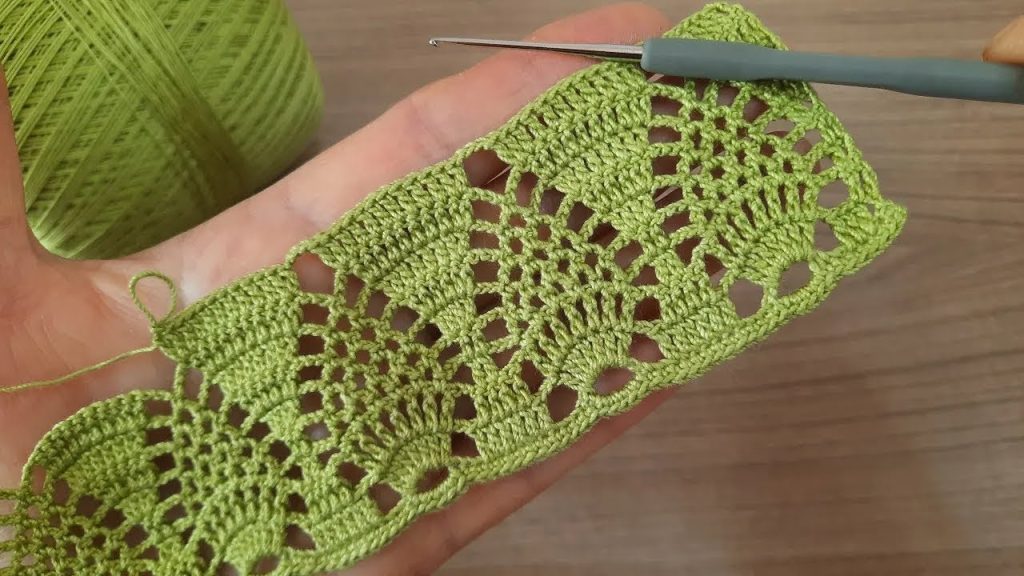
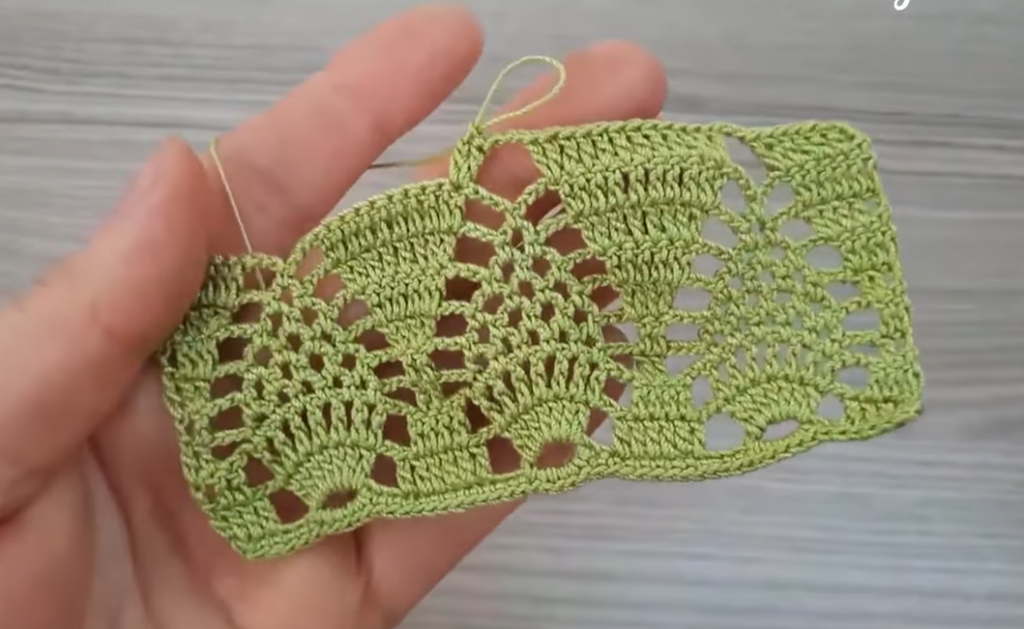
Bring the freshness of spring to your projects with the Emerald Garden Garland! This captivating design creates a continuous, flexible chain composed of small, dense five-petal flowers framed by beautifully detailed, veined leaves. The deep green yarn transforms this lace into a versatile garland, perfect for embellishing garments, creating bookmarks, or joining into a breathtaking heirloom table runner. The pattern requires precise shaping and the Join-As-You-Go (JAYG) technique for a seamless result.
⭐️ Project Blueprint and Technique Check
| Feature | Detail |
| Skill Level | Advanced Intermediate. Requires specific shaping techniques (like dc into a chain space) and the ability to work sc into the sides of stitches. |
| Stitches Used | Chain (ch), Slip Stitch (sl st), Single Crochet (sc), Half Double Crochet (hdc), Double Crochet (dc), Treble Crochet (tr). |
| Construction | Each motif (Flower and 2 Leaves) is worked sequentially, with the flower being joined to the previous motif’s leaf. |
| Yarn Type | Fine cotton thread is ideal for the crisp edges and clear leaf veins. |
| Repeatable | The pattern is repeatable to create a chain of any desired length. |
Export to Sheets
🧵 Materials Selection & Precision Gauge
Yarn: Choosing the Green
- Weight: Crochet Thread Size 10 or a fine Lace Weight (Category 0) yarn. Using a fine, stable thread is crucial for defining the edges of the small flowers and the detailed veins of the leaves.
- Fiber: 100% Mercerized Cotton thread is highly recommended for its strength, crisp stitch definition, and superb stability after blocking.
- Color: A rich Emerald Green or Forest Green (like the sample) to mimic natural foliage.
- Yardage: Approximately 15 to 20 yards per complete flower-and-leaf motif set.
Hook: The Detailer
- Size: 1.5 mm to 1.75 mm (Steel Hook US 8 or 7). Choose a hook that results in firm stitches, which is necessary for the motifs to hold their intricate shape without sagging.
Notions & Blocking
- Tapestry Needle: Fine needle for weaving in ends.
- T-pins and Blocking Board: Highly Recommended. Blocking is key to opening the leaf veins and achieving sharp petal points.
Precision Gauge
Gauge is measured across one full set of the motif (Flower and two attached Leaves).
- One Complete Motif Set: Approximately 3.5 inches wide (from leaf tip to leaf tip) and 1.5 inches tall (flower diameter).
🌸 Pattern Instructions: The Flower Motif
The flower acts as the central anchor and joining point for the leaves.
Round 1 (Center Ring): ch 6, sl st to the first ch to form a ring. ch 1 (sc in ring). ch 3. sc in ring. Repeat the sequence ch 3,sc in ring 4 times more. sl st to the starting sc to join. (5 ch 3 loops)
Round 2 (Petals): sl st into the first ch 3 loop. ch 1 (sc in loop). hdc,3 dc,hdc in the same loop.
- sc in the sc between loops.
- Work sc,hdc,3 dc,hdc in the next ch 3 loop. Repeat the sequence sc,hdc,3 dc,hdc in loop 3 times more. sl st to the starting sc to join. (5 petals)
Fasten off for the first flower. For subsequent flowers, do not fasten off; proceed to the leaf section.
🌱 Pattern Instructions: The Detailed Leaf
Each leaf is worked back and forth in rows, starting from the flower and shaping the veins with chain loops.
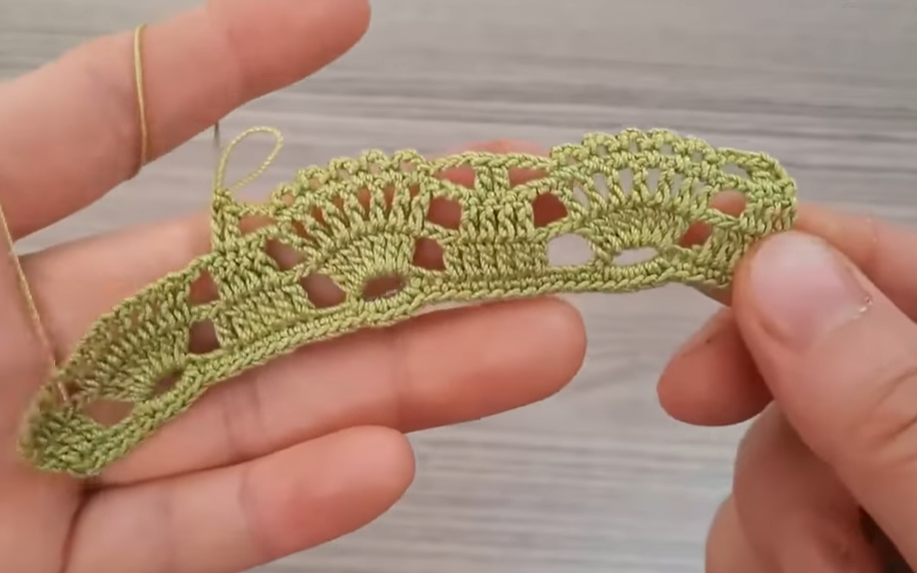
Leaf 1 (Joining Leaf)
Note: For the first motif in the chain, work Leaf 1 without joining to a previous flower. For all subsequent motifs, this is the JAYG leaf.
Row 1 (Base): Work 4 sl st across the top of the adjacent petal (Petal 5). ch 10. tr in the 5th ch from the hook. dc in the next ch. hdc in the next ch. sc in the next 2 ch. sl st into the dc of the next petal (Petal 1).
- Turn.
Row 2 (Vein Shaping – RS): ch 1 (sc in sl st join). sc in the sc below. ch 3, sc in the next hdc. ch 3, sc in the next dc. ch 3, sc in the next tr. ch 4. tr into the top of the starting ch 10.
- Turn.
Row 3 (Final Edge – WS): ch 1 (sc in tr). Work 3 sc over the ch 4 loop. Picot (ch 3,sl st in 1st ch).
- 4 sc over the next ch 3 loop. Repeat 4 sc over ch 3 loop 2 times more.
- sc in the next 2 sc. sl st into the sc on the edge of the Flower.
Leaf 2 (Connecting Leaf)
Row 1 (Base): Work 4 sl st across the next petal (Petal 2). ch 10. tr in the 5th ch from the hook. dc in the next ch. hdc in the next ch. sc in the next 2 ch. sl st into the dc of the next petal (Petal 3).
- Turn.
Row 2 (Vein Shaping – RS): ch 1 (sc in sl st join). sc in the sc below. ch 3, sc in the next hdc. ch 3, sc in the next dc. ch 3, sc in the next tr. ch 4. tr into the top of the starting ch 10.
- Turn.
Row 3 (Final Edge and JAYG Join – WS): ch 1 (sc in tr). Work 3 sc over the ch 4 loop. ch 1, sl st into the Picot of the previous motif’s Leaf 1. ch 1. sl st into the ch where you started the Picot.
- 4 sc over the next ch 3 loop. Repeat 4 sc over ch 3 loop 2 times more.
- sc in the next 2 sc. sl st into the sc on the edge of the Flower.
Fasten off and weave in the ends. Your first full flower-leaf-leaf unit is complete.
Continue repeating the entire sequence: Start a new Flower, work Leaf 1 (connecting to the previous Flower’s free petal), and work Leaf 2 (connecting to the previous motif’s Leaf 1 picot).

💡 Troubleshooting and Advanced Notes
| Issue | Cause | Solution |
| Leaves Curl Up | ch 10 on Row 1 is too short or tension is too tight. | Increase the chain base to ch 11 or ch 12 and ensure even tension on the taller tr and dc stitches. |
| Leaf Veins Aren’t Clear | sc or sl st used on Row 2 instead of ch 3. | Ensure you are using ch 3 to create the open loops that define the veins. Use the smallest sc or sl st possible to anchor the loops. |
| Chain Bumps/Doesn’t Lie Flat | JAYG join is too tight or too loose. | Practice the ch 1,sl st,ch 1 sequence on Row 3 of Leaf 2 to ensure a flat, flexible connection. |
| Want a Fuller Leaf | The leaf is too skinny for the project. | Add an extra dc and tr to the base chain in Row 1 (e.g., ch 12 and use tr twice). |
Video Tutorial:
🔨 Final Shaping and Heirloom Blocking
Blocking is necessary to open the leaf veins and straighten the final garland.
- Preparation: Weave in all loose ends on the back of the work.
- Soak: Submerge the garland in cool water with a small amount of liquid starch for a traditional, stiff finish. Gently squeeze out excess water.
- Tension Pinning: Lay the damp chain on a blocking mat. Using rust-proof T-pins:
- Pin the center of each flower to align the chain.
- Pin the tip of each leaf (the Picot join point), pulling gently to open the leaf and define the ch 3 vein loops.
- Dry: Allow the piece to dry completely flat for 12−24 hours.
Your stunning Emerald Garden Garland is complete! How will you use this delicate, beautiful chain to enhance your next project?


