
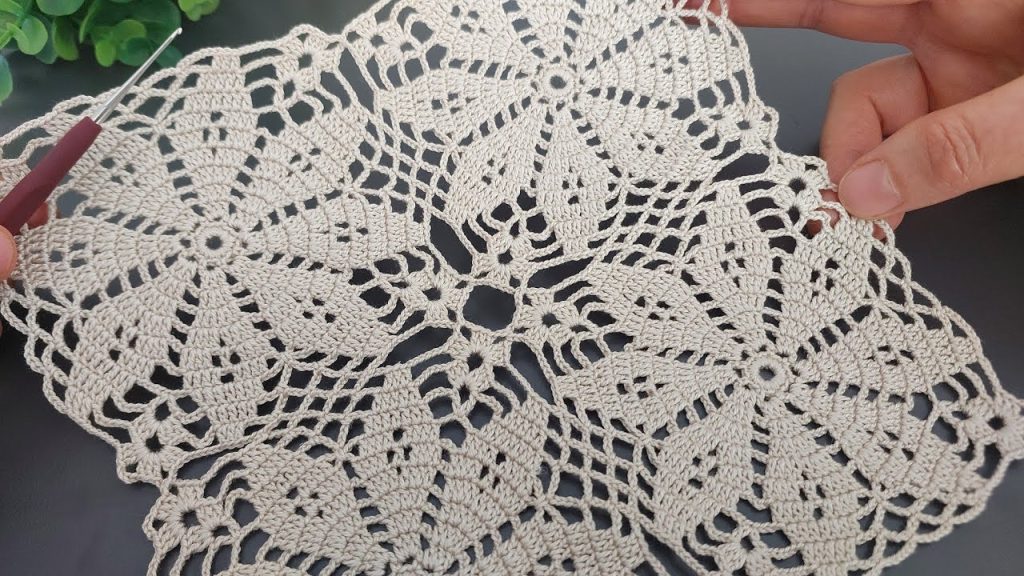
Illuminate your crafting with the stunning Sunburst Jewel Square! This motif begins with a captivating, dense floral center that seamlessly transitions into crisp, open lace corners. The bold yellow yarn highlights the geometric precision, making this a perfect choice for heirloom blankets, cushion fronts, or a striking table runner when multiple motifs are joined. This pattern is structured yet airy, providing an enjoyable challenge for the intermediate crocheter.
⭐️ Project Blueprint and Technique Check
| Feature | Detail |
| Skill Level | Advanced Intermediate. Requires focused stitch placement, working into chain spaces, and seamless circle-to-square shaping. |
| Stitches Used | Chain (ch), Slip Stitch (sl st), Single Crochet (sc), Half Double Crochet (hdc), Double Crochet (dc), Treble Crochet (tr). |
| Construction | Worked continuously in the round, starting as a circle and establishing the four corners for a square by Round 5. |
| Yarn Type | Fine cotton thread is ideal for the crisp lace and defined geometry. |
| Final Product | A perfectly square motif ready for blocking and joining. |
Export to Sheets
🧵 Materials Selection & Precision Gauge
Yarn: Choosing for Brilliance
- Weight: Crochet Thread Size 10 or a fine Lace Weight (Category 0) yarn. A stable cotton thread is essential for maintaining the sharp geometric corners and petal points.
- Fiber: 100% Mercerized Cotton is highly recommended for its strength, excellent stitch definition, and superb blocking properties.
- Color: A vibrant Gold/Mustard Yellow (like the sample), or a high-contrast color like black or deep blue.
- Yardage: Plan for 45 to 60 yards per motif.
Hook: The Detailer
- Size: 1.5 mm to 2.0 mm (Steel Hook US 8 or 7). The goal is to use the smallest hook size that still allows comfortable manipulation, ensuring the final fabric is firm.
Notions & Blocking
- Tapestry Needle: Fine needle for weaving in ends.
- T-pins and Blocking Board: Absolutely Mandatory. Blocking is the only way to achieve the sharp, perfect square shape.
Precision Gauge
Gauge is measured across one finished motif after blocking.
- Finished Motif Size (After Blocking): Approximately 5.5 to 6.5 inches square.
- First Four Rounds Diameter: Approximately 1.5 inches.
🌻 Pattern Instructions: The Center Flower
The motif begins with a solid, compact floral center.
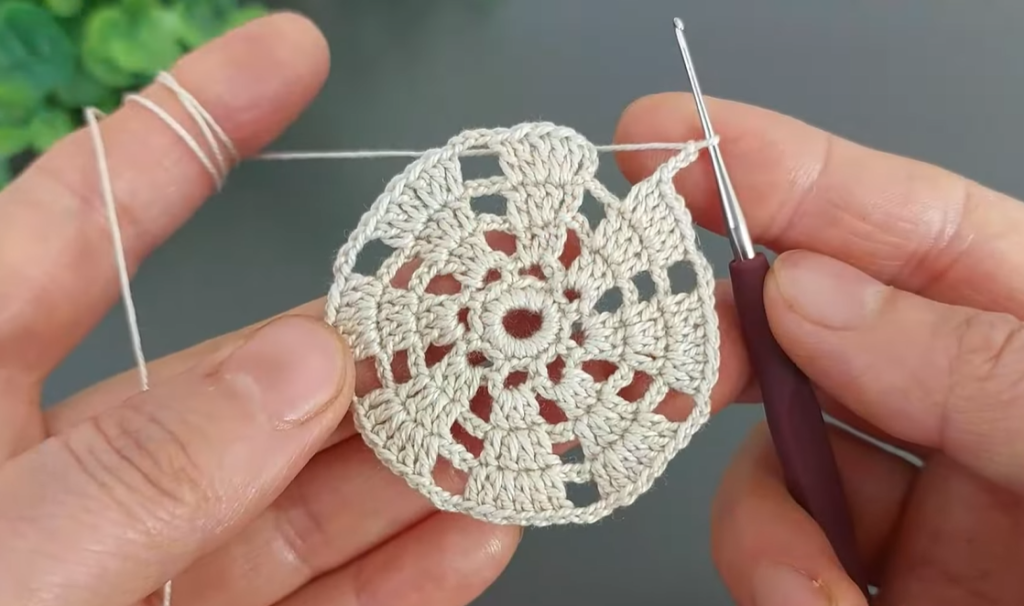

Round 1 (Center Ring): ch 5, sl st to the first ch to form a ring. ch 3 (counts as dc), 15 dc into the ring. sl st to the top of the starting ch 3 to join. (16 dc)
Round 2 (Petal Spacing): ch 1 (sc in first dc). ch 3, sk 1 dc, sc in next dc. Repeat the sequence ch 3,sk 1 dc,sc in next dc 6 times more. ch 3, sl st to the starting sc to join. (8 ch 3 loops)
Round 3 (Creating Petals): sl st into the first ch 3 loop. ch 3 (counts as dc). Work 3 dc,ch 1,4 dc in the same loop.
- sc in the sc between loops.
- Work 4 dc,ch 1,4 dc in the next ch 3 loop. sc in the sc between loops. Repeat the sequence 4 dc,ch 1,4 dc in loop, sc in sc 6 times more. sl st to the top of the starting ch 3 to join. (8 petals)
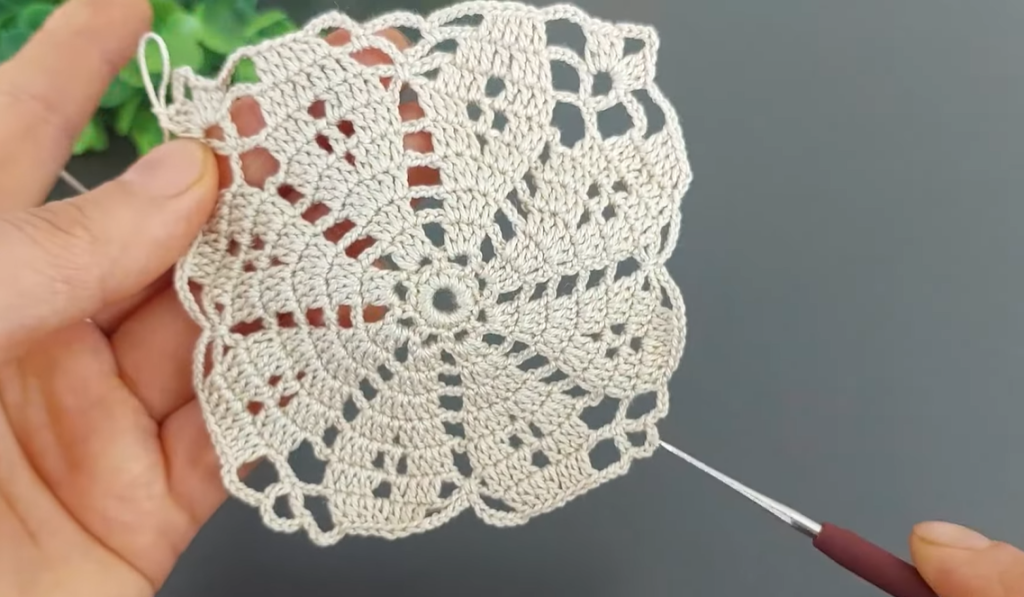
💠 Pattern Instructions: Shaping the Square
This section introduces taller stitches to transition the circle into a distinct square shape.
Round 4 (Corner Anchor Row): ch 1 (sc in sl st join). ch 5, sc into the ch 1 space at the tip of the next petal. Repeat ch 5,sc into petal tip 7 times more. ch 5, sl st to the starting sc to join. (8 ch 5 loops)
Round 5 (Defining Corners): sl st into the first 2 ch. ch 3 (counts as dc). 3 dc in the same loop.
- Side: 4 dc in the next ch 5 loop.
- Corner 1: In the next ch 5 loop, work 3 tr,ch 3,3 tr.
- Side: 4 dc in the next ch 5 loop.
- Side: 4 dc in the next ch 5 loop.
- Corner 2: In the next ch 5 loop, work 3 tr,ch 3,3 tr. Repeat the sequence (2 dc sides followed by1 corner) 2 times more.
- Join with a sl st to the top of the starting ch 3. (4 corners and8 dc side groups)
🕸 Pattern Instructions: The Lace Border
This section builds the final open-work frame around the dense center.
Round 6 (Lattice Netting): ch 1 (sc in sl st join). ch 3, sk 1 dc, sc in next dc. Repeat 3 times more across the first side 4 dc group.
- Corner Net: ch 5, sc into the ch 3 corner space. ch 5.
- sc in the 1st tr of the next 3 tr group. ch 3, sc in 2nd dc of next 4 dc group. Repeat across the side. Repeat the entire side/corner sequence 3 times more. sl st to the starting sc to join.

Round 7 (Solid Corner Fan): sl st into the first ch 3 loop. ch 3 (dc). 2 dc in the same loop. sc in the next ch 3 loop.
- 3 dc in the next ch 3 loop. sc in the next ch 3 loop.
- Corner Fan: In the corner ch 5 loop, work 4 dc,ch 3,4 dc.
- Side: sc in the ch 5 loop. 3 dc in the next ch 3 loop. sc in the next ch 3 loop. Repeat the entire side/corner sequence 3 times more. sl st to the starting ch 3 to join.
Round 8 (Final Scalloped Edge): ch 1 (sc in sl st join). ch 3. sc into the sc below. ch 3.
- sc in the center dc of the next 3 dc group. ch 3. sc in the sc below. ch 3.
- Corner Scallop: In the corner ch 3 space, work 4 dc,Picot,4 dc. Repeat the side/corner sequence 3 times more. sl st to the starting sc to join.
Fasten off and weave in the end.
Video Tutorial:
🔨 Final Shaping and Heirloom Blocking
Blocking is the singular most important step for this motif. It opens the lace, straightens the sides, and defines the corners.
- Preparation: Weave in all loose ends carefully on the back.
- Soak: Submerge the motif in cool water (consider adding a touch of starch for a crisp finish). Gently squeeze out excess water.
- Tension Pinning: Lay the damp motif on a blocking board. Using T-pins:
- Pin the four corner Picots first, pulling them taut to ensure a perfect 90-degree angle.
- Pin the sc points along the edge and the petal tips to open up the ch loops and define the geometry.
- Dry: Allow the piece to dry completely flat for 12−24 hours.
Your stunning Sunburst Jewel Square is ready! Will you use the Join-As-You-Go method to connect these into a larger project?


