
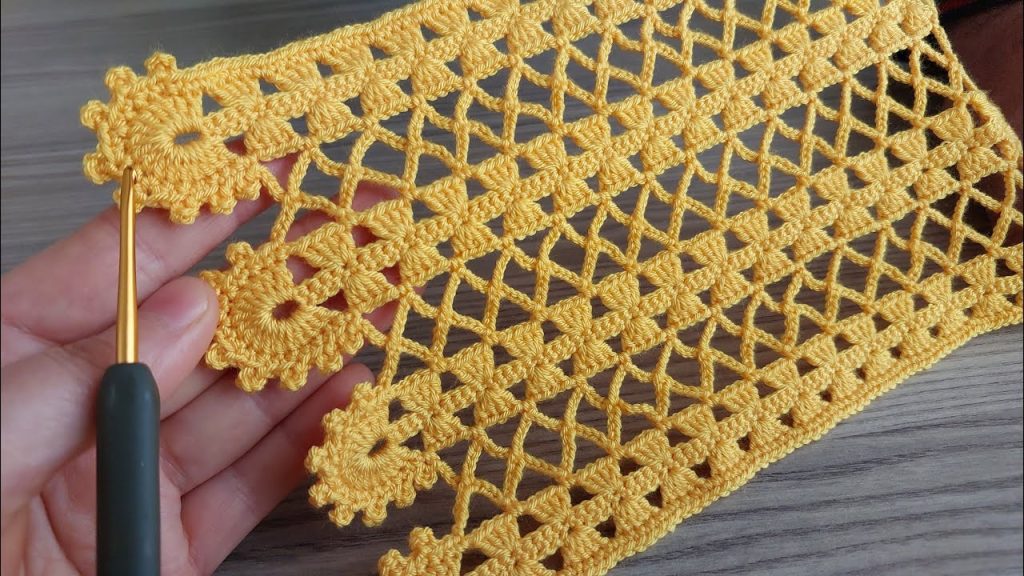
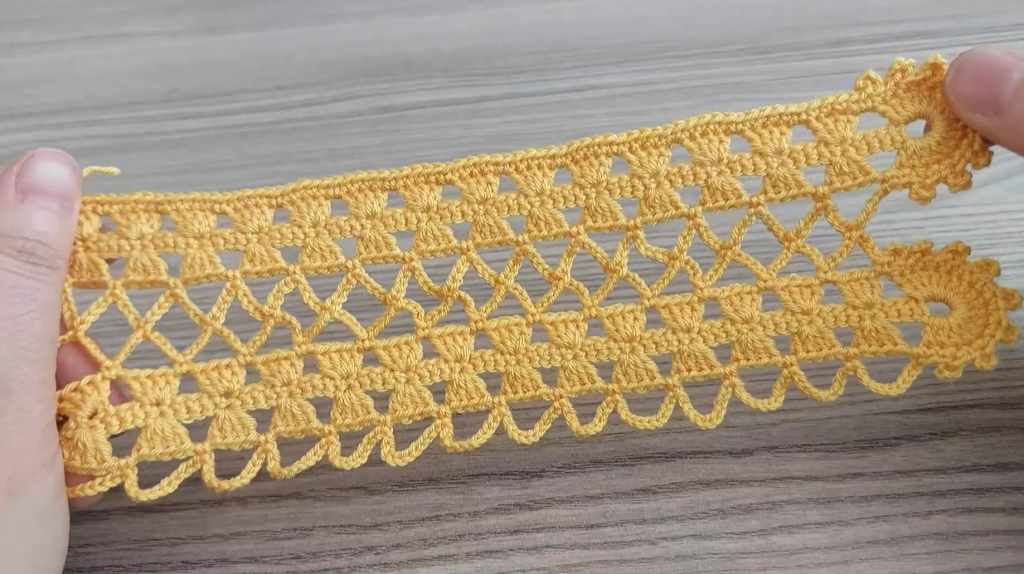
Welcome, fellow yarn lovers! Get ready to fall in love with a pattern that perfectly balances open, airy mesh with decorative, solid texture. The beautiful fabric you see above—a striking combination of geometric openwork and fan motifs, framed by a charming scalloped border—is what I call the “Golden Sunflower Lace.”
This stitch pattern, worked in that gorgeous yellow, is ideal for projects where drape and elegance are key, such as summer shawls, table runners, decorative curtains, or lightweight garments. You asked for long and detailed, so let’s dive into every stitch and technique needed to bring this sunny pattern to life!
🛍️ Materials & Tools: Your Project Checklist 🛍️
The light and crisp look of this lace is best achieved with a yarn that allows for great stitch definition.
- Yarn: I highly recommend a Sport Weight (Weight 2) or DK (Double Knitting/Weight 3) yarn in cotton or a cotton blend. Cotton will ensure the lace opens up beautifully when blocked.
- Crochet Hook: A hook size appropriate for your chosen yarn, usually one size larger than the yarn label suggests to enhance the airy look. For Sport weight, a 3.0 mm (C/2) or 3.5 mm (E/4) hook is a good start. For DK, try a 4.0 mm (G/6) hook.
- Scissors: To finish off your ends.
- Tapestry Needle: For weaving in ends neatly.
- Stitch Markers (Optional): Handy for marking the first and last stitch of the border rows.
📚 Stitch Glossary: Essential Abbreviations 📚
We will be using standard US crochet terminology. This pattern relies heavily on a specialized Picot Shell stitch to create the beautiful border.
| Abbreviation | Stitch Name | Description |
| ch | Chain | Yarn over, pull through loop on hook. |
| st(s) | Stitch(es) | |
| sk | Skip | |
| sl st | Slip Stitch | Insert hook, yarn over, pull through stitch and loop on hook. |
| sc | Single Crochet | Insert hook, yarn over, pull up a loop, yarn over, pull through both loops. |
| dc | Double Crochet | Yarn over, insert hook, pull up loop, [yarn over, pull through 2 loops] twice. |
| Picot | Picot Stitch | Ch 3, sl st into the first ch. |
| Picot Shell | Picot Shell | (2 dc, Picot, 2 dc) all worked into the same stitch or space. |
Export to Sheets
📐 Gauge and Pattern Repeat 📐
A swatch is especially important with lace patterns to ensure your open mesh doesn’t pull too tightly.
Pattern Repeat:
The body of this pattern is worked over a multiple of 4+4 chains for the starting foundation.
- For our detailed swatch, we will start with Ch 32 (4×7=28+4=32).
- Row 1 sets the foundation, and the pattern repeats across Rows 2 and 3 for the main body of the fabric.
- The ch 3 at the beginning of a row counts as 1 dc.
☀️ The “Golden Sunflower Lace” Pattern: Row by Row ☀️
This pattern is a repeating cycle of two rows: a Mesh Row and a Fan Row. The border is established on the first row and repeated with each Fan Row.
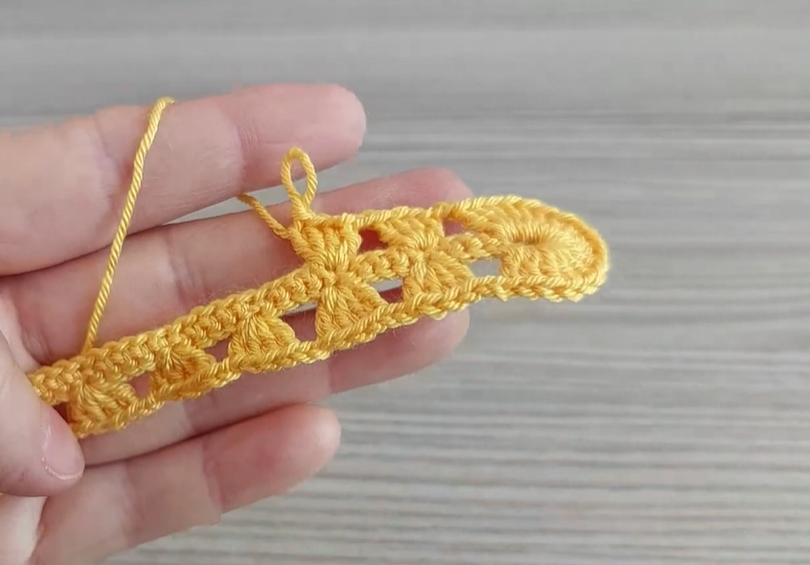
▶️ Foundation & Edging Setup:
- Ch a multiple of 4+4. (For swatch, Ch 32).
Row 1 (RS – Establishing the Edging):
- Dc in the 4th ch from the hook (counts as 2 dc).
- Dc in the next ch.
- Sk 1 ch, sc in the next ch.
- *Ch 3, sk 3 ch, sc in the next ch.*
- Rep from * to * across the row until 4 chs remain.
- Ch 3, sk 3 ch, dc in the last ch.
- Turn.
This row creates the base chain-3 arches that form the lace mesh.
Row 2 (WS – Mesh Row):
- Ch 3 (counts as 1 dc).
- Dc in the next dc.
- Sk 1 st (the sc), ch 3, sc in the next ch-3 sp.
- *Ch 3, sc in the next ch-3 sp.*
- Rep from * to * across the row until the final 3 sts remain.
- Ch 3, sk 1 st (the sc), dc in the next dc, dc in the top of the turning ch-3.
- Turn.
The mesh should now consist of a repeated grid of ch-3 arches.
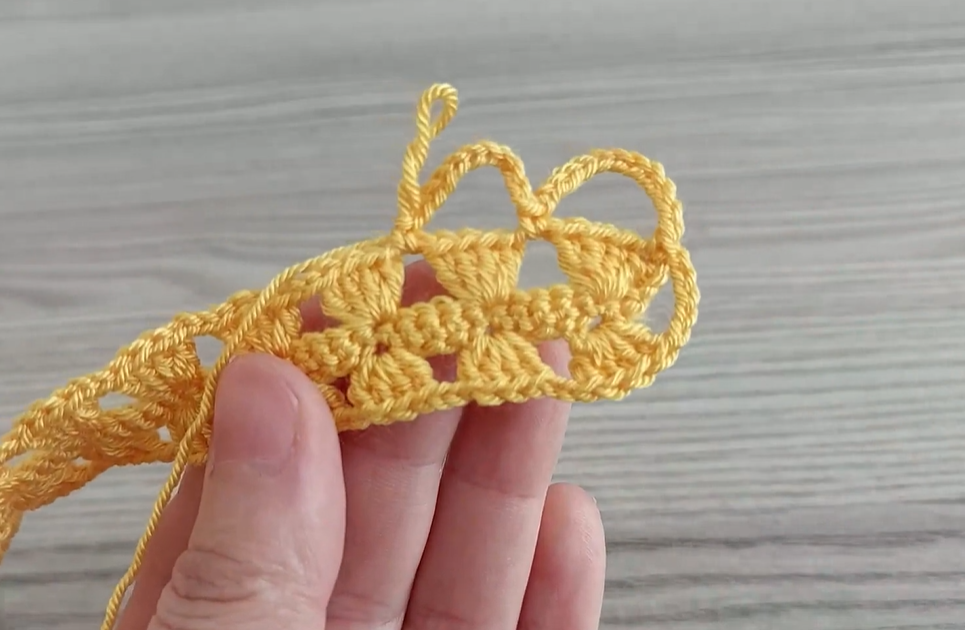
Row 3 (RS – Fan Row with Scalloped Edging):
- Ch 1 (does not count as a st). Sl st in the first dc.
- Picot Shell (2 dc, Picot, 2 dc) in the next dc. (This forms your first scalloped border motif).
- Sk 1 st (the sc), sc in the next ch-3 sp.
- *Ch 3, sc in the next ch-3 sp.*
- Rep from * to * across the row until the final 3 sts remain.
- Ch 3, sk 1 st (the sc), dc in the next dc, dc in the top of the turning ch-3.
- Turn.
This row introduces the decorative edge fan/shell and keeps the main mesh pattern going.
Row 4 (WS – Mesh Row – Aligned for Next Repeat):
- Ch 3 (counts as 1 dc). Dc in the next dc.
- Sk 1 st (the sc), ch 3, sc in the next ch-3 sp.
- *Ch 3, sc in the next ch-3 sp.*
- Rep from * to * across the row until you reach the final sc (just before the border shell).
- Ch 3, sk 1 st (the sc), sl st into the center Picot of the border shell.
- Ch 3, sl st into the 2nd dc after the Picot.
- Turn.
This row ensures the mesh transitions smoothly into the next decorative border row.
Row 5 (RS – Next Scalloped Edging):
- Sl st into the next 2 dc (to center your hook over the previous Picot Shell).
- Picot Shell (2 dc, Picot, 2 dc) in the ch-3 sp you just created in the previous row (or into the center of the previous shell, depending on your preferred look). For simplicity in this repeat, we will work into the ch-3 sp.
- Sk 1 st (the sc), sc in the next ch-3 sp.
- *Ch 3, sc in the next ch-3 sp.*
- Rep from * to * across the row until the final 3 sts remain.
- Ch 3, sk 1 st (the sc), Picot Shell (2 dc, Picot, 2 dc) into the top of the turning ch-3.
- Turn.
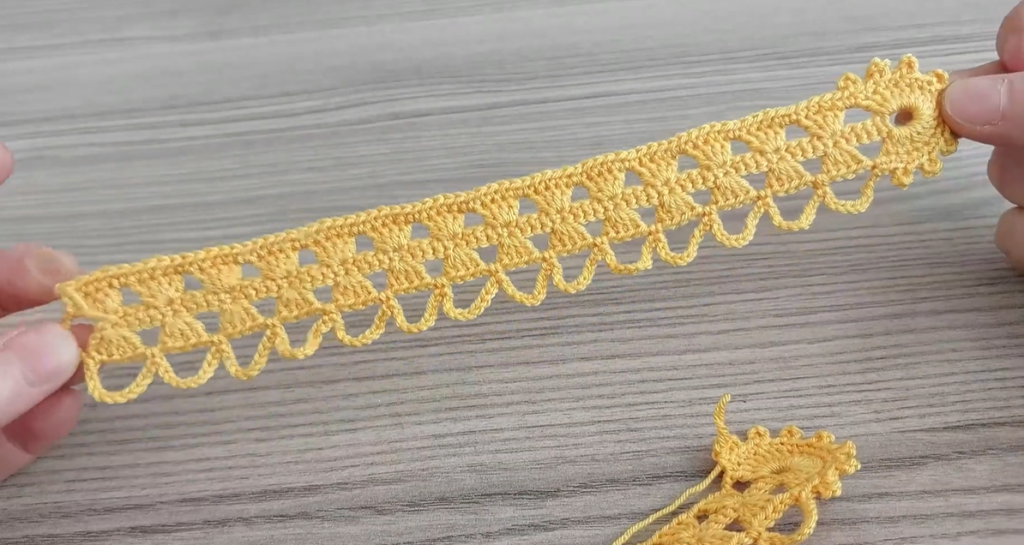
This row introduces the second scalloped edge motif on the opposite side, making the edging continuous on both sides.
Video Tutorial:
🔁 The Repeat Sequence: Building the Fabric 🔁
To continue the Golden Sunflower Lace pattern, you will now repeat Rows 2-5 until your project reaches your desired size, then finish with a final edging row.
- Pattern Cycle:
- Mesh Row: Row 2
- Fan/Edging Row (Side 1): Row 3
- Mesh Row: Row 4
- Fan/Edging Row (Side 2): Row 5
- This 4-row repeat creates the staggered, continuous scalloped border on both sides of your work.
🧼 Finishing Touches: Blocking for Beauty 🧼
With any intricate lace, blocking is not optional—it’s essential! Blocking transforms the fabric, opening up the mesh squares and making the shell/fan motifs crisp and defined.
- Wet Blocking: Gently soak your finished piece in lukewarm water.
- Remove Water: Squeeze out excess water (do not twist or wring). Lay the piece on a towel, roll it up, and step on it gently to absorb more moisture.
- Pin and Shape: Pin the lace to a blocking mat or towel, carefully stretching it to open up the ch-3 mesh spaces and shaping the Picot Shells.
- Dry: Allow the item to dry completely before unpinning.
💡 Project Inspiration: Ideas for Your Lace 💡
This pattern’s gorgeous texture and scalloped edges are perfect for elegant items:
- Elegant Shawl or Wrap: The perfect accessory for a wedding or evening wear.
- Table Linen: Use it for a delicate table runner or placemats.
- Curtain Valances: The open mesh allows light through while providing a decorative touch.
- Scarf or Headband: A lightweight accessory for warmer weather.
Happy crocheting! I’d love to hear what beautiful creations you make with the Golden Sunflower Lace pattern!


