
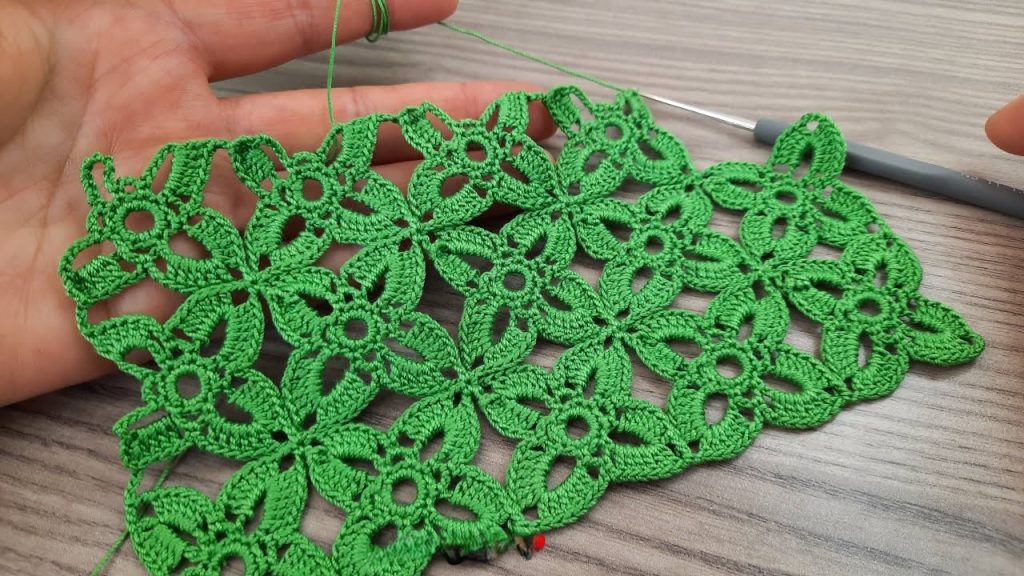
Welcome to the most rewarding lace challenge yet! The striking green fabric you see above is a masterpiece of interlocking florals. Unlike traditional lace that builds rows with simple arches, this pattern creates a stunning, reversible fabric by generating four-petal clover motifs and joining them on the fly. This stitch is perfect for everything from airy scarves and shawls to delicate curtains and table runners.
You asked for detailed and long, so let’s explore every nuance of this beautiful, continuous pattern!
🛍️ Materials & Tools: Your Essential Supplies 🛍️
For such intricate lacework, the yarn and hook choice are crucial for defining those delicate petals and the open mesh.
- Yarn: I highly recommend a fine yarn, such as Fingering Weight (Weight 1) or Sport Weight (Weight 2), in mercerized cotton or a smooth bamboo blend. These fibers provide excellent stitch definition and drape beautifully when blocked.
- Crochet Hook: A small steel or aluminum hook, generally a 1.75 mm or 2.0 mm (for very fine thread) up to a 3.0 mm (C/2) for Sport Weight. Use a hook that gives your fabric a lot of movement and airiness.
- Scissors: For clean cuts.
- Tapestry Needle: For weaving in those inevitable ends.
- Stitch Markers (Optional): Can be useful for marking the central joining point of the motifs.
📚 Stitch Glossary: The Language of Lace 📚
We will be using standard US crochet terminology. Note the specific combination used to create the delicate petals.
| Abbreviation | Stitch Name | Description |
| ch | Chain | Yarn over, pull through loop on hook. |
| st(s) | Stitch(es) | |
| sk | Skip | |
| sl st | Slip Stitch | Insert hook, yarn over, pull through st and loop on hook. |
| sc | Single Crochet | Standard sc. |
| dc | Double Crochet | Standard dc. |
| Picot | Picot Stitch | Ch 3, sl st into the first ch. |
| Petal | Petal Motif | (3 dc, Picot, 3 dc) all worked into the same ch-sp or ring. |
Export to Sheets
📐 Gauge and Pattern Repeat 📐
This pattern is measured by the size of the completed motif.
Pattern Repeat:
The pattern is worked in a continuous process across and back. The foundation chain must accommodate the chain loops required to anchor the first row of motifs.
- Each full clover motif measures approximately 1.5 to 2 inches (3.8 cm to 5 cm) depending on your yarn.
- Foundation Chain (Approximate for 4 Motifs): For 4 motifs across, you will need approximately Ch 56.
🍀 The “Emerald Clover Mesh” Pattern: Row by Row 🍀
This pattern is built on a 2-row repeat that creates a flower on one row and joins the next row of flowers into the previous row’s mesh.
▶️ Foundation Row (Creating the Base Loops):
- Ch a multiple of 12+8. (For swatch, Ch 56).
- Dc in the 4th ch from the hook, ch 1, dc in the same st. (V-st created).
- *Ch 3, sk 5 ch, sc in the next ch.
- Ch 5, sk 5 ch, sc in the next ch.*
- Rep from * to * across the row until 6 chs remain.
- Ch 3, sk 5 ch, V-st (dc, ch 1, dc) in the last ch.
- Turn.
This row sets up the small and large arches that will form the flower centers and connecting mesh.
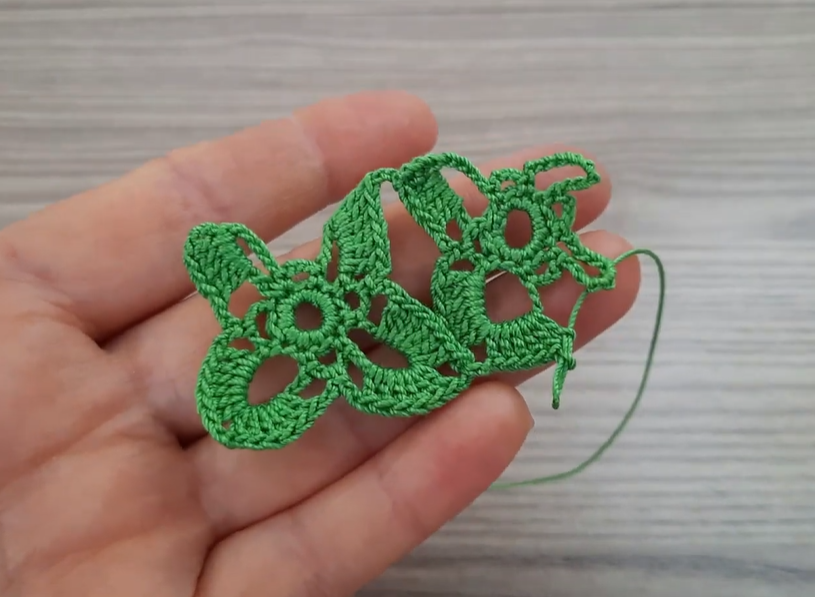
Row 1 (RS – First Flower Motifs):

- Ch 3 (counts as 1 dc). Dc in the ch-1 sp of the V-st.
- Petal (3 dc, Picot, 3 dc) into the ch-3 sp.
- Sc into the next ch-5 sp (the large loop).
- Ch 5, sc in the same ch-5 sp (this creates the center ring for the next flower).
- Petal into the ch-3 sp you just created (the first petal of the new flower).
- Ch 3, sl st into the Picot of the previous Petal (joining the two petals).
- Ch 3, sl st into the same center ring. (Second petal complete).
- Petal into the center ring.
- Ch 3, sl st into the Picot of the previous Petal (joining the petals).
- Ch 3, sl st into the same center ring. (Third petal complete).
- Petal into the center ring.
- Sl st into the center ring. (Fourth petal complete. One full flower is done!).
- *Ch 3, sl st into the Picot of the Petal just made (forming the next joining point).
- Ch 3, sc in the next ch-3 sp.
- Sc in the next ch-5 sp.
- Ch 5, sc in the same ch-5 sp (center ring for next flower).*
- Rep from * to * across the row, ending with dc in the final V-st.
- Turn.
This complex row creates the first full row of flowers, using the ch-5 loops as the center rings.
Row 2 (WS – Joining Row and New Flower Center Setup):
- Ch 3 (counts as 1 dc). Dc in the first dc.
- Ch 3, sl st into the center Picot of the first full flower motif.
- Ch 3, sc in the ch-3 sp before the next full flower.
- Ch 5, sc in the ch-3 sp after the full flower (creating a large mesh loop).
- Ch 5, sc in the next sc (creating the center ring for the next row of flowers).
- *Ch 5, sc in the ch-3 sp before the next full flower.
- Ch 5, sc in the ch-3 sp after the next full flower.
- Ch 5, sc in the next sc (new center ring).*
- Rep from * to * across the row, ending with dc in the final dc.
- Turn.
This row creates the large ch-5 mesh squares and the ch-5 center rings that the next row of flowers will be built upon.
Row 3 (RS – Next Flower Motifs, Joined):
- Ch 3 (counts as 1 dc). Dc in the next dc.
- Petal (3 dc, Picot, 3 dc) into the ch-3 sp before the first ch-5 loop.
- Sc in the next ch-5 loop (the large mesh).
- Sl st into the center ch of the ch-5 loop from Row 2 (the center ring).
- Petal (3 dc, Picot, 3 dc) into the center ring.
- Ch 3, sl st into the Picot of the Petal just made.
- Ch 3, sl st into the next ch-5 loop (the large mesh).
- Petal into the center ring.
- Ch 3, sl st into the Picot of the 3rd Petal of the previous row’s flower (joining the new flower to the old one).
- Ch 3, sl st into the center ring.
- Petal into the center ring. Sl st into the center ring. (Flower complete).
- *Ch 3, sl st into the Picot of the petal just made.
- Ch 3, sc in the next ch-5 sp.
- Sc in the next ch-5 loop (the center ring).
- Petal into the center ring.*
- Rep from * to * across the row, ending with dc in the final dc.
- Turn.
This row creates the second row of flowers, joining them to the mesh created in Row 2 and directly to the previous flower row.
Video Tutorial:
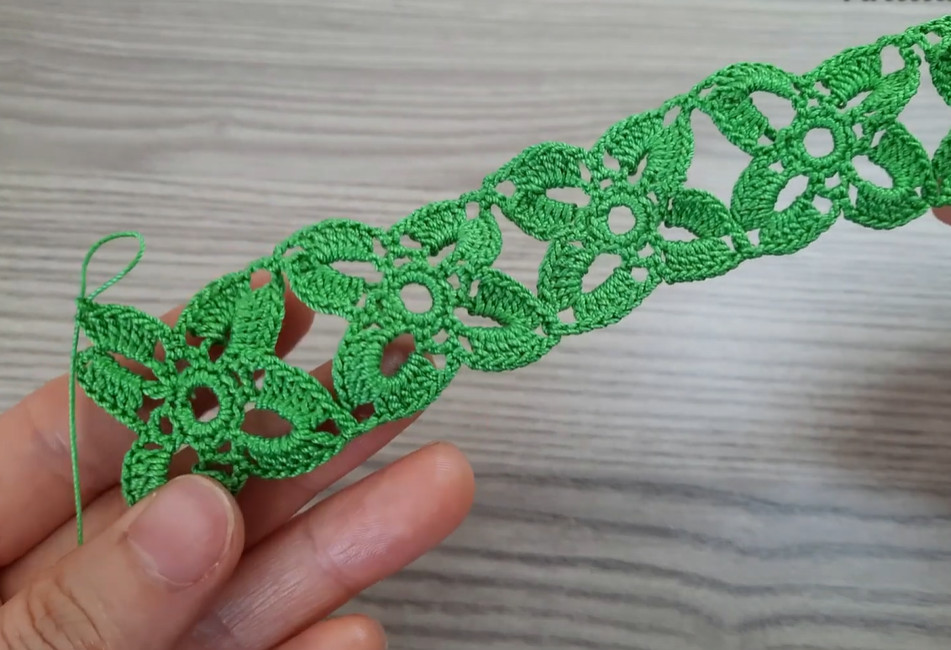
🔄 The Repeat Sequence: Building the Fabric 🔄
The pattern is now fully established! To continue the Emerald Clover Mesh, you will alternate between the Joining Row and the Flower Motif Row.
- The full repeat cycle for the pattern body is Rows 2 and 3.
- Key Point: Always ensure your Picot joins are accurately placed, as they define the structure of the entire mesh. The center of each new flower must align with the open mesh space created by the previous row’s joins.
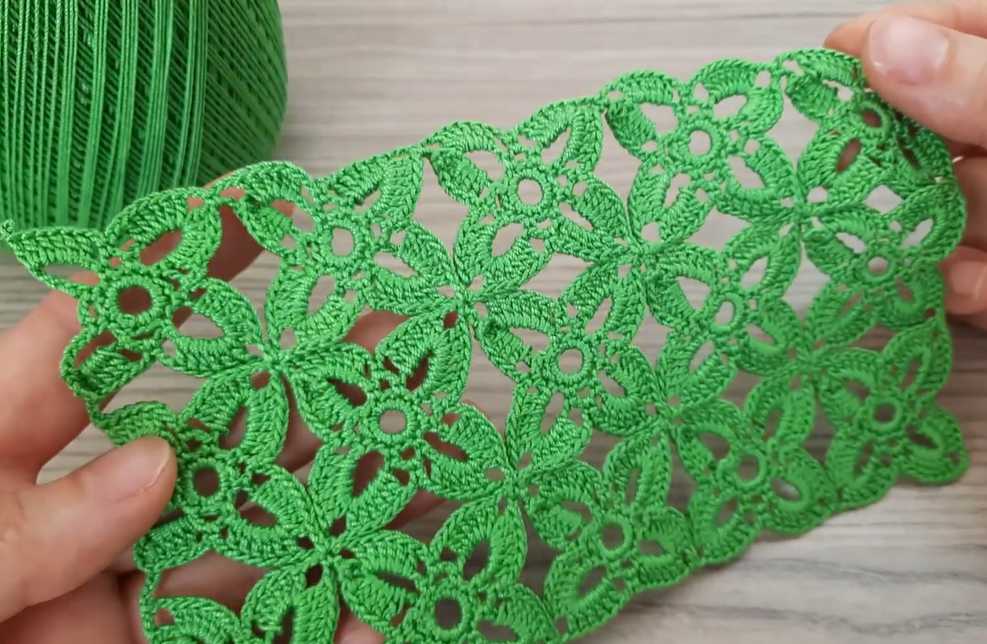
🚿 Finishing and Blocking: Perfecting the Lace 🚿
For this delicate, structural lace, blocking is absolutely vital to open up the design and define the four-petal motifs.
- Finishing: Fasten off your yarn. You can add a single row of sc around the entire perimeter of your finished piece to create a neat, sturdy edge if desired.
- Wet Blocking: Submerge your item in lukewarm water.
- Pin Aggressively: Pin the lace out onto a blocking mat, stretching it firmly both vertically and horizontally. Pay special attention to pinning out the points of each Picot and ensuring the center of each flower is open.
- Dry: Allow the piece to dry completely before unpinning.
🌟 Project Inspiration 🌟
- Summer Shawl or Stole: The open texture provides fantastic drape and airflow.
- Window Dressing: Ideal for a light, semi-sheer curtain or valance.
- Table Decor: A stunning, elegant table runner or doily.
- Garment Yoke: Use the pattern to create a lacy yoke for a simple summer top.
Happy crocheting! May your “Emerald Clover Mesh” bring you much joy!


