
✨ Introduction: The Allure of the Two-Row Repeat
Welcome, crochet enthusiasts, to a stitch that truly belongs in your permanent library: the Reversible Offset Chevron and Shell Stitch. This pattern, featured in the captivating video tutorial, is celebrated for its stunning texture, perfect drape, and exceptional simplicity—it utilizes just a two-row vertical repeat!
Unlike many textured stitches, this motif is completely reversible, making it an ideal choice for scarves, wraps, and blankets where both sides of the fabric are visible. It creates a subtle, undulating chevron effect combined with the elegance of offset shells.
Why Choose This Stitch?
- 100% Reversible: Perfect for outerwear and accessories.
- Excellent Drape: Works beautifully with lighter yarns for airy summer projects.
- Beginner-Friendly: Uses only the most basic stitches (Chains and Double Crochet).
- Fast Workup: The shell and chain spaces allow rows to be completed quickly.
Suggested Projects
| Project Type | Ideal Yarn Weight | Notes |
| Elegant Shawls & Wraps | Fingering (1) or DK (3) | Highlights the drape and delicate lace. |
| Lightweight Scarves/Cowls | Sport (2) or DK (3) | The reversible nature is a huge benefit here. |
| Table Runners & Placemats | Worsted (4) or Cotton | Provides a beautiful, classic texture for home décor. |
| Summer Cardigan/Vest | Cotton/Linen Blend | Airy structure makes it great for warmer weather garments. |
Export to Sheets
📌 Pattern Notes & Gauge
Achieving the correct drape is crucial for this pattern. The final fabric should feel light and supple, not stiff.
Stitch Multiple
The motif repeat requires a sequence of 7 stitches, plus additional stitches for the stable Double Crochet borders and starting chain.
Chain a multiple of 7+4 for the initial foundation row. (For example, to achieve a width of 3 motif repeats, you would chain: 7×3=21, plus 4=25 starting chains.)
Gauge (Approximate)
Using a DK weight yarn and a 3.5 mm hook: Approximately 2 pattern repeats (two 7-stitch sections) should measure 3 inches, and 6 rows should measure 2.5 inches. Always check your gauge to ensure desired fabric outcome.
Abbreviations (US Terms)
| Abbreviation | Meaning |
| ch | Chain |
| st(s) | Stitch(es) |
| sl st | Slip Stitch |
| dc | Double Crochet |
| sk | Skip |
| ch-sp | Chain Space |
| Rep | Repeat |
Export to Sheets
Materials
- Yarn: Light to Medium weight yarn (DK or Worsted Weight is ideal). A smooth, non-fuzzy fiber is best for highlighting the stitch definition.
- Hook: A hook size slightly larger than your yarn usually calls for is recommended to enhance the open, airy quality of the lace. A D/3 (3.25 mm) or E/4 (3.5 mm) hook is a great starting point for DK yarn.
- Tools: Scissors, tapestry needle, and a few stitch markers (helpful for marking the starting/ending edges).
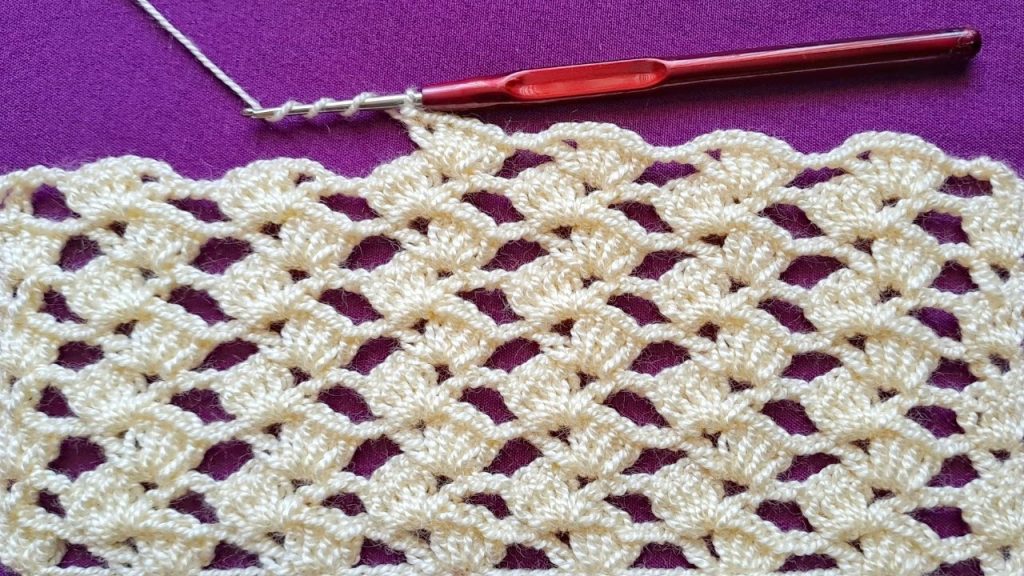
⛓️ Foundation Row: Setting the Stage (Row 1)
This row establishes the pattern sequence across the starting chain, which determines the alignment of the motifs for the rest of the fabric.

- Chain: Ch a multiple of 7+4. (E.g., Ch 25).
- Motif Setup:
- Initial V-Stitch: Sk 4 ch from the hook (this counts as the first DC and Ch 1). Work 1 DC in the 5th ch from the hook. (This forms a DC, Ch 1, DC V-stitch).
- Chain Space: Ch 2.
- 4-DC Shell: Sk 5 ch. Work 4 DC in the 6th ch.
- V-Stitch: Ch 2. Sk 1 ch. Work 1 DC in the next ch.
- Repeat Sequence: [*Ch 2. Sk 5 ch. Work 4 DC in the 6th ch. Ch 2. Sk 1 ch. Work 1 DC in the next ch.*] Rep from * across the row until you reach the last 6 chains.
- End: Ch 2. Sk 5 ch. Work 4 DC in the last ch. (Your last element will always be the 4-DC Shell).
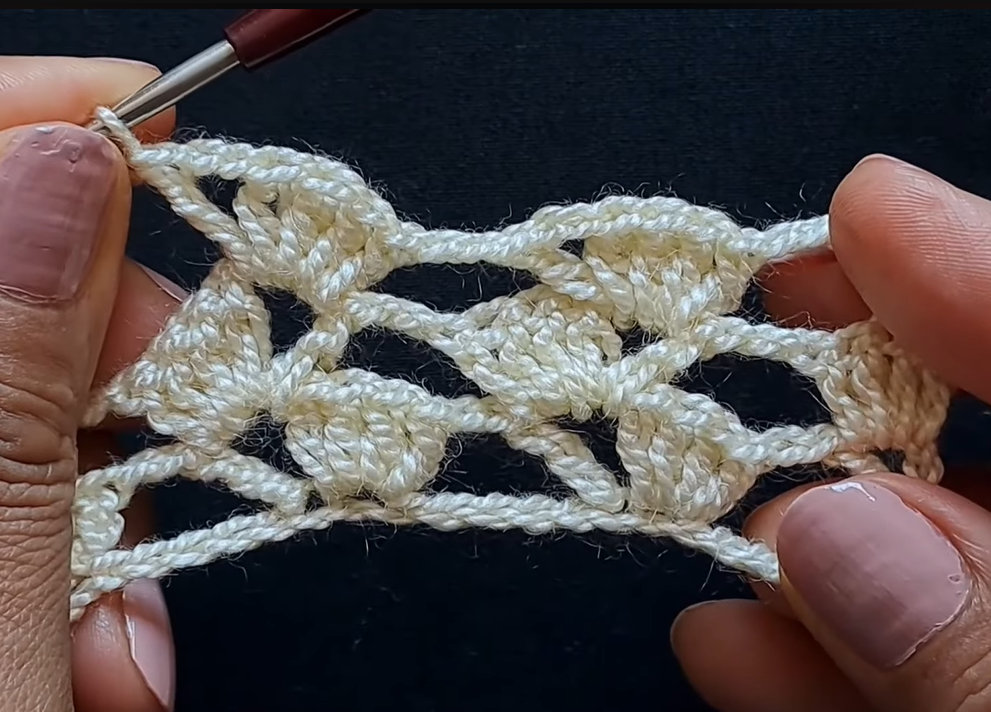
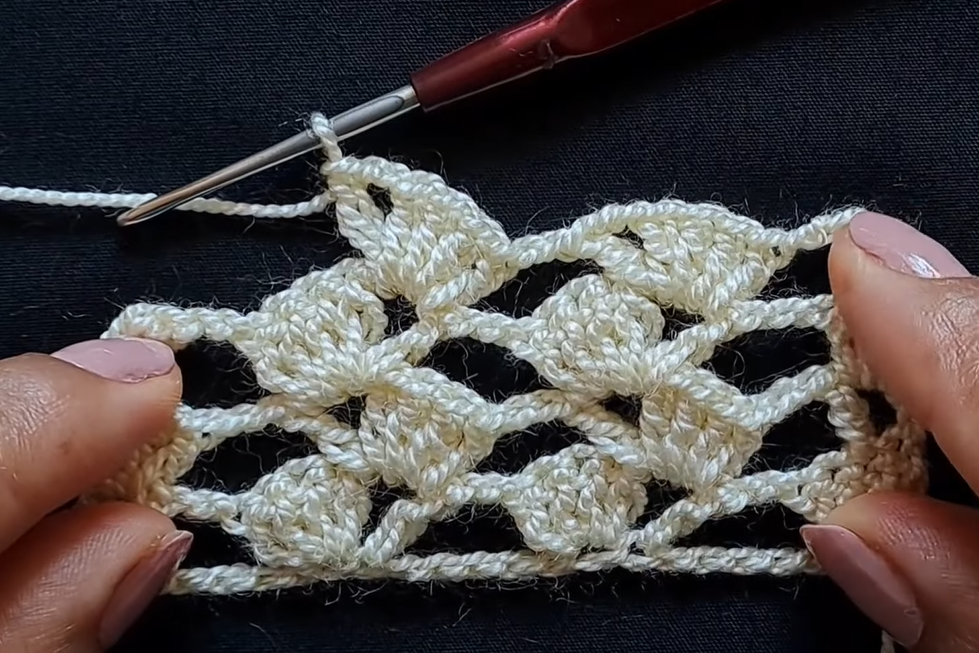
🔀 The Repeat: Rows 2 & 3
The pattern is created by repeating these two rows, which shift the placement of the shells in each new row.
Row 2: The Shell & V-Stitch Row (3-Ch Start)
This row is designed to end with a dense 4-DC edge, which prepares the fabric for the offset start of Row 3.
- Start: Ch 3 (counts as 1 DC), turn. Dc in the next st (the top of the last DC of the 4-DC shell). (2 DC Edge)
- Motif Pattern:
- Ch 2.
- 4-DC Shell: Work 4 DC in the next V-stitch Ch-2 space.
- Ch 2.
- V-Stitch: Work 1 DC in the Ch-2 space directly adjacent to the next 4-DC shell.
- Repeat Sequence: [*Ch 2. Work 4 DC in the next V-stitch Ch-2 space. Ch 2. Work 1 DC in the Ch-2 space adjacent to the next 4-DC shell.*] Rep from * across the row until you reach the final motif.
- End: You will finish with a V-stitch over the last Ch-2 space. Ch 2. Work 3 DC in the final space (the Ch-4 space from the start of Row 1). Then, work the 4th DC into the 3rd chain of the starting ch-4. (4 DC Edge)
Row 3: The Offset Start Row (2-Ch Start)
This row starts with the 4-DC shell, which is offset from the previous row’s start, creating the chevron effect.
- Start: Ch 3 (counts as 1 DC), turn. Dc in the next st. (2 DC Edge)
- Motif Pattern:
- Ch 2.
- 4-DC Shell: Work 4 DC in the next V-stitch Ch-2 space.
- Ch 2.
- V-Stitch: Work 1 DC in the Ch-2 space directly adjacent to the next 4-DC shell.
- Repeat Sequence: [*Ch 2. Work 4 DC in the next V-stitch Ch-2 space. Ch 2. Work 1 DC in the Ch-2 space adjacent to the next 4-DC shell.*] Rep from * across the row.
- End: Ch 2. Work 1 DC in the top of the last DC of the previous row (the 2nd DC of the 2 DC Edge). Dc in the top of the turning chain-3. (2 DC Edge)
Video Tutorial:
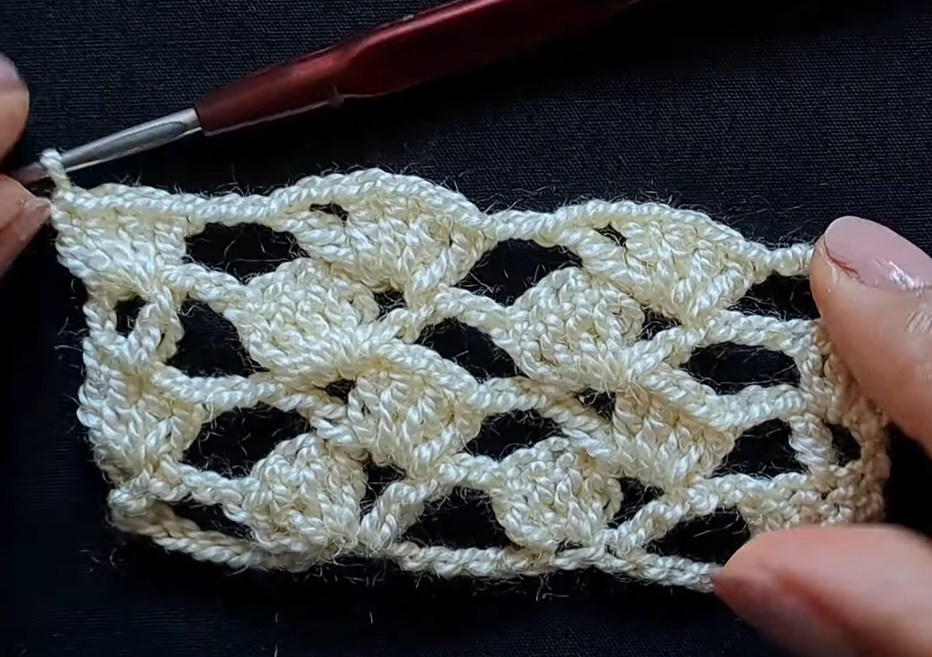
➡️ Continuing the Pattern & Finishing
The Vertical Repeat
To continue this pattern to your desired length, you will simply alternate repeating Row 2 and Row 3.
- Row 4: Repeat Row 2.
- Row 5: Repeat Row 3.
- …and so on.
The main guiding principles:
- 4-DC Shells are always worked into the Ch-2 V-stitch space of the previous row.
- V-stitches (single DC) are always worked into the Ch-2 space next to a 4-DC Shell of the previous row.
Tips for Success
- Count Carefully: Always ensure you have the correct number of chains (Ch 2) between your shells and V-stitches.
- Maintain Tension: Loose tension is key to achieving good drape. If your fabric feels stiff, switch to a larger hook.
- Weaving Ends: Weave in your ends securely after finishing. Due to the open nature of the fabric, you may need to split a few DC stitches with your needle to hide the yarn tails effectively.
Finishing
Once you have reached your desired length, finish the last row (either Row 2 or Row 3). Fasten off, leaving a long tail for weaving. No special border is usually required, as the 4-DC edges provide a neat finish, but a simple row of Single Crochet (SC) along the top and bottom edge can provide extra stability if needed.
Congratulations on mastering this elegant, reversible stitch!


