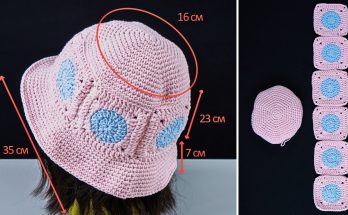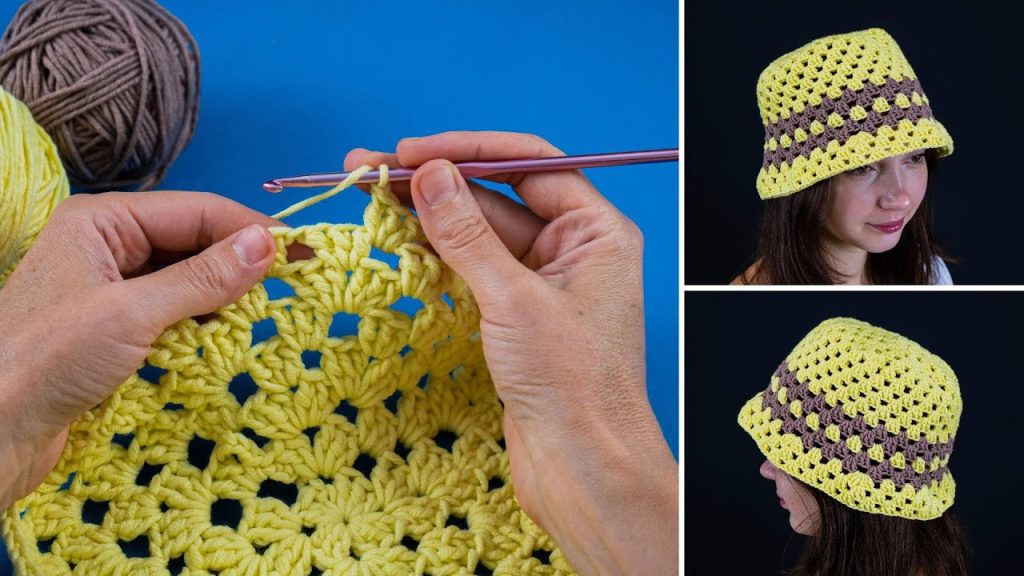
A crochet bucket hat is a fun and practical accessory, and this pattern creates a beautiful, eye-catching version with a decorative shell-stitch body and a striped brim. The shell stitch gives the hat a lovely, airy texture perfect for warm weather, while the solid, striped brim adds structure and style. This pattern is written for an average adult size, with tips on how to adjust for a perfect fit.
Materials
- Worsted-weight yarn (Category 4): Approximately 150-200 yards in total.
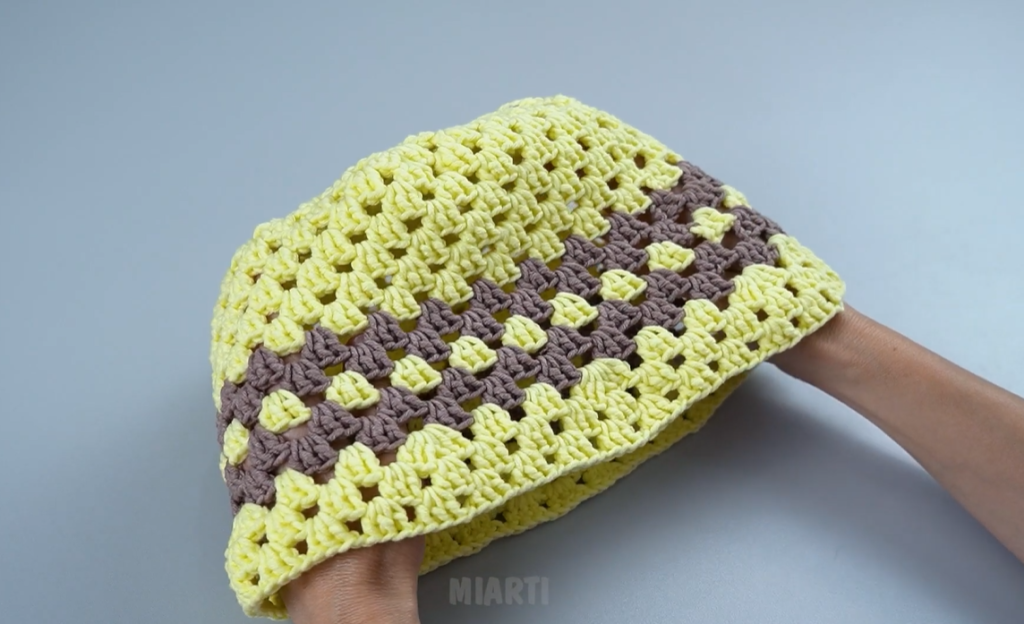
- Color A (main color): About 100-150 yards for the main hat body and brim. The yarn in the image appears to be a bright yellow.
- Color B (contrasting color): About 50-75 yards for the stripes on the brim. The yarn in the image appears to be a dark brown or maroon.
- Crochet hook: US size H/8 (5.0 mm), or the size needed to obtain gauge.
- Tapestry needle: For weaving in ends.
- Stitch marker: Optional but helpful for marking the beginning of the round.
Gauge
Getting the right gauge is important to ensure your hat fits correctly.
- In double crochet (DC): 4 rows of 5 DC should measure 1 inch by 1 inch.
Adjust your hook size if your gauge is off. If your swatch is too small, use a larger hook. If it’s too big, use a smaller hook.
Pattern Notes
- This hat is worked from the top down in continuous rounds. You will not join with a slip stitch at the end of each round unless otherwise stated.
- The beginning chain of each round does not count as a stitch unless specified.
- The openwork section uses the Shell Stitch (SS).
- Shell Stitch (SS): Work 5 double crochet (DC) stitches into the same stitch or space.
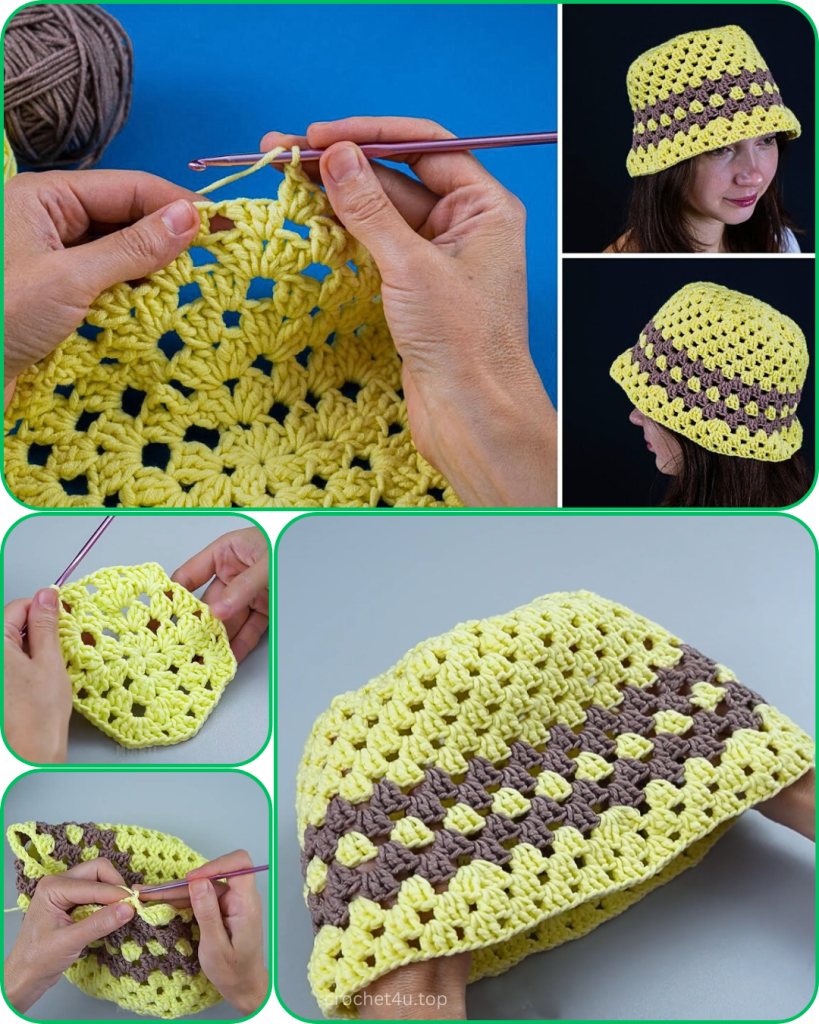
Hat Construction
Part 1: The Crown (Using Color A)

- Round 1: Create a magic ring. Chain 2. Work 10 double crochet (DC) into the magic ring. Pull the ring tight. Do not join. Place a stitch marker in the first stitch. (10 stitches)
- Round 2: 2 DC in each stitch around. (20 stitches)
- Round 3: *1 DC in the next stitch, 2 DC in the next stitch.* Repeat from * to * around. (30 stitches)
- Round 4: *1 DC in the next 2 stitches, 2 DC in the next stitch.* Repeat from * to * around. (40 stitches)
- Round 5: *1 DC in the next 3 stitches, 2 DC in the next stitch.* Repeat from * to * around. (50 stitches)
- Round 6: *1 DC in the next 4 stitches, 2 DC in the next stitch.* Repeat from * to * around. (60 stitches)
Continue increasing in this manner (adding one DC between increases each round) until the diameter of the circle is approximately 6-7 inches. For a custom fit, you can measure the crown of your head and increase until the circle is the same size. For an average adult, this is typically around 60-70 stitches.
Part 2: The Hat Body (Shell Stitch Section)

- Round 7: This is the first shell stitch round. Work a Shell Stitch (SS) into the first stitch. *Skip 4 stitches, work a SS into the next stitch.* Repeat from * to * around. Join with a slip stitch to the top of the first shell.
- Round 8: Chain 2. Work a SS into the center DC of the first shell from the previous round. Continue working a SS into the center DC of each shell around. Join with a slip stitch.
- Rounds 9-15 (or until desired length): Repeat Round 8.
Continue working in this shell stitch pattern until the hat body measures approximately 4-5 inches from the last increase round. Try the hat on to check the fit. It should sit comfortably on your head, reaching just above your ears before the brim begins.
Part 3: The Brim (Striped Section)
- Round 16: This round will flatten the fabric to create a solid brim. Join the yarn at the seam. Work a single crochet (SC) into the top of the first shell. Work 2 SC into the space between the shells. Continue working 1 SC on top of each shell and 2 SC in each space between the shells. Join with a slip stitch to the first SC. (60 stitches)
- Round 17: Change to Color B. Chain 2. DC in each stitch around. Join with a slip stitch.
- Round 18: Change back to Color A. Chain 2. DC in each stitch around. Join with a slip stitch.
- Round 19: Change to Color B. Chain 2. DC in each stitch around. Join with a slip stitch.
- Round 20: Change back to Color A. Chain 2. *1 DC in the next 9 stitches, 2 DC in the next stitch.* Repeat from * to * around. Join with a slip stitch.
- Final Round: Chain 1. Work a single crochet (SC) in each stitch around to create a clean, finished edge. Join with a slip stitch to the first SC.
Video Tutorial:
Finishing
- Cut the yarn, leaving a long tail.
- Weave in all loose ends with your tapestry needle, ensuring they are secure.
- Give your hat a gentle steam or block it to help the stitches settle and the brim to lay flat.
Enjoy your new, handmade, and perfectly breezy bucket hat!