✨ Introduction: The Perfect Everyday Bucket Hat
Welcome to the ultimate pattern guide for crocheting the stylish and sturdy Starlight Bucket Hat! Inspired by the clean, simple design in the video, this hat is constructed using only single crochet stitches, resulting in a dense, beautiful fabric with excellent structure. The simple, repetitive technique makes this a relaxing and highly satisfying project perfect for beginners looking to level up to garment-making, or for experienced crocheters seeking a quick, fashionable make.
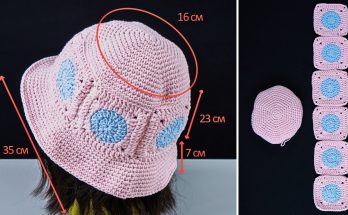
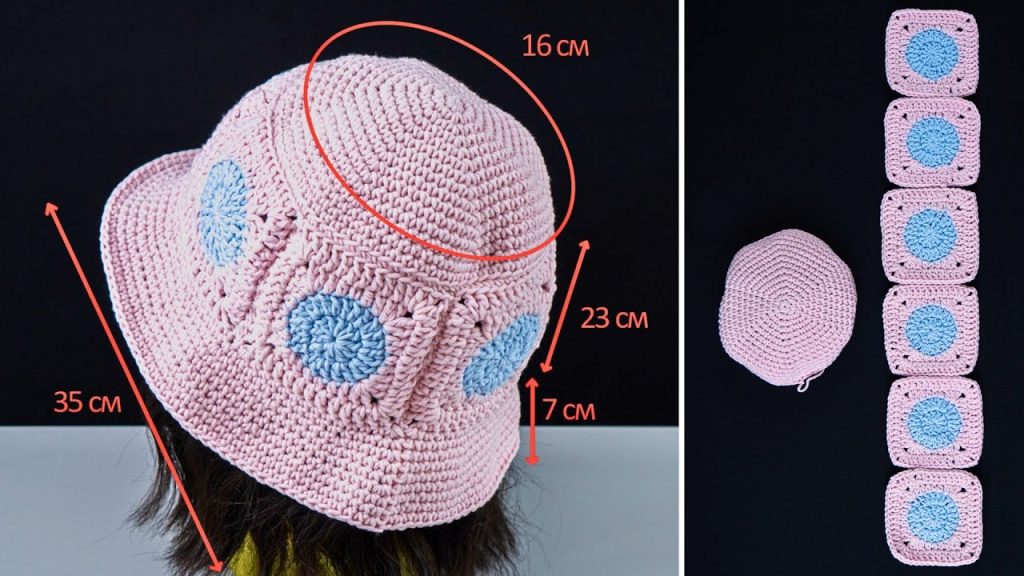
This pattern is divided into three distinct sections: the flat circular Crown, the straight cylindrical Hat Body, and the outward-flaring Brim. By following the calculated increases, you’ll create a perfectly fitted, classic bucket hat shape designed to fit an average adult head circumference of 56 cm (22 inches).
Why You’ll Love This Project
- Structured Fabric: Using a small hook relative to the yarn weight and tight single crochet ensures a hat that holds its shape without requiring any stiffening agents.
- Beginner Friendly: The pattern relies solely on the Single Crochet (SC) stitch and simple, predictable increases.
- Versatile Style: Easily customizable by changing colors between rounds, adding stripes, or using a variegated yarn.
- Perfect Fit: The included measurements and stitch counts are calibrated for a standard adult size (56 cm head circumference).
📚 Materials & Terminology
| Abbreviation | Meaning |
| ch | Chain |
| st(s) | Stitch(es) |
| sl st | Slip Stitch |
| sc | Single Crochet |
| sc inc | Single Crochet Increase (Work 2 SC in the same stitch) |
| MR | Magic Ring |
| ( ) | Repeat instructions inside parentheses |
Materials Needed
- Yarn: Worsted Weight (Category 4) cotton or acrylic yarn. Cotton is highly recommended for structure and breathability.
- Color A: Main Hat Color (approx. 100-120g).
- Color B: Optional contrasting color for stripes or brim.
- Hook: 4.0 mm to 4.5 mm (G/6 to 7) hook. Using a slightly smaller hook than recommended on your yarn label is key for density.
- Tools: Scissors and a tapestry needle for weaving in ends.
📏 Gauge & Sizing
The gauge is determined by the diameter of the crown. Your flat circle crown should measure approximately 6.5 to 7.0 inches (16.5–18 cm) across after all increase rounds are complete.
- Final Head Circumference: ~56 cm (22 inches)
- Final Height (Crown to Brim Base): ~10–11 cm (4–4.3 inches)
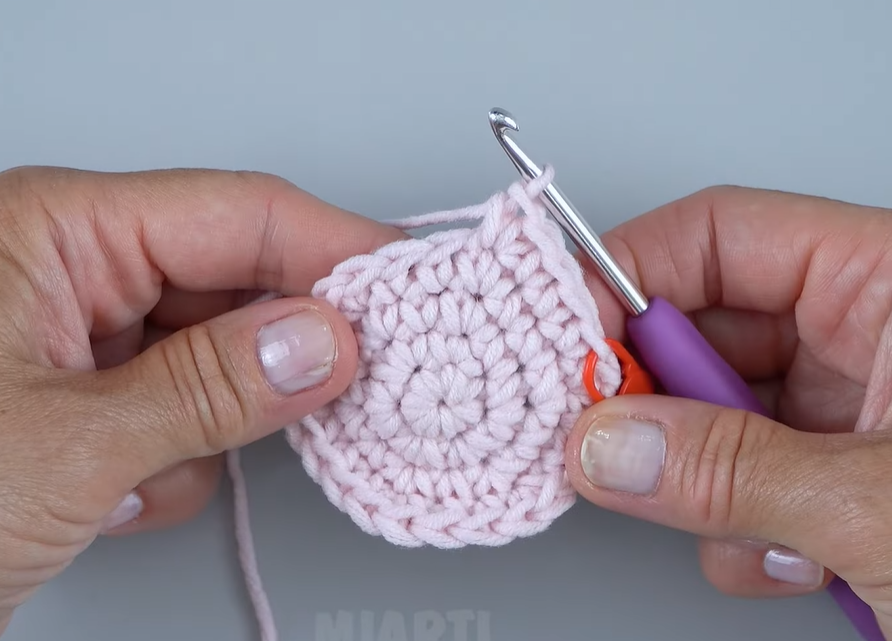
🔝 Part 1: The Crown (SC Increases)
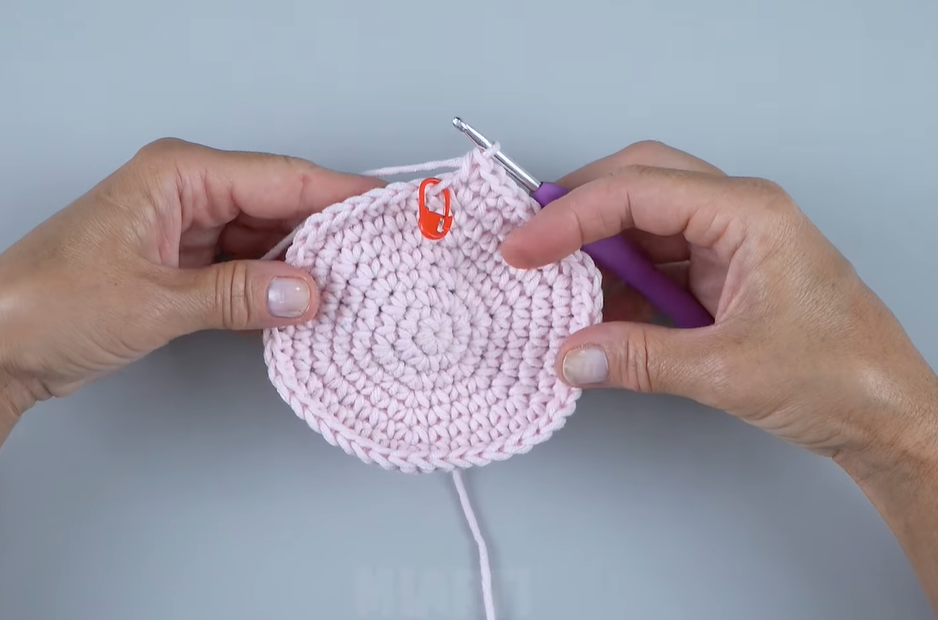
The Crown is worked in continuous rounds of Single Crochet, using the spiral method of increasing to form a flat, even circle. We will use the standard increase every round by 6 stitches method.
Start: Using Color A.
Rounds 1–12: Establishing the Flat Circle
| Round | Instructions | Stitch Count |
| R1 | Work 6 SC into a Magic Ring (MR). Sl st to the first SC to join. (Ch 1, or use a stitch marker for spiral method). | [6 SC] |
| R2 | SC inc in every st around. | [12 SC] |
| R3 | (1 SC, SC inc) rep 6 times. | [18 SC] |
| R4 | (2 SC, SC inc) rep 6 times. | [24 SC] |
| R5 | (3 SC, SC inc) rep 6 times. | [30 SC] |
| R6 | (4 SC, SC inc) rep 6 times. | [36 SC] |
| R7 | (5 SC, SC inc) rep 6 times. | [42 SC] |
| R8 | (6 SC, SC inc) rep 6 times. | [48 SC] |
| R9 | (7 SC, SC inc) rep 6 times. | [54 SC] |
| R10 | (8 SC, SC inc) rep 6 times. | [60 SC] |
| R11 | (9 SC, SC inc) rep 6 times. | [66 SC] |
| R12 | (10 SC, SC inc) rep 6 times. | [72 SC] |
Adjustment to Fit (R13)
The final size of the hat body requires 75 SC for the 56cm circumference.
| Round | Instructions | Stitch Count |
| R13 | SC in the first 3 sts. (24 SC, SC inc) rep 3 times. SC in the last 3 sts. | [75 SC] |
⬇️ Part 2: The Hat Body (Straight Sides)
This section transitions from the flat crown to the vertical sides, giving the hat its depth. There are no increases in these rounds.
Continue: Using Color A.
Rounds 14–16: Working Straight
| Round | Instructions | Stitch Count |
| R14 | SC in each st around. (This is the first straight round which helps the hat start turning down). | [75 SC] |
| R15 | SC in each st around. | [75 SC] |
| R16 | SC in each st around. | [75 SC] |
The number of straight rows can be adjusted here based on your personal preference for the hat’s depth.
☀️ Part 3: The Brim (Flaring Edge)
The brim is worked by incorporating increases again to create an outward flare. The video suggests significant increases to achieve a floppy, wide brim.
Continue: Using Color A or switch to Color B here for a contrasting brim.
Rounds 17–20: Flaring the Brim
| Round | Instructions | Stitch Count |
| R17 | (14 SC, SC inc) rep 5 times. | [80 SC] |
| R18 | (15 SC, SC inc) rep 5 times. | [85 SC] |
| R19 | (16 SC, SC inc) rep 5 times. | [90 SC] |
| R20 | (17 SC, SC inc) rep 5 times. | [95 SC] |
Rounds 21–23: Maintaining the Flare
These rounds maintain the current width, letting the fabric relax and the brim naturally curve.
| Round | Instructions | Stitch Count |
| R21 | SC in each st around. | [95 SC] |
| R22 | SC in each st around. | [95 SC] |
| R23 | SC in each st around. | [95 SC] |
Rounds 24–26: Final Brim Width
A final set of increases for a wider, more pronounced edge.
| Round | Instructions | Stitch Count |
| R24 | (18 SC, SC inc) rep 5 times. | [100 SC] |
| R25 | SC in each st around. | [100 SC] |
| R26 | SC in each st around. | [100 SC] |
🧺 Part 4: Finishing and Styling
Final Edge
- Work one final round of Slip Stitch around the entire brim edge. This creates a neat, firm finish that helps the edge lie flat and look polished.
- Fasten off and weave in the tail securely.
Weaving and Blocking
- Weaving: Use your tapestry needle to carefully weave in all yarn tails on the inside of the hat.
- Blocking: Blocking is highly recommended for cotton hats to set the shape.
- Dampen the hat thoroughly with a spray bottle or a quick soak.
- Place the crown over a ball or form of the correct diameter (or wear it!) to shape the head opening.
- Flatten the brim and smooth it out, setting the amount of curl you prefer.
- Let the hat air dry completely before wearing.
Video Tutorial:
Styling Options
For extra flair, consider adding a decorative band around the base of the hat body (R14-R16):
- Ribbed Band: Crochet a long strip of SC worked in the back loop only, then sew it around the base of the hat body.
- Stripe: Use a contrasting Color B for the straight body rows (R14-R16) before switching back for the brim.
Your custom-made, structured Starlight Bucket Hat is now ready to wear!