
A handmade baby dress is a truly special project, and this pattern creates a beautiful, classic garment with a timeless design. The dress starts with a classic crocheted yoke, worked with simple double crochet stitches and strategic increases to create a perfect fit. The pattern then transitions into a charming, lacy skirt, making it a complete and beautiful piece. This pattern is written for a newborn size but includes comprehensive notes on how to adjust for a larger size.
Materials
- Worsted-weight yarn (Category 4): Approximately 150-200 yards. The yarn in the image is a bright, solid-colored pink. You may need more yarn for larger sizes.
- Crochet hook: US size I/9 (5.5 mm), or the size needed to obtain gauge.
- Tapestry needle: For weaving in ends.
- Small button or ribbon: For the back closure.
- Stitch markers: Optional but helpful for marking key stitches.
Gauge
Getting the right gauge is important for sizing baby garments.
- In double crochet (DC): 4 rows of 5 DC should measure 1 inch by 1 inch.
Adjust your hook size if your gauge is off. If your swatch is too small, use a larger hook. If it’s too big, use a smaller hook.
Sizing Guide
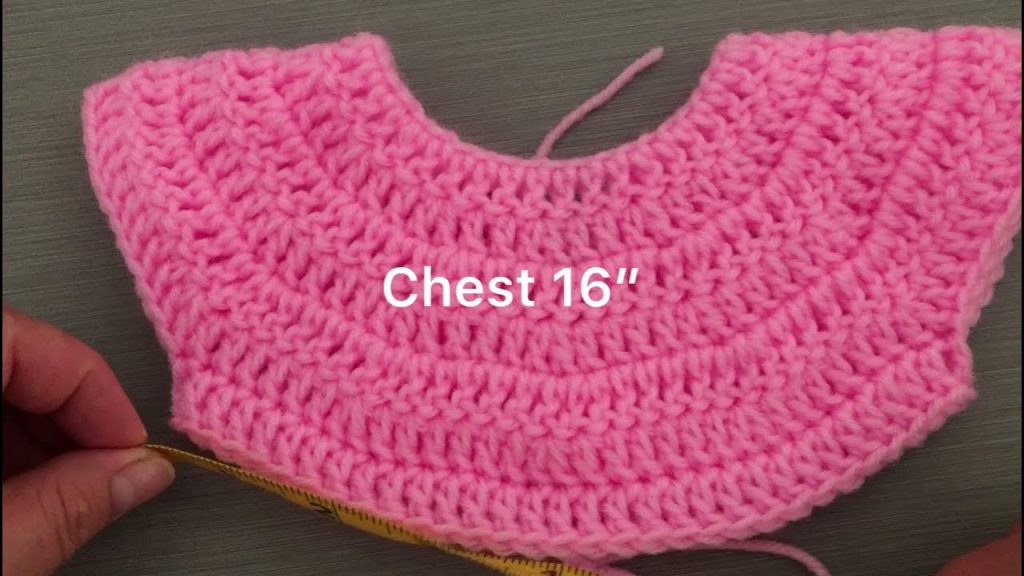
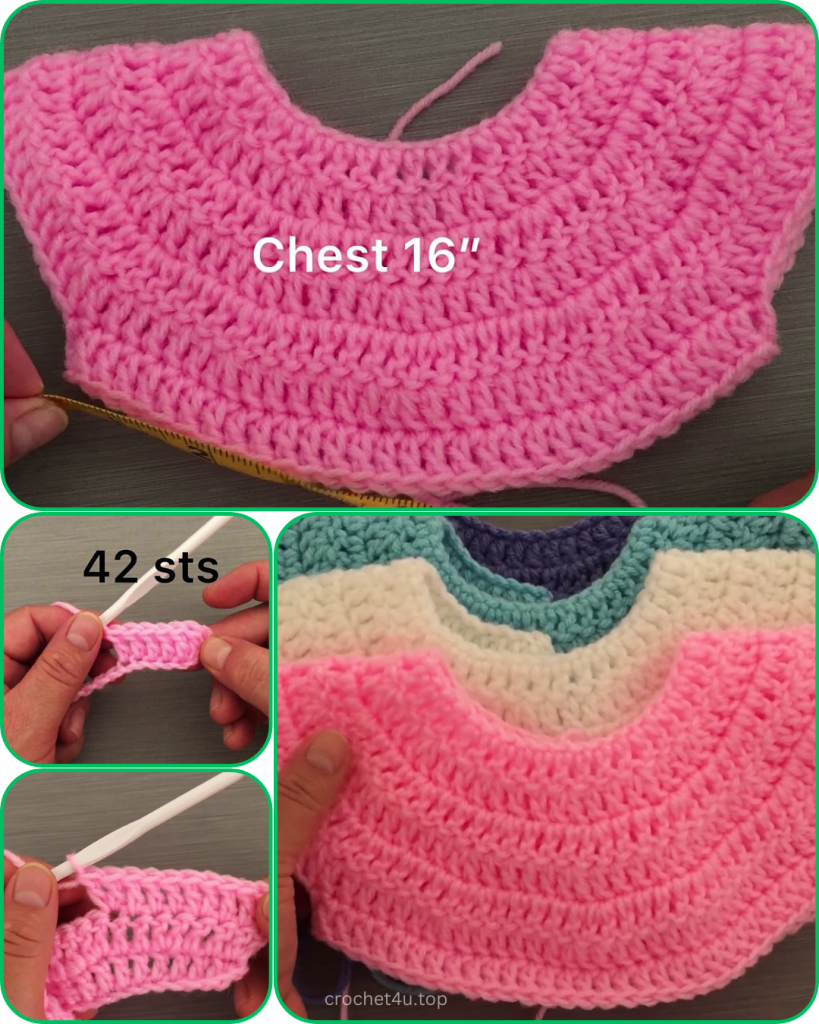
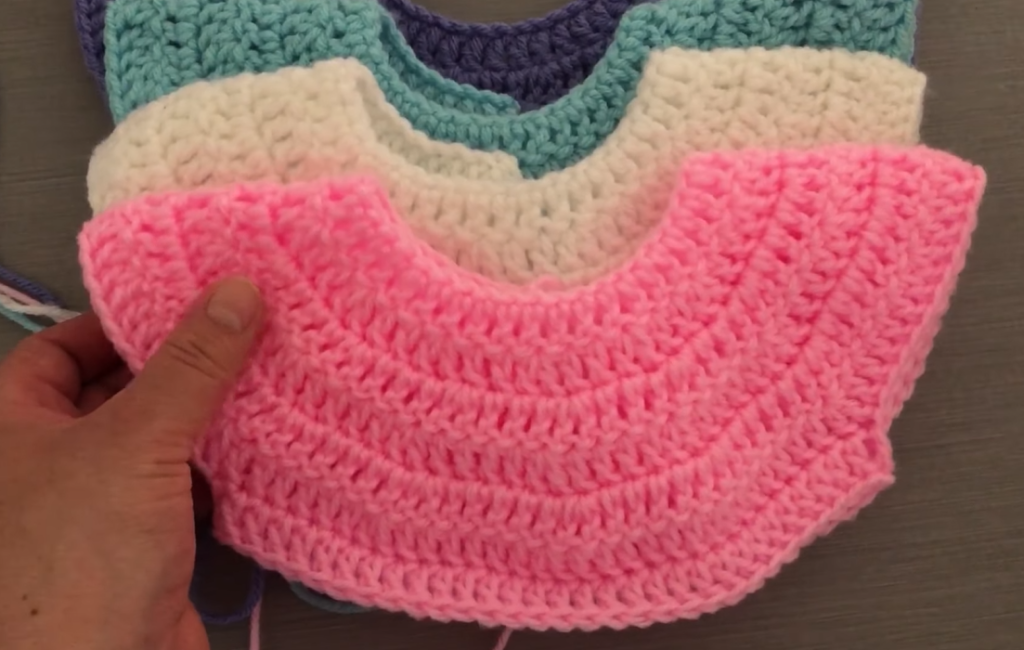
- Newborn: Chest 16″. Yoke will be approximately 45 stitches at the neckline.
- 3-6 Months: Chest 18″. Yoke will be approximately 50 stitches at the neckline.
- 6-12 Months: Chest 20″. Yoke will be approximately 55 stitches at the neckline.
To adjust the size, simply increase or decrease the number of chains in the starting row. Make sure the number is divisible by a number that allows for even increases in the following rows.
Pattern Notes
- This dress is worked from the top down.
- The yoke is worked in rows, and the skirt is worked in rounds.
- The increases in the yoke are made at regular intervals to create the curved, growing shape.
- The beginning chain of each row/round does not count as a stitch unless specified.
- Shell Stitch (SS): Work 5 double crochet (DC) stitches into the same stitch or space.
Dress Construction
Part 1: The Yoke (Bodice)
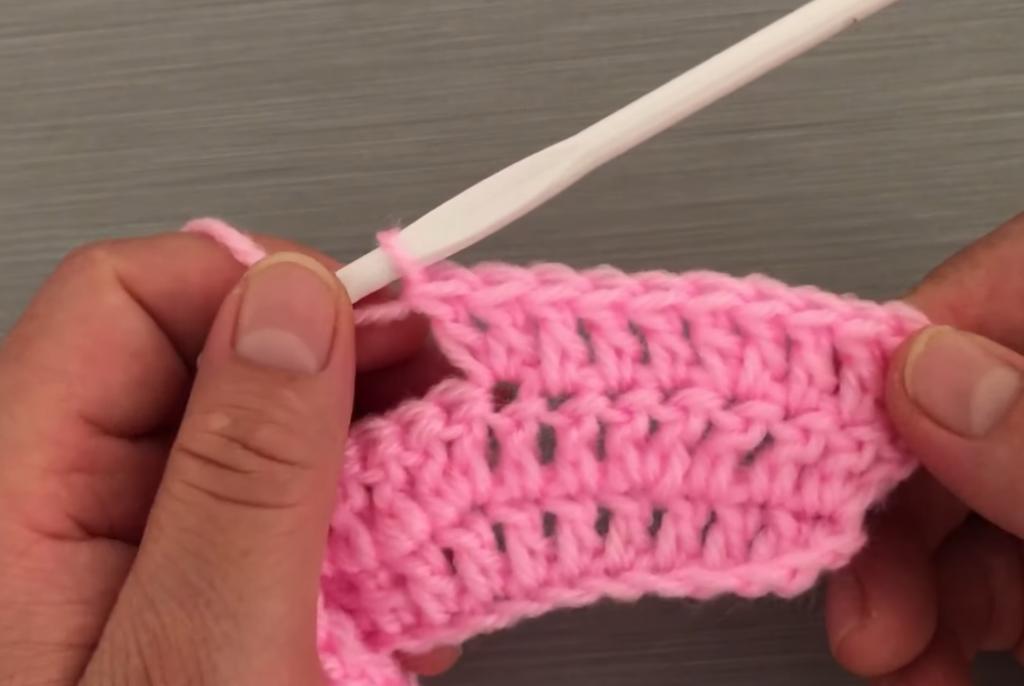
- Row 1: Chain 47. DC into the third chain from the hook and in each chain across. (45 stitches)
- Row 2: Chain 2. Turn. 2 DC in the first stitch. *1 DC in the next 5 stitches, 2 DC in the next stitch.* Repeat from * to * 6 times. 2 DC in the last stitch. (53 stitches)
- Row 3: Chain 2. Turn. 2 DC in the first stitch. *1 DC in the next 6 stitches, 2 DC in the next stitch.* Repeat from * to * 6 times. 2 DC in the last stitch. (61 stitches)
- Row 4: Chain 2. Turn. 2 DC in the first stitch. *1 DC in the next 7 stitches, 2 DC in the next stitch.* Repeat from * to * 6 times. 2 DC in the last stitch. (69 stitches)
- Row 5: Chain 2. Turn. 2 DC in the first stitch. *1 DC in the next 8 stitches, 2 DC in the next stitch.* Repeat from * to * 6 times. 2 DC in the last stitch. (77 stitches)
- Row 6: Chain 2. Turn. 2 DC in the first stitch. *1 DC in the next 9 stitches, 2 DC in the next stitch.* Repeat from * to * 6 times. 2 DC in the last stitch. (85 stitches)

Part 2: Separating for Sleeves
Now we will create the armholes and join the yoke into a circle to begin the skirt.
- Row 7: Chain 2. Turn. DC into the first 12 stitches (front panel). Skip the next 18 stitches (first sleeve). DC into the next 25 stitches (back panel). Skip the next 18 stitches (second sleeve). DC into the last 12 stitches (second front panel). (49 stitches)
Note: The stitch counts for the front and back panels are adjustable. For a larger armhole, skip more stitches. For a smaller armhole, skip fewer stitches.
Part 3: The Skirt (Lacy Section)
Now we will join the work into a round to create the skirt.
- Round 8: Chain 2. DC into each of the 49 stitches from the previous row. Join with a slip stitch to the first DC.
- Round 9: We will now create the first shell stitch round. Chain 2. Work a Shell Stitch (SS) into the first stitch. *Skip 4 stitches, work a SS into the next stitch.* Repeat from * to * around. You should have 10 shells in total. Join with a slip stitch to the top of the first shell.
- Round 10: Chain 2. Work a SS into the center DC of the first shell from the previous round. Continue working a SS into the center DC of each shell around. Join with a slip stitch.
- Rounds 11-20 (or until desired length): Repeat Round 10.
Continue working in this shell stitch pattern until the dress reaches your desired length. The image shows a shorter, knee-length dress, but you can continue the pattern for a longer gown.
Part 4: Finishing Touches
- The Scalloped Hem: To create the scalloped edge at the bottom of the skirt, work 5 double crochet (DC) stitches into the center of each shell on the last round. This will create a beautiful, wavy finish.
- Back Closure: On the back opening of the yoke, work a few rows of single crochet (SC) up both sides to create a neat edge. Create a small loop with a few chain stitches on one side to attach a button. Sew a small button to the other side.
- Final Touches: Weave in all loose ends securely with your tapestry needle.
Your beautiful baby dress is now complete and ready for its little recipient!


