
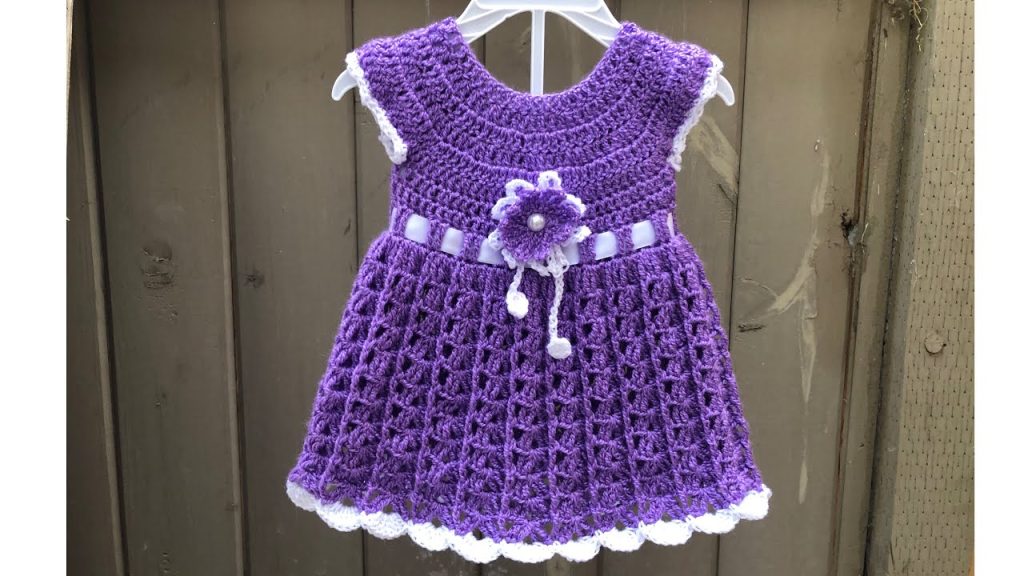
Have you ever wanted to create a stunning, handcrafted dress for a little one in your life? This crochet pattern will guide you step-by-step to make a beautiful purple dress, complete with a lovely scalloped hem and a delicate flower belt. It’s a project that looks more complicated than it is, and the result is a cherished keepsake. This pattern is written for a baby or toddler size, approximately 12-18 months, but can be easily adjusted by changing your hook size or yarn weight.
Materials
- Yarn: Approximately 300-400 yards of DK weight (Category 3) yarn in a vibrant purple. I used a 100% acrylic yarn for its durability and washability.
- Contrast Yarn: A small amount of white DK weight yarn for the trim.
- Hook: A 4.0 mm (G/6) crochet hook.
- Accessories: A small amount of white satin ribbon (about 1 yard), a button or bead for the flower’s center, a yarn needle for weaving in ends, and scissors.
Stitches Used (US Terms)
- ch: Chain
- sl st: Slip Stitch
- sc: Single Crochet
- hdc: Half Double Crochet
- dc: Double Crochet
- inc: Increase (work two stitches in the same stitch)
- FPdc: Front Post Double Crochet
- BPdc: Back Post Double Crochet
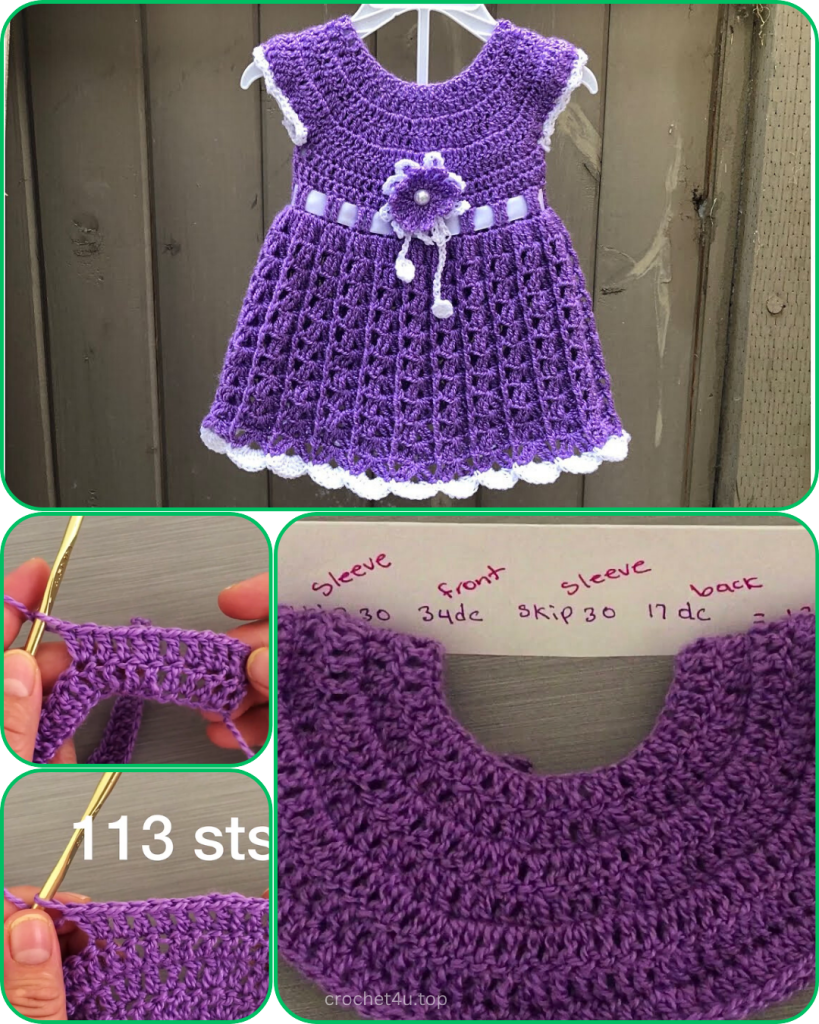
Part 1: The Bodice
The bodice is worked from the top down, in the round, creating a smooth, seamless yoke.
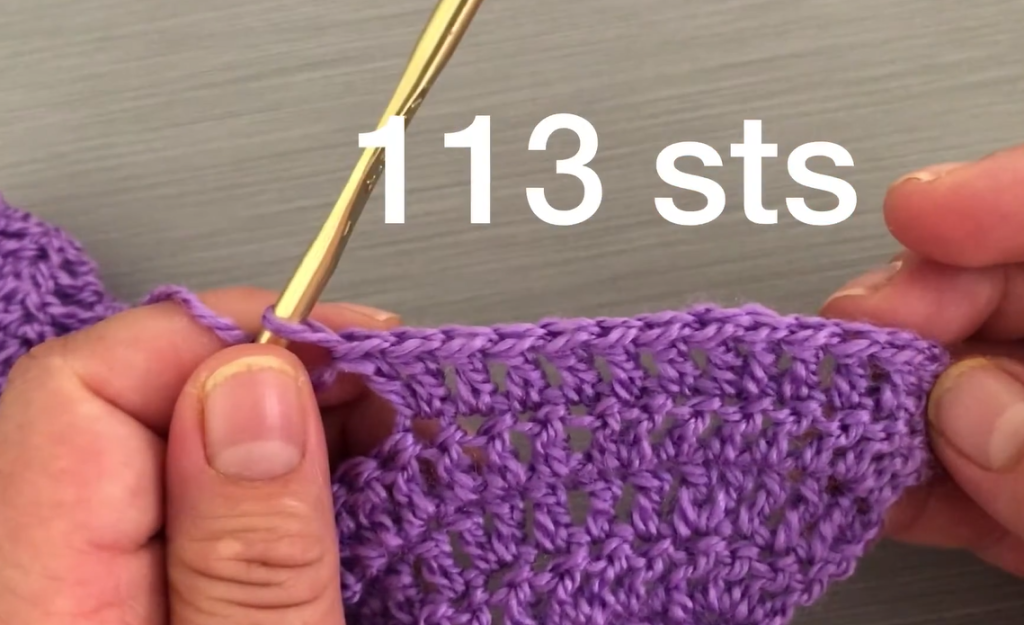
Row 1: Start with a chain of 70. Join with a sl st to the first chain to form a loop, being careful not to twist. (70 stitches)
Row 2: Ch 2 (counts as first hdc), hdc in each st around. Join with a sl st to the top of the ch 2. (70 hdc)
Row 3: Ch 2, hdc in the next 9 sts, inc (2 hdc in one st). Repeat * to * around. Join with a sl st. (77 hdc)
Row 4: Ch 2, hdc in the next 10 sts, inc. Repeat * to * around. Join with a sl st. (84 hdc)
Row 5: Ch 2, hdc in the next 11 sts, inc. Repeat * to * around. Join with a sl st. (91 hdc)
Row 6: Ch 2, hdc in the next 12 sts, inc. Repeat * to * around. Join with a sl st. (98 hdc)
Row 7: Ch 2, hdc in the next 13 sts, inc. Repeat * to * around. Join with a sl st. (105 hdc)
Row 8: Ch 2, hdc in each st around. Join with a sl st. (105 hdc)
Now, we will divide the stitches to create the armholes.
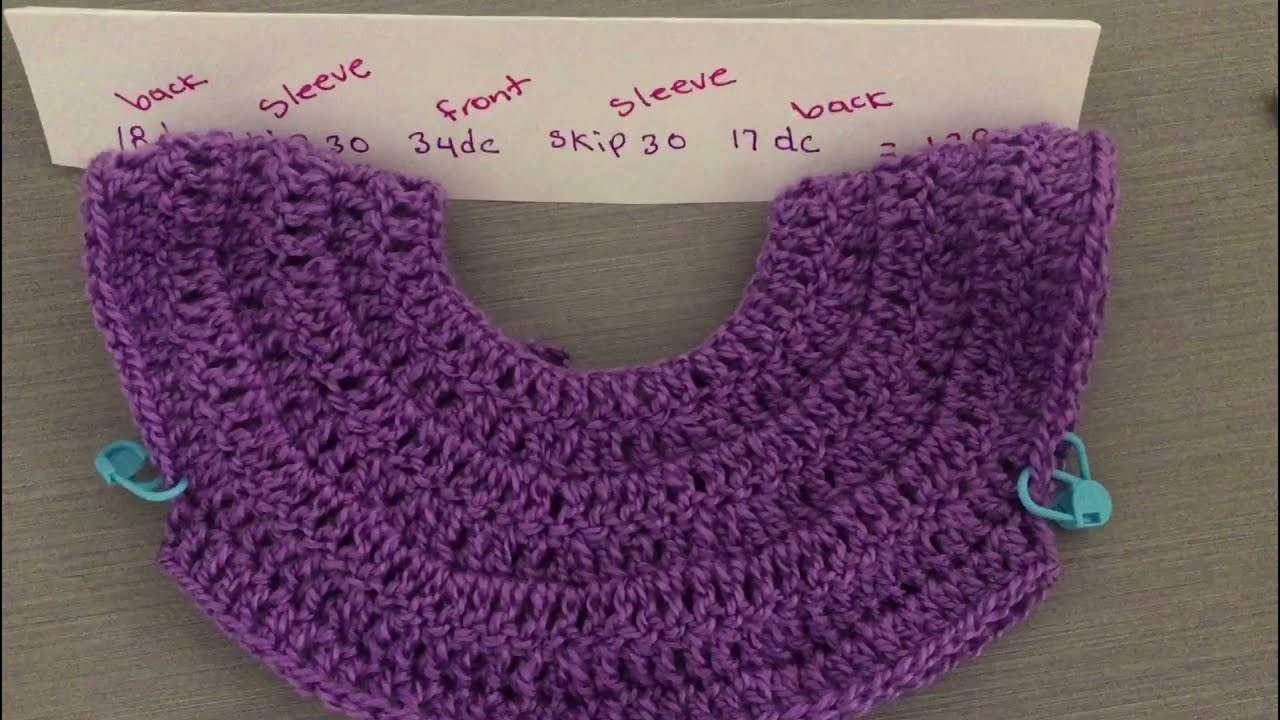
Row 9: Ch 2, hdc in the next 15 sts (this is the back section). Ch 10 (skip 22 sts for the first armhole), hdc in the next 31 sts (this is the front section). Ch 10 (skip 22 sts for the second armhole), hdc in the next 16 sts. Join with a sl st to the top of the ch 2. (62 hdc + 20 ch)
Row 10: Ch 2, hdc in each st and each chain around. Join with a sl st. (82 hdc)
Row 11-15: Ch 2, hdc in each st around. Join with a sl st. The bodice is now complete. Do not fasten off.
Part 2: The Skirt
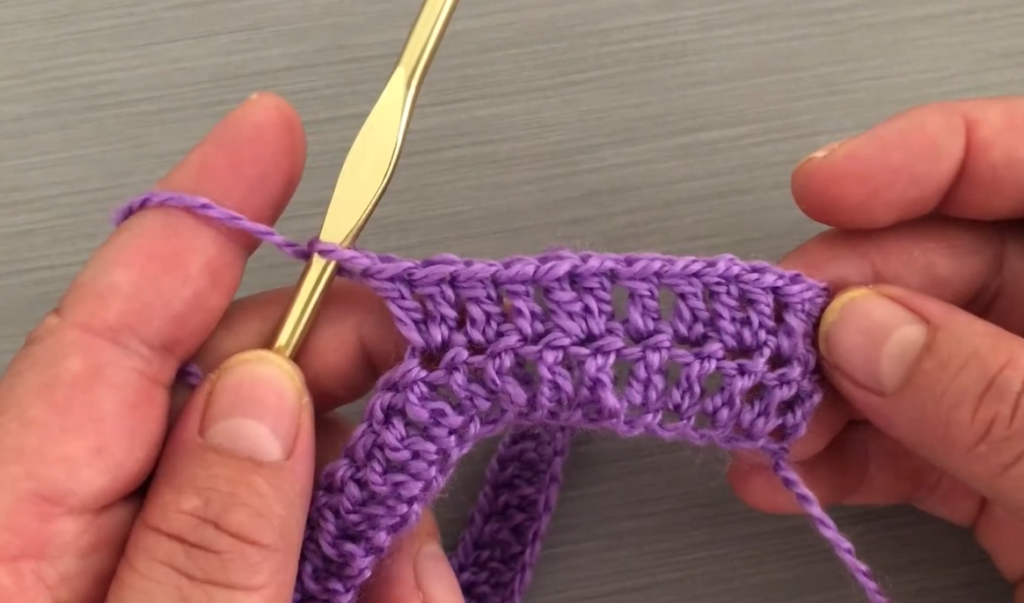
The skirt is worked in a beautiful “grid” or “mesh” pattern. It’s easy to memorize and works up quickly.
Round 1: Ch 3 (counts as first dc). Dc in the same stitch. Skip 1 st, dc in the next st, dc in the same st. Repeat * to * around. Join with a sl st. (This creates a series of ‘V’ stitches).
Round 2: Ch 3 (counts as dc). Dc in the space between the first two dc from the previous round. Dc in the space between the next pair of dc. Repeat * to * around. Join with a sl st.
Round 3: Ch 3, dc in the first space from the previous round. Dc in the next space, dc in the same space. Repeat * to * around. Join with a sl st.
Repeat Round 3 for the body of the skirt. Continue working in this manner until the skirt reaches your desired length. For a baby dress, about 25-30 rounds should be sufficient. The skirt will naturally flare out, creating a lovely A-line shape.
Part 3: The Finishing Touches
The White Belt
- Thread the satin ribbon through the stitches of the first row of the skirt. The “V” stitches are perfect for this, as the ribbon will weave in and out naturally.
- Tie the ribbon in a bow at the center front of the dress.
The Flower
- Ch 5, join with a sl st to form a ring.
- Round 1: Ch 1, 10 sc in the ring. Join with a sl st.
- Round 2: In the first sc, work a series of (sl st, ch 2, 3 hdc, ch 2, sl st). This forms one petal. Repeat this in each of the remaining 9 sc from the previous round. You will have 10 petals.
- Fasten off and weave in ends. Sew a button or bead in the center of the flower for added detail.
- Sew the flower to the center of the ribbon bow.
The Scalloped Edges
This is what gives the dress its final, polished look.
- Sleeves: With the white yarn, join to the bottom of one armhole. Work (sl st, ch 2, 3 hdc, ch 2, sl st) in the first stitch. Skip 1 stitch, and repeat the pattern. Continue this around the armhole. Repeat for the second armhole.
- Neckline: Join the white yarn at the back of the neck. Work a row of sc around the entire neckline. Fasten off.
- Hem: Join the white yarn at the bottom of the skirt. Work (sl st, ch 2, 3 hdc, ch 2, sl st) in the first stitch. Skip 1 st and repeat the pattern. Continue this around the entire hem of the dress.
Final Touches and Sizing
Weave in all remaining ends with your yarn needle, and gently block the dress to help it lay flat and showcase the stitches.
To adjust the size:
- For a smaller size (e.g., 6-12 months): Use a smaller hook (e.g., 3.5 mm) or start with a smaller initial chain for the bodice.
- For a larger size (e.g., 2T-3T): Use a larger hook (e.g., 4.5 mm) or add more initial chains and increase rows to the bodice. You will also need to increase the length of the skirt.
This pattern is a wonderful way to create a one-of-a-kind garment that is both beautiful and practical. The intricate look of the bodice and skirt is a testament to the versatility of crochet, and the final piece is a true labor of love. Happy crocheting!


