
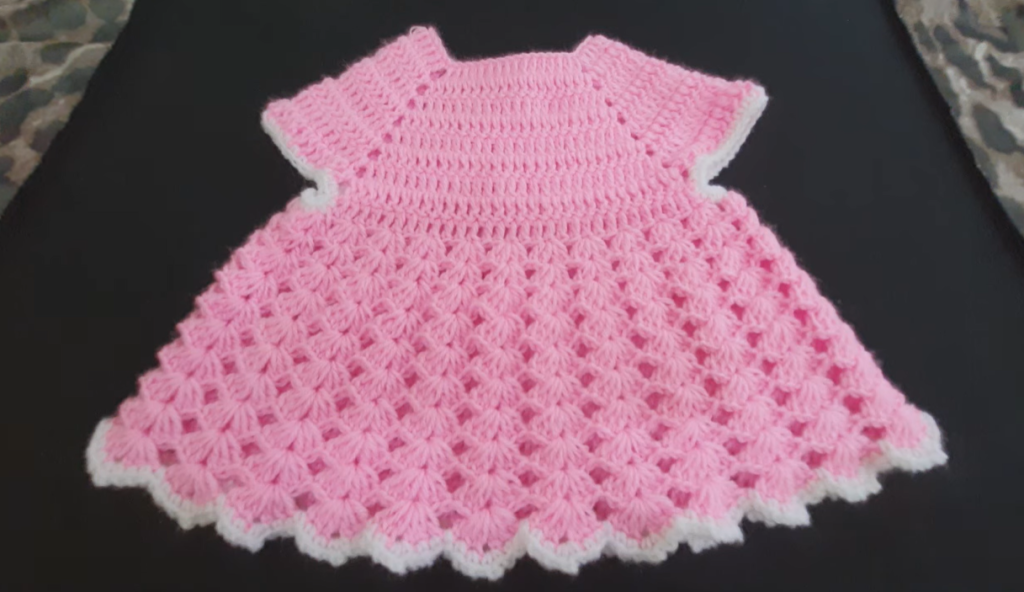
This pattern will guide you through creating a beautiful, top-down yoke, the foundation for a dress or a cardigan. The design features a delicate eyelet detail that adds a touch of elegance and works up quickly. This yoke is designed for a baby or toddler, fitting approximately 12-18 months, but you can easily adjust the size by changing your hook or initial chain count.
Materials
- Yarn: Approximately 100-150 yards of DK weight (Category 3) yarn in a pretty pink. A soft, machine-washable yarn is perfect for baby clothes.
- Hook: A 4.0 mm (G/6) crochet hook.
- Accessories: A yarn needle for weaving in ends, and scissors.
Stitches Used (US Terms)
- ch: Chain
- sl st: Slip Stitch
- sc: Single Crochet
- hdc: Half Double Crochet
- dc: Double Crochet
- inc: Increase (work two stitches in the same stitch)
- ch-sp: Chain space
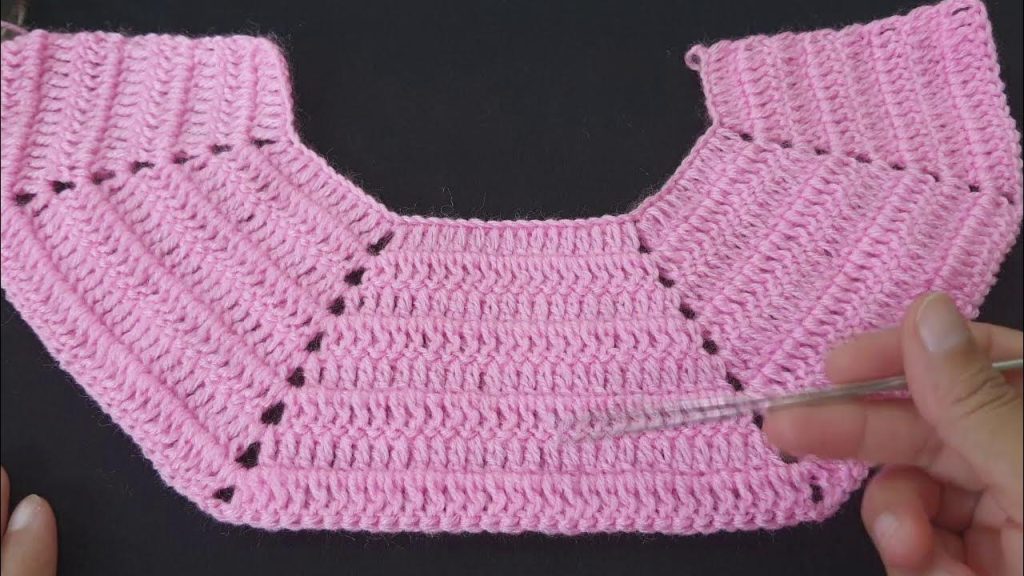
Part 1: The Yoke Construction
The yoke is worked from the top down, in the round, creating a smooth, seamless piece.

Row 1 (Foundation): Start with a chain of 60. Join with a sl st to the first chain to form a loop, being careful not to twist. (60 stitches)
Row 2: Ch 2 (counts as first hdc), hdc in each st around. Join with a sl st to the top of the ch 2. (60 hdc)
Row 3 (Increase Round): Ch 2, inc (2 hdc in the same st), hdc in the next 9 sts. Inc, hdc in the next 9 sts. Repeat * to * around. Join with a sl st. (66 hdc)
Row 4: Ch 2, hdc in each st around. Join with a sl st. (66 hdc)
Row 5 (Increase Round): Ch 2, inc, hdc in the next 10 sts. Inc, hdc in the next 10 sts. Repeat * to * around. Join with a sl st. (72 hdc)
Row 6: Ch 2, hdc in each st around. Join with a sl st. (72 hdc)
Row 7 (Increase Round): Ch 2, inc, hdc in the next 11 sts. Inc, hdc in the next 11 sts. Repeat * to * around. Join with a sl st. (78 hdc)
Row 8: Ch 2, hdc in each st around. Join with a sl st. (78 hdc)
Row 9 (Eyelet Row): Ch 3 (counts as first dc). Dc in the next st. Ch 1, sk 1 st, dc in the next 2 sts. Repeat * to * around. Join with a sl st to the top of the ch 3.
Row 10: Ch 2, hdc in each dc and each ch-sp around. Join with a sl st.
Row 11 (Increase Round): Ch 2, inc, hdc in the next 12 sts. Inc, hdc in the next 12 sts. Repeat * to * around. Join with a sl st. (84 hdc)
Row 12: Ch 2, hdc in each st around. Join with a sl st. (84 hdc)
Row 13 (Increase Round): Ch 2, inc, hdc in the next 13 sts. Inc, hdc in the next 13 sts. Repeat * to * around. Join with a sl st. (90 hdc)
Row 14: Ch 2, hdc in each st around. Join with a sl st. (90 hdc)
Row 15 (Eyelet Row): Ch 3 (counts as first dc). Dc in the next st. Ch 1, sk 1 st, dc in the next 2 sts. Repeat * to * around. Join with a sl st.
Row 16: Ch 2, hdc in each dc and each ch-sp around. Join with a sl st.
Row 17 (Increase Round): Ch 2, inc, hdc in the next 14 sts. Inc, hdc in the next 14 sts. Repeat * to * around. Join with a sl st. (96 hdc)
Row 18: Ch 2, hdc in each st around. Join with a sl st. (96 hdc)
Row 19 (Increase Round): Ch 2, inc, hdc in the next 15 sts. Inc, hdc in the next 15 sts. Repeat * to * around. Join with a sl st. (102 hdc)
Row 20: Ch 2, hdc in each st around. Join with a sl st. (102 hdc)
Row 21 (Eyelet Row): Ch 3 (counts as first dc). Dc in the next st. Ch 1, sk 1 st, dc in the next 2 sts. Repeat * to * around. Join with a sl st.
Row 22: Ch 2, hdc in each dc and each ch-sp around. Join with a sl st.
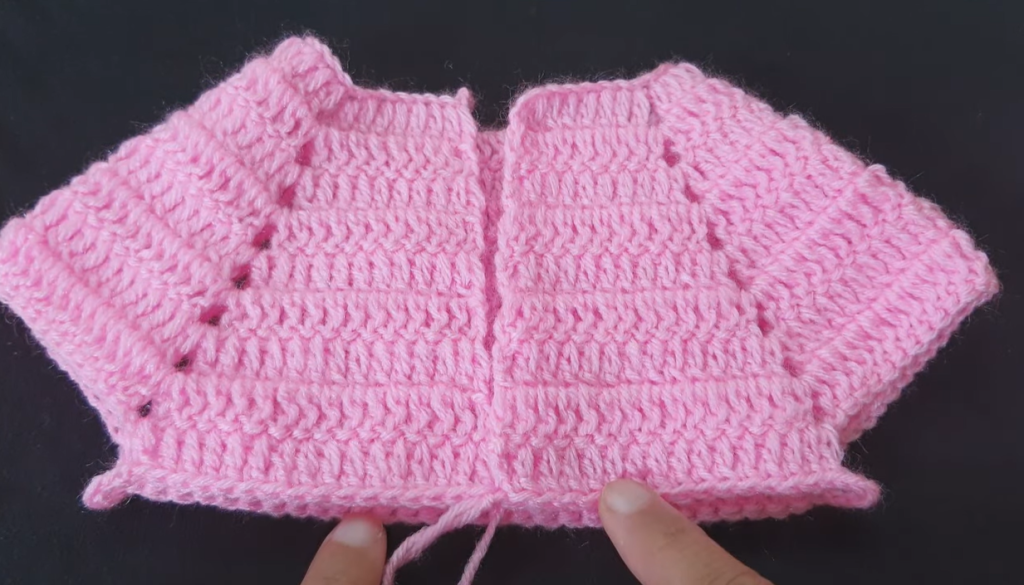
Part 2: Dividing for Armholes
Now you’ll divide your stitches to create the openings for the sleeves.
Row 23: Ch 2, hdc in the next 15 sts (this is the back section). Ch 10 (skip 21 sts for the first armhole), hdc in the next 30 sts (this is the front section). Ch 10 (skip 21 sts for the second armhole), hdc in the next 15 sts. Join with a sl st to the top of the ch 2.
Row 24: Ch 2, hdc in each st and each ch around. Join with a sl st. (80 hdc)
Row 25: Ch 2, hdc in each st around. Join with a sl st. (80 hdc)
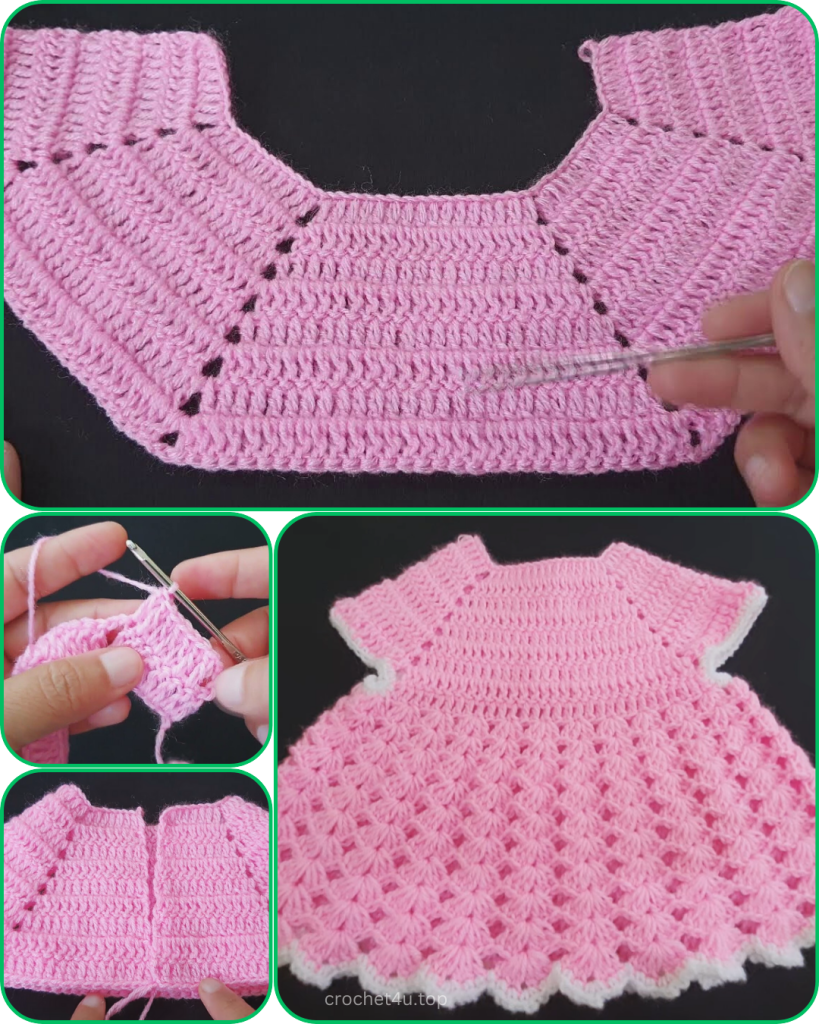
Final Touches and Sizing
Weave in all remaining ends with your yarn needle. Gently block the yoke to help it lay flat and showcase the stitches. At this point, you have a perfect starting point for a dress or a top.
To continue to a dress: Simply continue working in the round with your chosen stitch pattern (for example, a double crochet or a shell stitch) until you reach your desired length.
To adjust the size:
- For a smaller size (e.g., 6-12 months): Start with a smaller initial chain (e.g., 50) and a smaller hook (e.g., 3.5 mm). Adjust the number of increase rounds and stitches accordingly.
- For a larger size (e.g., 2T-3T): Start with a larger initial chain (e.g., 70) and a larger hook (e.g., 4.5 mm). You will also need to add more increase rounds and stitches before dividing for the armholes.
Video Tutorial:
This pattern is a fantastic way to create a classic, handmade piece that can be customized to your liking. The repetition of the stitches makes it a relaxing project, and the final result is a beautiful and professional-looking garment.


