
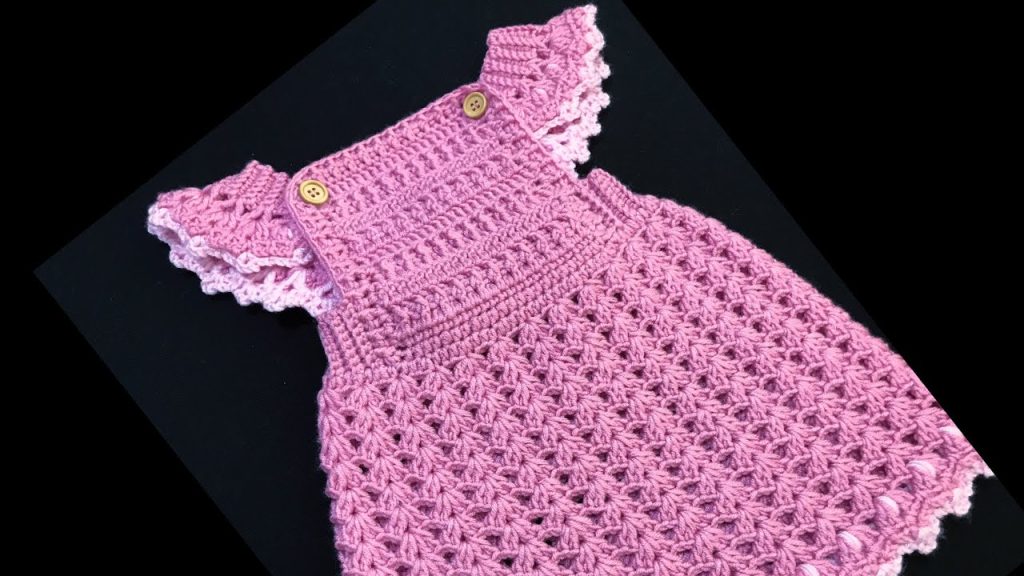
Crocheting clothes for babies is one of the sweetest handmade gifts you can make. There’s just something magical about creating a tiny garment filled with care, detail, and love. Today, I’ll guide you through making a crochet baby pinafore dress with flutter sleeves, similar to the one in the image.
This pattern is designed for 3–6 months, but I’ll also provide instructions on how to adjust sizing for newborns, toddlers, and up to 2 years. By the end of this blog, you’ll have not only a gorgeous dress but also the skills to customize it for different sizes, colors, and even occasions (imagine this in red and white for Christmas, or pastel yellow for Easter!).
Materials Needed
To make this baby dress, you’ll need:
- Yarn: Soft baby yarn or cotton blend, weight #3 (DK/light worsted).
- Main Color (MC): Pink (around 200–250g for size 3–6 months).
- Contrast Color (CC): White or cream (around 50g) for sleeve and hem edging.
- Crochet Hook: 3.5 mm (E) or 4.0 mm (G), depending on your tension.
- Buttons: 2 small wooden buttons for the straps (approx. ½ inch).
- Scissors
- Tapestry Needle (for weaving in ends)
- Stitch Markers (to keep track of increases and rounds)
Stitches & Abbreviations
All terms are in US crochet terminology.
- ch – chain
- sc – single crochet
- hdc – half double crochet
- dc – double crochet
- sl st – slip stitch
- sk – skip
- sp – space
- st(s) – stitch(es)
- V-stitch – (dc, ch 1, dc) in the same stitch
- Shell stitch – 5 dc in same stitch
- Puff stitch – yarn over, insert hook, pull up a loop (3 times), yarn over, pull through all loops
Construction Overview
This pinafore dress is worked in two main parts:
- Bodice (Top Panel & Straps): Worked flat in rows to create a rectangle with shoulder straps. Buttons are added to secure.
- Skirt: Worked in rounds from the base of the bodice downward using a lace/shell stitch pattern.
- Flutter Sleeves & Edging: Added last, worked in rounds with contrast color to give a delicate frill.
This makes it easy to adjust—if you want a longer dress, just add more skirt rounds; for a bigger size, increase bodice rows and skirt stitches.
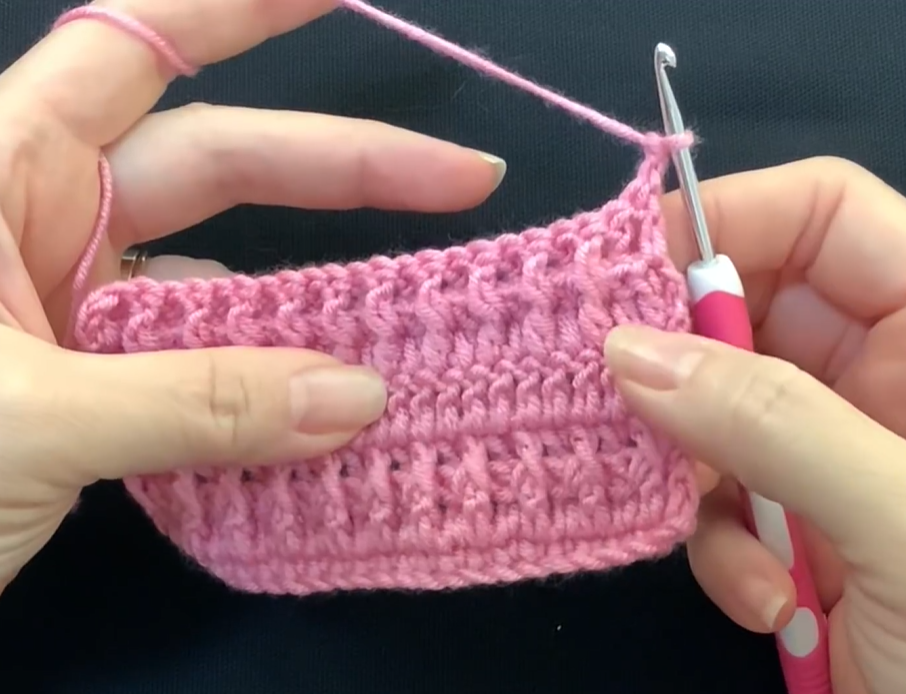
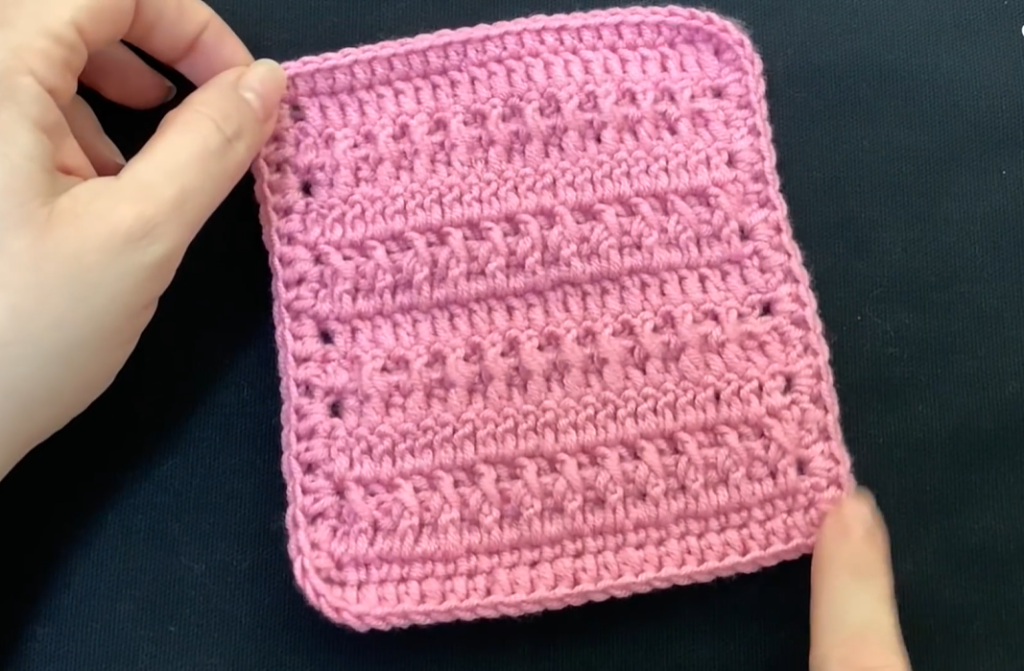
Step 1: The Bodice (Top Panel)
Foundation Chain:
- Ch 46 (for size 3–6 months). This will measure around 18 cm across.
Row 1 (Foundation Row):
- Dc in 3rd ch from hook and across. (44 sts)
Rows 2–12:
- Ch 2, turn. Dc in each st across. (44 sts)
This creates a neat rectangular bodice panel. Adjust row count if you want a taller bodice.
Straps:
- Attach yarn to the top corner. Ch 30 (for strap length). Dc in 3rd ch from hook and across strap back to bodice. Sl st to secure.
- Repeat on the other side for the second strap.
You should now have a flat rectangle with two long straps coming up. Later, these will fold over the shoulders and button down.
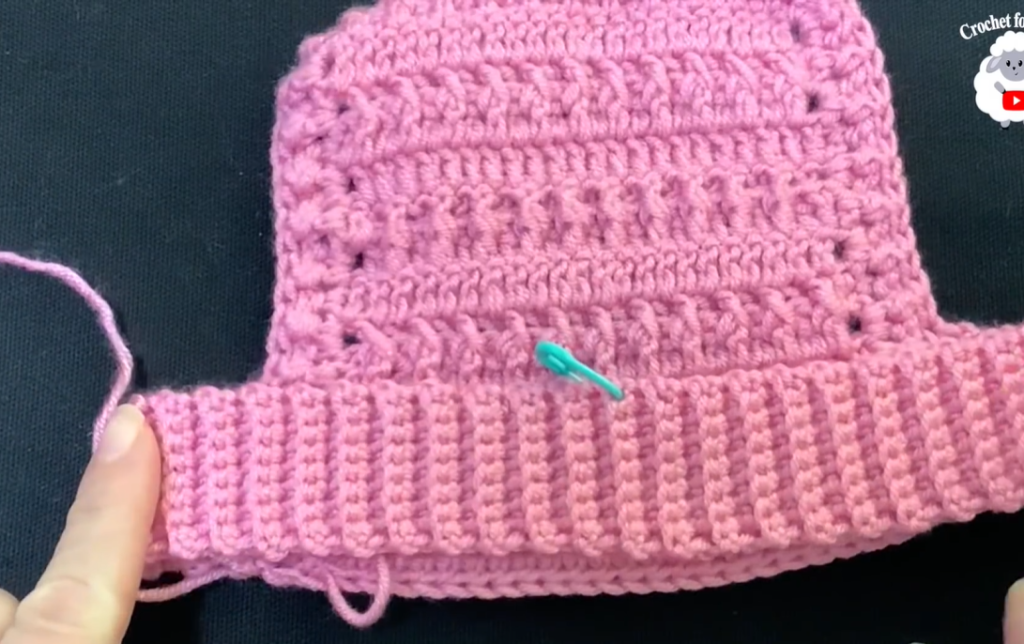
Step 2: Joining the Skirt
Now we’ll begin the lacy skirt from the bottom of the bodice.
Foundation Round:
- Attach yarn to the lower edge of the bodice. Work 1 round of dc evenly across, making sure stitch count is divisible by 4. (For 3–6 months, aim for 88–92 dc). Join with sl st.
Skirt Pattern (Repeat):
We’ll use a V-shell stitch for the lacy look.
Round 1:
- Ch 3 (counts as dc), sk 1, 2 dc in next st, ch 1, 2 dc in same st (V-shell made), sk 3. Repeat around. Join.
Round 2:
- Sl st into center of V-shell, ch 3 (counts as dc), (2 dc, ch 1, 2 dc) in same sp. Repeat in each V-shell around. Join.
Round 3–18:
- Repeat Round 2 until desired skirt length is reached (about 18 rounds for 3–6 months).
For a fuller skirt, increase by adding chains between shells (e.g., ch 2 instead of ch 1).
Step 3: Hem Edging
To add contrast and finish off the bottom edge:
Round 1 (Puff edging):
- Switch to white/cream yarn. Ch 1, sc in same st, ch 2, puff st in next sp, ch 2, sc in next st. Repeat around. Join.
Round 2 (Shell edge):
- In each ch-2 sp, make 5 dc. Skip next puff, sl st into sc, repeat.
This gives the hem a wavy scallop finish.
Step 4: Flutter Sleeves
The flutter sleeves are worked into the armhole edge.
Round 1:
- Attach yarn to armhole top. Work sc evenly around the sleeve edge. Join.
Round 2:
- Ch 3, 2 dc in same st, sk 1, 3 dc in next st. Repeat around. Join.
Round 3 (Contrast frill):
- Switch to white yarn. Work (sc, ch 3, sc) in each dc group for a delicate frill.
Repeat for the other sleeve.
Step 5: Finishing Touches
- Buttons: Sew 2 buttons on the bodice front. Adjust strap length if needed so they button securely.
- Weaving in Ends: Use tapestry needle to weave in all loose yarn ends neatly.
- Blocking (Optional): Lightly steam block the dress to shape and smooth.
Size Adjustments
- Newborn (0–3 months): Start with ch 38 for bodice, 72–76 dc for skirt foundation. Work 14 skirt rounds.
- 6–12 months: Start with ch 52 for bodice, 100–104 dc for skirt foundation. Work 20 skirt rounds.
- 12–24 months: Start with ch 60 for bodice, 112–120 dc for skirt foundation. Work 22–24 skirt rounds.
Always measure against a baby garment you already have to confirm.
Video Tutorial:
Tips & Variations
- Use cotton yarn for a breathable summer dress or soft acrylic for cooler seasons.
- Try color-blocking: Bodice one color, skirt another.
- Add ribbon through the waistline for decoration.
- Skip sleeves if you want a simpler sundress look.
Conclusion
This crochet baby pinafore dress is not just a garment—it’s a keepsake. Whether you’re making it as a gift, for your own little one, or for a special occasion, it’s a project that combines love, patience, and creativity. The bodice gives it structure, the skirt adds elegance, and the flutter sleeves make it adorable.
Once you’ve mastered this, you’ll find it easy to adapt into different dress styles. Add layers, change stitches, or even turn it into a tunic for toddlers.


