

Hello, sun seekers and stitchers! Are you ready for a project that blends utility with gorgeous style? Today, we’re crocheting the Summer Breeze Chevron Tote Bag, an airy, durable carryall perfect for market runs, beach days, or just adding a touch of handmade elegance to your daily routine.
This tote features a lovely chevron mesh stitch that keeps the bag light and breathable while still offering plenty of structure. We’ll use a sturdy yarn like raffia or cord to give it a robust, professional look. The bag is worked in the round, starting with a sturdy oval base and building up the sides with our beautiful openwork pattern.
Grab your hook, pick out a fantastic natural-fiber cord, and let’s create a chic tote you’ll use all season long!
🧶 Materials You’ll Need
Gather these items for your durable tote project:
- Yarn:Raffia, Paper Yarn, or Polyester Cord (Sport to DK weight, or a thin cord). Using a synthetic or natural fiber cord provides the necessary structure.
- Color: Natural Tan/Brown (as pictured).
- Quantity: Approximately 350 – 450 yards (This amount can vary significantly depending on the fiber thickness and desired bag size).
- Crochet Hook: 3.5 mm to 4.0 mm (E-4 to G-6). Choose a hook size that gives you a tight, dense fabric for the base and a nice open mesh for the body.
- Stitch Marker: Essential for tracking the start of rounds.
- Yarn Needle (Tapestry Needle): For weaving in ends.
- Scissors.
📏 Finished Size (Approximate)
This pattern is for a medium-large tote bag.
- Base Length: 12 inches (30 cm)
- Bag Height (excluding strap): 13 inches (33 cm)
- Bag Width (laid flat): 16 inches (40 cm)
Note: Your finished size depends on your yarn, hook, and tension.
📝 Abbreviations & Special Stitches (US Terms)
We’ll use a mix of basic and slightly more advanced stitches for the mesh.
- ch: chain
- sl st: slip stitch
- sc: single crochet
- dc: double crochet
- st(s): stitch(es)
- inc: increase (2 sc in one st)
- sc2tog: single crochet 2 together (decrease)
- ch-sp: chain space
💡 Important Notes & Techniques
Understanding the construction will ensure your tote comes together perfectly!
- Construction: We start with an oval base worked in continuous rounds (SC), then transition to the sides worked in joined rounds (DC mesh).
- Base Density: Use a slightly smaller hook or keep your tension very tight when crocheting the base to ensure it is sturdy and doesn’t sag.
- Chevron Mesh Pattern: The mesh pattern uses double crochet, chain stitches, and decreases/increases to create the zigzag effect. Pay close attention to the starting chain counts.
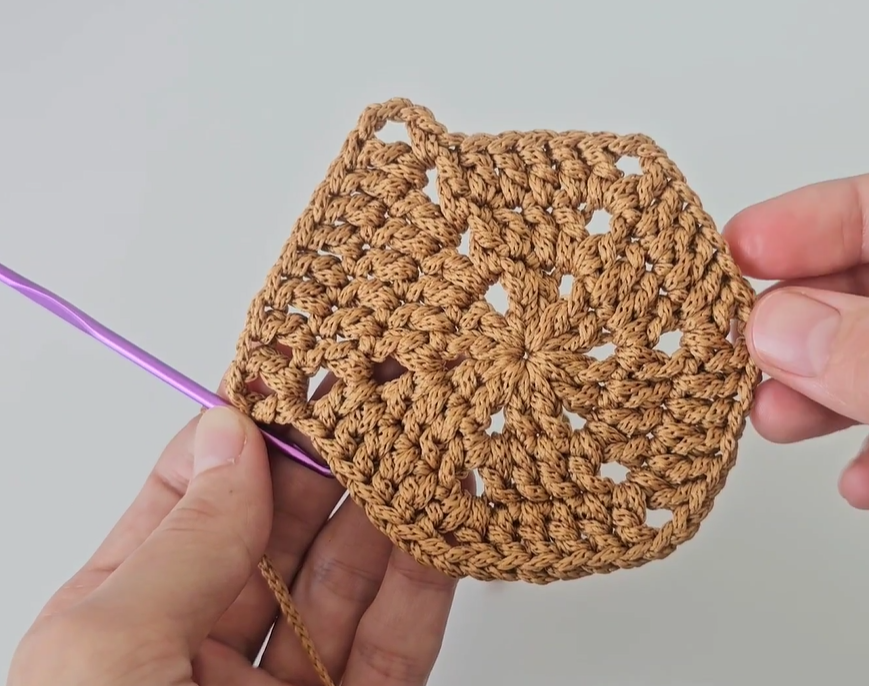
🟢 Part 1: The Sturdy Oval Base (Single Crochet)
We work the base in continuous spirals for a smooth bottom.

- Starting Chain: Ch 31. (This determines the base length. Subtract 1 to get the initial length: 30 chains = 10 inches).
- Round 1: Sc in the 2nd ch from hook, sc in next 28 chs. 3 sc in the last ch (working around the end). Rotate to work down the other side of the starting chain. Sc in the next 28 chs. 2 sc in the last ch (where you started). Do not join. Place stitch marker. (62 sts)
- Round 2: Sc inc in the first st. Sc in the next 28 sts. Sc inc in the next 3 sts. Sc in the next 28 sts. Sc inc in the last 2 sts. (68 sts)
- Round 3: [Sc inc in the next st, 1 sc in the next st] repeat 2 times. Sc in the next 28 sts. [Sc inc in the next st, 1 sc in the next st] repeat 3 times. Sc in the next 28 sts. [Sc inc in the next st, 1 sc in the next st] repeat 2 times. (75 sts)
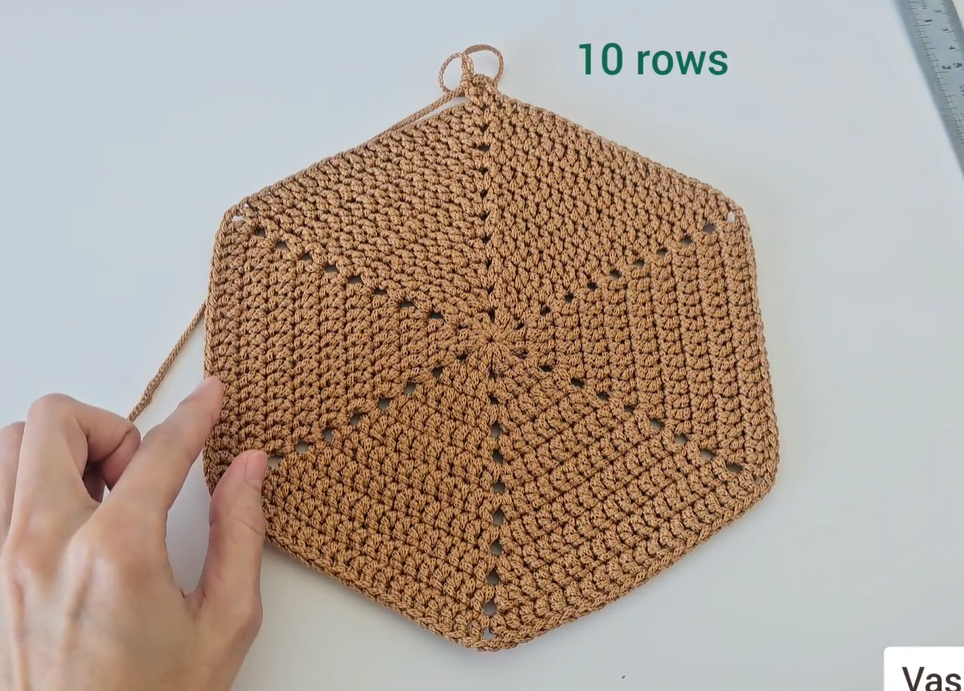
- Round 4 (Transition): Work 1 sc in the BLO of each st around. Sl st to the first sc to join. (75 sts)
- Working in BLO here helps the sides turn up sharply and provides a neat transition.
🌊 Part 2: The Body (Chevron Mesh)
The sides are worked in joined rounds. The mesh pattern repeats over 8 stitches. Ensure your final stitch count from the base is a multiple of 8 (e.g., 72 or 80 sts). We will use a count of 80 stitches for the pattern below. If your base has 75 sts, add 5 increases evenly in the transition round.
Setup Round (Adjusting to 80 sts):
- Ch 1. Sc in each st around, increasing evenly by 5 sts if necessary to reach 80 sts. Sl st to the first sc to join. (80 sts)
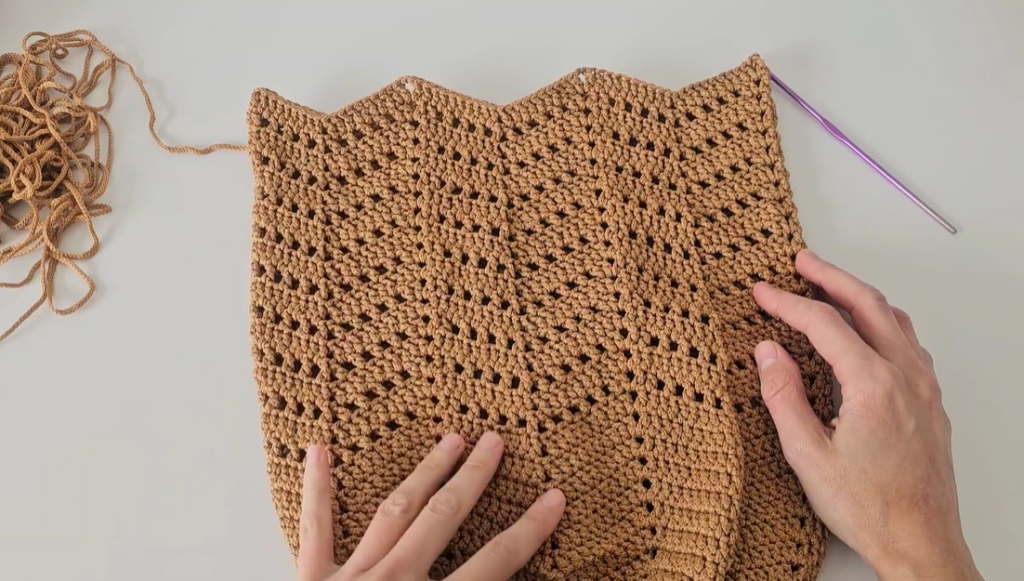
Chevron Mesh Rounds (Repeat the following):
- Round 1 (Mesh Base): Ch 3 (counts as dc). Dc in the same st (inc). [Ch 1, skip 1 st, dc in the next 3 sts] repeat until 7 sts remain. Ch 1, skip 1 st, dc in the next 2 sts. Sl st to the top of the starting ch-3 to join.
- This round establishes the first zigzag. The increase at the start is balanced by the shorter ending sequence.
- Round 2 (Peak & Valley): Ch 3 (counts as dc). Dc in the first dc (peak inc). [Ch 1, skip ch-sp, dc in the next 2 sts, dc2tog over the next 2 sts, dc in the next 2 sts] repeat around until the last peak. Ch 1, skip ch-sp, dc in the next 2 sts. Sl st to the top of the starting ch-3 to join.
- Round 3: Ch 3 (counts as dc). Dc in the first dc (peak inc). [Ch 1, skip ch-sp, dc in the next st, dc2tog over the next 2 sts, dc in the next st] repeat around until the last peak. Ch 1, skip ch-sp, dc in the next st. Sl st to the top of the starting ch-3 to join.
- Round 4: Ch 3 (counts as dc). Dc in the first dc (peak inc). [Ch 1, skip ch-sp, dc2tog over the next 2 sts] repeat around until the last peak. Ch 1, skip ch-sp. Sl st to the top of the starting ch-3 to join.
- Repeat Rounds 1-4 until the bag reaches your desired height (about 12-13 inches).
⚓ Part 3: Final Border and Handle Setup
Once the bag reaches the desired height, we create a strong, solid top edge for the straps.
- Border Round 1 (Flatten Mesh): Ch 1. Work 1 sc in every dc and 1 sc in every ch-sp around. Sl st to the first sc to join. (80 sts)
- Border Round 2 (Solid Edge): Ch 1. Sc in each st around. Sl st to join. (80 sts)
- Border Round 3 (Strap Placement): Ch 1. Sc in the next 14 sts. Skip the next 12 sts (where the strap will go). Sc in the next 28 sts (back of the bag). Skip the next 12 sts (second strap location). Sc in the last 14 sts. Sl st to join. (56 sts)
👜 Part 4: The Straps
The image shows two simple, flat handles created by chaining and then single crocheting over the chain.
- First Strap: Ch 100 (or desired strap length, about 25-30 inches).
- Handle Round: Sc in the 2nd ch from the hook, and 1 sc in each of the 99 chs (or chain length).
- Joining: Sl st the last sc to the 12th skipped stitch space on the bag’s body (where the first strap began). Sl st around the remaining 11 skipped stitches, joining the foundation chain to the bag top securely.
- Second Strap: Repeat steps 1-3 for the second strap on the opposite side.
- Final Handle Pass (Optional for Strength): Ch 1. Work 1 sl st around the entire edge of the bag opening and all along the inner and outer edge of the crocheted straps to provide a clean, dense, and super sturdy finish. Sl st to join and FO.
Video Tutorial:
✨ Finishing Touches
- Weave in Ends: Securely weave in all starting and ending yarn tails using your yarn needle. This is crucial for a durable bag.
- Shape: Fill the bag with towels or blankets to gently shape the chevron mesh and flatten the base. The natural cord material will hold its shape well once used.
🎉 Congratulations!
You’ve completed your stunning Summer Breeze Chevron Tote Bag! This durable, stylish accessory is ready for all your adventures. Enjoy the compliments!


