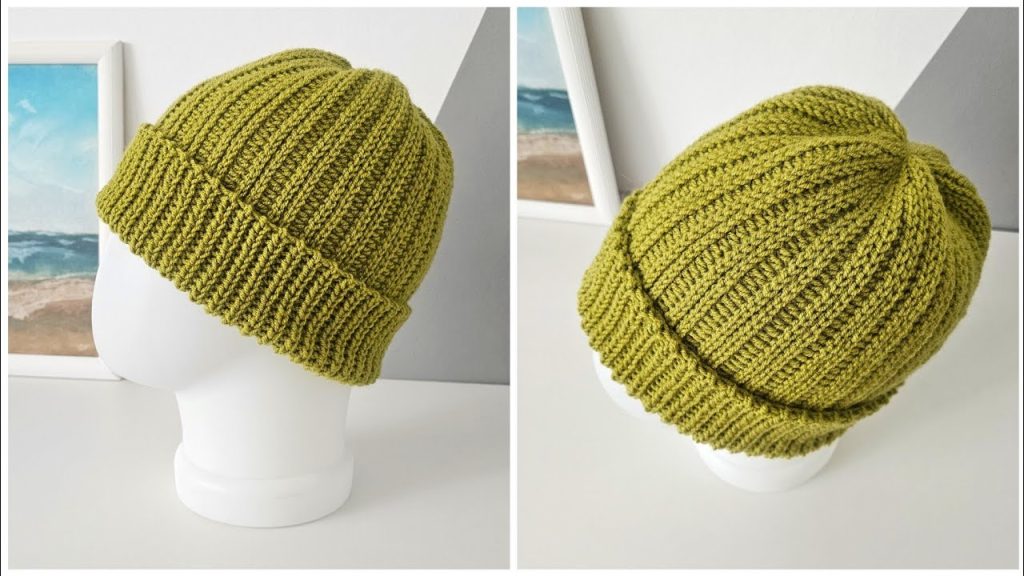
Welcome back, cozy crafters! If you’re searching for a quick, beginner-friendly project that delivers serious style and comfort, you’ve found it. Today, we’re crocheting the Olive Grove Ribbed Beanie, a classic, unisex hat distinguished by its beautiful vertical ribbing and deep, foldable cuff.
The fantastic texture that mimics knitting is achieved entirely through the Half Double Crochet in the Back Loop Only (HDC BLO) stitch. This simple technique gives the fabric amazing stretch—perfect for a comfortable, snug fit. This hat, shown here in a rich, earthy olive green, is a timeless piece and a wonderful blank canvas for your favorite colors!
Ready to hook up a hat that’ll keep you warm and stylish? Let’s get started!
🧶 Materials You’ll Need
Gather your supplies—this project uses minimal materials for maximum effect!
- Yarn:Worsted Weight (Aran / 10-ply), preferably a soft acrylic, wool, or wool blend with good elasticity.
- Color: Olive Green (or your choice).
- Quantity: Approximately 200 – 230 yards per hat. (This accounts for the deep brim).
- Crochet Hook: 5.5 mm (I/9). This hook size helps keep the BLO ribbing tight enough to maintain shape but loose enough to stretch comfortably.
- Yarn Needle (Tapestry Needle): Essential for seaming the hat and weaving in ends.
- Scissors.
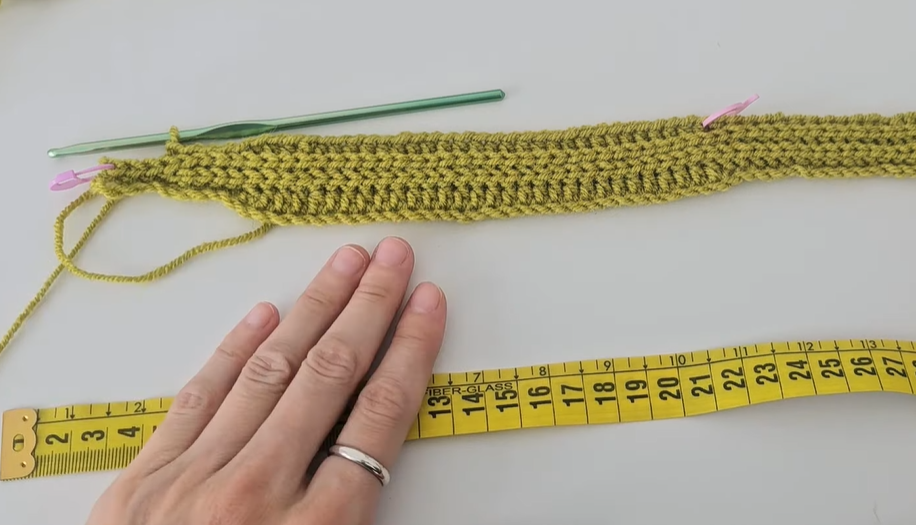
- Measuring Tape: To ensure your panel is the correct length before seaming.
📏 Finished Size & Customization
This pattern is written for a standard adult size (unisex). The design is highly adaptable for other sizes.
- Adult Beanie (Approximate):
- Height (Unfolded): 11.5 inches (29 cm)
- Circumference (Stretched): 21 – 23 inches (53 – 58 cm)
- Customization Guide:
- To adjust Height/Depth: Change the number of foundation chain stitches in Part 1. (More chains = Taller hat).
- To adjust Width/Circumference: Change the total number of rows in Part 2. (More rows = Wider hat. Aim for a length about 2 inches less than the head circumference, as the ribbing stretches significantly.)
📝 Abbreviations (US Terms)
This pattern uses minimal stitches:
- ch: chain
- sl st: slip stitch
- hdc: half double crochet
- st(s): stitch(es)
- BLO: back loop only
- dec: decrease (hdc2tog – half double crochet two together)
💡 Important Notes Before You Start
A couple of tips to ensure your ribbing is perfect and your hat has a seamless look:
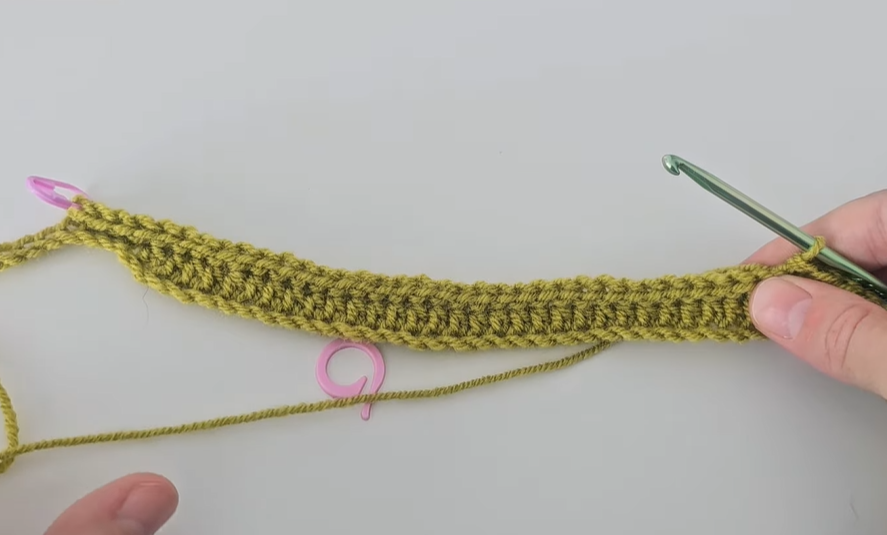
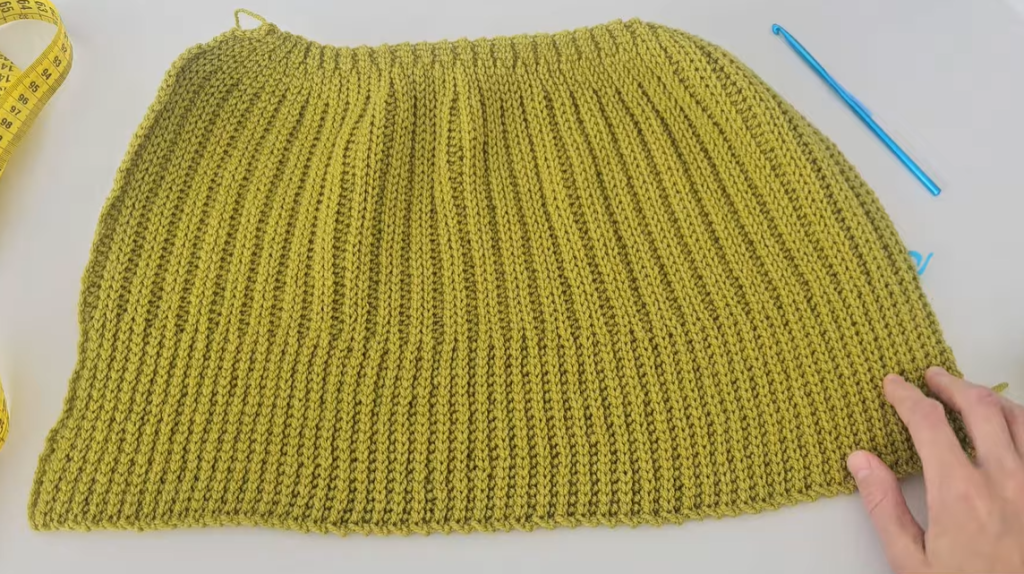
- Construction Method: This hat is crocheted flat in one long rectangle, with the ribbing running vertically from brim to crown. The rectangle is then seamed up the side to form the beanie tube.
- Ribbing Technique: The ribbed texture is created by working HDC into the BLO of the previous row’s stitches.
- Turning Chain: Start every row with a Chain 1. This chain DOES NOT count as a stitch. It’s only there to bring the yarn up to the correct height for the next row.
- Brim Depth: For the deep cuff shown in the image, we dedicate the bottom 10-12 stitches of the foundation chain to the brim height.
🌳 Part 1: The Beanie Panel (Worked Flat)
We will create a rectangular panel approximately 11.5 inches tall by 20-21 inches long.
- Foundation Chain (Determines Height): Ch 42. (This allows for 10 chains for the folded brim, 30 chains for the body, and 2 chains for decreases at the crown).
- Row 1 (First Row): Hdc in the 2nd ch from the hook, and 1 hdc in each remaining chain across. Ch 1, turn. (41 hdc)
- Row 2 (Ribbing Established): Work 1 hdc in the BLO of each st across. Ch 1, turn. (41 hdc)
- Repeat Row 2 for a total of 60 rows (or until the panel, when slightly stretched, measures approximately 20-21 inches long).
- Important Check: Ensure your tension remains firm but not overly tight. The resulting fabric should have excellent horizontal stretch for a comfortable fit around the head.
⬆️ Part 2: Shaping the Crown (The Last 4 Rows)
To avoid a bulky gather at the top, we introduce subtle decreases over the final rows. The brim section (the first 10 stitches) remains untouched.
- The first 10 stitches (the brim) will always be worked as normal HDC BLO.
- Decreases will happen only over the remaining 31 stitches (the crown).
- Row 61 (Decrease 1):
- Work 1 hdc in the BLO of the first 10 sts (brim).
- Work 1 hdc in the BLO of the next 29 sts.
- Hdc2tog (dec) over the last 2 sts. Ch 1, turn. (40 hdc)
- Row 62 (No Decrease):
- Work 1 hdc in the BLO of the first 10 sts (brim).
- Work 1 hdc in the BLO of the remaining 30 sts. Ch 1, turn. (40 hdc)
- Row 63 (Decrease 2):
- Work 1 hdc in the BLO of the first 10 sts (brim).
- Hdc2tog (dec) over the next 2 sts.
- Work 1 hdc in the BLO of the next 26 sts.
- Hdc2tog (dec) over the last 2 sts. Ch 1, turn. (38 hdc)
- Row 64 (Final Row):
- Work 1 hdc in the BLO of the first 10 sts (brim).
- Work 1 hdc in the BLO of the remaining 28 sts. Do NOT Ch 1. (38 hdc)
🧵 Part 3: Seaming and Final Touches
We’re in the home stretch—time to assemble the hat!
- Seam the Sides:
- Fold the panel in half lengthwise, lining up Row 1 (the foundation chain side) with Row 64 (the finished side).
- Using the yarn tail attached to your hook, slip stitch (sl st) the two edges together. Work through the BLO of the final row and the starting chain loop of the first row for a flatter, less visible seam.
- Continue seaming until you reach the last stitch at the top edge of the crown.
- Fasten Off (FO), leaving a very long tail (about 20 inches) for closing the crown.
- Close the Crown:
- Thread the long tail onto your yarn needle.
- Weave the needle in and out through the end of every row (about 64 total weaving points) all the way around the top opening.
- Once you have woven through every row end, pull the yarn tail firmly to cinch the top opening completely shut.
- Secure the gathered center by stitching back and forth several times. Knot the yarn tail on the inside and weave in the end.
- Finish:
- Weave in the starting tail from the foundation chain.
- Flip the hat right-side out.
- Fold the bottom 10-12 rows upward to form the deep, ribbed cuff.
Video Tutorial:
🎉 Congratulations!
You’ve successfully crocheted your beautiful Olive Grove Ribbed Beanie! Its simple elegance and incredible stretch make it the perfect hat for any season. Enjoy the cozy comfort of your new favorite crochet accessory!