
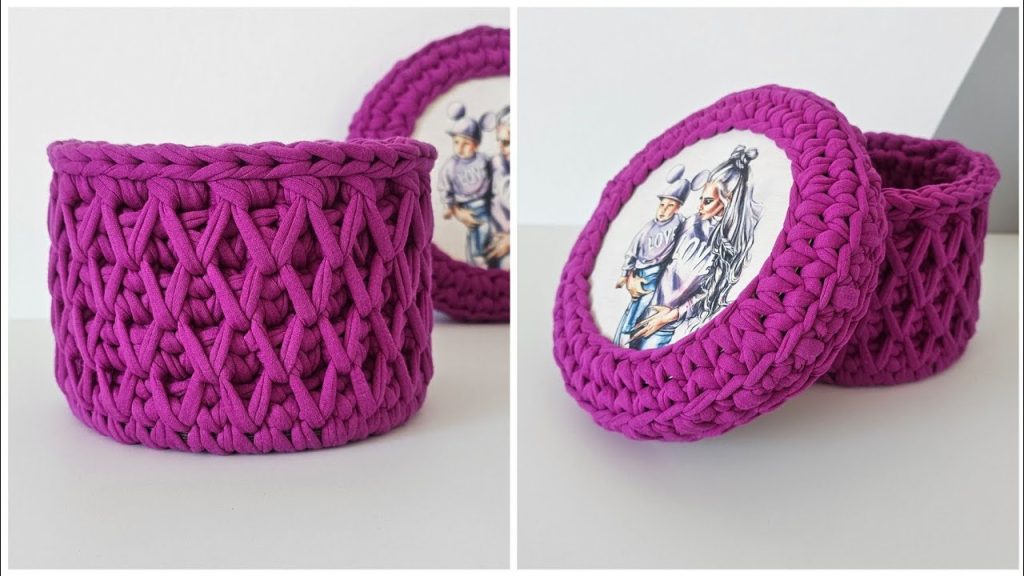
Welcome, storage solution fanatics! Are you ready to tackle a basket project that is not only incredibly robust but also stunningly decorative? Today, we’re diving into the “Majestic Diamond Storage Box,” a breathtaking container featuring a rich, textured diamond pattern and a unique lid designed to showcase a favorite photo, graphic, or piece of fabric.
This project is made using thick T-shirt yarn, which gives the box its necessary rigidity. The star of the show is the Diamond Weave Stitch (a type of extended tapestry crochet) that creates a dense, gorgeous surface. This pattern will guide you through achieving that firm, woven texture and constructing the professional-looking lid.
Grab your boldest chunky yarn and let’s crochet something truly majestic!
🧶 Materials You’ll Need
Gather these items for your structural storage box:
- Yarn:Super Bulky T-Shirt Yarn (Weight 6 or 7). A thick, non-stretchy version is essential for maintaining the box’s shape.
- Color: Majestic Purple (or color of choice).
- Quantity: Approximately 250 – 350 yards (The textured stitch uses more yarn than simple single crochet).
- Crochet Hook: 7.0 mm (L) or 8.0 mm (M). You must choose a hook size that forces extremely tight tension.
- Wooden/Acrylic Base & Lid Kit (Recommended): Two circular pieces (one base, one lid) with pre-drilled holes, approximately 6 to 8 inches (15-20 cm) in diameter.
- The lid insert will require a piece of clear plastic/glass and a photo/decal cut to fit the inside diameter.
- Smaller Hook (Optional): A 4.0 mm or 5.0 mm hook for starting on the wooden base/lid holes.
- Stitch Marker: Essential for working in continuous rounds.
- Yarn Needle (Tapestry Needle): For weaving in ends.
- Scissors.
📏 Finished Size & Gauge
- Base Diameter: 6 – 8 inches (15 – 20 cm)
- Height (Body): 4 – 5 inches (10 – 13 cm)
- Gauge: Focus entirely on tension. The fabric must be incredibly dense and sturdy. Your basket should stand up straight and stiffly on its own. The stitch count must be a multiple of 4 for the Diamond Weave Stitch.
📝 Abbreviations & Special Stitches (US Terms)
We will use a special stitch that creates the woven texture.
- ch: chain
- sl st: slip stitch
- sc: single crochet
- st(s): stitch(es)
- MR: Magic Ring
- BLO: back loop only
- Diamond SC (dsc): Diamond Single Crochet (or Extended Tapestry SC). (See notes below.)
💡 Important Notes & Special Techniques
Mastering the Diamond SC is the secret to this box’s impressive texture.
- Diamond Single Crochet (dsc): This technique is similar to the Tapestry SC (tsc), but instead of inserting the hook into the center of the V from the previous round, you insert it two rounds below, skipping the stitch in the round immediately below. This creates the long, diagonal bars that form the “diamond” shape.
- Working in the Round: The sides are worked in continuous spirals (no joining with a sl st) to keep the texture consistent.
- Tension is Paramount: Pull your yarn snug after every stitch. Loose tension will result in a floppy basket.
- Stitch Count: Ensure your stitch count is a multiple of 4 (e.g., 40, 48, 56) before starting the body pattern.
🧱 Part 1: The Body – Base and Transition
We will use the sturdy wooden base for this project.
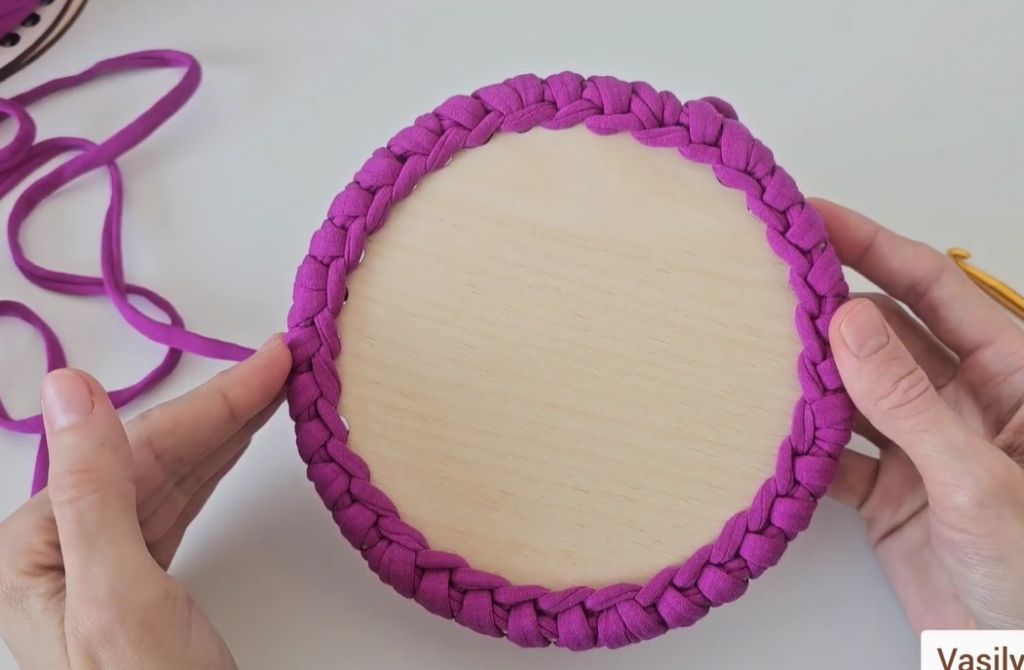
- Base Round 1 (Joining): Using your smaller hook and your main color, work 1 sc into every hole around the wooden base. Count your stitches and ensure the total is a multiple of 4 (adding increases if needed, placing them in the same hole). Do NOT join. Place a stitch marker. (E.g., 48 sts)
- Transition Round (Shaping): Work 1 sc in the BLO of each st around. Do not join. (This round creates the defined corner).
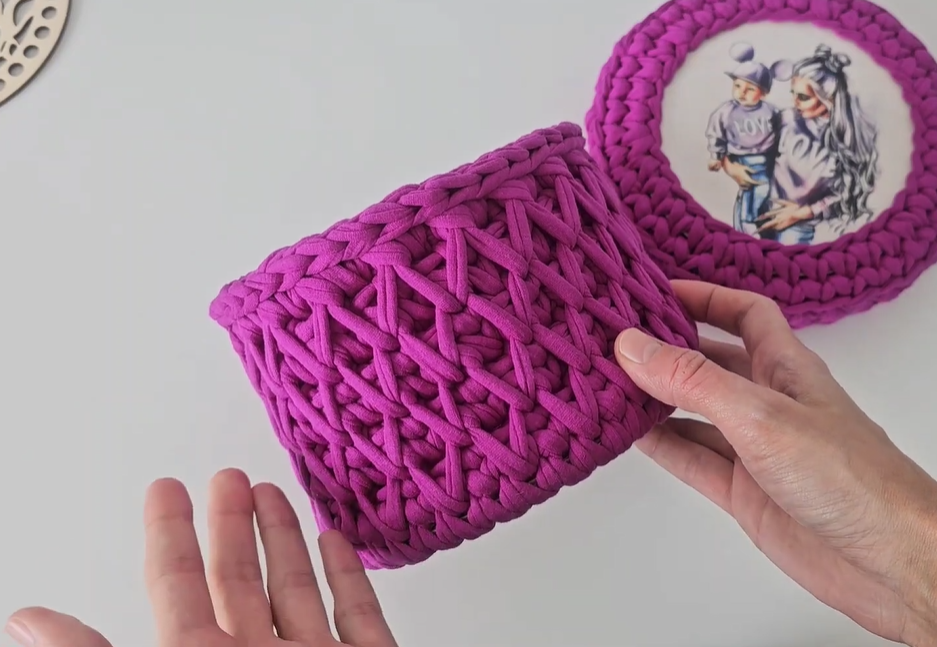
💎 Part 2: The Diamond Weave Sides
This is where the magic happens! The pattern alternates between a simple SC row and the decorative DSC row.

- Round 1 (Foundation): Work 1 sc in every stitch around. (48 sts)
- Round 2 (Pattern Set-up):[1 sc in the next 3 sts, 1 dsc in the next st] repeat around. (48 sts)
- To make a dsc here: Insert your hook into the center of the ‘V’ of the stitch two rounds below (the Transition Round). Yarn over, pull up a loop (it should be tall). Yarn over, pull through both loops.
- Round 3: Work 1 sc in every stitch around. (48 sts)
- Round 4 (Diamond Center):[1 dsc in the next st, 1 sc in the next 3 sts] repeat around. (48 sts)
- To make a dsc here: Insert your hook into the center of the ‘V’ of the stitch two rounds below (Round 2). This places the long stitch directly above the SCs from Round 2, shifting the pattern to create the diamond shape.
- Round 5: Work 1 sc in every stitch around. (48 sts)
- Round 6: [1 sc in the next 3 sts, 1 dsc in the next st] repeat around. (48 sts)
- Repeat Rounds 3-6 until the basket reaches the desired height (about 4-5 inches). The pattern is formed by alternating the placement of the long DSC stitch.
🖼️ Part 3: The Lid and Frame
The lid uses the second wooden piece to create a frame for the image.

Lid Frame
- Lid Round 1 (Joining): Using the second wooden piece and your smaller hook, work 1 sc into every hole around the edge. Ensure the stitch count is the exact same as the body (e.g., 48 sts). Do not join.
- Lid Round 2 (Transition): Work 1 sc in the BLO of each st around. Do not join.
- Lid Round 3 (Frame Sides): Work 1 tsc (Tapestry SC) in every st around. Do not join.
- Lid Round 4 (Rim): Work 1 reverse sc (crab stitch) into every stitch around. Sl st to the first st to join. FO and weave in ends.
Lid Underside (Lip)
This piece ensures the lid stays perfectly seated on the box. It will be a small flat circle.
- Start: Make a MR. Ch 1. Work 8 sc into the MR. (8 sts)
- Round 2: Sc inc in each st around. (16 sts)
- Round 3: [1 sc in next st, sc inc in next st] repeat around. (24 sts)
- Round 4: [1 sc in next 2 sts, sc inc in next st] repeat around. (32 sts)
- Continue increasing until this crochet circle is slightly smaller than the inside diameter of the box body.
- Assembly Tail: FO, leaving a long tail for sewing.
🖼️ Part 4: Final Assembly & Customization
- Weave in Ends: Securely weave in all tails from the body and the lid frame.
- Insert Customization: Insert your chosen photo/graphic into the opening of the lid, centered on the wooden disc. Place a piece of clear plastic or glass over the photo to protect it.
- Attach Lip: Place the crochet circle (Lid Underside) inside the lid frame opening. Using the long tail, sew the underside piece securely to the inside edge of the lid frame. This locks the image/glass in place and creates the snug lip.
- Test Fit: Place the finished lid onto the box. The underside lip should fit perfectly inside the box’s rim, holding the lid firmly in place.
Video Tutorial:
🎉 Congratulations!
You’ve completed your stunning Majestic Diamond Storage Box! This is a project to be proud of—it’s sturdy, functional, and features that show-stopping diamond texture. Enjoy organizing your treasures in royal style!


