
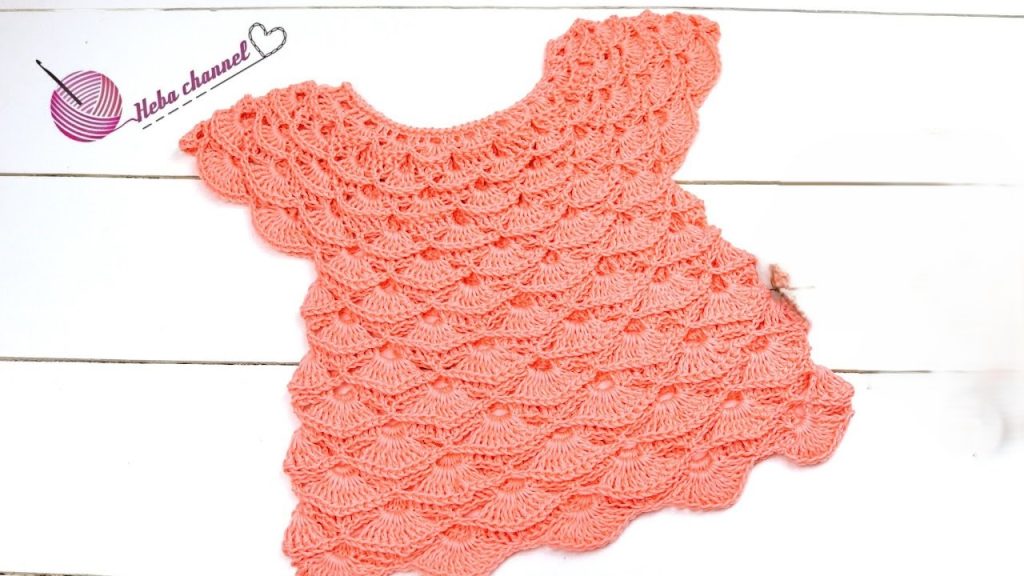
Welcome, crocheters! Prepare to dive into a project that is all about texture and drape: the Coral Sea Scallop Dress. This stunning piece is worked entirely in a dense, interlocking Fan/Shell Stitch, creating beautiful rows of scallops that shape the yoke, form delicate cap sleeves, and give the hem a delightful wavy finish. The overall effect is elegant, cozy, and simply beautiful.
This pattern is written for an Intermediate skill level due to the specific increases needed to shape the yoke with the shell stitch, but the repeating nature of the stitch makes the skirt enjoyable and fast.
🛍️ Section 1: Materials & Gauge
🧶 Supplies You’ll Need
- Yarn: Approximately 350 – 450 yards of DK weight (Category 3) yarn. The sample uses a gorgeous solid coral/peach color. A soft cotton or acrylic blend is perfect for baby wear.
- Hook: 4.0 mm (G/6) crochet hook, or size needed to obtain gauge.
- Buttons: 3 small buttons (approx. 0.5 inches / 1.25 cm) for the back neck closure.
- Tools: Stitch markers (crucial for marking the yoke corners!), a tapestry needle, and scissors.
📏 Gauge Check
Work in the Shell Stitch Pattern (Round 2 of the Yoke, explained below): 4 completed Shells and 5 rows of the pattern should measure 4 inches (10 cm) wide and 4 inches (10 cm) tall.
- Tip: If your piece is too tight or too loose, adjust your hook size until you meet the gauge.
📝 Key Abbreviations
| Abbreviation | Meaning | Abbreviation | Meaning | |
| Ch | Chain | Dc | Double Crochet | |
| Sl St | Slip Stitch | Tr | Treble Crochet | |
| Sc | Single Crochet | Dc Shell | 5 Dc in the same stitch/space | |
| Hdc | Half Double Crochet | Shell | Fan/Shell Stitch (5 Dc) | |
| Sk | Skip | Sp | Space |
Export to Sheets
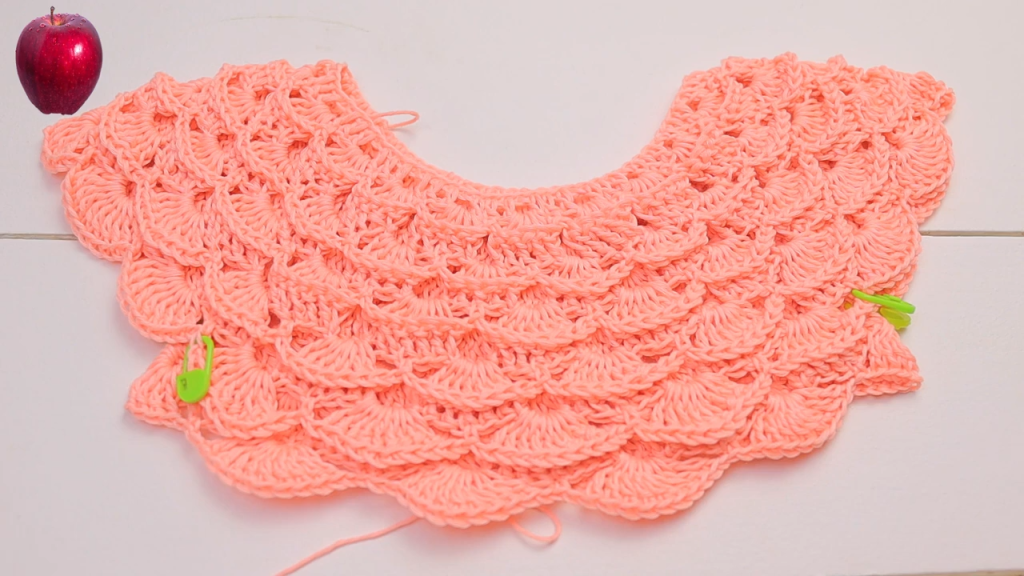
🌸 Section 2: The Yoke (Top & Sleeves)
The yoke is worked flat in rows to create the back opening. This pattern is sized for 6-12 months. The challenging part is incorporating the shell stitch increases at the four corners.
Foundation & Initial Shell Rows
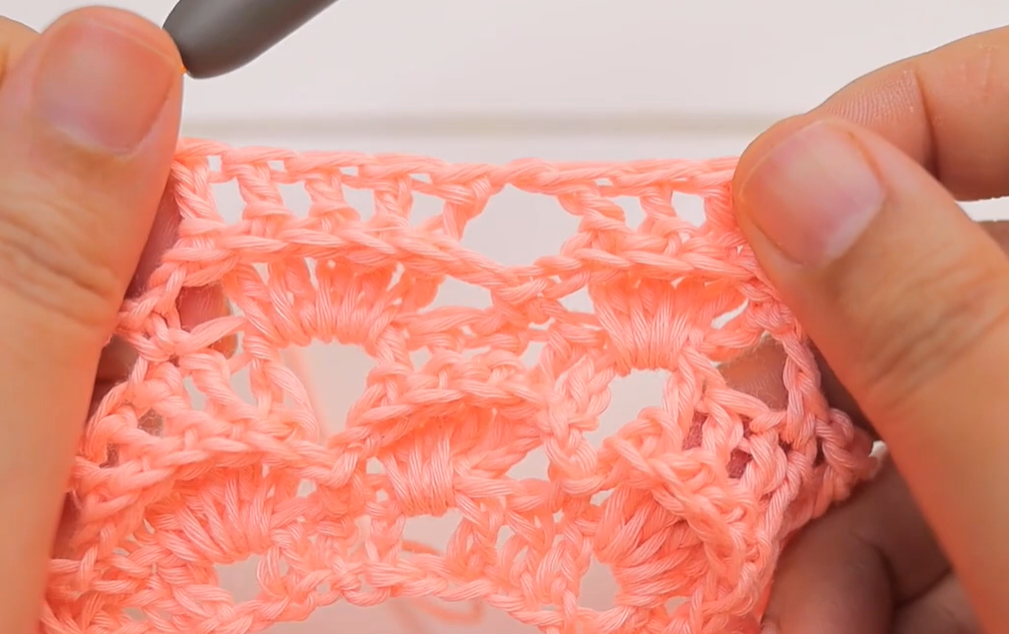
Row 1 (Foundation): Ch 76. Sc in the 2nd Ch from the hook and in each Ch across. (75 Sc). Ch 3 (counts as 1st Dc), turn. Note: We need a number divisible by 5 for the shells. 75 / 5 = 15 shells.
Row 2 (Shell Start): Dc in the same st. Sk 2 sts, Sc in the next st. Sk 2 sts, 5 Dc Shell in the next st. Rep from the parentheses around, ending with Sk 2 sts, Sc in the last st. Ch 3, turn. (15 shells, 16 Sc). To manage the corners, we will treat the Sc stitches as the foundation for the next row’s shell.

Corner Shaping with Shells
We divide the 15 shells: 3 (Back Right) | 3 (Sleeve Right) | 6 (Front) | 3 (Sleeve Left). The corners will fall on the Sc stitches between the shells.
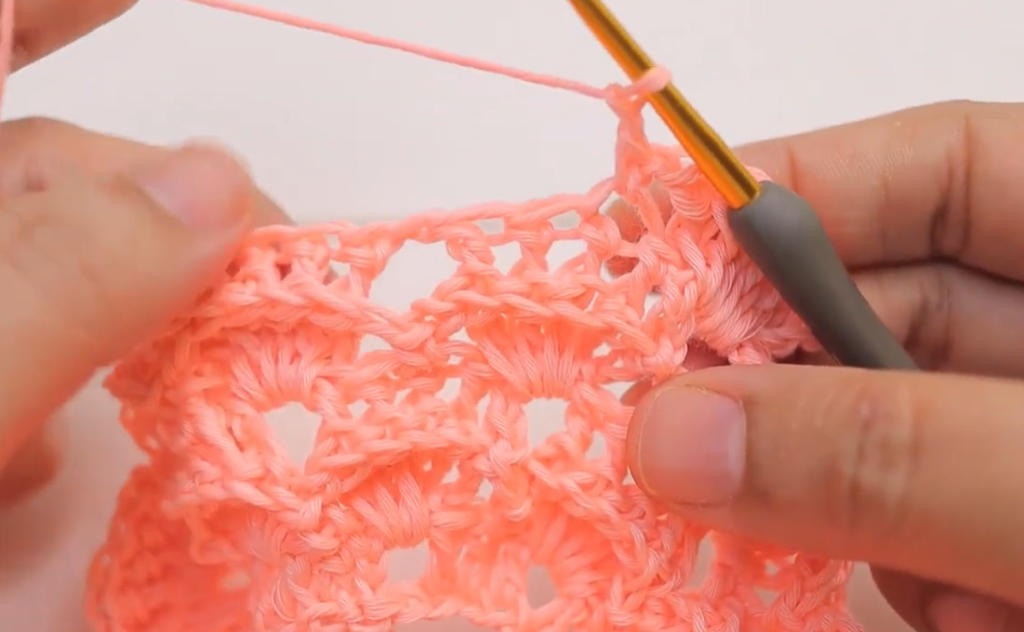
Row 3 (Increase Row): 2 Dc in the first Sc. Sk 2 sts, Sc in the center Dc of the next shell. Sk 2 sts, 5 Dc Shell in the next Sc. Rep this (Shell in Sc, Sc in Shell) pattern 2 more times (3 shells for the Back Panel).
- Corner 1: Work (5 Dc Shell, Ch 1, 5 Dc Shell) into the next Sc (This Sc is your first corner marker).
- Sleeve Panel: Sc in the center Dc of the next shell. 5 Dc Shell in the next Sc. Rep 2 more times (3 shells for the Sleeve Panel).
- Corner 2: Work (5 Dc Shell, Ch 1, 5 Dc Shell) into the next Sc.
- Front Panel: Sc in the center Dc of the next shell. 5 Dc Shell in the next Sc. Rep 5 more times (6 shells for the Front Panel).
- Corner 3: Work (5 Dc Shell, Ch 1, 5 Dc Shell) into the next Sc.
- Sleeve Panel: Sc in the center Dc of the next shell. 5 Dc Shell in the next Sc. Rep 2 more times (3 shells for the Sleeve Panel).
- Corner 4: Work (5 Dc Shell, Ch 1, 5 Dc Shell) into the next Sc.
- Back Panel: Sc in the center Dc of the next shell. 5 Dc Shell in the next Sc. Rep 2 more times. Sl St to the last Sc. Ch 3, turn. (You should have 27 shells total, 4 Ch-1 corner sps, and 16 Scs.)
Row 4: Work the established pattern (Shell in Sc, Sc in Shell). When you reach a Ch-1 corner sp, work a 5 Dc Shell into the Ch-1 sp and place a stitch marker here. Continue the pattern across the next panel. Ch 3, turn. (This row increases the total shell count by 4, one at each corner.)
Row 5 (Increase Row): Continue the pattern (Shell in Sc, Sc in Shell). When you reach the marked Shell at the corner, work two 5 Dc Shells with a Ch 1 between them into the center Dc of that marked shell. Move the stitch marker to the Ch-1 sp. Continue the pattern. Ch 3, turn. (This row increases the total shell count by 4 again.)
Rows 6 – 8: Repeat Rows 4 and 5 (alternating increase placement). Continue until the yoke measures approximately 4.5 – 5 inches (11.5 – 12.5 cm) from the neck, ensuring it fits comfortably around the baby’s chest.
Joining for Armholes
- Row 9 (Armhole Row): Continue the pattern across the first Back Panel. When you reach the first corner Ch-1 sp, work a 5 Dc Shell into the corner sp. Skip all shells across the entire Sleeve Panel (including the next corner), and join with a Sc into the first Sc/center Dc of the next Front Panel shell.
- Continue the shell pattern across the Front Panel.
- When you reach the next corner Ch-1 sp, work a 5 Dc Shell into the corner sp. Skip all shells across the entire Sleeve Panel, and join with a Sc into the first Sc/center Dc of the next Back Panel shell.
- Continue the pattern across the last Back Panel. Join with Sl St to the beg Ch 3 to form a circle. (Do NOT turn).
🌊 Section 3: The Skirt
The entire skirt is worked in the round in the established shell pattern, continuing the scallops seamlessly.
Shell Pattern Repeats (In the Round)
- Round 1 (Waist): Ch 3 (counts as 1st Dc), 2 Dc in the Sc where you joined. Sc in the center Dc of the next shell. 5 Dc Shell in the next Sc. Rep from the parentheses around. Sc in the center Dc of the last shell. Work 2 Dc in the beg Sc. Join with Sl St to top of Ch 3.
- Round 2: Sl St into the first Dc (to center your work). Ch 1, Sc in the center (3rd) Dc of the shell. 5 Dc Shell in the next Sc. Sc in the center (3rd) Dc of the next Dc Shell. Rep from the parentheses around. Join with Sl St to the beg Sc.
- Round 3: Sl St into the Sc. Ch 3 (counts as 1st Dc), 2 Dc in the same Sc. Sc in the center (3rd) Dc of the next Dc Shell. 5 Dc Shell in the next Sc. Rep from the parentheses around. Sc in the center Dc of the last shell. Work 2 Dc in the beg Sc. Join with Sl St to top of Ch 3.
- Continue repeating Rounds 2 and 3 until the skirt reaches the desired length. For a 6-12 month size, stop when the skirt is approximately 8-10 inches (20-25 cm) long from the underarm. The natural increase in stitches as the pattern spreads will give the skirt a beautiful, flowing flare.
Final Scallop Hem
The final row simply ends the shell pattern, naturally creating the pronounced scallop edge seen in the image. The final round will be the one that ends with the Shell in the Sc (like Round 3). FO.
✨ Section 4: Edging and Finishing
🎀 Edging the Openings
- Neckline & Back Slit: Join yarn at the bottom of the back opening. Ch 1, Sc evenly up the edge, around the entire neckline, and back down the other side of the slit. FO.
- Sleeve Edging: The cap sleeves are created naturally by the last row of shells on the yoke. You can leave the edges as is for a beautiful scalloped finish, or add a simple Sc row for neatness. If adding Sc: Join yarn at the center bottom of the armhole. Ch 1, Sc evenly around the edge, working one Sc into the center of each shell and one Sc into each Sc between shells. FO. Repeat for the second sleeve.
✂️ Button Closure
- Button Band: Use one side of the back slit as the button band. Join yarn at the bottom and Sc evenly up the edge.
- Buttonhole Band: Use the opposite side of the back slit as the buttonhole band. Work one row of Sc evenly up the edge. Row 2 (Buttonholes): Sc in the first st. Ch 1, Sk 1 st (for buttonhole), Sc in the next few sts. Repeat for 3 buttonholes, evenly spaced. Sc to the top. FO.
Video Tutorial:
💖 Final Assembly
- Sew Buttons: Sew the 3 buttons onto the button band, aligning them with the buttonholes.
- Weave Ends: Weave in all loose yarn ends securely using your tapestry needle.
Your stunning Coral Sea Scallop Dress is now ready! The texture on this piece is truly remarkable—you’ve created a work of art!


