
✨ Introduction: A Pocket-Sized Treasure
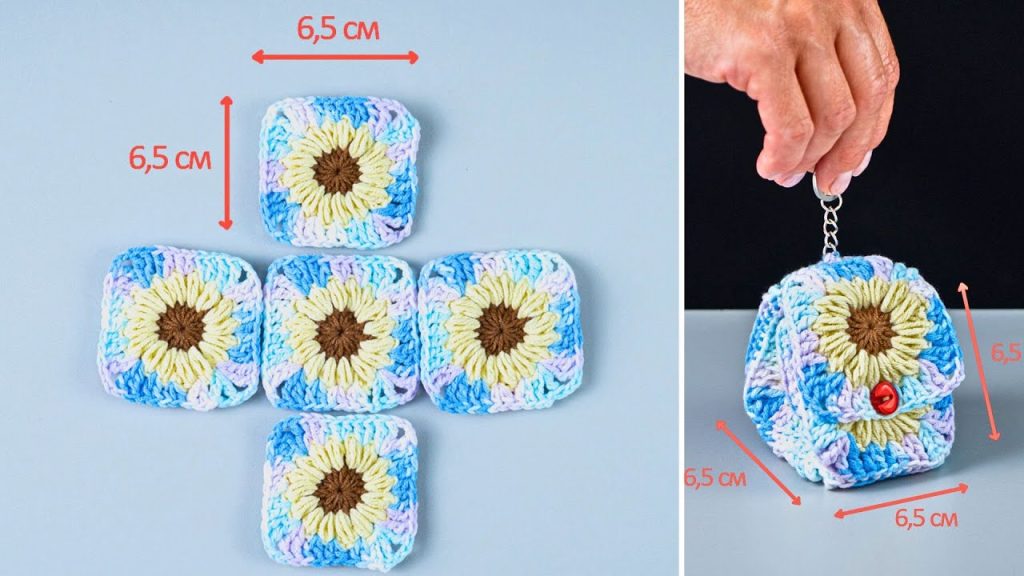
Welcome to the detailed crochet pattern for the Heirloom Lacy Granny Square Wallet! Inspired by the elegant and functional design shown in the video, this pattern creates a beautiful, small pouch perfect for holding coins, cards, or other small essentials. It features the classic granny stitch construction with open, lacy rounds, giving it a delicate, almost vintage feel, while remaining practical and sturdy enough for daily use.
This wallet is constructed from two primary components: a single, large traditional granny square that forms the body, and a smaller section worked in rows to create the flap. The entire piece is finished with a neat, durable border and is designed to be easily personalized with a button or clasp closure. This is a quick and satisfying project that makes a wonderful gift!
Why You’ll Love This Wallet
- Classic Look: Uses the traditional granny square stitch for a timeless, lacy aesthetic.
- Efficient Construction: The body is made from one piece, minimizing seaming and speeding up the project.
- Stash Buster: Perfect for using up small amounts of leftover yarn in complementary colors.
- Travel Friendly: Its small size makes it an ideal project for on-the-go crocheting.
📚 Materials & Terminology
| Abbreviation | Meaning |
| ch | Chain |
| st(s) | Stitch(es) |
| sl st | Slip Stitch |
| sc | Single Crochet |
| dc | Double Crochet |
| ch-sp | Chain space |
| rep | Repeat |
| MR | Magic Ring |
| ( ) | Repeat instructions inside parentheses |
Materials Needed
- Yarn: Worsted Weight (#4) or DK Weight (#3) yarn in 2-3 colors. Using cotton or a cotton blend is recommended for durability and stitch definition.
- Color A: Center/Main Body (e.g., Pink).
- Color B: Secondary/Accent Color (e.g., White).
- Color C: Final Border/Edging Color (e.g., Green).
- Hook: A hook size appropriate for your yarn. 3.5 mm to 4.5 mm is a good range.
- Tools: Scissors, tapestry needle, and a button (approx. 15–20 mm) for the closure.
📐 Gauge & Sizing
- Gauge: The size of the finished square determines the wallet’s dimensions. Work until your square measures approximately 12 to 14 inches (30–35 cm) across before folding.
- Finished Wallet Dimensions (Approximate, folded):
- Width: 6–7 inches (15–18 cm)
- Height: 4–5 inches (10–12.5 cm)
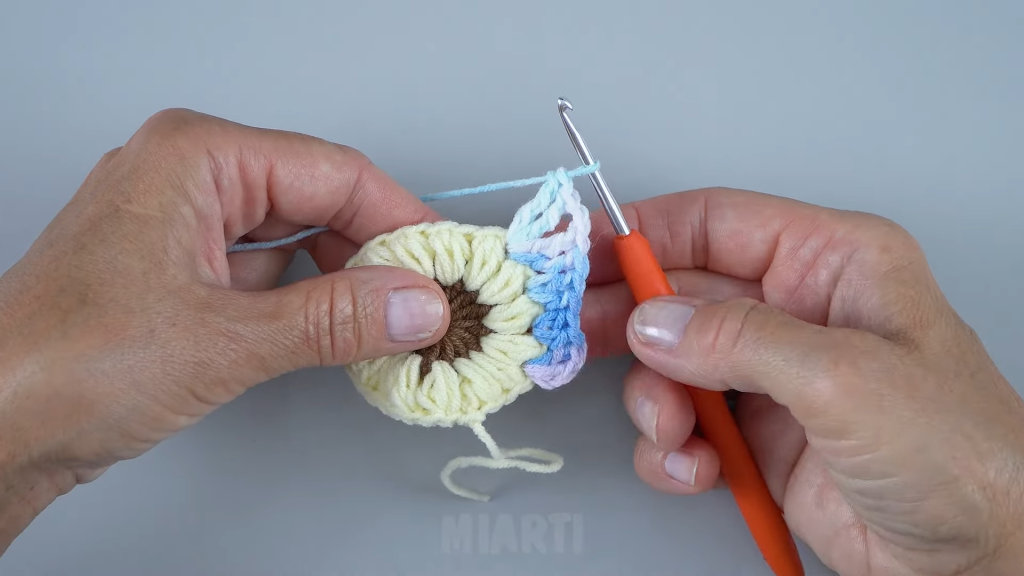
🟥 Part 1: The Main Wallet Body (Granny Square)
The wallet body is created from a single large granny square. You will work in rounds until the square is the size you desire for the wallet’s height and width.
Color Key: R1-R4 in Color A, R5-R8 in Color B, R9+ in Color C or your chosen pattern.

Round 1: Foundation (Color A)
- Start with a Magic Ring (MR) or Ch 4 and sl st to join.
- Ch 3 (counts as 1 DC). Work 2 DC into the ring.
- Corner: Ch 2.
- *(Work 3 DC into the ring. Ch 2).* Rep from * 2 more times.
- Sl st to the top of the beg Ch 3 to join. Cut Color A and secure.
Round 2: Building the Square (Color B)
- Join Color B with a sl st in any Ch-2 corner space.
- Ch 3 (counts as 1 DC). Work 2 DC, Ch 2, 3 DC into the same corner space. (First corner made).
- Side: Ch 1.
- Corner: Work (3 DC, Ch 2, 3 DC) into the next Ch-2 corner space.
- Rep Steps 3 and 4 twice more.
- Finish the final side with Ch 1.
- Sl st to the top of the beg Ch 3 to join.
Round 3: Consistent Increases (Color B)
- Sl st into the next 2 DC and into the Ch-2 corner space.
- Ch 3 (counts as 1 DC). Work 2 DC, Ch 2, 3 DC into the same corner space.
- Side: Ch 1. Work 3 DC into the Ch-1 space from the previous round. Ch 1.
- Corner: Work (3 DC, Ch 2, 3 DC) into the next Ch-2 corner space.
- Rep Steps 3 and 4 twice more.
- Finish the final side: Ch 1, 3 DC in the Ch-1 space, Ch 1.
- Sl st to the top of the beg Ch 3 to join. Cut Color B and secure.
Round 4 and Beyond: Continue Pattern
- Join the next color (e.g., Color C) in any Ch-2 corner space.
- Corner: Work (3 DC, Ch 2, 3 DC) into the corner space.
- Side: Ch 1. Work 3 DC into each Ch-1 space along the side. Ch 1 after the final DC group before the next corner.
- Rep the corner and side pattern until the square reaches your desired size (a total of 10–12 rounds is typical for a wallet).
Final Round of the Square: Finish with one round of SC in every stitch and Ch-1 space (2 SC in the corner Ch-2 space) for a firm edge that is easy to fold and join.
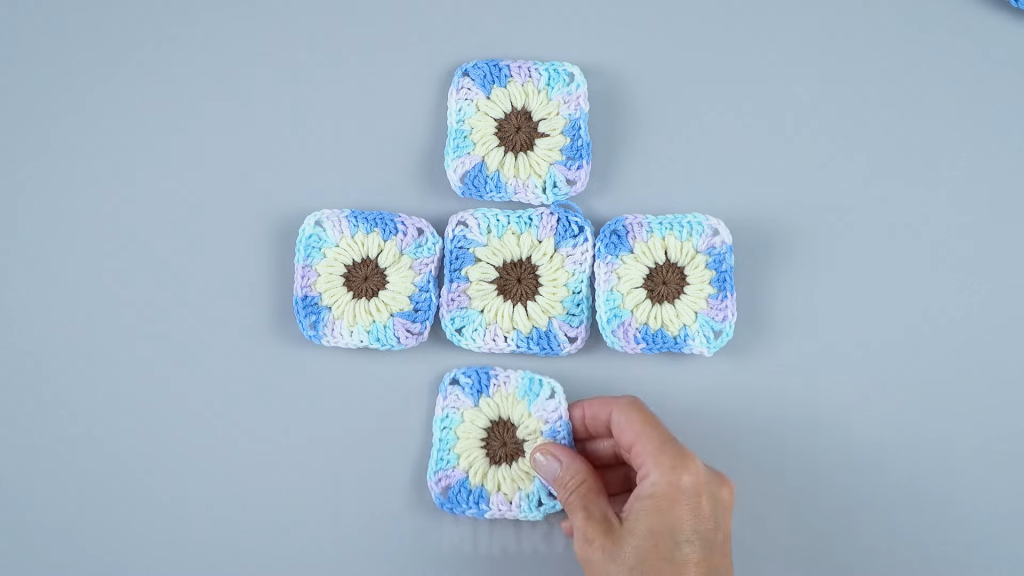
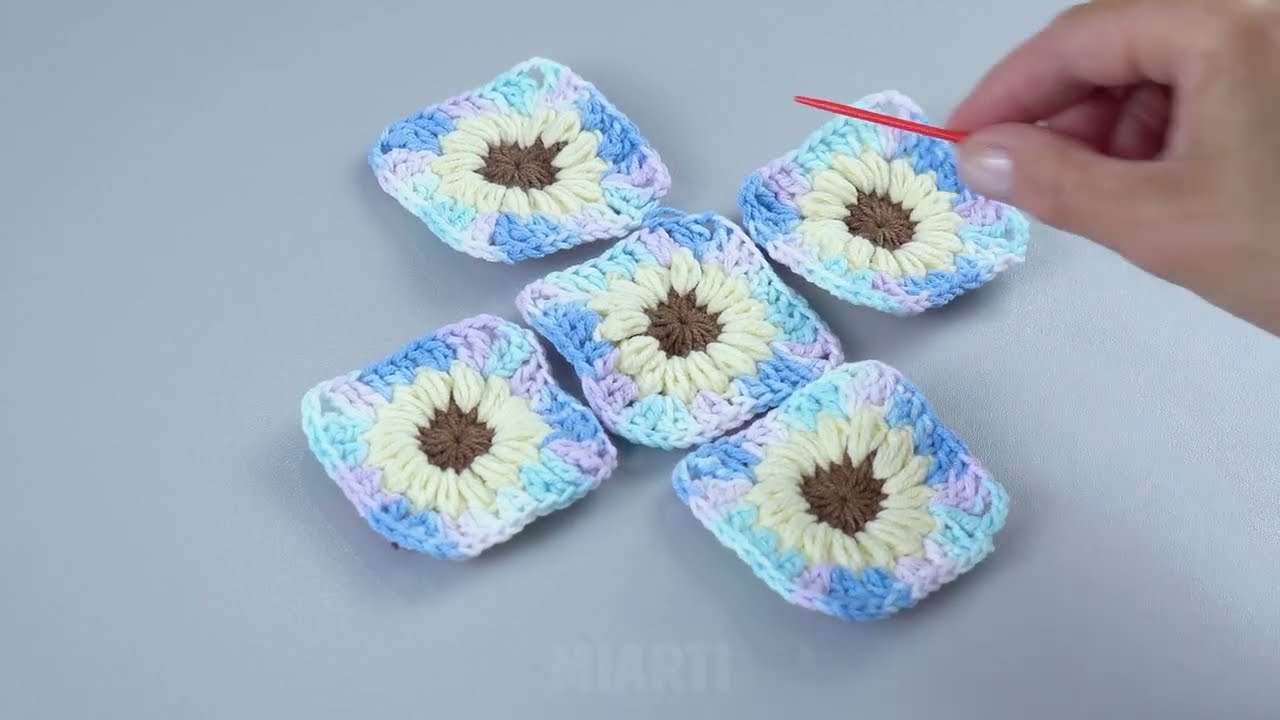
✂️ Part 2: Assembly of the Wallet Body
Once the square is complete, you will fold it and seam two sides to form the pouch.
- Folding: Lay the square flat with the right side facing up.
- Fold one corner towards the center. This section will become the closure flap.
- Fold the opposite corner up so that its two sides align with the two side edges of the flap, forming a pocket. The center section forms the back of the wallet.
- Seaming the Sides: Use Color C and the SC join method for a strong seam.
- Join yarn at the bottom fold of one side.
- Place the two edges right sides together.
- Work SC through both corresponding stitches up the seam until you reach the edge of the flap opening.
- Fasten off and repeat the seam on the opposite side.
- Weave in all ends securely before proceeding to the flap.
🪡 Part 3: The Flap and Edging
The remaining unseamed edges (the top opening and the flap) are finished with a clean border and a buttonhole.
Round 1: Edging the Top Opening (Color C)
- Join Color C with a sl st at one corner where the seam ends.
- Work SC evenly around the entire unseamed edge, starting along the main body opening, continuing around the raw edge of the flap, and finishing back at the starting corner.
- Sl st to the first SC to join.
Round 2: Buttonhole Setup (Color C)
- Ch 1. SC in each st until you reach the center of the flap (measure or count to find the approximate middle).
- Buttonhole: Ch 3 (or the number of chains needed to loop over your chosen button).
- Sk 3 sts.
- SC in the remaining stitches around the flap and the main body opening.
- Sl st to the first SC to join.
Round 3: Final Border (Color C)
- Ch 1. SC in each st around the entire opening.
- When you reach the Ch-3 buttonhole, work 3 SC (or the corresponding number of SC) over the chain loop to secure the buttonhole.
- Continue SC in each st around to the starting point.
- Sl st to the first SC to join. Fasten off.
🔑 Part 4: Finishing and Closure
- Button Placement: Place the button inside the wallet and press the flap down to align the buttonhole. Mark the position of the button on the main body of the wallet, ensuring it lines up perfectly under the buttonhole.
- Sewing the Button: Using a needle and matching thread, firmly sew the button onto the marked spot on the wallet body.
- Final Weaving: Give the wallet a final inspection and weave in any remaining loose ends.
Video Tutorial:
Your detailed, heirloom-style granny square wallet is complete!


