
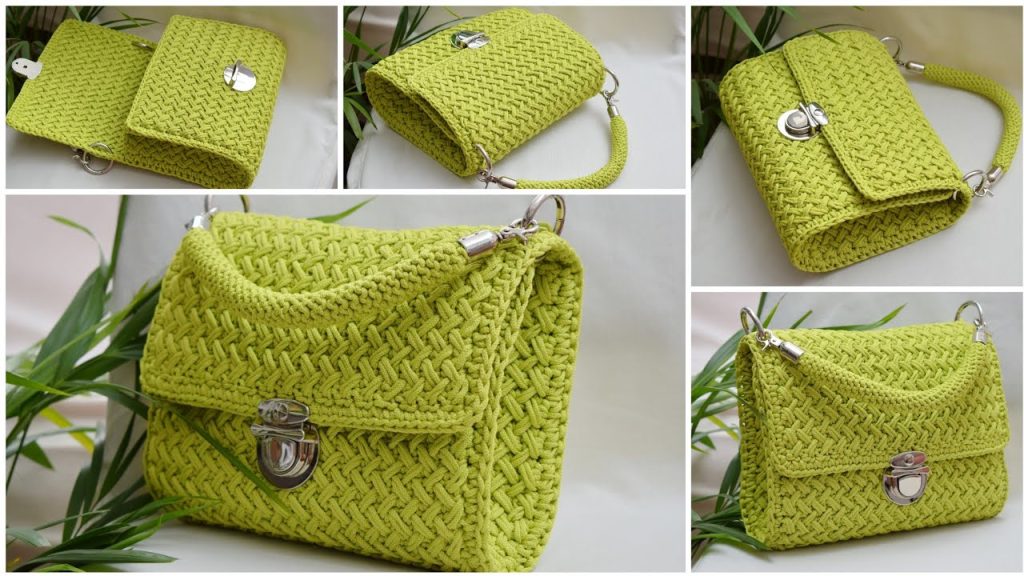
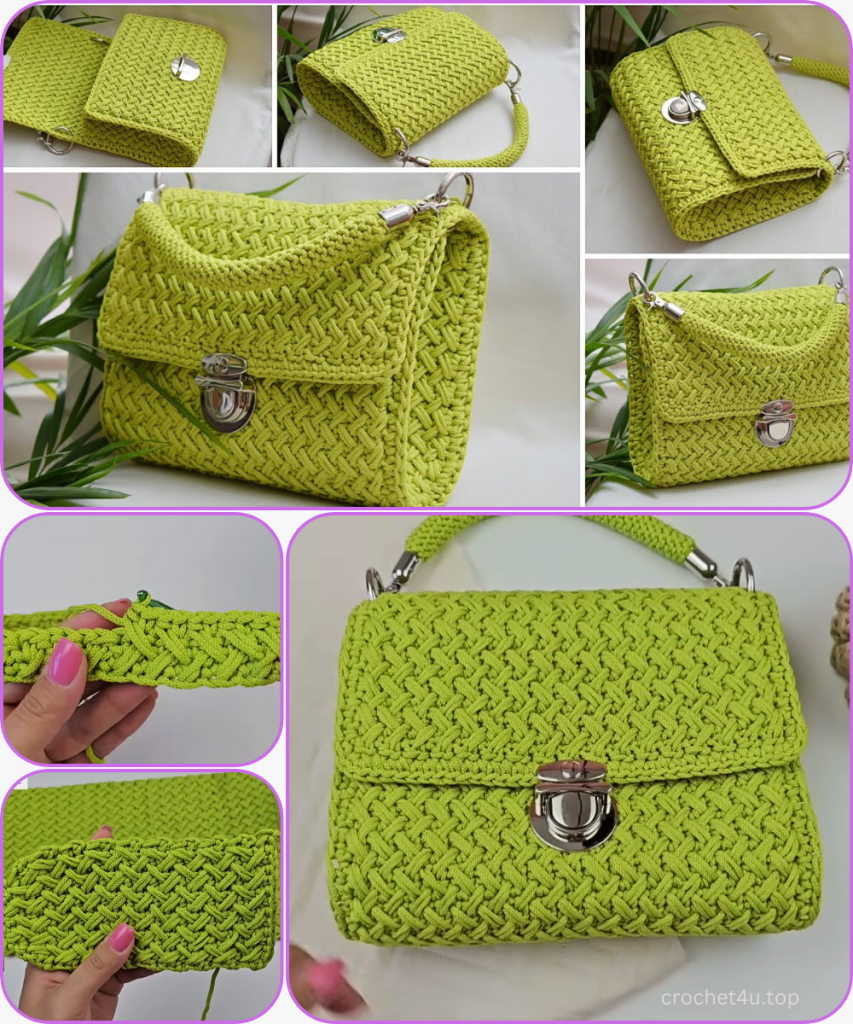
Welcome to the comprehensive pattern for the “Fir Tree Texture” Crossbody Bag, a beautiful, structured accessory perfect for showcasing the crisp, defined texture of polyester cord. This technique, a variation of the Herringbone or V-stitch, creates a dense fabric that requires no lining to hold its shape.
This detailed guide breaks down the construction into the main panel, side gussets, seamless assembly, and the final decorative rope handle.
🌲 Materials & Essentials
| Icon | Item | Details |
| Yarn | Main Yarn (MC) | Approximately 300 meters of 3 mm Polyester Cord. |
| Hook | Main Hook | 3.0 mm (essential for the tight tension needed for structure). |
| Hook | Seaming Hook | 2.5 mm (optional, for tighter assembly seams). |
| Hardware | Portfolio Lock | One Screw-on Portfolio Lock (The video uses White Nickel/Black Nickel). |
| Hardware | D-Rings (2) | Two 40 mm internal diameter Rings (or similar large D-rings). |
| Hardware | Handle Holders (2) | Two Screw-on Handle Holders (approx. 48 mm length). |
| Notions | Markers & Needle | Stitch Markers, Scissors, and Tapestry Needle (sized for the cord). |
📐 Sizing & Gauge Notes
| Icon | Measurement | Result |
| Width | Finished Bag Width | Approx. 25 cm (10 in) |
| Height | Finished Bag Height | Approx. 20 cm (8 in) |
| Depth | Finished Bag Depth | Approx. 8 cm (3 in) |
| Gauge | Texture Pattern | 17 pattern repeats (long HDC st) across the row. |
Important Gauge Note: The pattern relies on very firm tension to maintain the structure of the cord. If your fabric feels loose, consider dropping down half a hook size. The length of the side gusset is critical for proper assembly.
📚 Stitch Guide & Abbreviations
| Abbreviation | U.S. Terminology | Description |
| ch | Chain | |
| sl st | Slip Stitch | |
| sc | Single Crochet | |
| hdc | Half Double Crochet | |
| st(s) | Stitch(es) | |
| rep | Repeat | |
| sk | Skip |
Special Stitch: Long Half Double Crochet (HDC-long)
This stitch is the foundation of the texture:
- Yarn over (YO).
- Insert hook into the designated stitch in the row below (or two rows below) the current working row.
- YO and pull a loop through (the loop should be pulled to the height of the current row).
- YO and pull through all 3 loops on the hook.
Fir Tree Texture Stitch (FTTS) — Main Body Pattern:
The pattern is worked in rows and maintains an odd stitch count (35 stitches), resulting in 17 pattern repeats per row.
🖼️ Part 1: The Main Body Panel (Base, Back, & Flap)
This single long piece forms the back, bottom, and flap of the bag.
- Foundation: Ch 36.
- Row 1 (SC Base): Sk 1 ch. Work 1 SC into the second ch from the hook and in each ch across, working into one loop of the foundation chain. (35 SC).
- Row 2 (FTTS Start – RS): Ch 1, turn.
- Sk the first st. SC into the next st (2nd st).
- YO. Work 1 HDC-long into the corner of the SC base (R1), one row below the skipped st.
- Repeat Pattern 16 times: [Sk 1 st, SC into the next st, YO, 1 HDC-long (insert hook behind the SC just made, into the available stitch one row below)].
- SC into the last st. (17 HDC-longs, 18 SCs = 35 stitches). Ch 1, turn.
- Row 3 (FTTS Continued – WS):
- Sk the first st. SC into the next st.
- YO. Work 1 HDC-long into the stitch beside the long HDC of the row below, ensuring the hook comes out behind the work. This creates the first part of the “V” cross.
- Repeat Pattern 16 times: [Sk 1 st, SC into the next st, YO, 1 HDC-long (insert hook beside the previous long HDC, forming the cross)].
- SC into the last st. (17 HDC-longs, 18 SCs = 35 stitches). Ch 1, turn.
- Row 4 (FTTS Continued – RS): Rep Row 3, paying close attention to place the HDC-long into the correct lower stitch to complete the “V” shape (the herringbone cross).
Continue repeating Row 3 and Row 4 logic until you have completed a total of 62 rows of the Fir Tree Texture Stitch.
Panel Sectioning: The 62 rows form the bag in the following sequence:
- Rows 1-19: Bottom & Front (approx. 20 cm)
- Rows 20-41: Back of the bag (approx. 20 cm)
- Rows 42-62: The Flap (approx. 15 cm)
Cut the yarn, leaving a short tail for hiding later.
🧩 Part 2: The Side Gussets (x2)
You will need to create two identical side gussets. The pattern for the gusset includes initial increases to get the required width, then straight rows.

- Foundation: Ch 6.
- Row 1 (SC Base): Sk 1 ch. Work 1 SC into the second ch from the hook and in each ch across. (5 SC). Ch 1, turn.
- Row 2 (Increase 1): SC inc (2 SC) in the first st. Work FTTS pattern (alternating HDC-long and SC) 2 times. SC inc in the last st. (7 SC total). Ch 1, turn.
- Row 3 (Increase 2): SC inc in the first st. Work FTTS pattern 3 times. SC inc in the last st. (9 SC total). Ch 1, turn.
- Row 4 (Increase 3): SC inc in the first st. Work FTTS pattern 4 times. SC inc in the last st. (11 SC total). Ch 1, turn.
- Row 5 (Straight): Sk 1 st. SC into next st. Work FTTS pattern 4 times. SC into the last st. (11 SC total). Ch 1, turn.
- Rows 6 – 19: Rep Row 5 until you have a total of 19 rows.
Gusset Dimensions Check: The gusset should have 19 rows and a width of 11 stitches. The height (19 rows) should match the combined height of the bottom and front section of the main panel (45 rows/stitches).
Second Gusset: Crochet the second gusset exactly the same, but do not cut the yarn. You will use the live yarn for assembly.
🔗 Part 3: Assembly & Edging
The main panel has 45 rows/stitches along its edge where the gussets attach. The gussets have 19 rows/stitches.

- Preparation: Fold the Main Body Panel where the base meets the back. Place markers on the main panel’s edge where the gusset should be placed (45 rows/stitches total).
- Joining Gusset 1 (Pre-made): Align the first gusset with the marked edge of the main panel (45 stitches to 19 rows). Using the tapestry needle, whipstitch or Sl St the gusset to the main panel, matching one row to one stitch/row end.
- Joining Gusset 2 (Live Yarn): Using the live yarn from the second gusset and the 3.0 mm hook:
- Align the gusset edge to the open edge of the main panel.
- Work 1 SC through the outermost loops of both the gusset row end and the main panel row end, joining the pieces. Work 45 SC along this seam, carefully matching the stitches.
- Flap Edging: Once the second gusset is fully attached, continue working along the edge of the bag.
- Work 1 SC into the end of each of the 19 flap rows.
- Corner: Work 3 SC into the corner stitch.
- Work 1 SC into the end of the next 32 rows (along the top edge of the back panel).
- Corner: Work 3 SC into the corner stitch.
- Work 1 SC into the remaining 19 flap rows.
- Sl st to the first SC to join.
- Decorative Sl St Edge: Ch 1. Work [Sl st into next st, Ch 1, Sk 1] around the entire flap opening. This provides a very firm, clean, final edge.
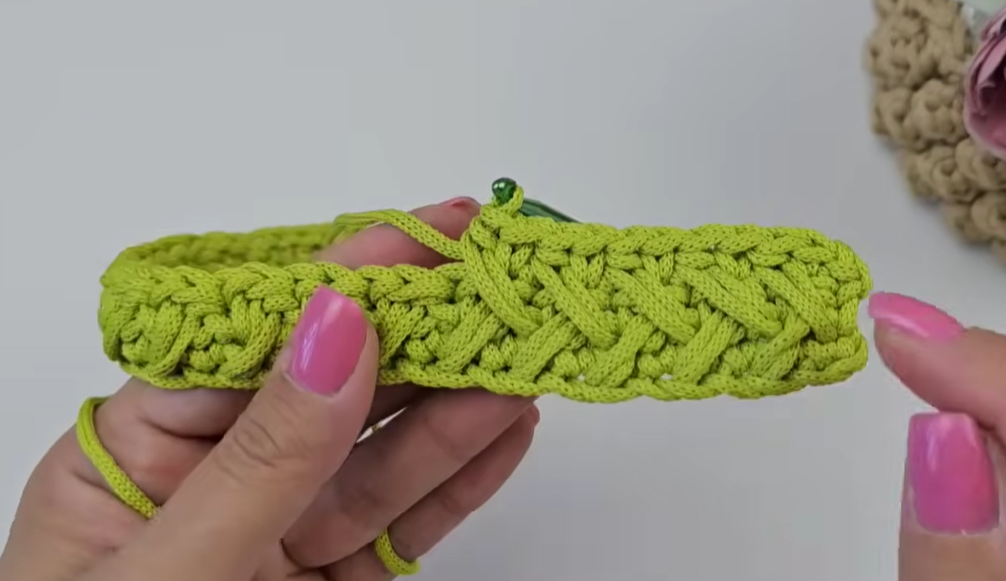
🧵 Part 4: The Rope Handle
This short, sturdy handle is created using a tight spiral of slip stitches, which coils naturally.

- Foundation: Ch 3. Sl st into the first ch to form a small ring.
- Round 1 (Increase): Ch 1. Work 8 sl st around the small ring. (8 sl st total).
- Rounds 2 – 40 (Rope Body): Work 8 sl st per round, continuously in a spiral. Only work into the back loop of the previous sl st to create the tight, rope-like effect.
- Decreases: Skip 1 st. Work 1 sl st. Rep 5 times until only 3 stitches remain.
- Final Round: Work 3 sl st. Cut the yarn, leaving a long tail, and secure the end by weaving the tail through the remaining 3 stitches.
Assembly: Attach the screw-on handle holders to the ends of the rope handle. Fasten the D-Rings to the handle holders.
✨ Final Touches & Hardware Installation
- Portfolio Lock: Install the female part of the portfolio lock centered on the front of the bag. Close the flap and mark the exact placement for the male part of the lock. Install the male part on the flap. Follow the hardware instructions for a secure screw-on fit.
- D-Rings: Locate the seam where the flap begins to fold over the front of the bag. Attach the large 40mm D-Rings to the sides of the bag using a few strong sl st or by weaving the metal ring through the finished edge (the video shows attaching them to the flap/back seam). Ensure they are centered and symmetrical.
- Attach Handle: Clip the rope handle D-Rings to the rings on the bag.
Video Tutorial:
Your sturdy and beautifully textured “Fir Tree Texture” Crossbody Bag is now complete!


