
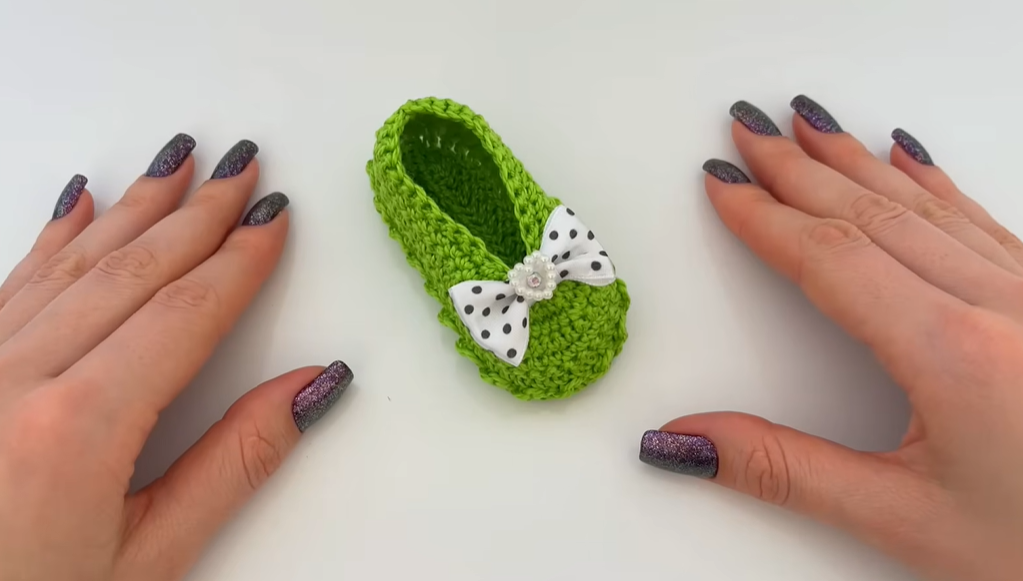
Welcome, crocheter, to a project that has captivated hearts across the fiber community! This beautiful baby bootie is a celebration of simple construction and stunning texture. Using a clever combination of basic stitches and a unique, shell-like cluster, we will create a seamless, beautifully fitting shoe that looks far more complicated than it actually is.
The bootie is constructed from a single flat rectangle, which is later transformed into a three-dimensional shoe through strategic seaming and cinching. This method ensures a perfect fit for the sole and minimal shaping frustration. Get ready to create something truly enchanting!
🧶 Materials & Tools
Gather your softest yarn and prepare your hooks. Since this pattern is worked flat and then seamed, you can use straight or circular needles, but we will focus on standard crochet hook sizes.
- Yarn: Approximately 50-70 grams of Light Worsted or DK Weight yarn (Category 3). A soft, anti-pilling acrylic or cotton blend is perfect for baby clothes.
- Color(s): The pattern can be worked in one color, or you can use contrasting colors for the sole/cuff and the body.
- Hook: 3.5 mm or 4.0 mm crochet hook (or size needed to meet your desired gauge and fabric density).
- Notions:
- Tapestry needle (essential for seaming and weaving in ends).
- Scissors.
- Measuring tape.
- Stitch marker (optional, but helpful for the SC rows).
📏 Sizing & Customization
The size provided below is for a standard newborn bootie. The beauty of this design lies in its easy scalability.
Standard Size: Newborn (0-3 Months)
- Initial Chain: 47 chains (resulting in 45 stitches in Row 1).
- Requirement: The initial chain count must be an odd number (47, 49, 51, etc.) for the texture row to finish correctly.
- Chain Length (Approximate): 20 cm (8 inches).
Adjusting the Size
The length of the starting chain determines the circumference of the foot, which is essential for the sole.
- Rule of Thumb: Measure the length of the baby’s foot from heel to toe. Chain a length equal to double that measurement.
- Stitch Count: Ensure your final chain count is an odd number.
📘 Abbreviations & Special Stitches (US Terms)
This pattern uses common US crochet terms, plus one unique cluster stitch.
| Abbreviation | Stitch Name |
| ch | Chain |
| st(s) | Stitch(es) |
| sl st | Slip Stitch |
| sc | Single Crochet |
| dc | Double Crochet |
| PC | Petal Cluster (Special Stitch) |
| st ch | Starting Chain (the chain-3 that begins the DC rows) |
Special Stitch Instruction: Petal Cluster (PC)
The PC is a decorative cluster worked into a single stitch, followed by a slip stitch in the next stitch. This sequence is what creates the unique wave/shell texture.
- Start: Yarn over (YO), insert hook into the specified stitch, YO, pull up a loop, YO, pull through 2 loops (2 loops remain on hook). (This is the first half of a double crochet).
- Cluster: YO, insert hook into the same stitch, YO, pull up a loop (4 loops remain on hook).
- Finish: YO, pull through all 4 loops on the hook.
- Advance: sl st into the next stitch.
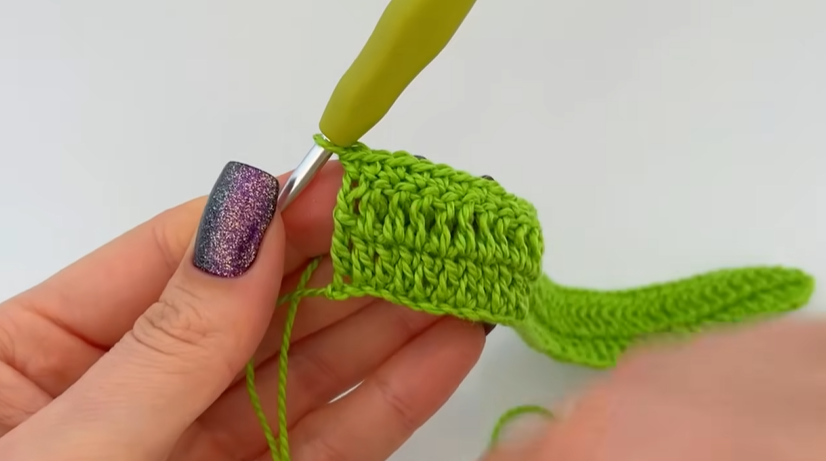
✨ Part 1: The Foundation (DC & SC Rows)
The bootie is started flat, and this section forms the base and the first part of the heel.

Preparation: Chain 47.
Row 1 (DC Foundation):
- DC in the 4th ch from the hook. (The skipped 3 chs count as the first DC).
- DC in the next ch and in every ch across.(45 DC)
Row 2 (DC Repeat):
- Ch 3 (counts as first DC). Turn your work.
- DC in the next st and in every st across.
- Ensure your final DC is worked into the top of the starting chain of Row 1.(45 DC)
Row 3 (SC Setup):
- Ch 1 (counts as first SC). Turn your work.
- SC in the next st and in every st across.
- Ensure your final SC is worked into the top of the starting chain of Row 2.(45 SC)
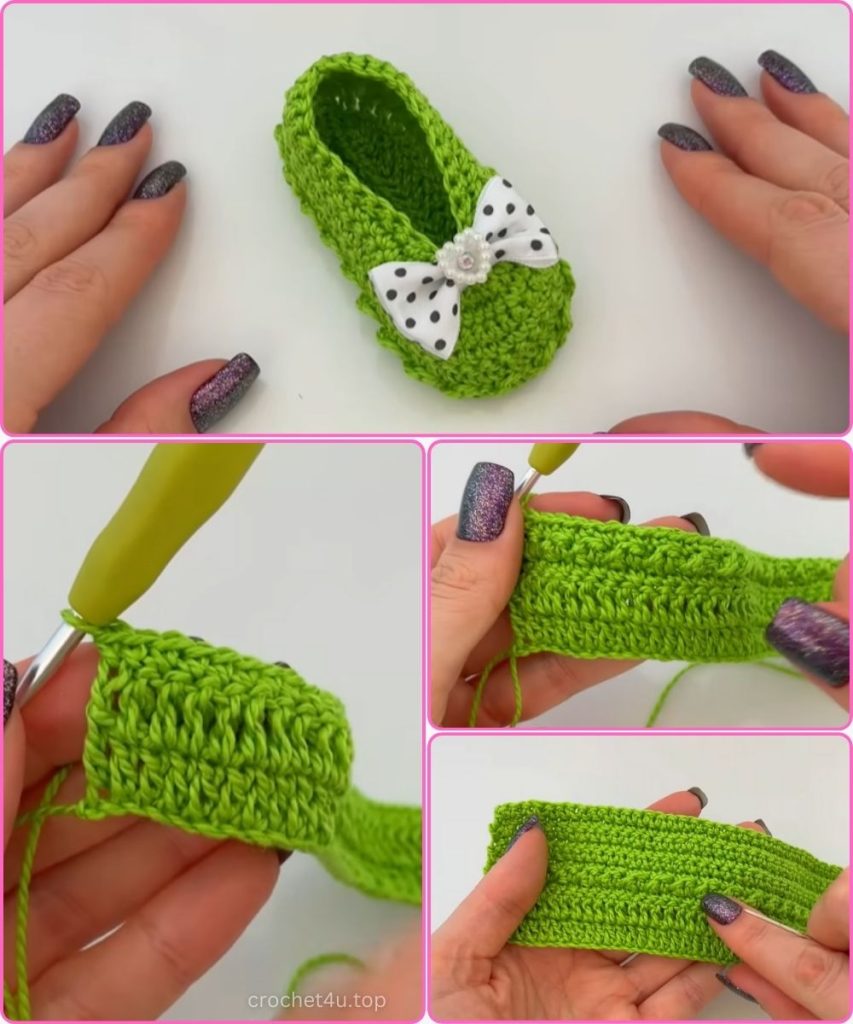
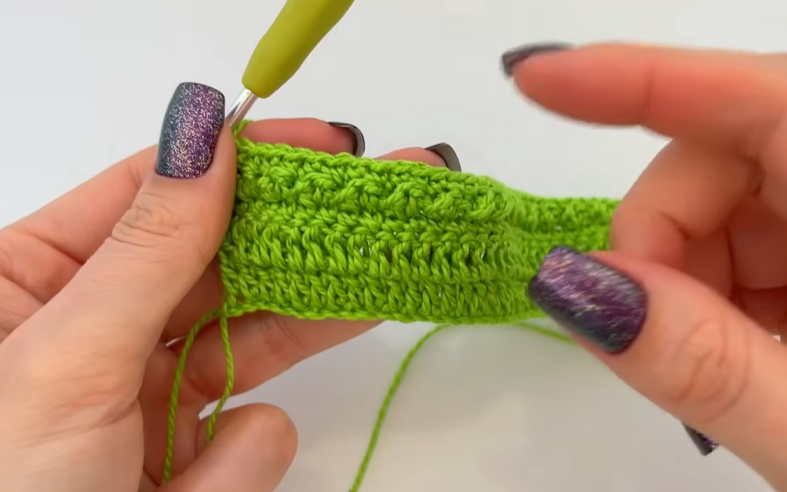
🌸 Part 2: The Textured Body
This section introduces the Petal Cluster and establishes the main texture of the bootie. The pattern alternates between the texture row and a basic SC stabilizing row.
Row 4 (Texture Row – PC):
- Ch 1. Turn your work.
- SC in the same stitch. (This acts as the stabilizing first stitch).
- Begin Sequence: PC in the next stitch.
- sl st in the next stitch.
- Repeat the sequence
PC in next st, sl st in next stacross the row until you reach the final stitch. - Finish: Work a SC in the final stitch.(You will have 22 PC/sl st repeats and 2 SCs at the edges. Total 45 sts)
Row 5 (SC Stabilizing Row):
- Ch 1. Turn your work.
- SC in the same st.
- SC in the next st and in every st across, working an SC into the top of every stitch below (both the PC and the sl st).
- Ensure your final SC is worked into the turning chain/SC of Row 3.(45 SC)
Rows 6 – 13 (Body Repeat):
- Repeat Rows 4 and 5 until you have reached your desired height. The video shows a height of approximately 5 cm (2 inches) of SC/Texture rows (a total of 8 rows in this section).
Finishing the Body:
- At the end of the final row (which should be an SC row), cut the yarn, leaving an extremely generous tail (at least 60 cm / 24 inches) for seaming.
- Pull the tail through the last loop to fasten off.
✂️ Part 3: Final Assembly & Shaping
The transformation from flat rectangle to formed bootie happens here through three crucial steps: the back seam, the sole seam, and the ankle cinch.

1. Seam the Back/Side (Heel)
- Fold: Turn the entire piece to the Wrong Side (WS). Fold the rectangle in half lengthwise so the two long side edges (the row edges) are aligned.
- Seam: Use the long tail and your tapestry needle to securely sew the short end together. This seam runs from the top edge (Row 13) down to the bottom edge (Row 1). This forms the back/heel seam of the bootie. Use a strong whipstitch or mattress stitch.
2. Seam the Sole (Heel and Toe Shaping)
- Heel Cinch: The back corner where the long seam meets the foundation chain needs shaping.
- Starting at this corner, work a running stitch (or zig-zag) through the foundation chain edge for approximately 1 cm (4-5 stitches).
- Pull the tail tightly to cinch the heel corner closed, creating a rounded curve. Knot securely.
- Sole Seam: Continue sewing the two raw edges of the sole together, working from the cinched heel towards the front/toe area.
- Toe Cinch: When you reach the front tip (the end of the piece), stop seaming about 2 cm from the end.
- Work a running stitch through the loops along the entire remaining raw edge.
- Pull the tail very tightly to fully cinch and close the toe tip, forming the curved shoe shape. Knot securely and weave the remaining tail securely into the seam.
3. Cinch the Ankle Opening
- Thread: Cut a separate piece of yarn (approximately 45 cm / 18 inches) or use ribbon. Thread it onto your tapestry needle.
- Weave: Starting at the center back seam on the top edge, weave the yarn/ribbon in and out through the stitches of the top row (Row 13), going all the way around the ankle opening.
- Cinch: Pull the two ends of the yarn/ribbon together to gather the top edge and create a snug, rounded opening. Knot the ends tightly or tie them in a neat bow.

💖 Final Touches & Variations
- Turn Right Side Out: Turn the bootie to the right side and gently shape the toe and heel with your fingers.
- Embellish:
- Attach a small, pre-made bow or a tiny crocheted flower over the cinched front for a focal point.
- Sew a decorative button or a few small pearl beads onto the front panel.
- Variations:
- Striped Look: Change colors every two rows (one texture, one SC) for a fun striped effect.
- Ribbon Tie: Use a long, decorative ribbon for the ankle cinch, leaving long tails to tie into a beautiful bow at the front.
Repeat all steps to create the second matching bootie! Enjoy the immense satisfaction of creating this stunning, woven-texture bootie!


