
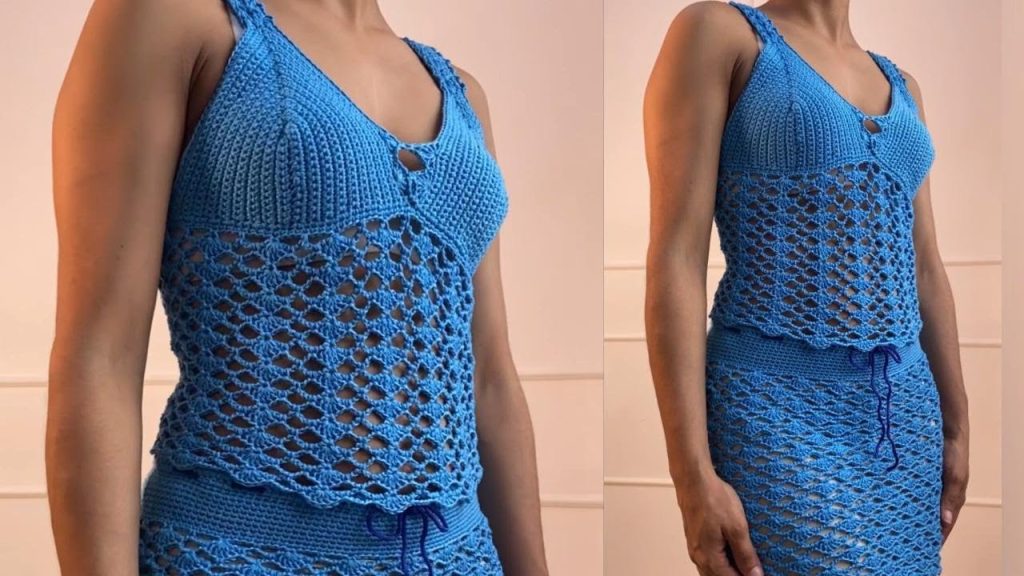
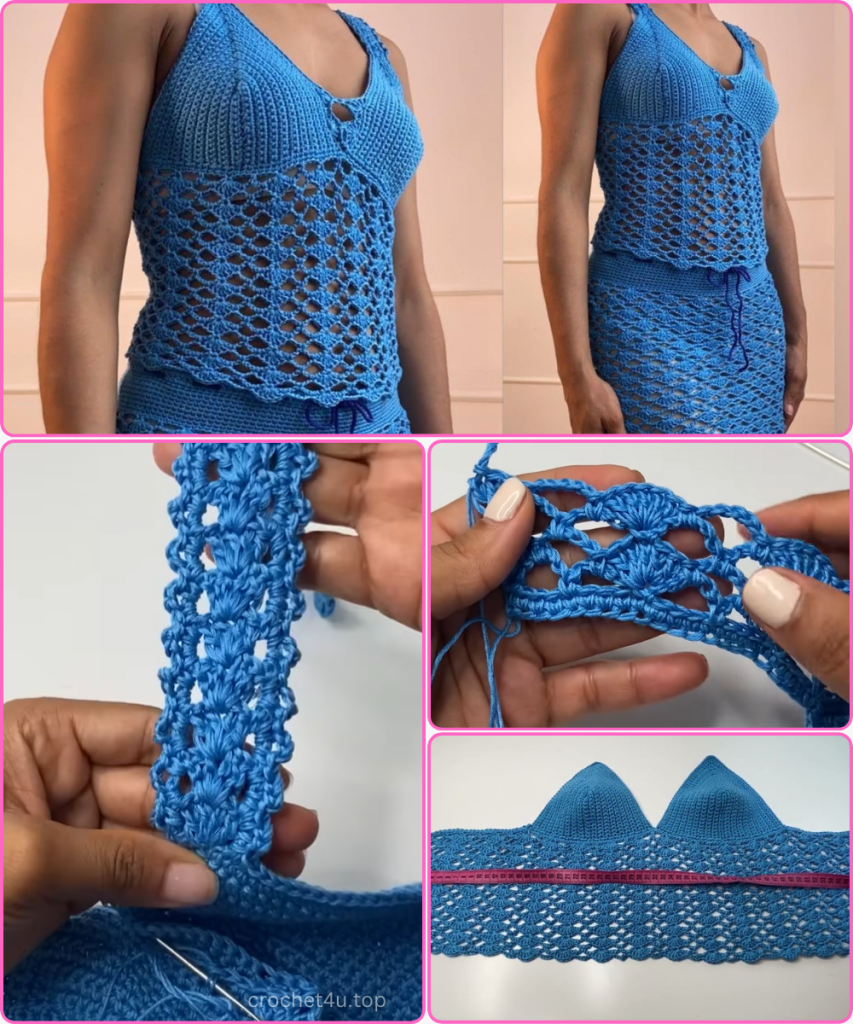
Welcome to the pattern for the Serenity Lace Bralette! This beautiful, adjustable top is designed to be worked from the bust down, starting with two pre-made cups that are joined together before the delicate lace body is crocheted in one piece. The result is an elegant, breezy garment with a comfortable, secure fit and a customizable back closure.
This pattern is fantastic for showcasing yarn with a beautiful drape, making it the perfect wardrobe addition for summer days, music festivals, or beach outings. The main body uses a simple two-row repeat that creates a gorgeous staggered shell pattern.
🧶 Materials & Tools
Choosing the right yarn is key to achieving a beautiful drape for this garment.
- Yarn: Approximately 150-250 grams (depending on cup size and final length) of Sport or DK Weight (Category 3) yarn. 100% cotton, linen, or a cotton-bamboo blend is highly recommended for breathability and drape.
- Hook: 3.5 mm (US size E/4) or 4.0 mm (US size G/6) crochet hook. Use the size that gives you a soft, airy fabric.
- Notions:
- Tapestry needle (essential for joining cups and weaving in ends).
- Scissors.
- Stitch markers (to mark the center of the cups and strap placement).
- Optional: Small amount of contrasting yarn for the tie-back.
📏 Sizing & Gauge
The pattern is highly customizable, as the two most important measurements—the cup size and the body circumference—are set before the lace pattern begins.
Cup Sizing (Pre-Work)
- This pattern requires two finished crochet bra cups. You must use your preferred pattern to create these first.
- Bust Width Measurement: To determine the chain length needed to join the cups (Part 2), measure the distance between the two cups across your front, allowing for the desired back gap.
- Example: If your full chest circumference is 90 cm (36 in) and you want a 15 cm (6 in) adjustable gap in the back, the front piece (cups + chain) should cover 75 cm (30 in). The chain will cover the distance not taken up by the cups.
Lace Pattern Gauge
- Pattern Repeat: A single full shell motif (Shell + Ch 5 space) should measure approximately 4.5 cm (1.8 inches) wide.
- Height: 4 rows of the lace pattern should measure approximately 3.5 cm (1.4 inches) tall.
Stitch Multiple
The main lace pattern works best over a stitch count that is a multiple of 5, plus 1 ((5n) + 1), though the cup shaping will make the final stitch count slightly irregular. The foundation row is the key.
📘 Abbreviations & Special Stitches (US Terms)
| Abbreviation | Stitch Name |
| ch | Chain |
| st(s) | Stitch(es) |
| sl st | Slip Stitch |
| sc | Single Crochet |
| dc | Double Crochet |
| ch-sp | Chain space |
| Shell | Shell Stitch (5 DC) |
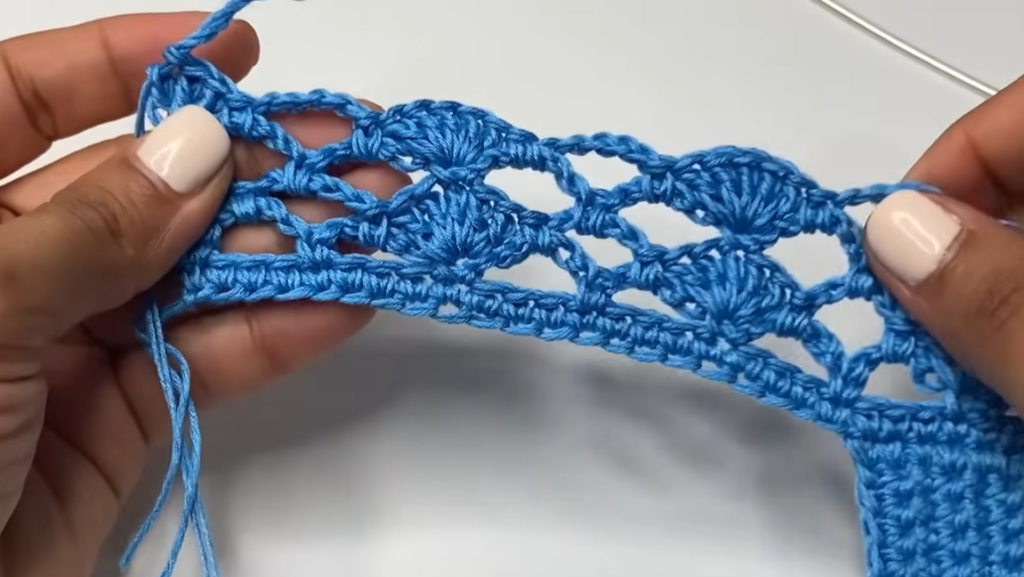
Special Stitch: Shell (5 DC)
Work 5 Double Crochet (DC) stitches into the same designated stitch or space.
☕ Part 1: The Cups (Pre-Work)
Before starting the main body, you must have your two desired crochet cups completed.
- Work Two Cups: Use your preferred pattern for standard crochet bra cups (Triangle, Bralette, etc.) and complete two matching pieces. Leave a long tail on the edge of one cup for seaming later.
- Optional Strap Placement: Mark the top center points of both cups where you will later attach the neck/shoulder straps.
🔗 Part 2: Joining the Cups & Foundation
We will now connect the two cups to form the foundation row for the body of the top.
- Center Chain: With the cups laid flat, attach the yarn to the bottom outer corner of the first cup (Cup A). Chain a length that spans the distance you calculated in the Sizing section (Bust Width Measurement minus the width of both cups). This chain will span the central front opening.
- Join: Slip stitch into the bottom inner corner of the second cup (Cup B). Fasten off, leaving a tail for weaving.
- Foundation Row (SC):
- Attach yarn to the outer bottom corner of Cup B.
- SC evenly along the entire bottom edge, including the edge of Cup B, the connecting chain, and the edge of Cup A.
- Crucial Step: When finished, your total SC count for this row should be a number that you can work the pattern over. If possible, aim for a stitch count that is close to a multiple of 5, plus 1, adjusting the SC density to fit the formula.
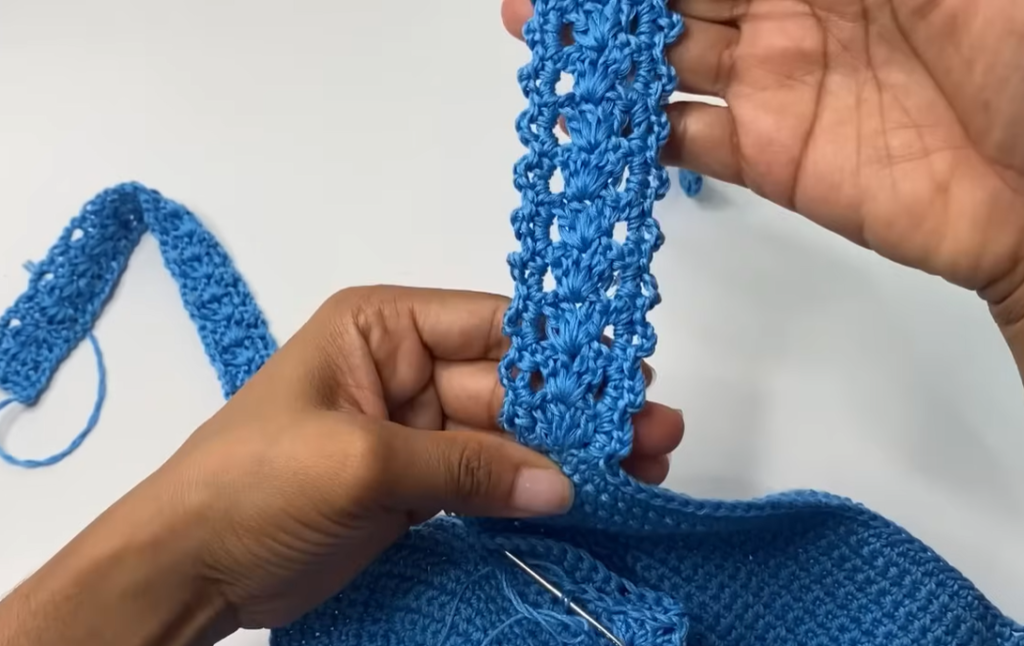
🌊 Part 3: The Main Lace Body (2-Row Repeat)
We will now establish the beautiful lace shell pattern, repeating just two rows to build the length of the top.

Row 1 (Arch Row)
- Ch 1. Turn your work. SC in the first st.
- *Ch 5.
- Skip 3 sts.
- SC in the next st. SC in the next st (2 SC total, worked into the foundation).*
- Repeat from * to * across the row.
- End with an SC in the very last st.
Row 2 (Shell Row)
- Ch 3 (counts as 1 DC). Turn your work.
- Work 2 DC in the first SC of the row (creating a half-shell at the edge).
- *SC into the next Ch-5 space.
- Work a Shell (5 DC) into the center of the next 2 SC set from the previous row (i.e., insert hook between the two SCs).*
- Repeat from * to * across the row.
- End by working 3 DC into the last SC of the previous row (completing the last half-shell).
Row 3 (Arch Row – Staggered)
- Ch 1. Turn your work. SC in the first DC.
- Ch 5.
- SC into the center (3rd DC) of the next 5-DC shell.
- *Ch 5.
- SC into the center (3rd DC) of the next 5-DC shell.*
- Repeat from * to * across the row.
- End with a Ch 5 and SC in the top of the beginning Ch 3 of the previous row.
Row 4 (Shell Row – Staggered)
- Ch 3 (counts as 1 DC). Turn your work.
- Work 2 DC in the first SC (half-shell edge).
- *SC into the next Ch-5 space.
- Work a Shell (5 DC) into the SC anchor of the previous row.*
- Repeat from * to * across the row.
- End by working 3 DC into the last SC of the previous row.
Main Body Repeat
- Repeat Rows 3 and 4 until the garment reaches the desired length.
- Recommended length: Stop approximately 1-2 cm (0.5-1 inch) above your natural waistline for a crop top fit.
✨ Part 4: Final Edging & Straps
We now clean up the edges and add the finishing touches.
1. Bottom Hem Edging
- Next Row (Small Scallop): Ch 1. Turn. SC in the first st.
- *Ch 3.
- SC in the same st.
- SC in the next 2 sts.*
- Repeat from * to * across the final row of the body.This creates a dainty picot/scallop edge. Fasten off.
2. Back Opening Edging
- Attach yarn to the top outer corner of one cup.
- SC evenly down the back opening edge (the outer side of the cup and the main body side edge).
- At the corner of the back opening, work (SC, Ch 3, SC) for a neat turn.
- SC evenly up the second back opening edge.
- Small Scallop: Work the SC, Ch 3, SC scallop in every second or third stitch along the entire top and inner cup edges for a uniform finish.
3. Neck and Shoulder Straps
The top will require two strap ties for the neck and two ties for the adjustable back.
- Neck Straps (x2): Attach yarn to the top center of each cup. Chain the desired length for the neck strap (e.g., 50-70 cm / 20-28 inches). Work sl st back down the chain to reinforce it. Fasten off.
- Back Ties (x2): Attach yarn to the bottom back corner of the top (where the top should tie around the waist/ribcage). Chain the desired length for the tie-back closure (e.g., 75-100 cm / 30-40 inches). Work sl st back down the chain to reinforce. Fasten off.

💖 Part 5: Assembly & Finishing
Your Serenity Lace Bralette is almost complete!
- Weave Ends: Use a tapestry needle to securely weave in all yarn tails on the inside of the garment.
- Try On & Adjust: Try on the top and adjust the neck and back ties to your desired fit.
- Optional: If you wish for a non-adjustable back, you can seam the back edges together instead of adding ties, or replace the long chains with simple rows of SC to create fixed straps.
Wear your beautifully light and airy top with confidence!


