
Hello, my wonderful fiber friends! Welcome back to the blog.
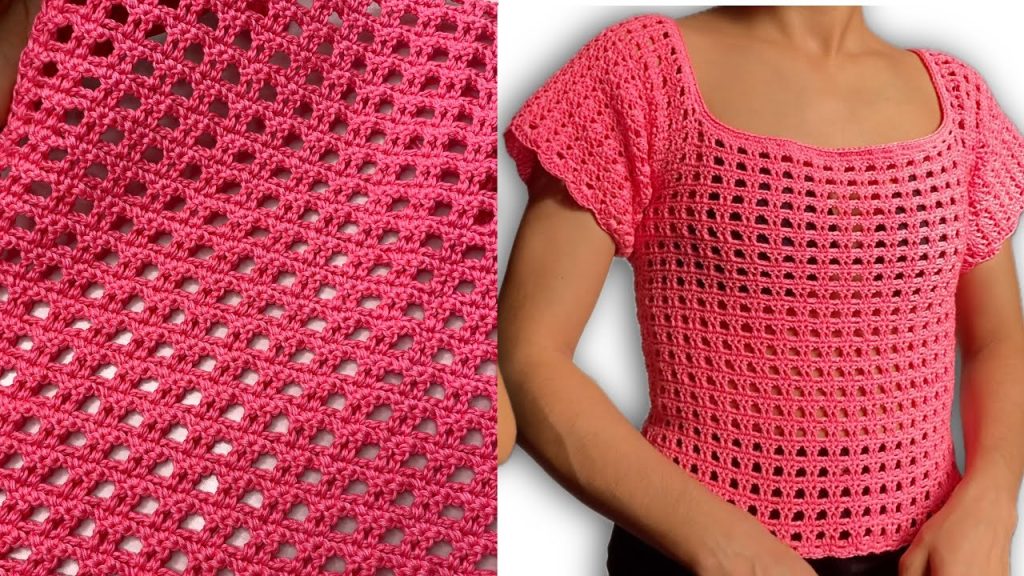
If you have been hunting for a stitch pattern that strikes the perfect balance between modern minimalism and classic elegance, you have officially found it. Today, we are exploring a stitch that is taking the DIY fashion world by storm. It is a geometric openwork pattern that looks incredibly high-end—like something you would find in a boutique summer collection—yet it is constructed using the most basic building blocks of crochet.
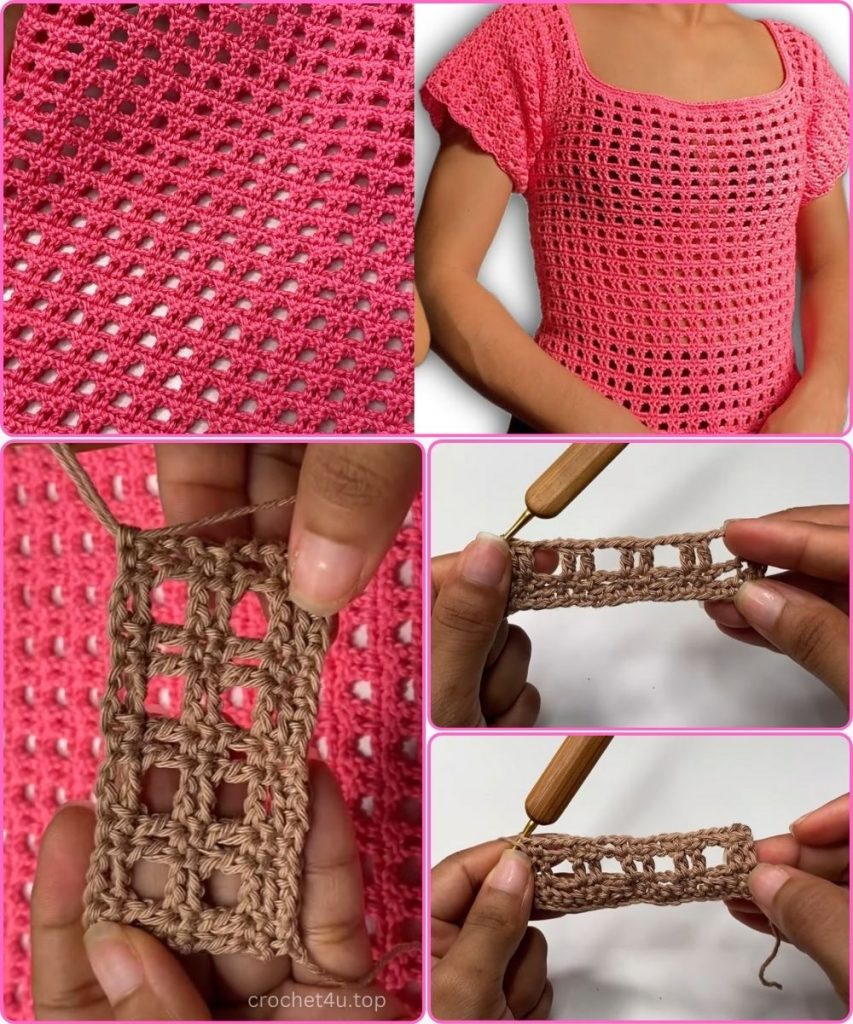
This stitch is characterized by “stacked” columns of solid stitches separated by airy, breathable windows. Because of this structure, it is the absolute champion for warm-weather garments. Think breezy tank tops, sophisticated beach tunics, or even a lightweight overlay for a summer dress.
Grab a cup of tea (or an iced coffee!), settle into your favorite crafting chair, and let’s master this beautiful stitch together.
🧶 The Perfect Materials Strategy
To get the exact look from the tutorial, your choice of materials matters. This pattern relies on clean lines, so fuzzy yarns can hide the beauty of the grid. Here is a deep dive into what you should use:
- The Yarn:Mercerized Cotton (Sport or DK Weight).
- Why Mercerized? Mercerized cotton has been treated to remove the “fuzz,” leaving a smooth, shiny cord-like finish. This is crucial because it gives you excellent “stitch definition.” Every square and every post will stand out crisply.
- Breathability: Cotton is a natural fiber that breathes, making it safe for skin in high heat.
- Alternatives: If you don’t like cotton, a Bamboo/Cotton blend adds a lovely silky drape, or a Linen blend offers a rustic, organic look.
- The Hook:2.5mm to 3.5mm.
- Check your yarn label. For this pattern, you want a hook that is slightly smaller than what you might use for a blanket. We want the structure to be firm, not floppy.
- Essential Tools:
- Sharp Scissors: For clean cuts.
- Tapestry Needle: For weaving in those slippery cotton ends.
- Blocking Mats & Pins: (Highly recommended for this specific stitch to make the grid square).
📝 Abbreviations & Technical Terms (US Terminology)
Before we start, let’s make sure we are speaking the same language. Here is your glossary for this project:
- Ch: Chain
- St(s): Stitch(es)
- Sk: Skip
- SC: Single Crochet (The short, sturdy stitch)
- DC: Double Crochet (The tall, elegant stitch)
- Yo: Yarn over
- Turning Chain: The chains you make at the start of a row to get up to the correct height.
📏 The Mathematical Foundation
Getting the math right at the start is the secret to a headache-free project.
- The Multiple:4 + 2.
- This means you pick a number divisible by 4 (e.g., 20, 40, 60, 80).
- Then, you add 2 extra chains to that number to balance the symmetry of the pattern.
- The Turning Chain: + 1.
- After you have your width (Multiple of 4 + 2), add 1 final chain which serves as the turning height for your first row of Single Crochet.
Quick Cheat Sheet:
- Want a small swatch? Chain 12 + 2 = 14 (+ 1 turn) = 15 chains.
- Want a scarf width? Chain 32 + 2 = 34 (+ 1 turn) = 35 chains.
- Want a blouse width? Chain 80 + 2 = 82 (+ 1 turn) = 83 chains.
🧵 The Masterclass: Step-by-Step Instructions
Phase 1: The Foundation
The goal here is to create a non-twisting, sturdy base.
- Make a slip knot and place it on your hook.
- Chain your calculated length (Multiples of 4 + 2 + 1).
- Pro Tip: Keep these foundation chains slightly loose. If they are too tight, the bottom of your blouse will curve into a smile shape (frowning).
Row 1: The Base (Stabilization)
We never start the fancy lace directly on the chain; we need a “foundation row” to anchor everything.
- Insert your hook into the 2nd chain from the hook.
- Make a SC (Single Crochet).
- Continue placing 1 SC in each chain all the way to the end.
- Check: Count your stitches. You should have a multiple of 4 + 2.
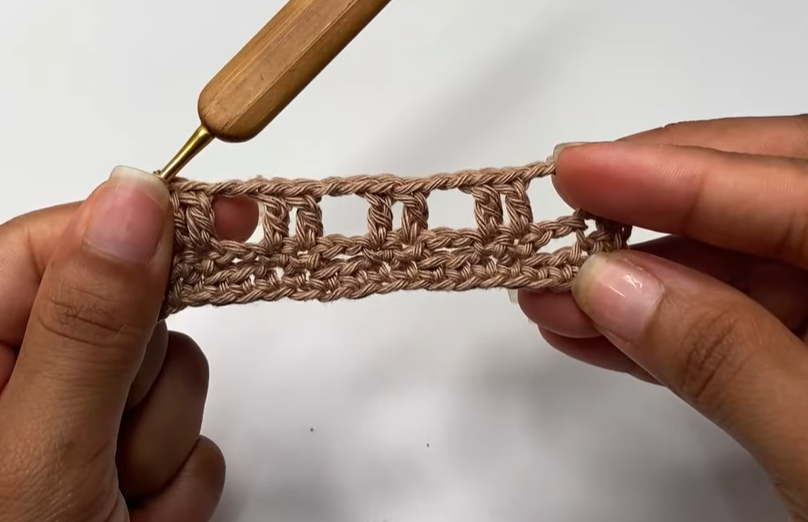
Row 2: The Grid Setup (Low Row)
This row creates the horizontal spacing. We are using Single Crochets (SC) to keep the profile low.

- Ch 1 and turn your work.
- SC in the very first stitch (the same one the chain came out of).
- SC in the next stitch.
- Visual Check: You now have a solid block of 2 SCs at the edge.
- The Repeat Begins:
- Ch 2.
- Sk 2 stitches on the row below.
- SC in the next stitch.
- SC in the stitch after that.
- Repeat step 4 all the way across the row: Ch 2, Skip 2, SC, SC.
- End: You should finish the row with 2 SCs in the last two stitches. This creates a symmetrical border.
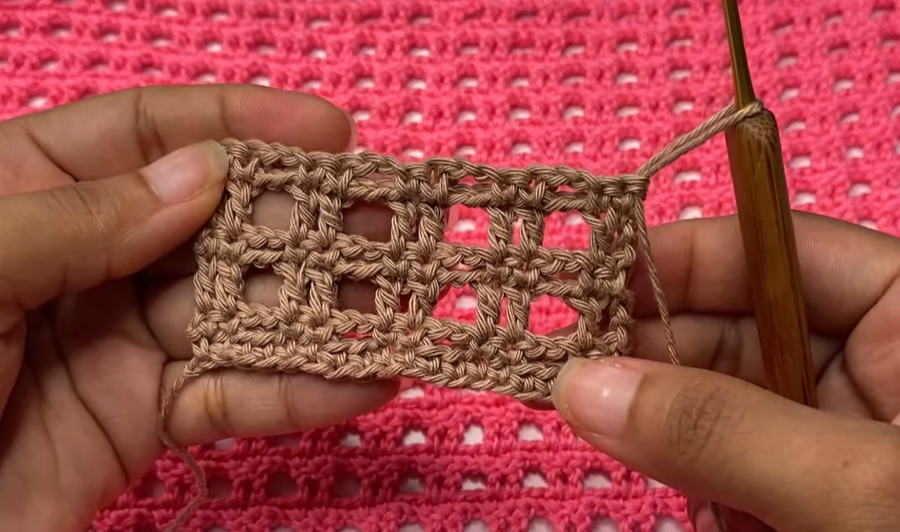
Row 3: The Pillars (High Row)
Now we add height. We are switching to Double Crochets (DC) to stretch those windows open vertically.
- Ch 3 and turn.
- Important: This Ch 3 counts as your first DC stitch!
- Yo, skip the first stitch (because the Ch 3 covers it), and make a DC in the second stitch (which is the 2nd SC from the row below).
- The Repeat Begins:
- Ch 2.
- Sk the chain-gap space completely. (Do not work into the hole).
- Yo, make a DC in the next SC stitch.
- Yo, make a DC in the following SC stitch.
- Repeat across: Ch 2, Skip space, DC, DC.
- Visualization: You will see that you are placing “posts” of Double Crochets directly on top of the “blocks” of Single Crochets from the previous row.
- End: Finish with a DC in the last SC.
Row 4: The Anchor (Low Row)
We return to Single Crochets to “lock in” the pillars and prepare for the next height increase.
- Ch 1 and turn.
- SC in the first DC (the top of the last stitch you made).
- SC in the next DC.
- The Repeat Begins:
- Ch 2.
- Sk the chain-2 space.
- SC in the next DC.
- SC in the following DC.
- Repeat across: Ch 2, Skip space, SC, SC.
- The Critical Finish: When you reach the end, you will see the turning chain (Ch 3) from the previous row. You must place your final SC into the top (3rd chain) of that turning chain.
- Why? If you miss this, your edge will become jagged and you will lose a stitch count.
Phase 2: The Growth
To continue growing your fabric, you simply repeat Row 3 and Row 4 consecutively.
- Odd Rows (3, 5, 7…): These are your Tall/DC rows. They add length/height to the garment.
- Even Rows (4, 6, 8…): These are your Short/SC rows. They add stability and square off the grid.
✨ Expert Tips for a Professional Finish
- Mind the Tension on Chains: When you make those “Ch 2” spaces, try not to make them too tight. If your chains are tight, the fabric will pinch inward. If you are a naturally tight crocheter, try doing “loose chains” or even switch to a slightly larger hook just for the chain sections (though that is fiddly!).
- Reading Your Knitting (Crochet): One of the best things about this pattern is that it is visually logical.
- Solid stitches always go on top of solid stitches.
- Gaps always go on top of gaps.
- If you find yourself putting a DC into a big hole, stop! You have misaligned the pattern.
- The Power of Blocking: Because this is a grid pattern, it might look a little “wobbly” or organic while you are working on it. Do not panic! Once you are finished:
- Wet your finished piece with cool water.
- Lay it flat on a foam mat.
- Pin the edges so the lines are perfectly straight and the corners are 90 degrees.
- Let it dry.
- This process (blocking) will “set” the grid, making it look crisp and manufactured.
- Color Play: While the video shows a solid color (which is elegant), this pattern looks amazing in color blocking. Try doing 4 rows of white, followed by 4 rows of sand, and 4 rows of navy blue for a nautical summer look.
Video Tutorial:
👗 What Can You Create With This?
This stitch is incredibly versatile. Here are three project ideas to get your creativity flowing:
- The “Boho-Chic” Vest: Crochet two rectangles using this stitch pattern. Seam the sides (leaving room for armholes) and seam the shoulders. Add fringe to the bottom. Voila! Festival ready.
- The Market Bag: Use a sturdier cotton (like a dishie cotton) and a smaller hook. The grid is strong enough to hold produce, but open enough to stretch slightly.
- The Curtain Panel: Because the light filters through the squares so beautifully, this makes for stunning kitchen window cafe curtains.
I hope this extended guide gives you all the confidence you need to tackle this pattern! It truly is one of those “high reward, low effort” stitches that makes you look like a crochet wizard.
If you try this out, I would love to hear how it went. Did you make a blouse? A scarf? Let me know in the comments below! Happy stitching!


