
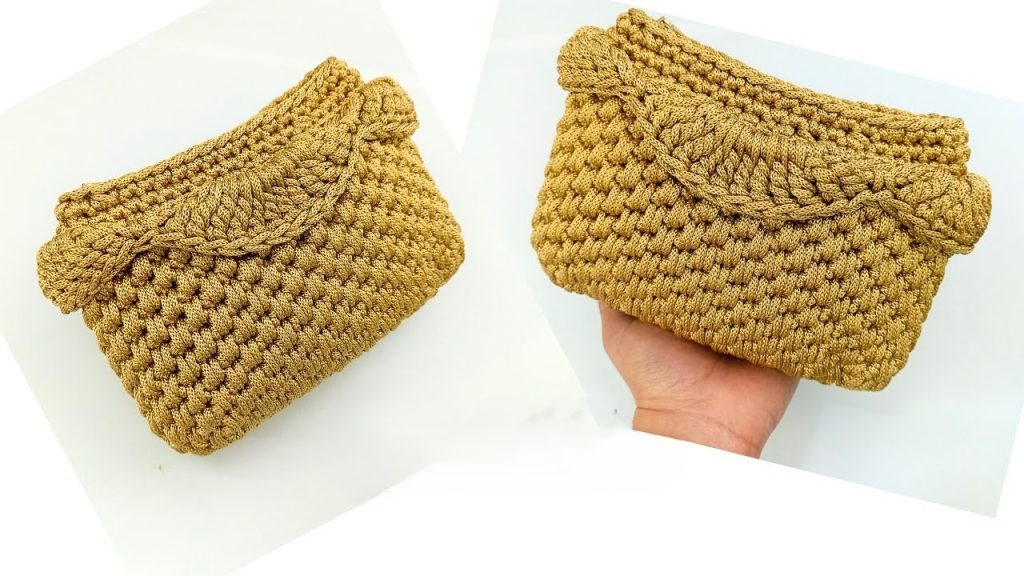
Welcome to a detailed guide on creating the Emerald Luxe Textured Pouch. This project is a stunning blend of architectural structure and intricate texture, making it the perfect chic wallet or a sophisticated gift. Featuring a unique “Long Single Crochet” texture and a delicate scalloped edge, this pattern is designed to look high-end while remaining an enjoyable and rewarding project for your hook.
We will walk through every step—from the foundational oval base to the final decorative trim. Let’s get started!
🧶 Section 1: Materials and Tool Kit
To achieve the stiff, professional structure seen in this design, choosing the right material is essential.
- Yarn: 3mm Polyester Macramé Thread. You will need approximately 250 grams. Polyester is preferred over cotton for this pouch because it provides a slight sheen and incredible durability, ensuring the bag keeps its shape over time.
- Hook: 5.0 mm Crochet Hook.
- Zipper: A standard zipper, slightly longer than the bag opening.
- Notions: * Plastic monofilament (fishing line) or heavy-duty sewing thread for the zipper.
- Stitch markers (absolutely essential for this pattern).
- Tapestry needle.
- Lighter (to singe the ends of the polyester thread to prevent fraying).
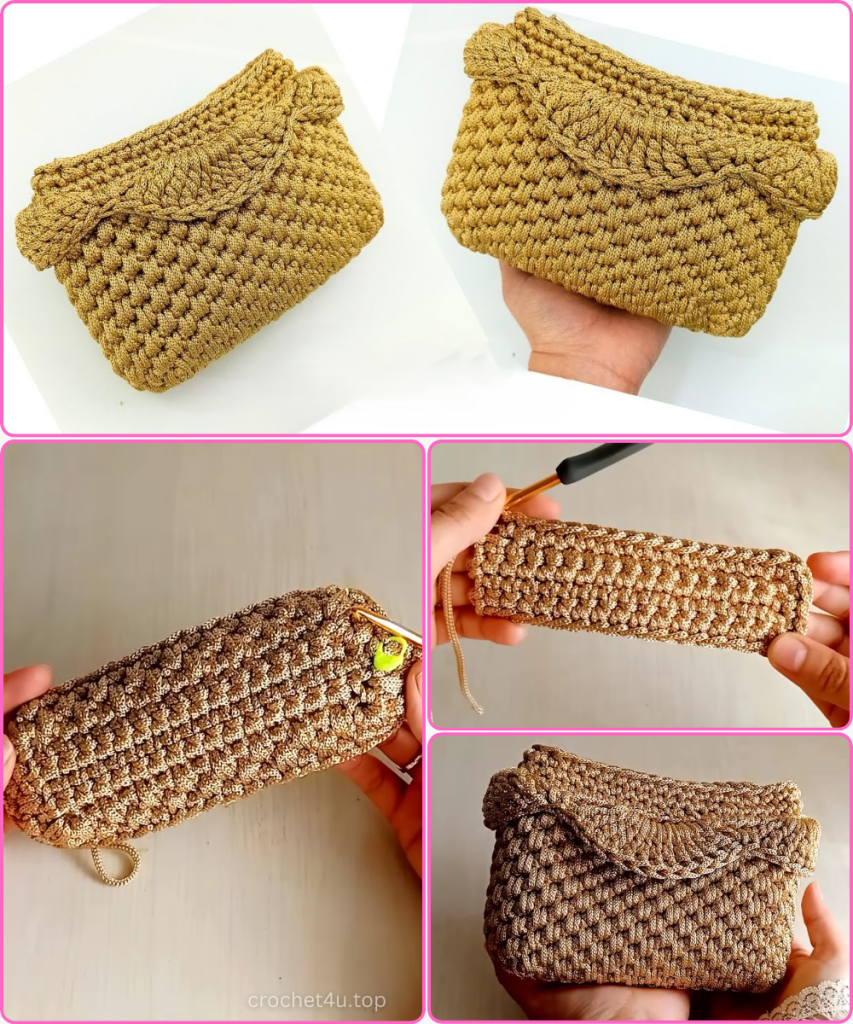
📐 Section 2: Building the Foundation (The Rectangular Base)
The base of this pouch starts with a small rectangle that is then “worked around” to create a seamless transition into the body.
- Foundation: Start with a slip knot and 17 chains.
- Row 1: Beginning in the second chain from the hook, work 16 single crochets (SC).
- Rows 2–4: Work 3 more rows of SC in both loops. (You now have a small 4-row rectangle).
- Creating the Perimeter: * Chain 1. Work 1 SC at the edge of each of the 4 rows (4 stitches).
- In the corner (the first chain of your foundation), work 3 SC to turn the corner.
- Continue along the foundation chain with SC in the front loop only.
- In the last chain, work 3 SC to turn the second corner.
- Work 4 SC along the opposite row edges.
- At the first stitch of the top edge, work 3 SC.
- Work across the top edge. In the final stitch, work 3 SC.
- The Result: Skip the starting chain and join with a slip stitch to the first SC. You should now have exactly 48 stitches surrounding the entire rectangular base.
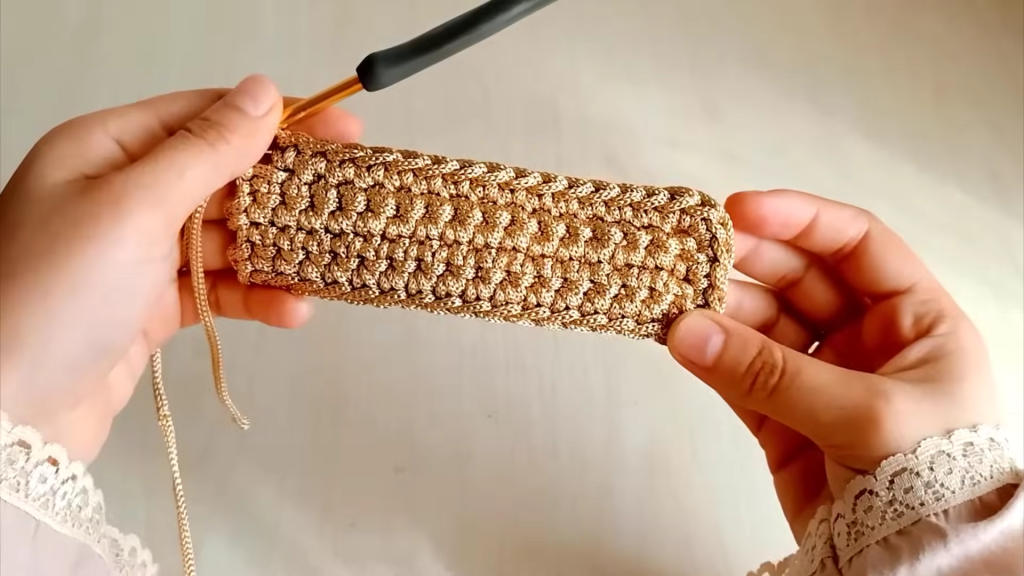
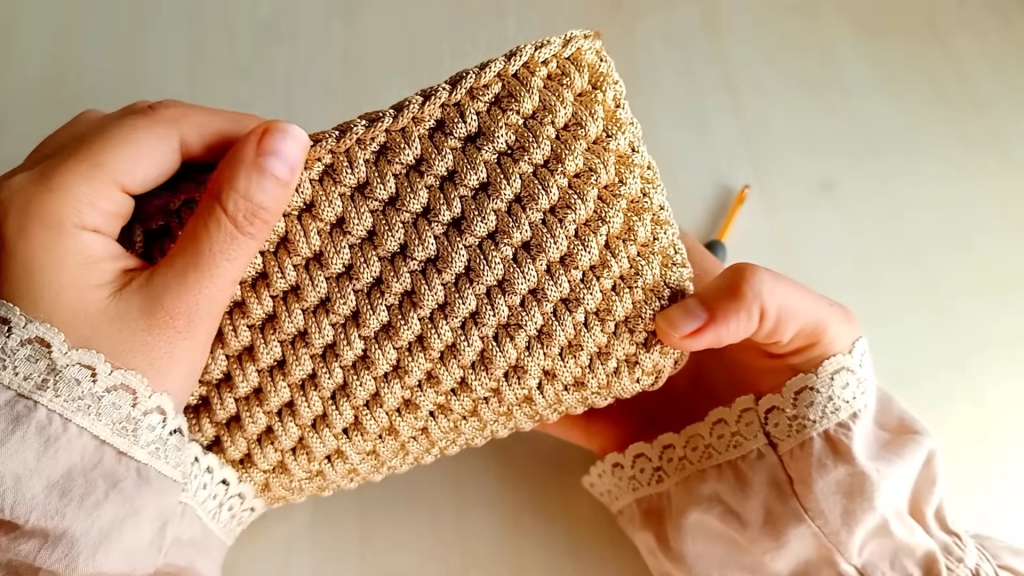
✨ Section 3: The “Spike” Texture (The Main Body)
This section uses the Long Single Crochet (or Spike Stitch) to create a thick, woven-look fabric.
- Round 1 Setup: Chain 1. Mark your first stitch with a stitch marker.
- Work 1 standard SC in both loops.
- Work a Long Single Crochet: Instead of inserting your hook into the current row, insert it into the space directly below the SC of the previous row. Pull up a loop to the current height and finish the SC.
- Repeat: [1 SC, 1 Long SC] all the way around.
- The Transition: Because the pattern requires an odd number of stitches to “offset” the spikes in the next round, add one extra SC at the end of this round. Your total is now 49 stitches.
- Round 2 and Beyond:
- Work directly in a spiral (do not join).
- In this round, you will work an SC into every Long SC from the row below, and a Long SC into every standard SC from the row below. This creates a beautiful, alternating “brick” texture.
- Height: Continue this alternating pattern until the bag reaches 11 cm in height (approximately 16 rounds). Ensure your final stitch aligns with your marker.
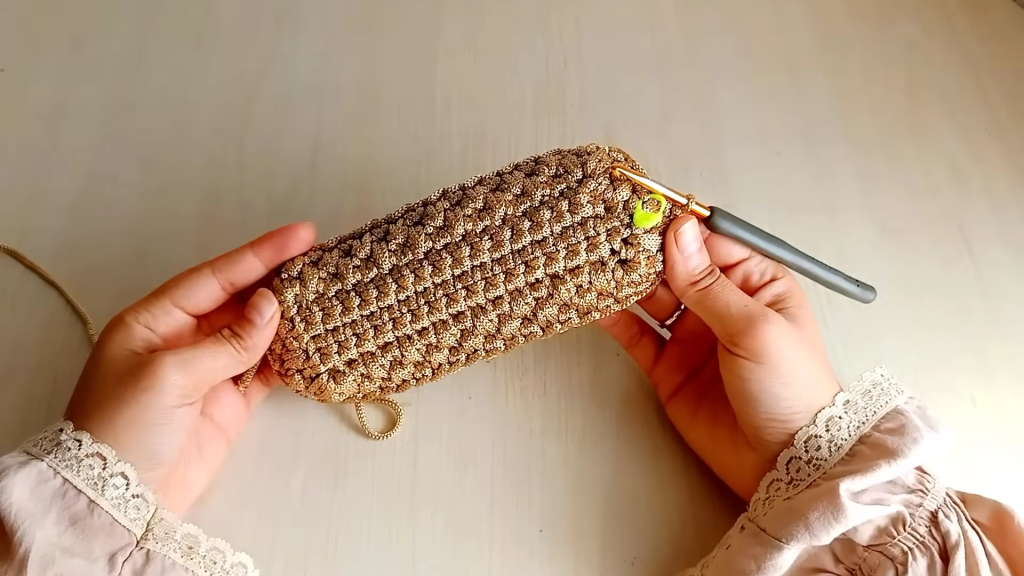
📉 Section 4: Shaping the Rim (Decreases)
To ensure the zipper sits neatly and the bag has a refined silhouette, we will slightly taper the top opening.
- Row 1 (BLO): Work a round of SC in the Back Loop Only. During this round, decrease 3 times evenly spaced. (Stitch count: 46).
- Row 2: Work a round of standard SC, decreasing 3 more times. (Stitch count: 43).
- Row 3: Work a final round of SC, decreasing 3 more times. (Stitch count: 40).
- The tapered rim provides a sturdy anchor for the zipper and prevents the top from “flaring” out.
🤐 Section 5: The Invisible Zipper Installation
Installing a zipper in crochet requires patience and a specific technique for a professional finish.
- Preparation: Cut your zipper so it is roughly 1–2 cm longer than the opening. Fold the ends of the zipper tape downward at a 45-degree angle to tuck them out of sight.
- Sewing: Use your durable sewing thread or plastic line.
- Start from one side and sew along the row of crochet stitches.
- Keep your stitches in a perfectly straight line on both the crochet fabric and the zipper tape.
- Ensure the distances between your stitches are equal—this prevents the zipper from “bubbling” or becoming wavy.
- Repeat for the second half of the zipper without cutting the thread to maintain strength.
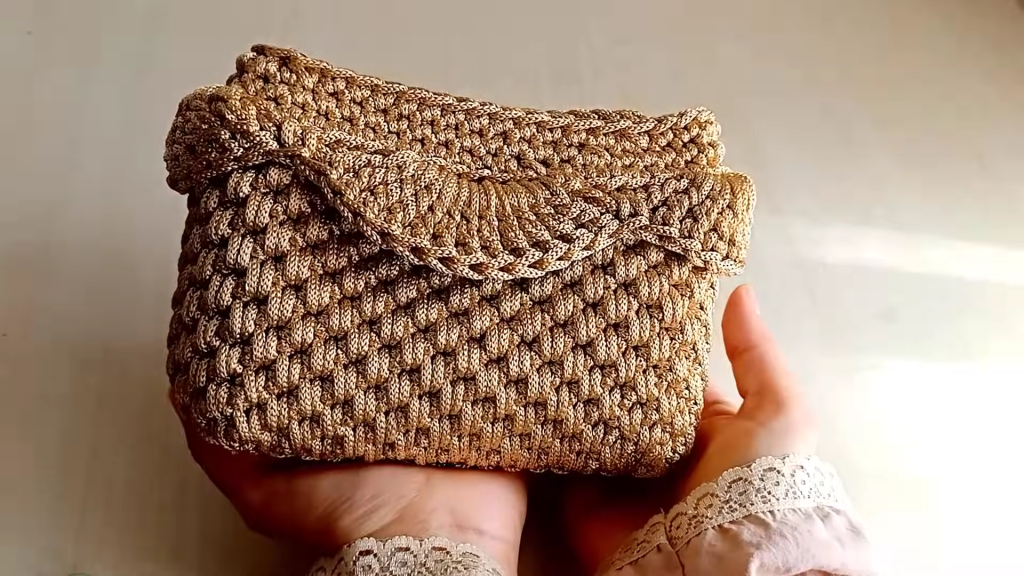
🌸 Section 6: The Scalloped Decorative Trim
The final touch is a delicate “fan” or scalloped edge that sits gracefully around the top of the pouch.
- The Loops:
- Join the thread to the first loop of the top row.
- Chain 6, skip 5 stitches, SC in the 6th loop. * Repeat this 8 times total to create 8 foundational loops around the rim.
- The Scallops:
- Chain 3. Work 1 SC into the first loop.
- In the next loop, work 12 Triple Crochets (TR). This creates a large, dramatic fan.
- Work 1 SC into the following loop.
- Repeat: [12 TR in one loop, 1 SC in the next] around the bag.
- Finish: Join with a slip stitch to the 3rd chain of the starting chains.
Video Tutorial:
🎁 Final Touches and Care
Your Emerald Luxe Textured Pouch is now ready!
- Singeing: Take your lighter and very carefully melt the tips of any remaining thread tails on the inside of the bag. Press the melted tip against the fabric to “lock” it in place.
- Blocking: Because polyester macramé is thermoplastic, you can lightly steam the scalloped edge to make the fans lie perfectly flat.
You now have a durable, high-fashion pouch that is as practical as it is beautiful. Happy Crocheting!


