
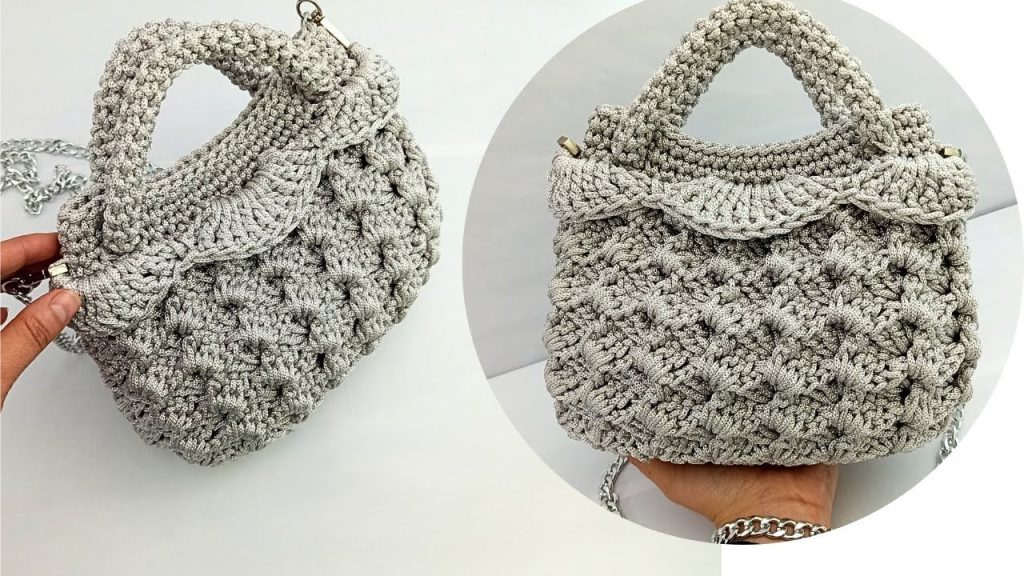
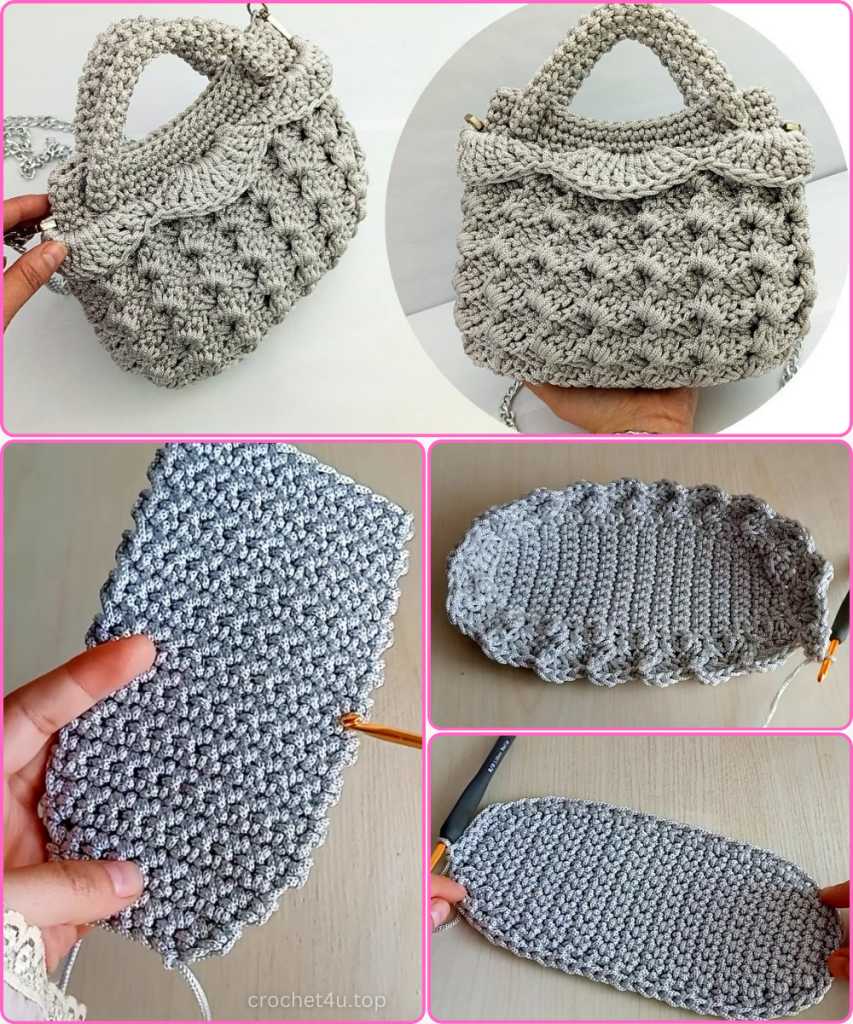
Welcome to your next favorite crochet project! If you’ve been looking for a bag that combines structural elegance with a rich, 3D texture, the “Midnight Gala” Handbag is designed for you. This project uses a unique variation of the “Crocodile Stitch” or “Petal Stitch” to create a bag that isn’t just an accessory—it’s a statement piece.
In this long-form, detailed guide, we will break down every section of the bag, from the uniquely shaped base to the intricate fan-style decorative rim. Let’s pick up our hooks and get started!
🧺 Materials & Tools Needed
Before we dive into the stitches, ensure you have these high-quality materials ready to give your bag that boutique-style finish:
- Yarn: 3mm Polyester Macrame Thread (or “Silsila” thread). You will need approximately 400 grams. This specific thread provides the necessary stiffness to keep the bag’s shape without a lining.
- Hook Size: 5mm crochet hook.
- Hardware: * One magnetic snap or decorative closure.
- Optional metal chain strap or D-rings.
- Notions: Stitch markers, tapestry needle, and sharp scissors.
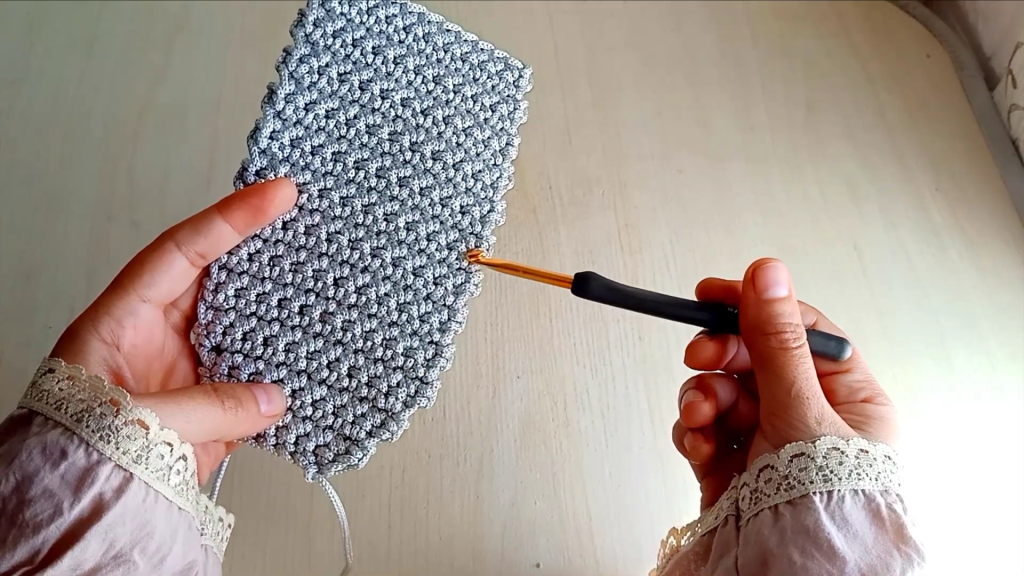
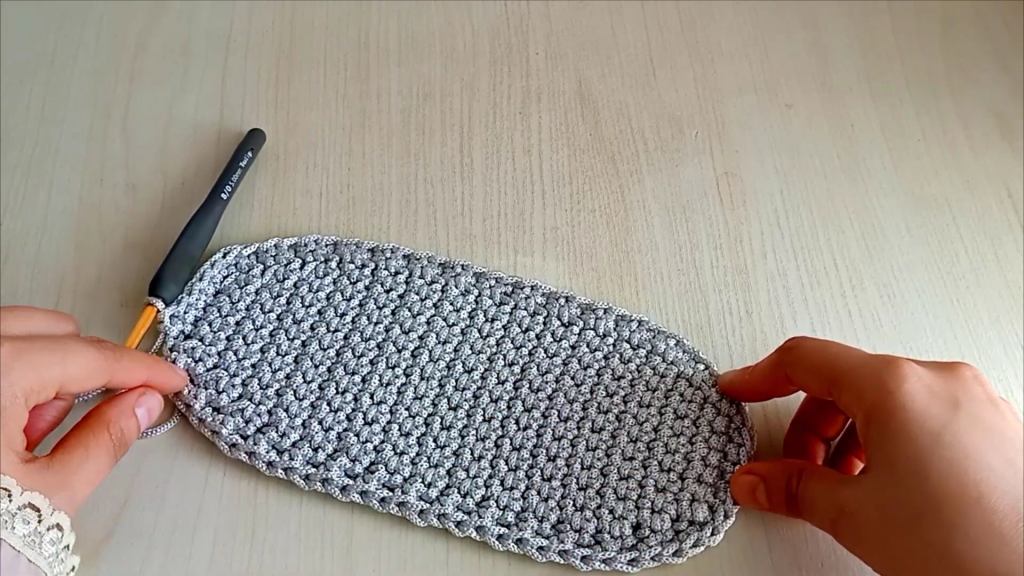
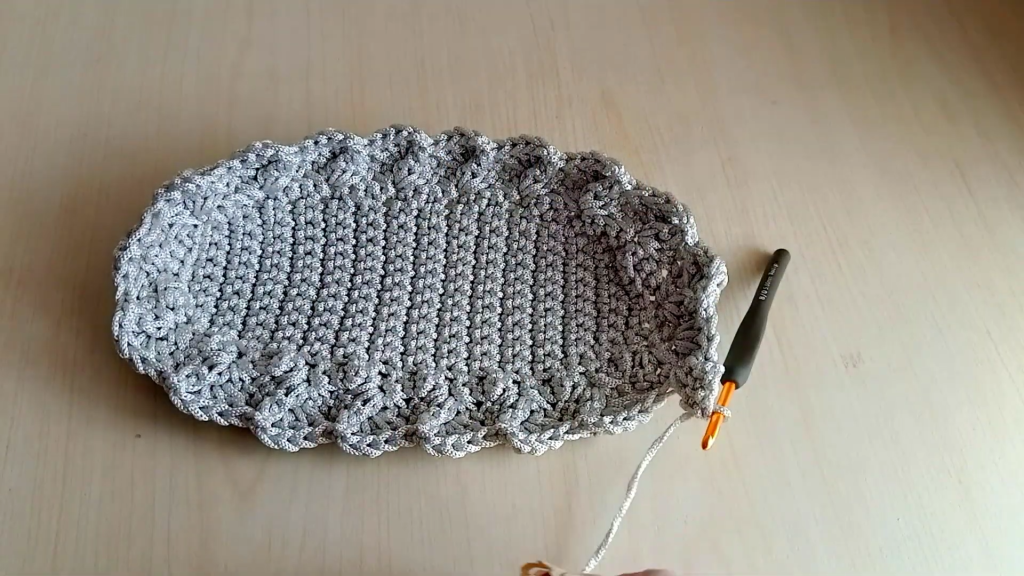
📐 Section 1: Crafting the Sculpted Base
Unlike a standard rectangular base, this bag starts with a tapered oval to provide better structural integrity and a more refined silhouette.

- Foundation: Start with a slip knot and 6 chains.
- Row 1 (The Increase): In the second chain from the hook, make 2 SC. SC in each of the next 3 chains. In the last chain, make 2 SC. You now have 7 SC on 5 foundation chains.
- Row 2 (Steady): Chain 1, turn. Work 7 SC across.
- Row 3 (Increase): Chain 1, turn. Make 2 SC in the first stitch, SC in the next 5, and 2 SC in the last stitch (9 SC total).
- Row 4 (Steady): Chain 1, turn. Work 9 SC across.
- Row 5 (Increase): Chain 1, turn. Make 2 SC in the first stitch, SC in the next 7, and 2 SC in the last stitch (11 SC total).
- Rows 6 – 25 (The Main Body of the Base): Work 20 rows steadily with 11 SC in each row.
- Row 26 (The Taper): It’s time to mirror the start. Decrease at the beginning and end of this row (9 SC).
- Row 27 (Steady): Work 9 SC across.
- Row 28 (Taper): Decrease at the beginning and end of this row (7 SC).
- Row 29 (Steady): Work 7 SC across.
- Row 30 (Final Taper): Decrease at the beginning and end of this row (5 SC). Your base should now measure approximately 21 cm by 9 cm.
The Perimeter: To transition from the flat base to the walls, work one round of SC around the entire edge of the base. Work 30 SC along each long side and 5 SC across the short ends. This will give you a total of 70 SC around the perimeter.
✨ Section 2: The “3D Petal” Wall Pattern
This is the heart of the design. We will use a “turn-and-twist” technique to create a beautiful, layered texture.
Round 1:
- Close the base round with a slip stitch. Chain 2.
- In the same space, make 3 Double Crochets (DC).
- Skip 3 stitches. In the 4th stitch, make 1 Single Crochet (SC).
- Chain 2 and make 3 DC in that same stitch.
- Repeat: Skip 3, [1 SC, Ch 2, 3 DC] in the next all the way around.
Round 2 (Textured Layering):
- Insert your hook to make a single crochet to close the row, then chain 2.
- Twist the work slightly. Make 3 DC in the same place.
- Now, look for the 3rd DC of the cluster from the row below. Work a Front Post Single Crochet (FPSC) around it.
- Chain 2, then work 3 DC under the Ch-2 space of the previous row’s cluster.
- Repeat this “Front Post SC + Cluster” pattern around. This layering creates the 3D effect.
Height: Continue repeating this textured pattern until the bag reaches approximately 16 cm in height (roughly 11 rows of the petal pattern).
🏛️ Section 3: The Finished Rim & Handle Openings
To give the bag a clean top edge and prepare it for the handles, we transition back to solid stitches.
- Transition Row: Work one row of SC. Crucial detail: Work the SC stitches only over the 3 DC stitches of the clusters, not over the chain spaces. This pulls the top of the bag into a firm, straight line.
- Buttonhole Row: Identify the 4 spots where your handle will enter the bag and mark them.
- Work SC until you reach a marker.
- Chain 3 and skip 3 stitches.
- Continue with SC until the next marker and repeat.
- Finishing the Rim: Work two more rows of SC over everything, including the Chain-3 spaces, to create sturdy reinforced holes.
🥨 Section 4: The “Roman Lace” Tubular Handle
We want a handle that is round, sturdy, and won’t stretch under the weight of the bag.
- The Ring: Create a magic ring and work 4 SC into it. Pull the tail tight.
- The Technique: Instead of working in standard rounds, work in a spiral into the third loop (the loop that sits just under the back loop).
- Length: Continue this spiral until your handle measures 45 cm. This produces a firm, rope-like cord.
- Assembly: Thread the handle through the 4 buttonholes we created in the rim. Use a sewing needle and a matching thread to join the two ends of the handle together invisibly.
🌸 Section 5: The Decorative Scalloped Flap
The final flourish is a “Fan Stitch” rim that gives the bag an elegant, vintage feel.
- Foundation Loops: Join your thread to the rim. Chain 5, skip 4 stitches, and SC into the 5th. Repeat this around to create base loops.
- The Fans: * In the first loop, slip stitch and chain 4.
- Work 9 Treble Crochets (TR) into the loop.
- In the next loop, work 1 SC.
- In the following loop, work 10 TR.
- Repeat this “Fan and Anchor” pattern around.
Video Tutorial:
✨ Final Touches
- Closure: Sew your magnetic snap to the center-inside of the bag, just below the scalloped rim.
- Finishing: Weave in all loose ends carefully using a tapestry needle. Since macrame thread can be slippery, we recommend weaving them back and forth several times for security.
Congratulations! You have completed your Midnight Gala Handbag. This bag is perfect for evening outings or adding a touch of handmade luxury to your daily style. Its dense texture and structured base ensure it will remain beautiful for years to come.
Happy Crocheting!


