
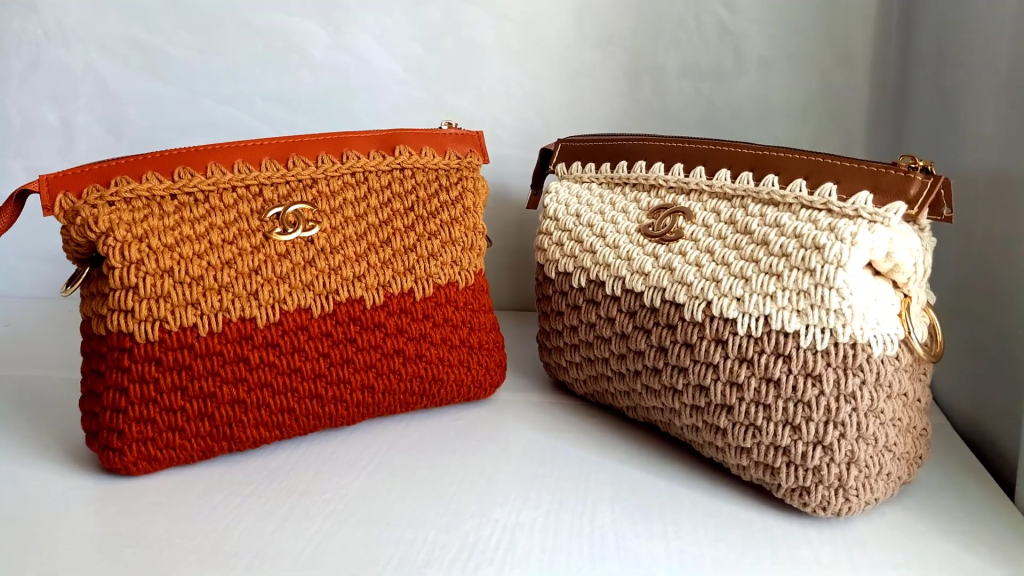
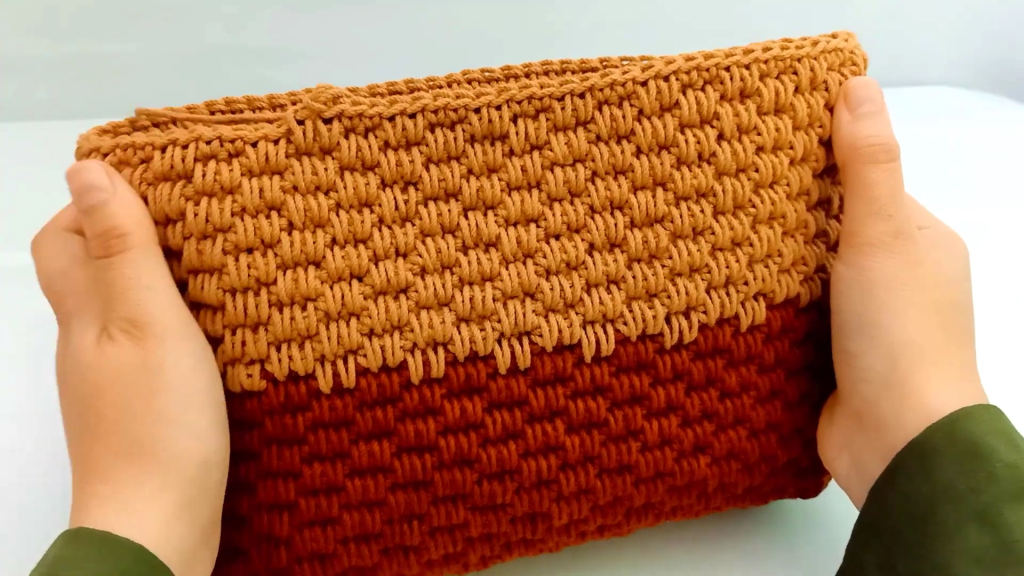
Welcome to your next favorite crochet project! If you’re looking for a bag that combines elegance with everyday practicality, the Celestial Horizon Bag is it. This design features a stunning textured stitch that mimics a woven fabric, a spacious interior, and a professional-looking leather-zipper finish. It’s lightweight enough for a day out but sturdy enough to hold all your essentials.
In this detailed blog post, we will walk through every step, from the foundation of the base to the final installation of the hardware. Grab your hooks, and let’s get started!
🧶 Materials & Tools
Before we dive into the stitches, let’s gather our high-quality supplies to ensure a boutique-style finish.
- Yarn: Macrame Cotton Thread (2.5 mm thickness). You will need two rollers in different colors to achieve the signature two-tone look. (We suggest a neutral beige for the bottom and a vibrant contrast for the top).
- Hook Size: 4.0 mm crochet hook.
- Zipper: A specialized zipper attached to a leather strip (this adds durability and a luxury feel).
- Hardware: Two sturdy metal D-rings or O-rings.
- Notions: A tapestry needle, stitch markers, and sharp scissors.
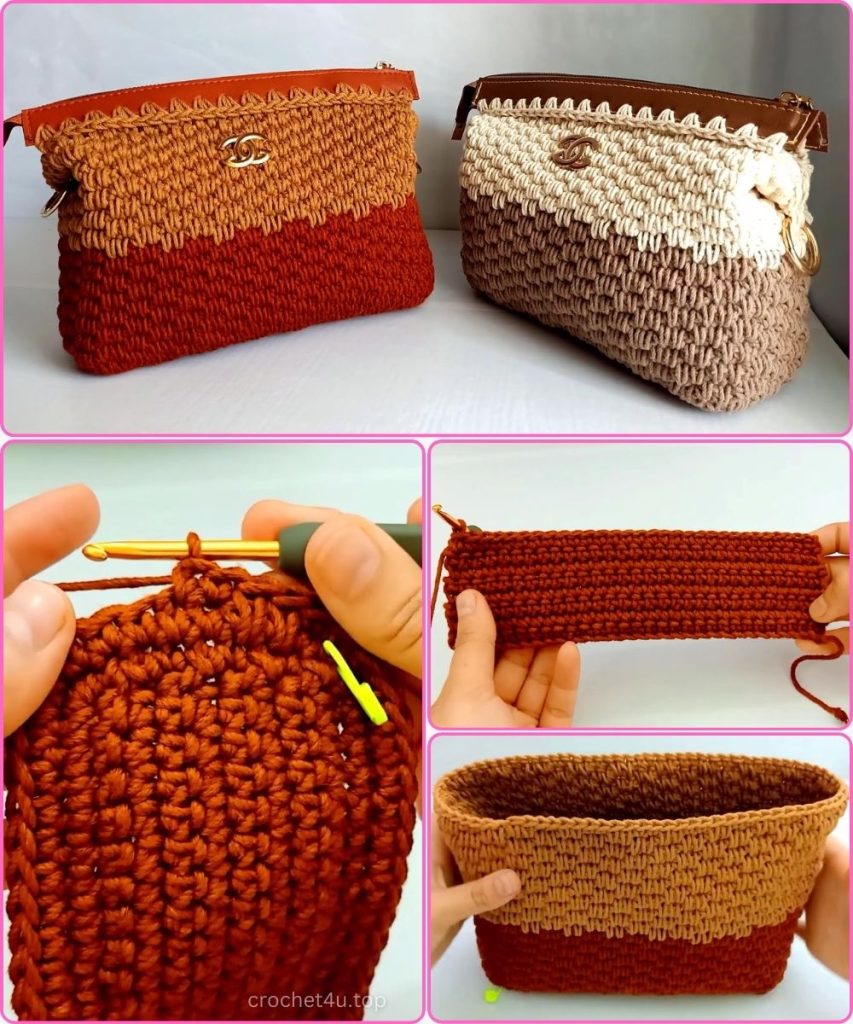
📏 Part 1: Crafting the Foundation Base
The base of this bag is worked in rows of single crochet to provide a flat, solid foundation that won’t sag.
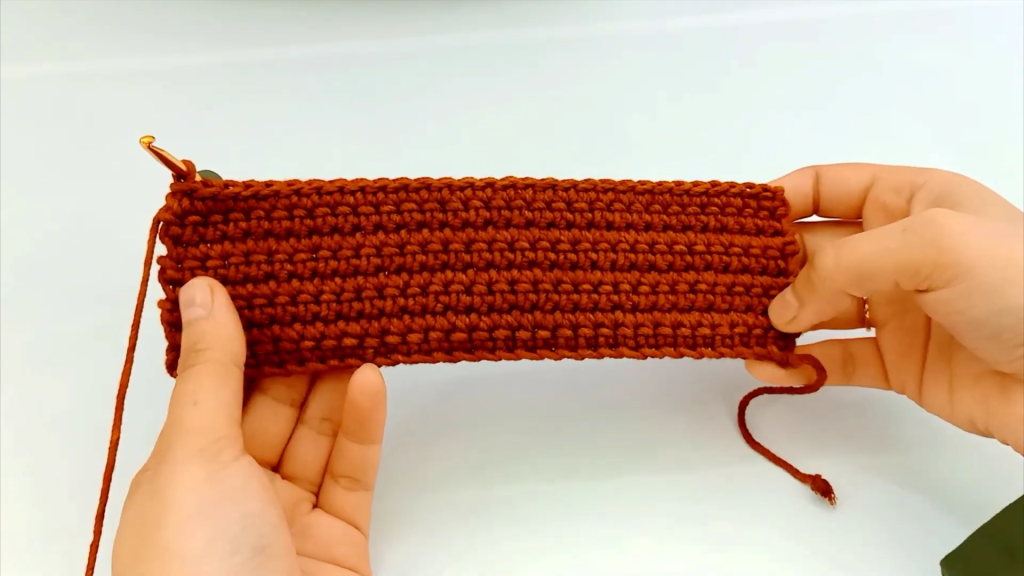
- Starting Chain: Create a slip knot and chain 31.
- Row 1: Starting from the second chain from the hook, work 30 Single Crochet (SC) stitches across.
- Rows 2–8: Chain 1 (turning chain), and work 30 SC in both loops across.
- Final Base Dimensions: Your base should measure approximately 21 cm x 6 cm.
🧱 Part 2: Building the Perimeter
To transition from a flat base to the walls of the bag, we must work around the entire rectangle.
- Sides: Along the short side of the base (where the row ends are), work 8 SC (one stitch per row). Note: The turning chain is for height only; do not count it as a stitch.
- Corner 1: In the first stitch of the long side, work 3 SC (this creates a rounded corner).
- Long Side 1: Work SC in each stitch across (front loops only for a decorative ridge), but stop before the last stitch.
- Corner 2: In the last stitch of this side, work 2 SC.
- Side 2: Work 8 SC along the other short side.
- Corner 3: In the first stitch of the second long side, work 3 SC.
- Long Side 2: Work SC across (front loops only), stopping before the last stitch.
- Corner 4: In the last stitch, work 2 SC.
- Total Stitch Count: You should now have exactly 82 stitches around the perimeter.
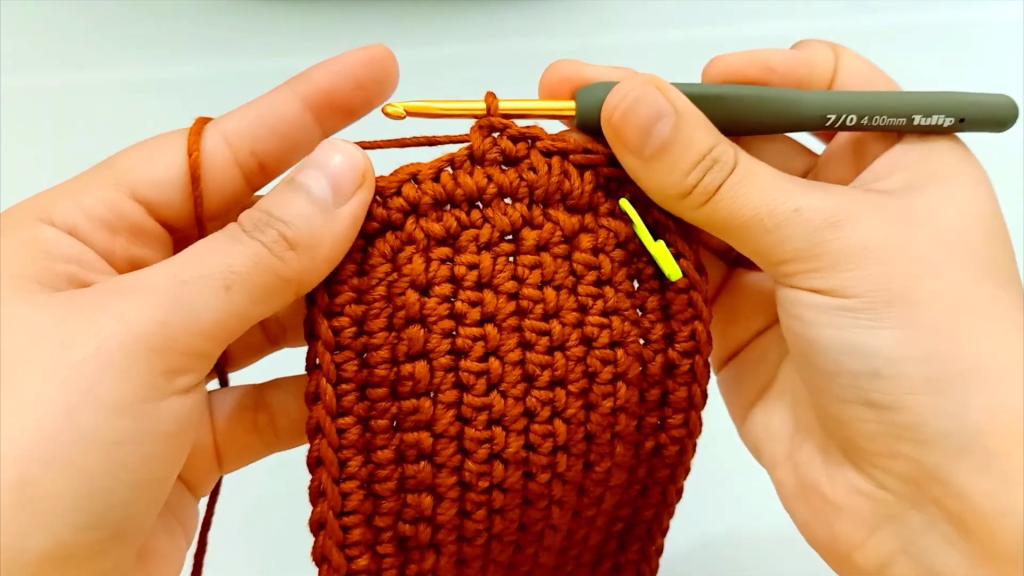
🎨 Part 3: The Woven Texture Pattern
This is where the magic happens! We use a combination of standard and long single crochets to create a thick, textured wall.
- Row 1: Work one full row of 82 SC through both loops to stabilize the frame. Place a stitch marker in the first stitch.
- The Pattern Logic:
- Stitch A: 2 SC in the standard two loops.
- Stitch B: 2 Long Single Crochets (also known as Spike Stitches). To do this, insert your hook under the SC of the row below, pull up a long loop to the height of your current row, and complete the stitch.
- Continuous Rounds: Work this alternating pattern (2 standard, 2 long) in continuous rounds. This means you won’t close the rows with a slip stitch; just keep spiraling upward.
- Color A Section: Complete 15 rows in your first color.
🌈 Part 4: The Color Transition
Switching colors gives this bag its “horizon” look.
- The Switch: When you reach the stitch marker after 15 rows, finish your last stitch with the new color.
- Color B Section: Continue the same pattern (2 standard, 2 long) for another 15 rows.
- Finishing the Body: Once you have a total of 30 pattern rows, fasten off and weave in the ends. Your bag body is now complete!
🤐 Part 5: Preparing the Zipper
Using a leather-attached zipper makes the assembly much easier and more professional.
- Crocheting the Zipper: Join your thread to the first pre-punched hole in the leather zipper strip.
- Stitch Count: Chain 1 (first stitch), then work another SC in the same hole. Continue by making 2 SC in every hole across the leather strip.
- The Tail: After the last stitch, leave about 1 meter of thread before cutting. This long tail will be used to sew the zipper to the bag. Repeat this for both sides of the zipper.

🪡 Part 6: Assembly & Final Details
It’s time to bring all the components together.
- Mapping the Bag: Use stitch markers to mark 9 stitches on each short side of the bag. This leaves 32 stitches for the front and 32 stitches for the back—exactly matching the stitch count on your zipper piece.
- Sewing the Zipper: Using your tapestry needle and the long yarn tail, sew the zipper piece to the penultimate (second to last) row of the bag body. Use a clean running stitch or mattress stitch for an invisible join.
- Hardware Installation: While sewing the zipper, incorporate your metal rings. We recommend placing the ring so it sits slightly lower, reaching the first beige row, for better weight distribution and style. Fix the rings firmly.
- Repeat: Secure the second half of the zipper to the opposite side of the bag.
Video Tutorial:
✨ Conclusion
Your Celestial Horizon Bag is finished! You now have a practical, spacious, and incredibly lightweight bag that looks like it came straight from a designer boutique. The textured “long SC” pattern ensures the bag keeps its shape, while the two-tone design makes it a versatile accessory for any outfit.
Did you enjoy this project? Tell us what colors you chose in the comments below! Happy crocheting! 🧶✨


