
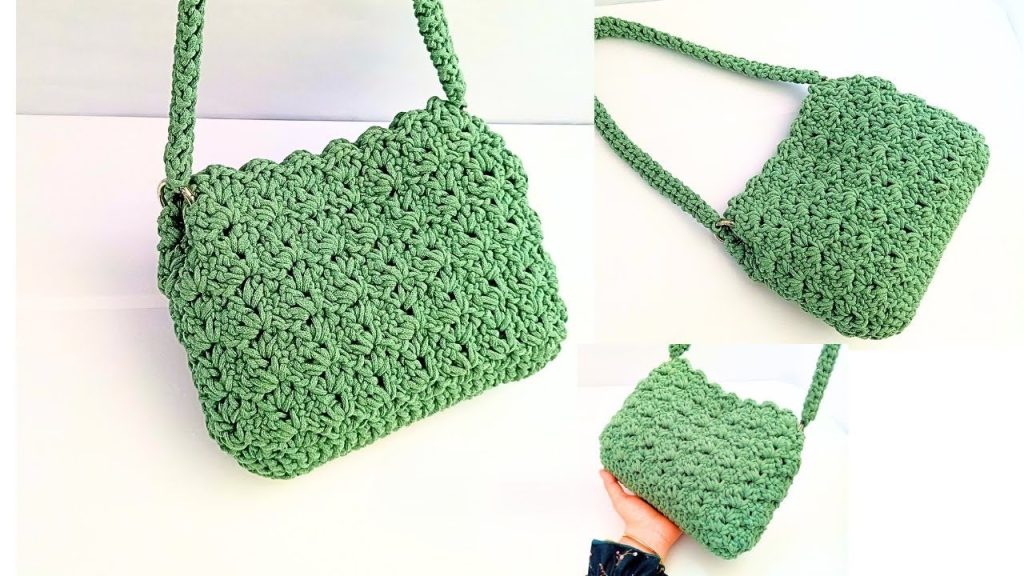
Welcome to a fresh chapter of your crochet journey! To celebrate new beginnings, we are crafting the “New Year’s Bloom” Bag. This design is the epitome of “simple yet sophisticated”—it uses accessible stitches to create a rich, three-dimensional texture that looks like it came straight from a high-end boutique.
Whether you are a beginner looking to level up or a seasoned pro wanting a quick, gratifying project, this long-form guide will walk you through every loop and knot. Let’s pick up our hooks and create something extraordinary!
🧶 Section 1: Materials and Gear
To achieve the structure and definition seen in this bag, the choice of yarn is vital. We want something that holds its shape but feels soft to the touch.
- Yarn: Cotton Cordon Thread (5mm thick). You will need approximately one large pulley (about 250–300g). This thick cord gives the bag “stand-up” power without needing a lining.
- Hook: 6.0 mm (J-10) Crochet Hook. Using a slightly larger hook with the thick cord ensures the stitches are defined but not so tight that they become stiff.
- Hardware: * 2 Large “Gate” Rings (Easy-open metal rings).
- 1 Magnetic Snap Closure (sew-on or prong style).
- Notions: Tapestry needle (extra large for thick cord), stitch markers, and sharp scissors.
📏 Section 2: Crafting the Seamless Oval Base
The foundation of any great bag is a sturdy base. We are creating an oval shape that transitions seamlessly into the walls.
- The Foundation: Start with a slip knot and 20 chains.
- Round 1: * Starting in the 3rd chain from the hook, work 17 Double Crochets (DC) across. Pro tip: Work into the back horizontal bumps of the chain for a cleaner edge.
- In the very last chain, work 6 DC all into the same stitch. This “fan” creates the curve for the end of the oval.
- Rotate your work. Work 17 DC along the opposite side of the starting chains.
- In the final remaining chain space (where you started), work 6 DC.
- Join with a slip stitch (Sl St) to the top of your first DC. (Total: 46 stitches).
- Round 2:
- Chain 1 (does not count as a stitch). Work 17 DC steadily along the straight side.
- Now you’ve reached the curve of 6 stitches. Work an increase (2 DC in each stitch) across those 6 stitches. You now have 12 stitches on the curve.
- Work 17 DC along the second straight side.
- Work an increase (2 DC in each stitch) across the final 6 stitches of the second curve.
- Join with a Sl St. Your base is complete with a total of 58 stitches.
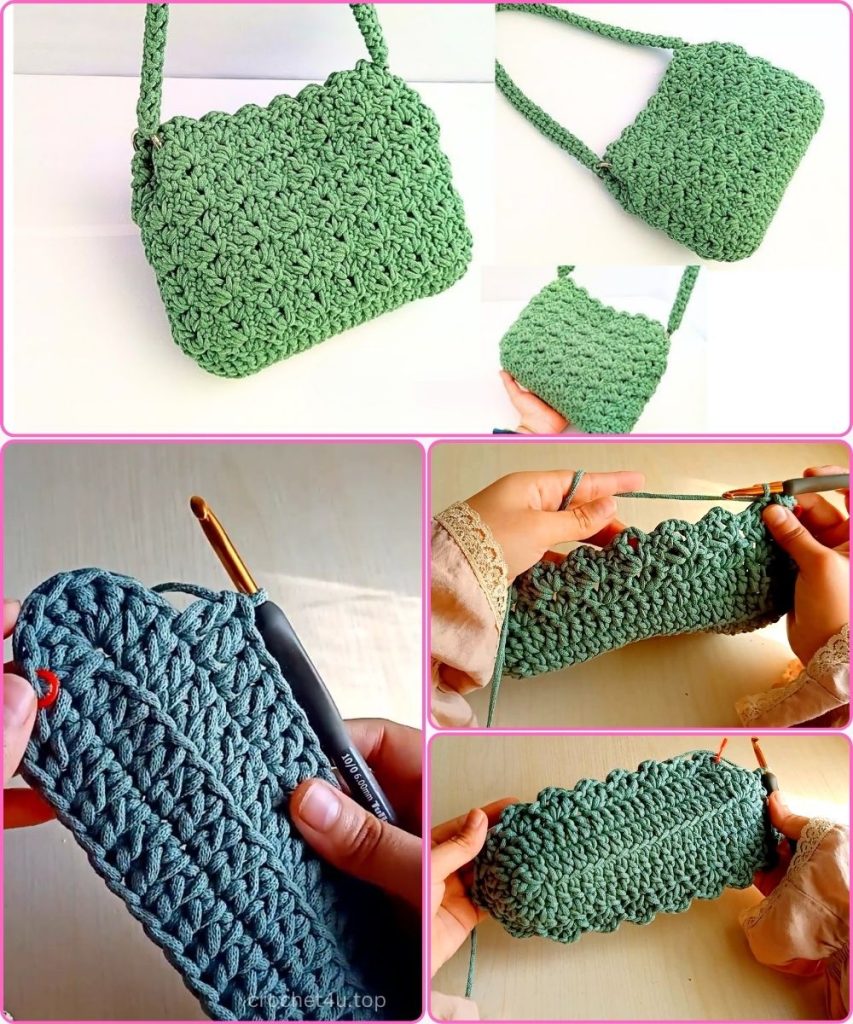
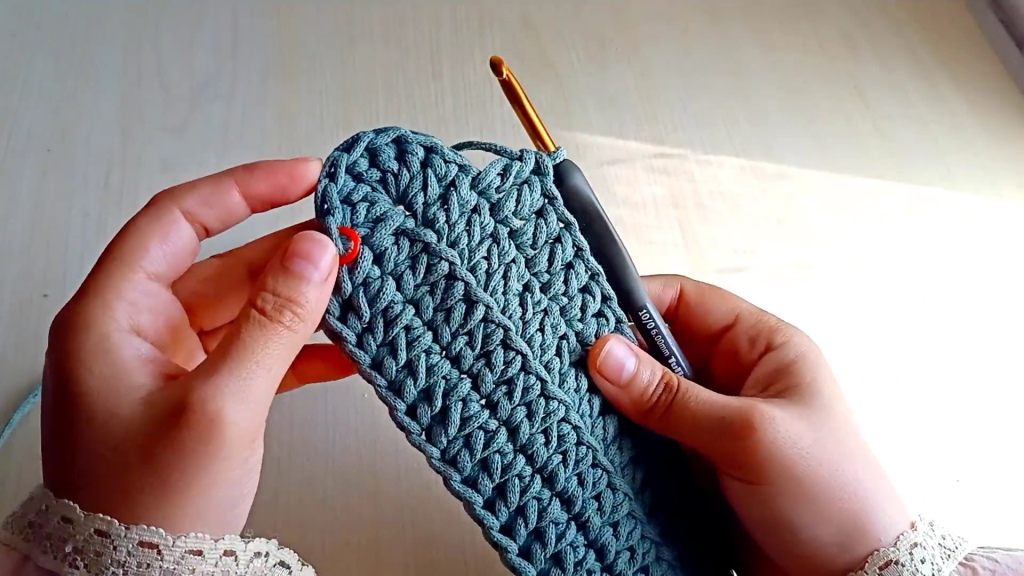
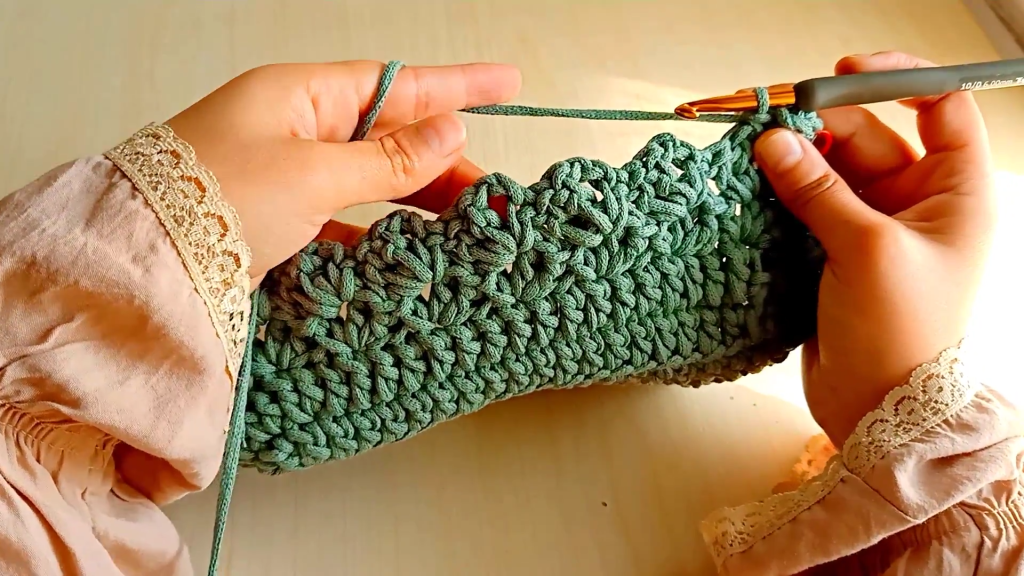
✨ Section 3: The “Petal Ripple” Body Pattern
This is where the magic happens! This pattern uses a “turning” technique to create a zig-zag texture that looks complicated but is surprisingly rhythmic.
- Round 1 of Body: * In the first stitch, work the following cluster: [2 Double Crochet, 2 Chains, 1 Single Crochet] all in that same spot.
- Skip 2 stitches.
- Repeat the cluster: [2 DC, 2 Ch, 1 SC] in the next stitch.
- Repeat this all the way around. Join with a Sl St to the first DC.
- Round 2 (The Turn):
- Chain 1 and TURN your work. We are now working in the opposite direction (on the inside of the bag).
- Slip stitch into the first Chain-2 space (the “window” created by the cluster below).
- Chain 1 to rise, then work the cluster: [2 DC, 2 Ch, 1 SC] directly into that Ch-2 loop.
- Repeat this cluster in every Ch-2 loop around the bag. Join with a Sl St.
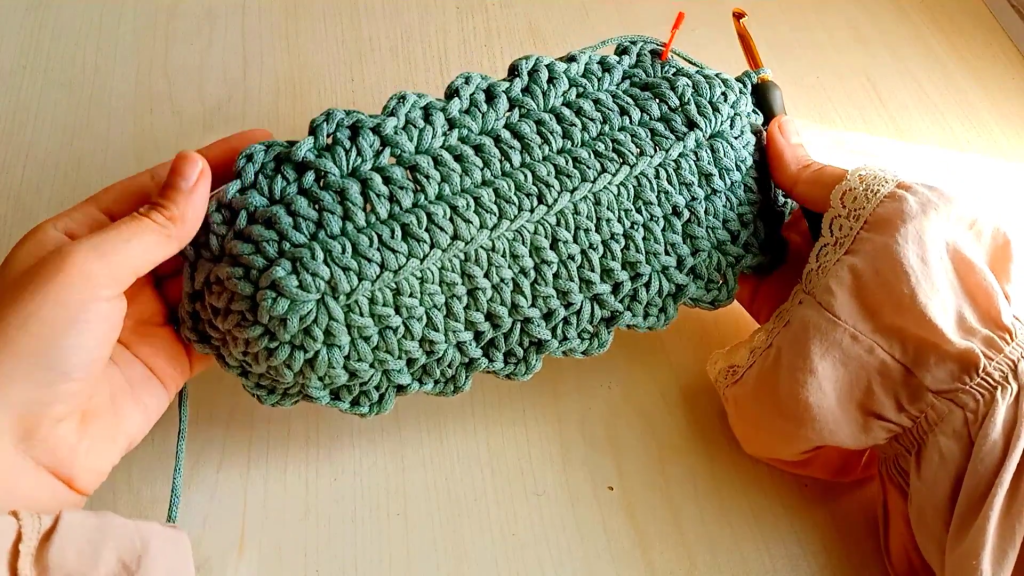
- Rounds 3–11:
- Continue this pattern, turning your work after every round. By alternating directions, the stitches “stack” in a way that creates a beautiful, thick, rippled fabric.
- Continue until the body measures approximately 18 cm (7 inches) in height, which is usually around 11 rounds total.
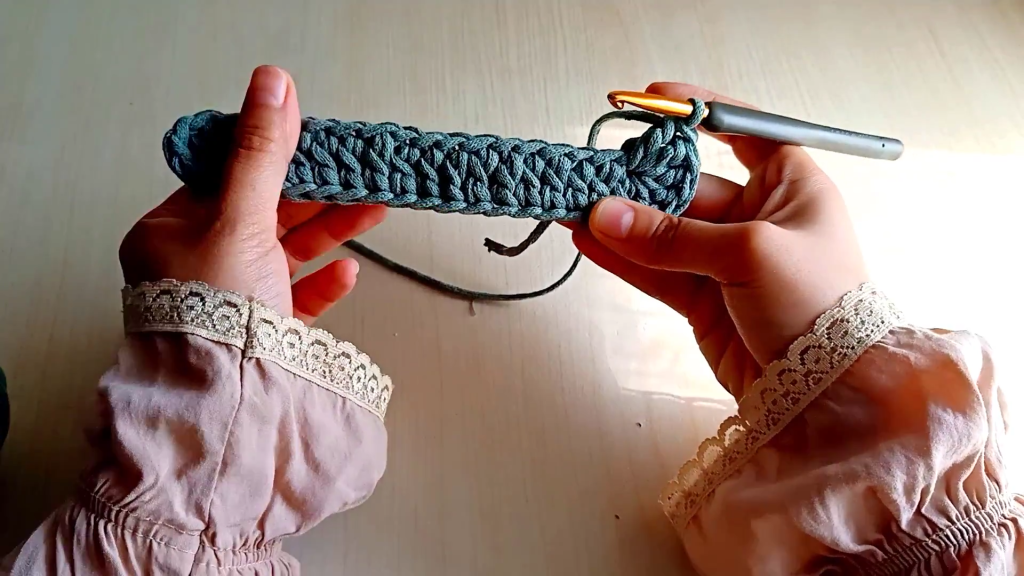
📐 Section 4: The “Thermal” Shoulder Strap
A flimsy strap can ruin a good bag. We are using the Thermal Single Crochet stitch to create a handle that is thick, stretchy, and incredibly strong.
- Setup: Attach your thread to one of the metal gate rings.
- Foundation: Work 2 SC directly onto the ring. Chain 1 and turn.
- The Thermal Stitch: * Insert your hook into the back loop of the current stitch AND the unworked loop of the row below it.
- Work a Single Crochet through both loops.
- This creates a double-thick fabric that feels like a woven belt.
- Length: Continue until the strap reaches 60 cm (24 inches).
- Finish: Work the final 2 stitches directly onto the second metal ring to secure it. Fasten off and weave in the ends.
🧲 Section 5: Final Assembly and Finishing
- Hardware Placement: Attach your metal rings (with the strap already attached) to the top sides of the bag. Because we used a 5mm cord, the bag is sturdy enough to hold the rings directly through the crochet stitches between the clusters.
- The Closure: Center your magnetic snap inside the rim. Use a standard sewing thread in a matching color to stitch the snap pieces to the inner clusters of the bag.
- Steam Blocking (Optional but Recommended): To make the bag look truly professional, lightly steam the “Petal Ripple” pattern with an iron (do not touch the iron to the yarn!). This will set the stitches and give the bag a crisp, boutique finish.
💡 Section 6: Pro Tips for Success
- Tension Control: When working the “Petal Ripple” stitch, try to keep your Chain-2 loops consistent. If they are too loose, the bag will look “gappy”; if they are too tight, it will be hard to work into them in the next round.
- Thread Management: Cotton cordon can be heavy. If your hand gets tired, take a break! The beauty of this bag is the uniform tension.
- Customization: Want a crossbody? Simply extend the thermal strap to 110 cm. Want a clutch? Omit the strap and just use the gate rings as decorative accents!
Video Tutorial:
Congratulations! You’ve just finished the “New Year’s Bloom” Bag. This accessory is as functional as it is beautiful—spacious enough for your essentials and stylish enough for any occasion.
Happy Crocheting! Don’t forget to share your finished masterpieces!


