
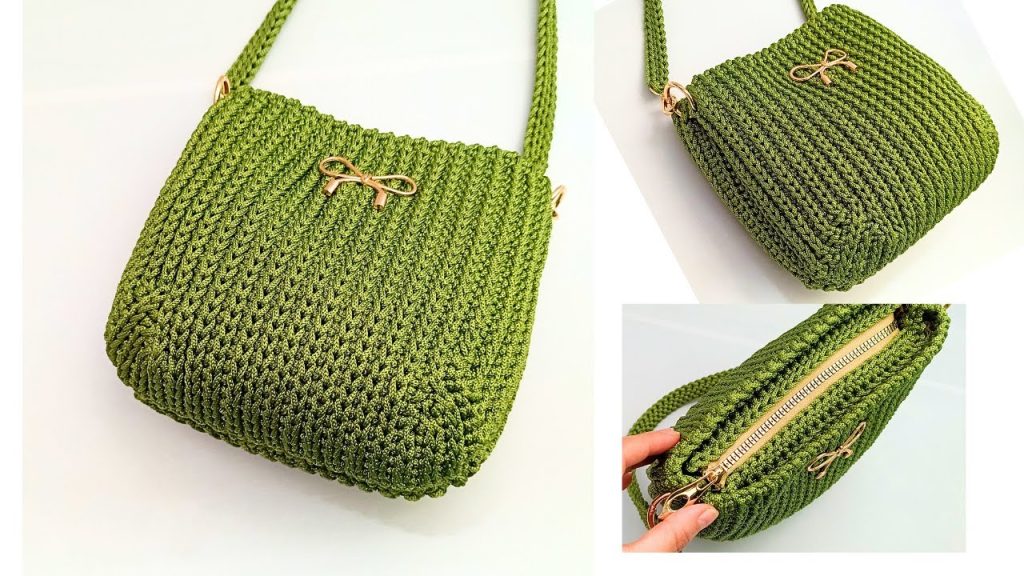
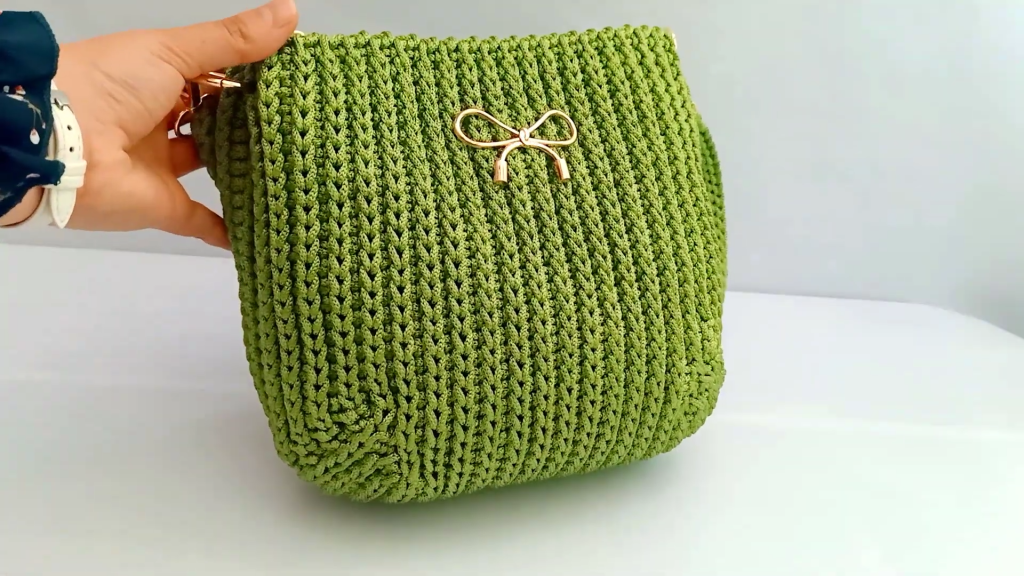
Welcome to what is arguably one of the most sophisticated crochet patterns you will ever attempt. This isn’t just a bag; it is an exploration of sculptural crochet. By using a combination of short rows, alternating slip-stitch textures, and a specific “tight-tension” finishing technique, we are going to create a handbag that holds its shape like leather but retains the soul of handmade art.
This design, inspired by the innovative techniques of Amena Crochet Bags, is perfect for the crocheter who is tired of “floppy” bags and wants something that looks like it belongs on a boutique shelf in Milan. Let’s begin this journey.
🧶 Section 1: The Material Manifest
To achieve the “sculpted” look, you cannot use standard wool or acrylic. You need materials with high tensile strength.
- The Yarn: Polyester Macramé Thread (3mm – 4mm). You will need approximately 450–500 grams. Polyester is preferred over cotton here because it has a slight sheen and better “memory” for the curved shapes we are creating.
- The Hook: 5.0 mm (H) Ergonomic Hook. Because macramé thread can be tough on the hands, an ergonomic handle is highly recommended.
- The Zipper: A high-quality nylon or metal zipper (approx. 25-30 cm).
- The Finishing Kit: * A Large-Eye Tapestry Needle (steel is better than plastic for pulling through macramé).
- Stitch Markers (you will need at least 10 to keep track of the tiered rows).
- Lighter/Matches: To singe the ends of the polyester thread to prevent fraying (a professional secret!).
📏 Section 2: Understanding the Geometry
Before we stitch, let’s look at the math. The bag is composed of two identical panels. The “curve” isn’t created by increasing in a circle, but by varying the length of rows.
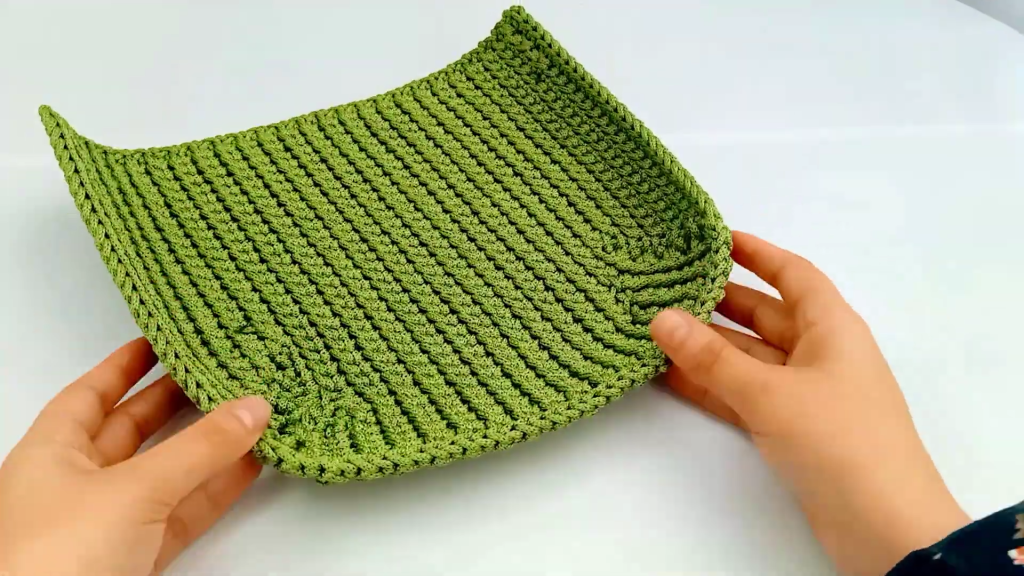
We start with a base of n=25 stitches. As we skip the first stitch in subsequent rows, we create a 45∘ taper. Later, we use increases to mirror that taper on the opposite side. The final structural integrity comes from a “Rim of 88” slip stitches that pulls the 2D fabric into a 3D bowl shape.
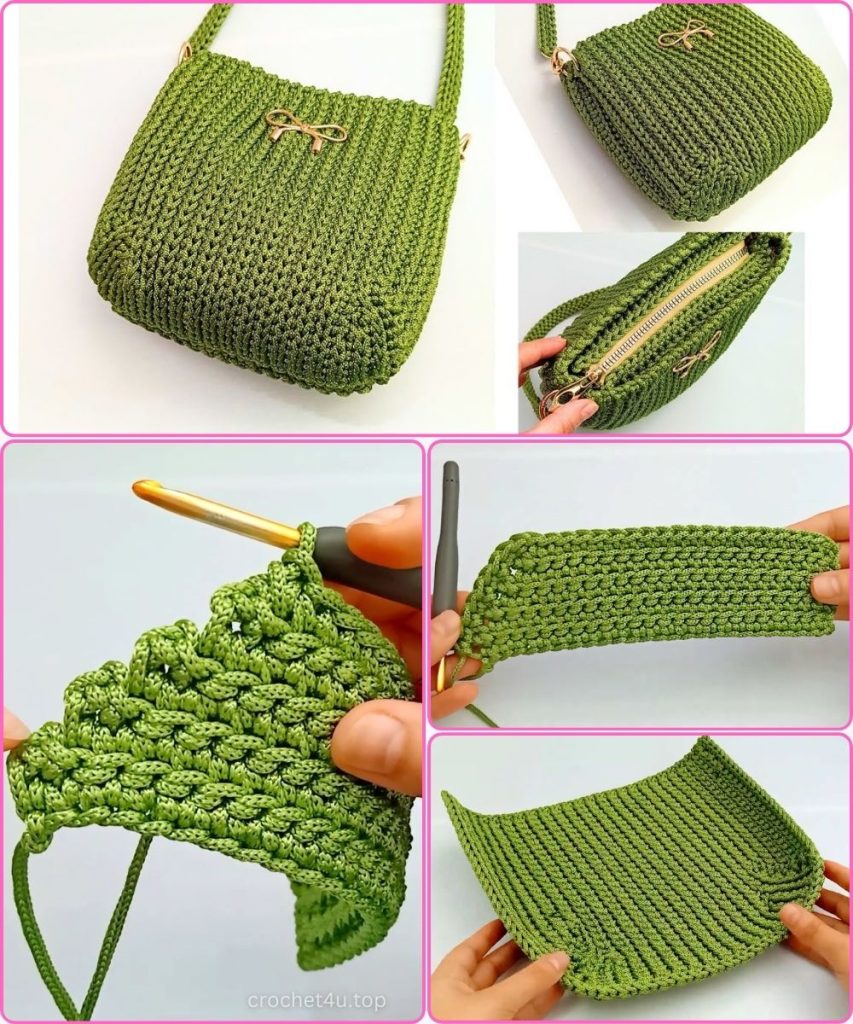
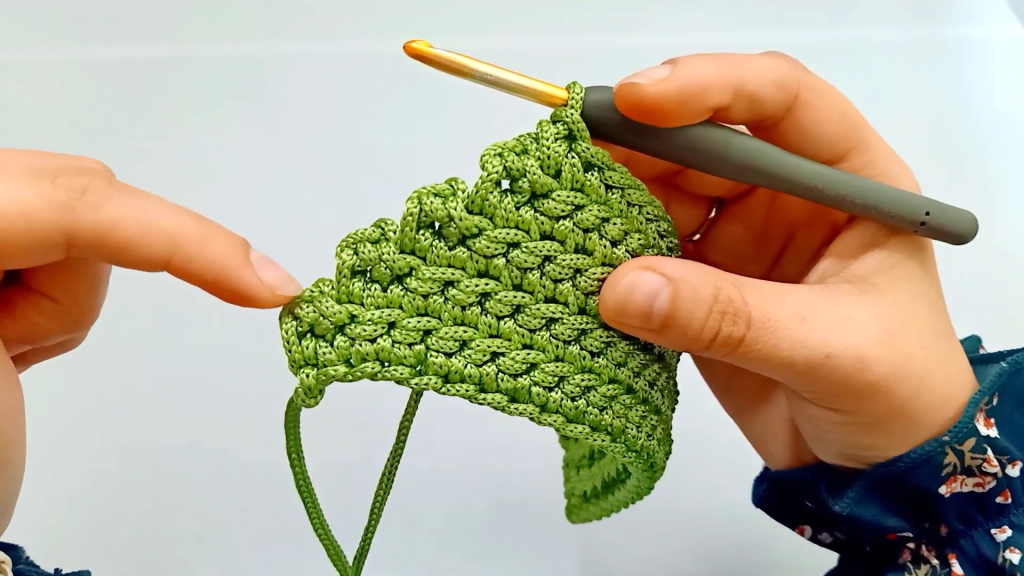
📐 Section 3: Crafting the First Sculptural Panel (Phase 1: The Taper)
This phase creates the first “staircase” of the bag’s side.
- Foundation: Create a slip knot and chain 26.
- Row 1: Starting in the 2nd chain from hook, work 25 Single Crochet (SC).
- Row 2 (Texture Shift): Turn, skip the very first stitch. Work 24 Slip Stitches (SL ST) through both loops. This skip is what begins the “staircase” effect.
- Row 3 (The Ridge): Turn. Now, look for the horizontal loop created by the slip stitches of the previous row. Work 24 SC into that loop only. This creates a “ribbed” ridge on the front of the bag.
- Row 4: Turn, skip the first stitch, and work 23 SL ST.
- Row 5: Turn, work 23 SC into the ridge loop.
- Row 6: Turn, skip the first stitch, and work 22 SL ST.
- Row 7: Turn, work 22 SC.
- Row 8: Turn, skip the first stitch, and work 21 SL ST.
🏛️ Section 4: Phase 2: The Body Expansion
Now we transition from the side taper to the wide front face of the bag.
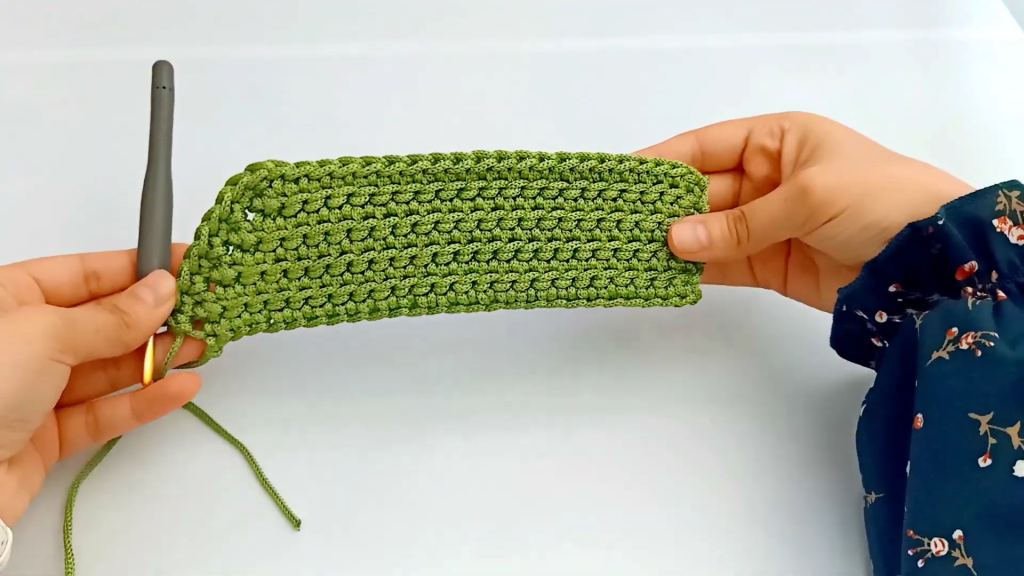
- Row 9: Turn. Work 21 SC into the ridge. When you reach the end, do not turn. Instead, work 9 SC down the side of the “staircase” you just built (1 SC for every row edge). Your total stitch count is now 30 SC.
- Row 10: Turn. Work 30 SL ST across.
- Row 11: Turn. Work 30 SC into the ridge loop.
- Row 12 (Short Row): Turn. Work only 7 SL ST. This creates the “indent” where the bag folds.
- Row 13: Turn, skip the first stitch, work 6 SC.
- Row 14: Turn, work 6 SL ST.
- Row 15: Turn, work 5 SC.
- Row 16 (The Bridge): Turn. Work 31 SL ST all the way across the entire top edge to reunite the sections.
- Row 17: Turn. Work 31 SC into the ridge loop.
- The Repetition: To create the width of the bag, repeat the Row 16 & 17 sequence 11 times.
🧱 Section 5: Phase 3: Mirroring the Sculpture
To finish the panel, we must reverse the “staircase” using increases.
- Row 39: Work 31 SC.
- Row 40: Turn. Work 5 SL ST.
- Row 41: Turn. Increase in the first stitch (2 SC in one), then SC across the remaining 5. (Total 6 SC).
- Row 42: Turn. Work 6 SL ST. At the end of the row, work a SL ST into the row below to “anchor” it, skip one stitch of the main body, and SL ST into the next.
- Row 43: Turn. Increase in the first stitch, then SC across. (Total 7 SC).
- Row 44: Turn. Work 30 SL ST across the whole top.
- Row 45: Turn. Work 30 SC.
- Rows 46–53: Fasten off and re-attach at the 9th stitch. You will now work the final 21–25 stitches, mirroring the very first rows by increasing at the edges until your final row (Row 53) has 25 SC.
🎡 Section 6: The “Rim of 88” (Crucial Step)
This is the secret to the bag’s shape.
- Do not fasten off Row 53.
- Work Slip Stitches all the way around the curved perimeter of the panel.
- The Tension Secret: You must keep your tension very tight during this round. This “shrinks” the edges slightly, forcing the flat panel to cup upward into a 3D bowl.
- You should have exactly 88 Slip Stitches when you return to the start.
- Repeat all steps for the Second Panel.
🤐 Section 7: The Zipper Housing
Instead of sewing a zipper directly to the bag (which looks messy), we create “Housing Strips.”
- The Strips (Make 2): Create a Double Chain of 25. If you prefer a standard chain, chain 26 and work 25 SC.
- Structure: Work 1 row of 25 SC in both loops.
- The Assembly: Sandwich your zipper between these two strips.
- Sewing: Use a back-stitch with your tapestry needle. Ensure the zipper is not stretched while sewing, or the bag will “pucker” when finished.
🪡 Section 8: The Final Assembly (Joining the Worlds)
- Zipper Insertion: Take your zipper unit and sew it into the top opening of your two main panels. Do not sew it right to the edge; leave about 2mm of the crochet panel visible for a “nested” look.
- The Main Join: Flip the panels so the Wrong Sides (inside) are facing out.
- Slip Stitch Seam: Use your hook to SL ST the two panels together through the 88 stitches we made earlier.
- Pro Tip: Only go through the inner loops of each panel’s edge to create a seam that is invisible from the outside but acts like a “spine” on the inside to keep the bag upright.
- Handles: You can attach pre-made leather handles with rivets or crochet a simple I-cord handle to attach to the sides.\
Video Tutorial:
✨ Section 9: Professional Finishing Touches
- Blocking: Because polyester macramé is thermoplastic, you can use a steam iron (with a cloth over the bag!) to lightly steam the seams. This “sets” the shape permanently.
- Singeing: Check every single yarn tail. Trim them to 1cm, then carefully melt the tip with a lighter and press it against the inside of the bag. It will never come undone.
You have successfully created the Sculpted Architectural Bag! It is a complex build, but the result is a durable, high-fashion accessory that defies the “traditional” look of crochet.
Would you like me to explain the “Double Chain” technique in more detail for your zipper strips?


