
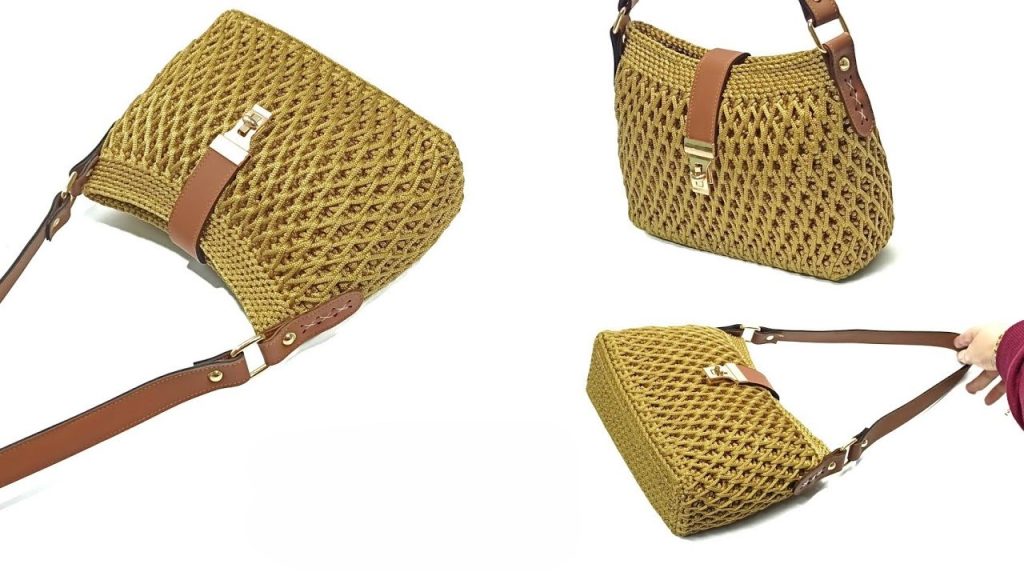
Are you ready to elevate your accessory game with a piece that screams “boutique luxury” but is entirely handmade by you? Today, we are diving deep into the creation of a stunning, spacious shoulder bag. This design combines structural integrity with a unique, textured “V” stitch and deep relief patterns, making it as much a piece of art as it is a functional tote.
This bag is worked using Macrame Chain Cord (Selsela), which provides a beautiful sheen and the rigidity needed for a bag of this size. Whether you’re a seasoned pro or an ambitious beginner, this long-form guide will walk you through every loop, pull, and stitch.
🧶 Materials & Tool Kit
Before we pick up the hook, let’s ensure your workstation is prepared.
- Yarn: Approximately 380 grams of 3mm Macrame Chain Cord (Selsela). This cord is favored for its durability and slight stretch.
- Hook: A 4.0 mm crochet hook. (You can go up to a 5.0 mm if you have tight tension, but a 4.0 mm is recommended for a firm bag wall).
- Hardware: * A set of leather handles with a matching leather tongue/closure.
- A metal lock (if not included with the leather tongue).
- D-rings or gate rings (optional, if making your own handles).
- Notions: Stitch markers, scissors, a tapestry needle, and a lighter (essential for sealing the ends of macrame cord).
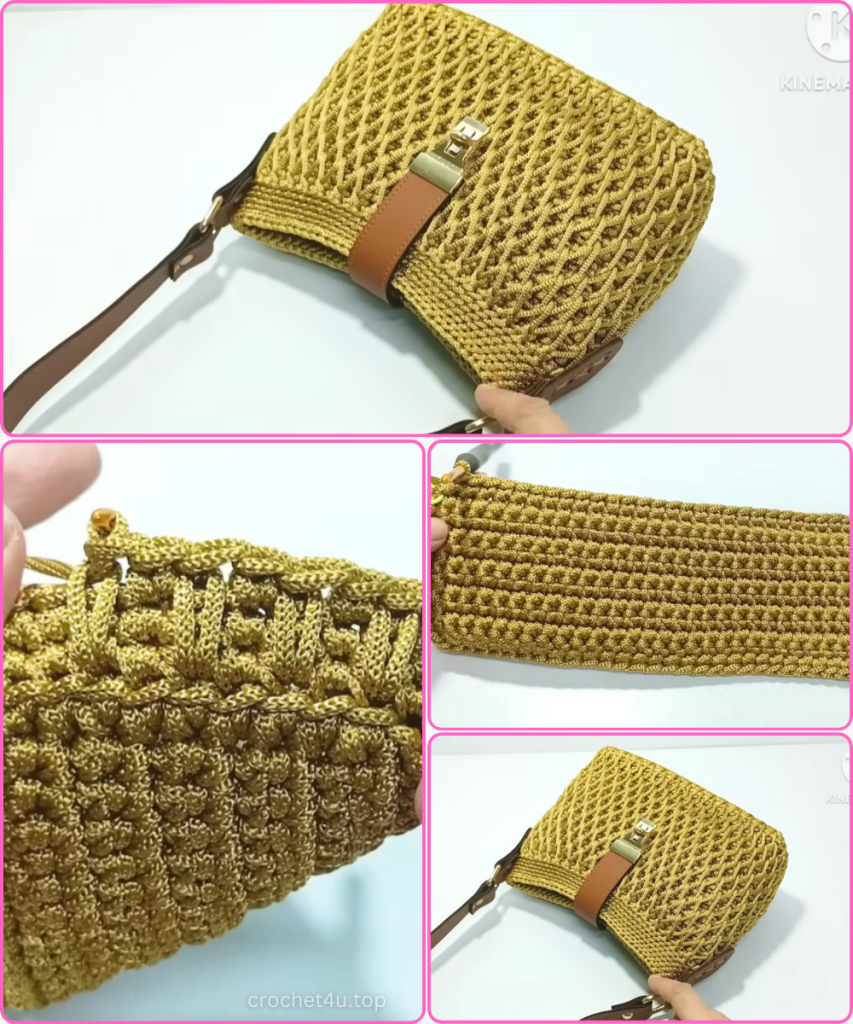
📐 Section 1: Engineering the Foundation (The Base)
The foundation determines the capacity and shape of your tote. We begin with a sturdy rectangular base.
- The Starting Chain: Create a slip knot and chain 28. This should measure approximately 19 cm.
- Row 1: Work in the “back bumps” of the chain for a cleaner finish. Starting in the second chain from the hook, work 28 Single Crochets (SC) across.
- Building Height: Continue working back and forth in rows of SC (Chain 1 and turn at the end of each row).
- Completion: Work for 10 rows. After 10 rows, your base should measure roughly 22 cm in length and 8 cm in width.
- The Perimeter Edge: To transition to the walls, we must “box” the base. Chain 1 and work SC all the way around the rectangle.
- Corners: In each corner stitch, work [1 SC, Chain 1, 1 SC] to allow the work to turn smoothly.
- Stitch Count: Ensure you have an even distribution of stitches on all four sides.
🧱 Section 2: Rising Up (Transitioning to the Body)
Now we shift from 2D to 3D.
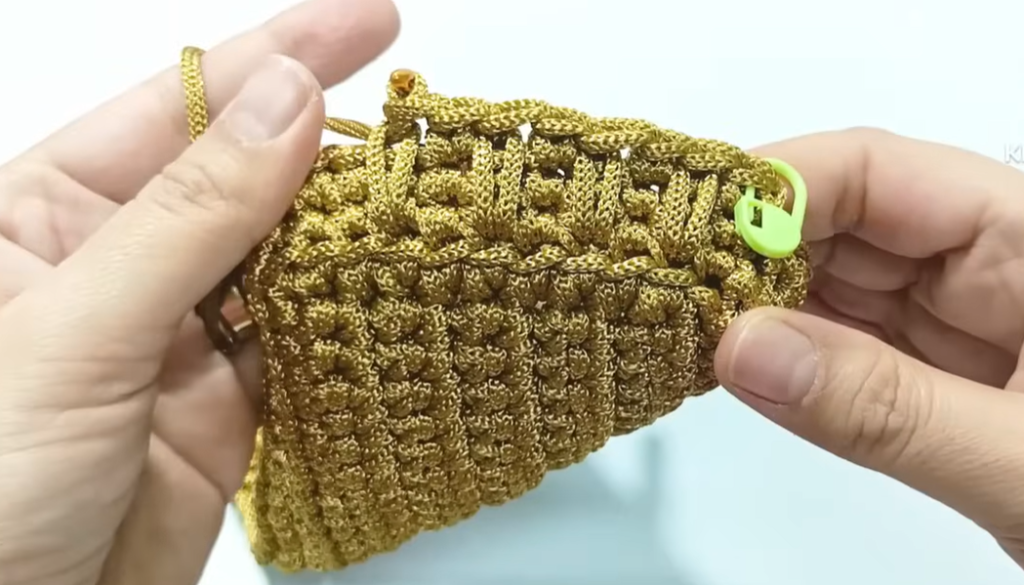
- Round 1 (The Ridge): To create a crisp “bottom” to your bag, work the first round of the body in the Back Loop Only (BLO). Work 1 SC in every stitch around. This creates a structural ridge that helps the bag stand upright.
- Round 2: Work one round of standard SC under both loops. Join with a slip stitch, but do not turn. We are now working in a spiral (or joined rounds, using a marker for the start).
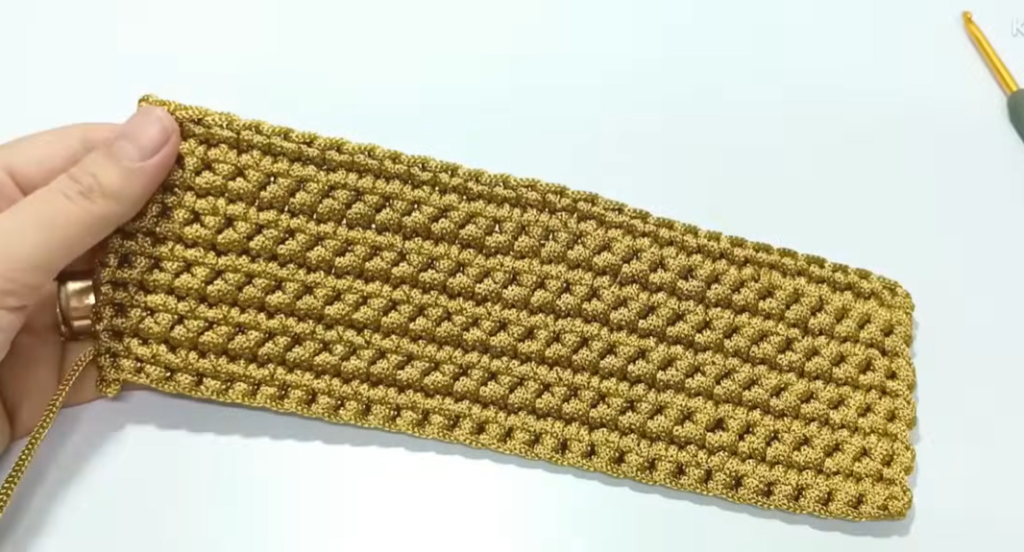
✨ Section 3: The “Deep V” Textured Stitch
This is the heart of the bag’s design. It’s a two-row repeat that creates a beautiful, interlaced texture.
- The “Deep” Row: * Alternate between a standard SC and a Deep SC (Spike Stitch).
- For the Deep SC: Instead of inserting the hook into the top of the stitch below, insert it into the base of the stitch from the previous round (Round 1). Pull up a long loop to the height of your current work and complete the SC.
- Skip one stitch behind the deep SC and work a regular SC in the next.
- The “Bridge” Row:
- In the next round, we “bridge” the deep stitches.
- Insert your hook under the left “leg” of one Deep SC and the right “leg” of the next Deep SC. Yarn over and pull through both, then complete your SC. This creates a slanted “V” effect.
- The Repeat: Continue alternating these rows. As the bag grows, the texture will start to look like woven fabric.
- Growth: Continue until the body of the bag reaches a height of 16 cm.
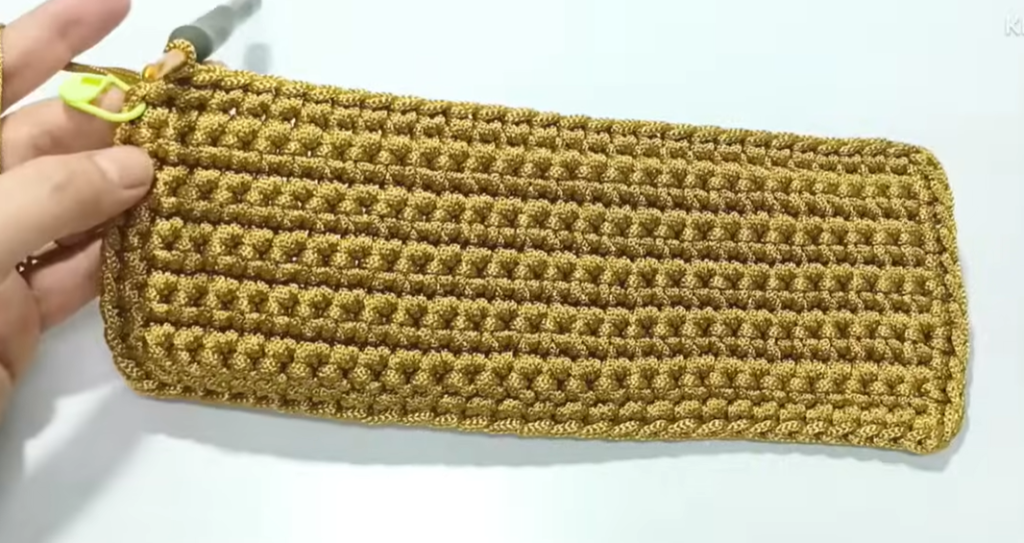
🏛️ Section 4: The Refined Rim
To ensure the top of the bag doesn’t stretch out with heavy use, we finish with a very dense section.
- The Slip Stitch Border: Transition to working Slip Stitches around the entire rim.
- Technique: Work these slip stitches in the Back Loop Only (BLO).
- The Band: Continue for 6 rounds. This creates a thick, ribbed band at the top of the tote that looks like a store-bought finish. It also provides a sturdy surface to attach your leather handles.
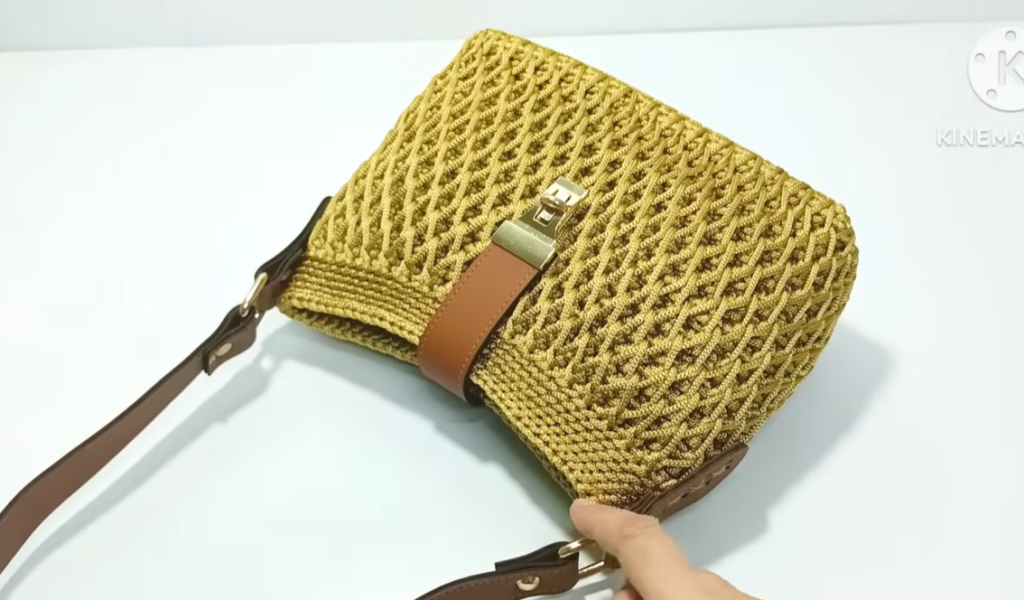
🛠️ Section 5: Assembly and Professional Finishing
Now we transform our crochet fabric into a luxury tote.
- Securing the Ends: Since this is macrame cord, use a lighter to carefully melt the ends of your yarn before weaving them in. This prevents the cord from unraveling over time.
- Attaching Leather Elements:
- The Tongue: Center the leather closure tongue on the back rim of the bag. Use a tapestry needle and a scrap of the same cord to sew it through the pre-punched holes in the leather.
- The Handles: Position your leather shoulder straps symmetrically on the front and back. Ensure they are sewn through the thick slip-stitch band for maximum strength.
- The Lock: Attach the metal portion of the lock to the front of the bag, aligning it with the leather tongue.
Video Tutorial:
💡 Pro-Tips for a Better Bag
- Tension Control: When working the “Bridge” row, keep your loops slightly loose so the bag doesn’t “pinch” inward.
- Stitch Markers: With textured stitches, it’s easy to lose the start of your round. Keep a marker in the first stitch of every round.
- Alternative Straps: If you don’t have leather handles, you can crochet two sturdy SC bands (about 4 stitches wide and 60 cm long) and sew them directly to the bag.
Your Masterpiece is Complete! You now have a spacious, high-fashion shoulder bag that is as durable as it is beautiful. The “Deep V” texture not only looks amazing but creates a thick wall that protects your belongings. Happy Crocheting!


