
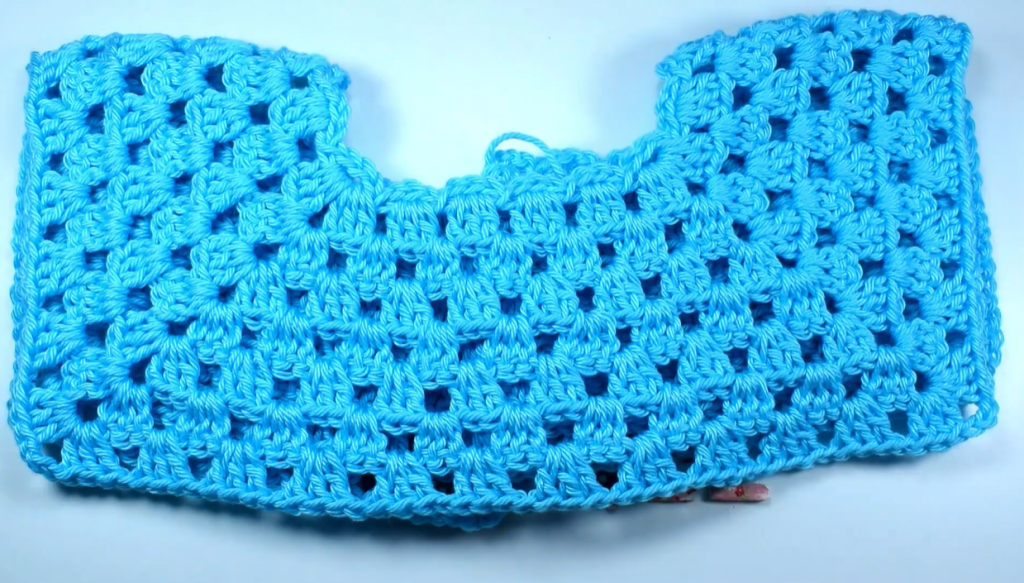
This elegant yoke features a solid, textured neckband that flows into a delicate all-over floral lace pattern. This design is perfect for transforming into a beautiful dress, a stylish cardigan, or a unique top by simply adjusting the length and armhole separation. The pattern uses a classic top-down raglan construction worked in the round.
This detailed pattern is provided for three sizes: Newborn (NB), 6-12 Months (6-12M), and 2-3 Years (2-3Y).
Materials Needed 🧶
- Yarn: Approximately 150-250 yards of Sport Weight (#2) or light DK Weight (#3) yarn. A soft, light yarn like cotton, silk, or a high-quality acrylic blend is recommended for the best drape and lace definition.
- Main Color (MC): Rose Pink (Solid)
- Crochet Hook: 3.5 mm (US E-4), or the size needed to obtain gauge.
- Buttons: 4-6 small pearl or decorative buttons (approx. 1/4 inch / 6mm).
- Tapestry Needle: For seaming and weaving in ends.
- Stitch Markers: 4 markers for the raglan corners.
Skill Level & Notes 💡
- Skill Level: Advanced Intermediate. Requires concentration to maintain the lace pattern repeat and manage the raglan increases within the lace structure.
- Construction: The yoke is worked flat in rows from the top-down to create the back opening/button placket, then the body is joined into the round.
- Lace Repeat: The main floral lace pattern is worked over a multiple of 4 stitches.
- Chains: Ch 3 at the beginning of rows always counts as the first DC unless noted otherwise.
Gauge 📏
In Half Double Crochet (HDC) (Neck Band) using a 3.5 mm hook: 16 HDC stitches and 13 rows = 4 inches (10 cm) square.
Abbreviations 📚
| Abbreviation | Description |
| ch | chain |
| sl st | slip stitch |
| sc | single crochet |
| hdc | half double crochet |
| dc | double crochet |
| tr | treble crochet |
| st(s) | stitch(es) |
| rep | repeat |
| sk | skip |
| BLO | Back Loop Only |
| FPDC | Front Post Double Crochet |
Export to Sheets
Special Stitch ✨
Floral Lace Stitch (FLS)
This creates the main body texture:
- FLS: (Dc, ch 2, dc) all worked into the same stitch or space.
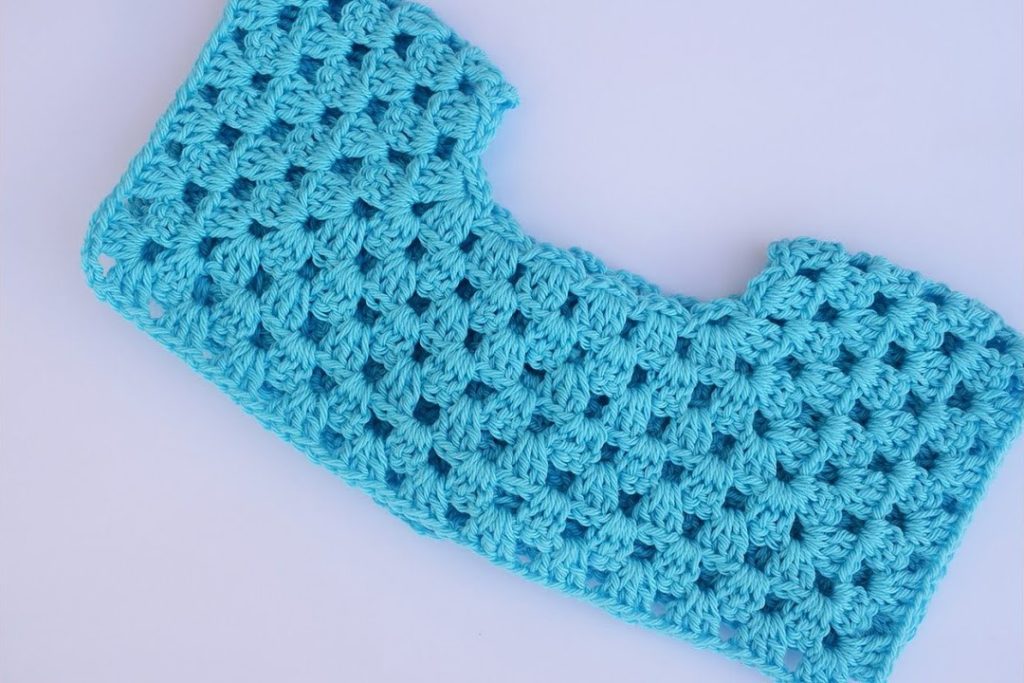
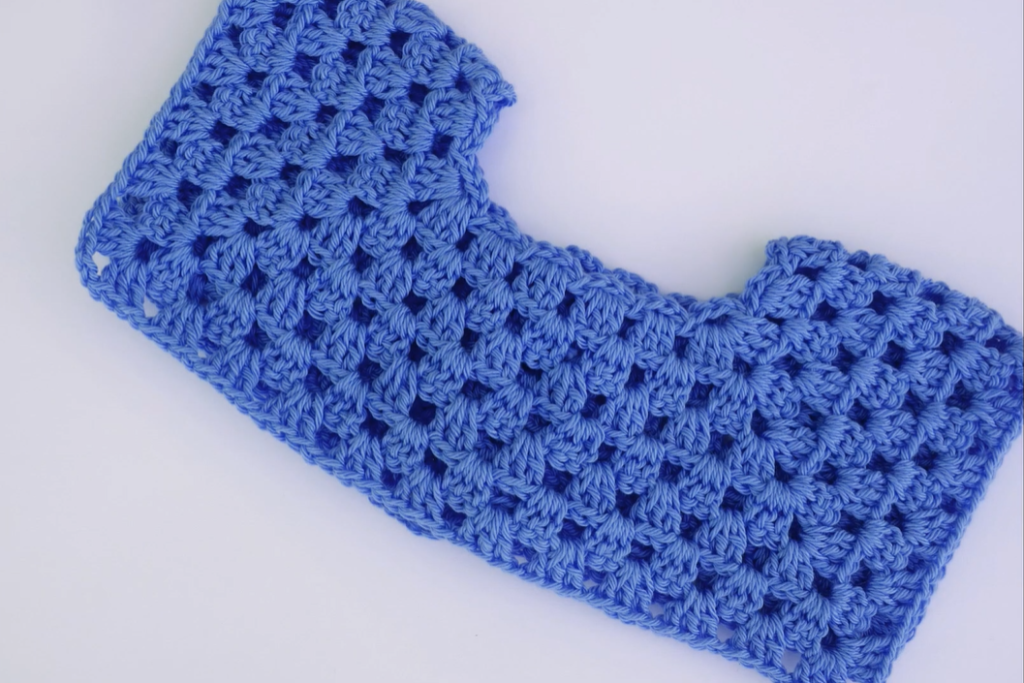
Part 1: Initial Yoke Setup (HDC Neckband) ⬆️
The yoke is worked flat in rows to create the back opening.
| Size | Starting Chain (incl. Ch 2) | Stitches Per Section | Total Sts (Row 1) | Total Raglan Rows |
| NB | Ch 66 | 8F / 10S / 18B / 10S / 8F | 66 DC | 6 Rows |
| 6-12M | Ch 78 | 10F / 12S / 22B / 12S / 10F | 78 DC | 8 Rows |
| 2-3Y | Ch 90 | 12F / 14S / 26B / 14S / 12F | 90 DC | 10 Rows |
Export to Sheets
Row 1 (Neck Setup): Dc in the 4th ch from hook (counts as 2 dc). Dc in the next (F-3) sts. [Dc, ch 2, dc] in the next st (PM in ch-2 sp). Dc in the next (S) sts. [Dc, ch 2, dc] in the next st (PM). Dc in the next (B) sts. [Dc, ch 2, dc] in the next st (PM). Dc in the next (S) sts. [Dc, ch 2, dc] in the next st (PM). Dc in the last (F-1) sts.
Rows 2 – Raglan (HDC): Ch 2 (does not count as st), turn. Hdc in the BLO of each st up to the first ch-2 sp. [Hdc, ch 2, hdc] in the ch-2 sp. Rep the increase sequence 3 more times. Hdc in the BLO of each remaining st.
- Note: Repeat Row 2 for the number of Raglan Rows indicated in the table above.
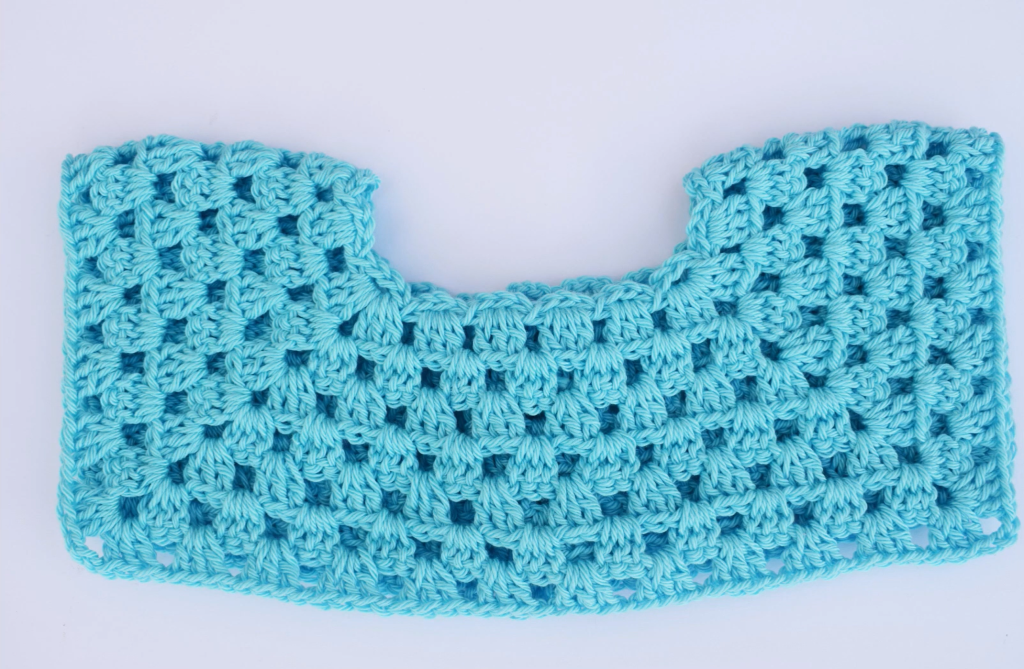
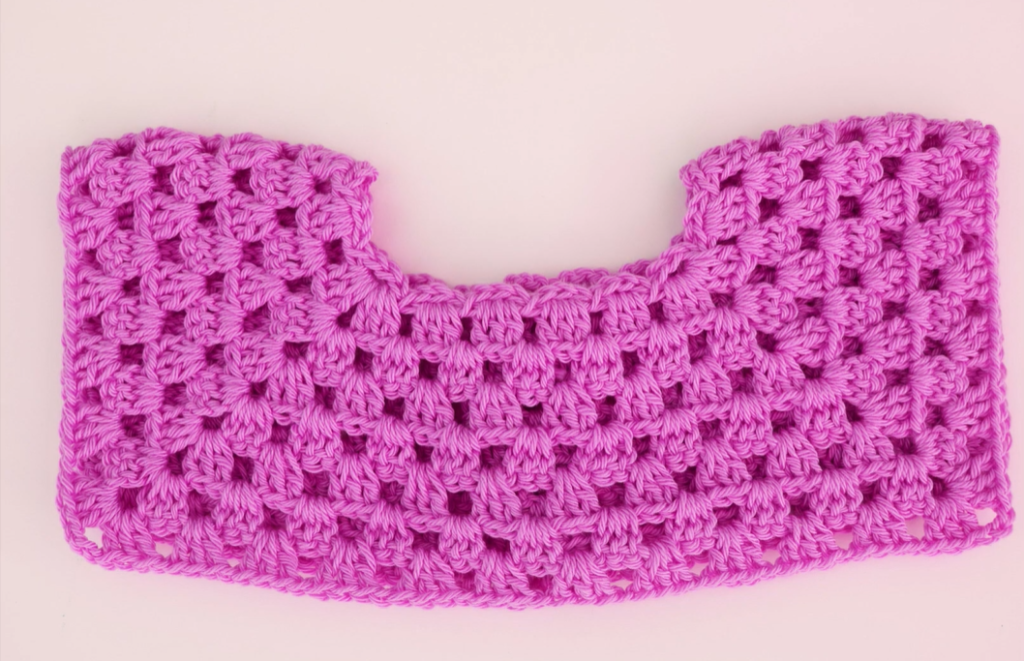
Part 2: Lace Transition and Armhole Division 👚
After the final Raglan Row, the yoke should be wide enough.
| Size | Total Stitches before Separation |
| NB | 114 sts |
| 6-12M | 142 sts |
| 2-3Y | 170 sts |
Export to Sheets
Next Row (Lace Setup): Ch 3 (counts as dc), turn. Dc in each st up to the first ch-2 sp. [Dc, ch 1, dc] in the ch-2 sp. Rep 3 more times. Dc in each remaining st. (Total increases by 4 dc).
Next Row (Armhole Separation): Ch 3, turn. Dc in each st up to the first ch-1 sp. Dc in the ch-1 sp. Ch 1 (skips the sleeve). Dc in the ch-1 sp of the second raglan corner. Dc in each st across the back to the third ch-1 sp. Dc in the ch-1 sp. Ch 1 (skips the second sleeve). Dc in the ch-1 sp of the fourth raglan corner. Dc in each remaining st.
Next Row (Join to Round): Ch 3. Dc in each st across. Join with sl st to the top of the beg ch-3.
Next Round (Lace Prep/Adjustment): Ch 3. Dc in each st and 1 dc in each ch-1 underarm sp. Sl st to join.
- Important: Adjust the total stitch count in this round (increase or decrease) to make the final count a multiple of 4 for the FLS pattern.

Part 3: The Floral Lace Skirt/Body 👗
The lace pattern is worked in the round.
Round 1 (FLS Base): Ch 3 (counts as dc). Dc in the same st. [Sk 3 sts, sc in the next st, sk 3 sts, FLS (dc, ch 2, dc) in the next st] rep around. Sl st to the top of the beg ch-3.
Round 2 (FLS Connector): Ch 1. Sc in the center (ch-2 sp) of the first FLS. [Ch 3, sk the next sc, sc in the center of the next FLS] rep around. Ch 3. Sl st to the beg sc.
Round 3 (FLS Centered Shells): Sl st into the first ch-3 sp. Ch 3. Dc in the same sp. [Sc in the next sc, FLS in the next ch-3 sp] rep around. Sc in the last sc. Sl st to the top of the beg ch-3.
Rounds 4-7: Repeat Rounds 2 and 3 until the yoke/bodice measures the desired length.
- Stop here for a yoke only piece, or continue the FLS rows to create the skirt of a dress or the body of a vest.
Part 4: Finishing and Edging 🎀
A. Back Placket (Button Loops):
- Right Back Edge: Attach yarn to the bottom of the right back opening. Sc evenly up the edge. Fasten off.
- Left Back Edge (Buttonholes): Attach yarn to the bottom of the left back opening. Sc in the first 3 sts. [Ch 2 (buttonhole), sk 2 sts, sc in the next 3 sts] rep 3-5 times, spacing evenly up the edge. Sc to the top. Fasten off.
B. Neckline and Armhole Edging:
- Neckline: Attach yarn at the back opening. Work 1 round of sc evenly around the entire neckline. Sl st to join.
- Armholes (Optional Sleeves): For a sleeveless garment, work 1 round of sc evenly around each armhole opening.
Video Tutorial:
Assembly and Final Touches 🫧
- Weave in all ends securely.
- Sew Buttons: Sew the small buttons onto the Right Back Placket, aligning them with the buttonholes on the Left Back Placket.
- Blocking: Gently wet or steam block the yoke. Pin out the edges to ensure the Floral Lace Stitch is fully open and defined. Allow to dry completely.
Your versatile Heirloom Floral Lace Yoke is now ready! You can now easily attach a solid body, a ruffle, or more lace to create your final garment.


