
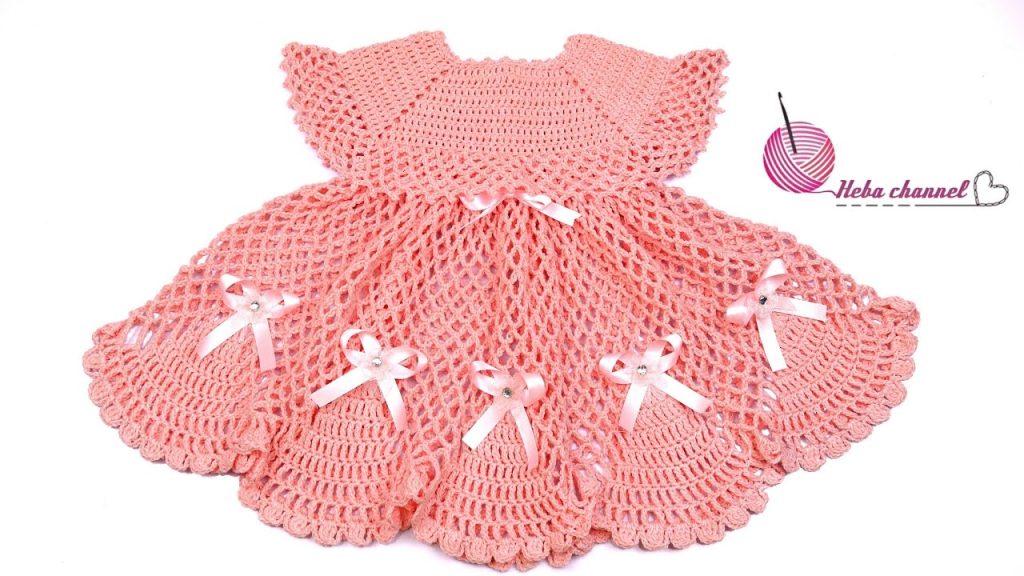
Welcome, master crocheters! Get ready for a project that demands patience and precision but rewards you with a true showstopper: the Princess Petal Dress. This design features a comfortable, solid yoke and a stunning, airy skirt constructed from individual, large lace panels (petals) that are joined as you go. The little ribbons on each panel add the perfect amount of charm.
This pattern is written for an Advanced Intermediate to Experienced skill level due to the complex construction of the skirt panels and the required stitch counting.
🛍️ Section 1: Materials & Gauge
🧶 Supplies You’ll Need
- Yarn: Approximately 400 – 550 yards of DK weight (Category 3) yarn. The sample uses a soft, solid peach/coral pink. A cotton or cotton blend is recommended for better drape.
- Hook: 4.0 mm (G/6) crochet hook, or size needed to obtain gauge.
- Buttons: 3 small buttons (approx. 0.5 inches / 1.25 cm) for the back neck closure.
- Ribbon: Approximately 4 yards of 1/4-inch wide satin ribbon (white or matching color) for the bows and waist tie.
- Tools: Stitch markers (essential for the yoke!), a tapestry needle, and scissors.
📏 Gauge Check
Work in Double Crochet (DC): 16 DC and 8 rows = 4 inches (10 cm).
- Accuracy in the yoke is vital for a good fit!
📝 Key Abbreviations
| Abbreviation | Meaning | Abbreviation | Meaning | |
| Ch | Chain | Dc | Double Crochet | |
| Sl St | Slip Stitch | Tr | Treble Crochet | |
| Sc | Single Crochet | Dc Cl | Dc Cluster (3 Dc in space) | |
| Hdc | Half Double Crochet | Dc Shell | 5 Dc in the same stitch/space | |
| Sk | Skip | Sp | Space |
Export to Sheets
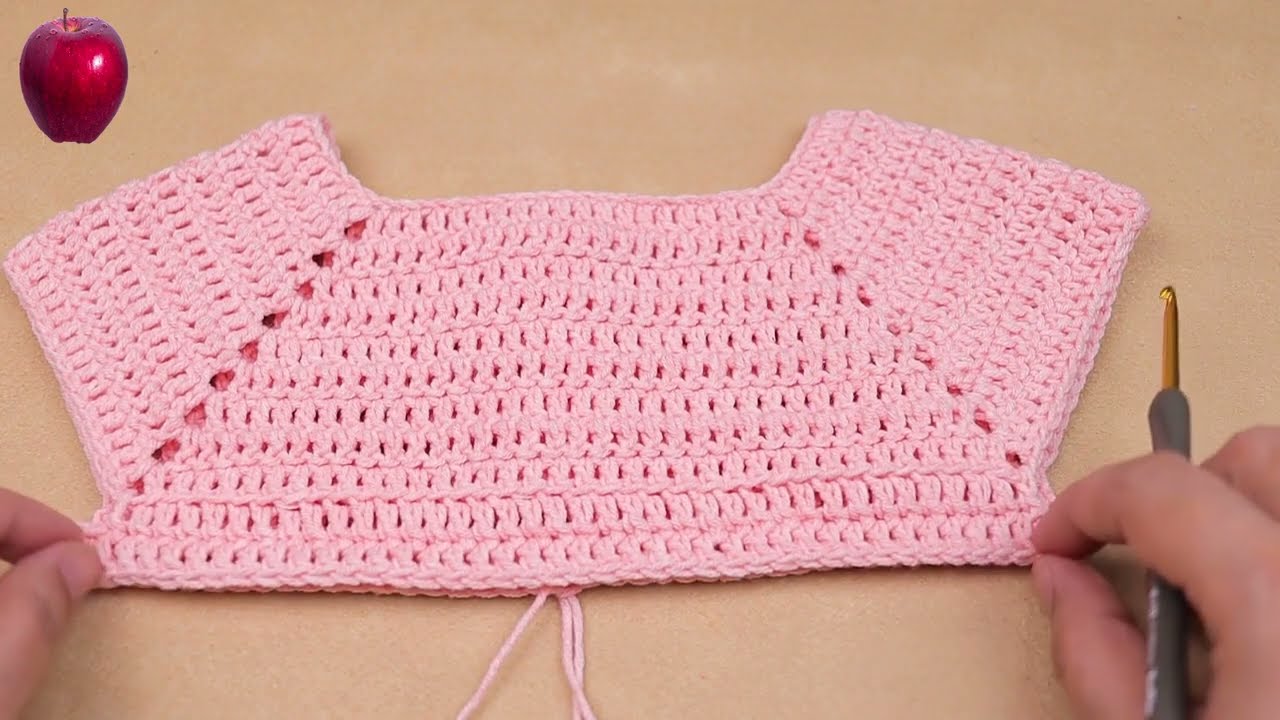
🌸 Section 2: The Yoke (Top & Sleeves)
The yoke is worked flat in rows to create the back opening. This size is for 6-12 months.
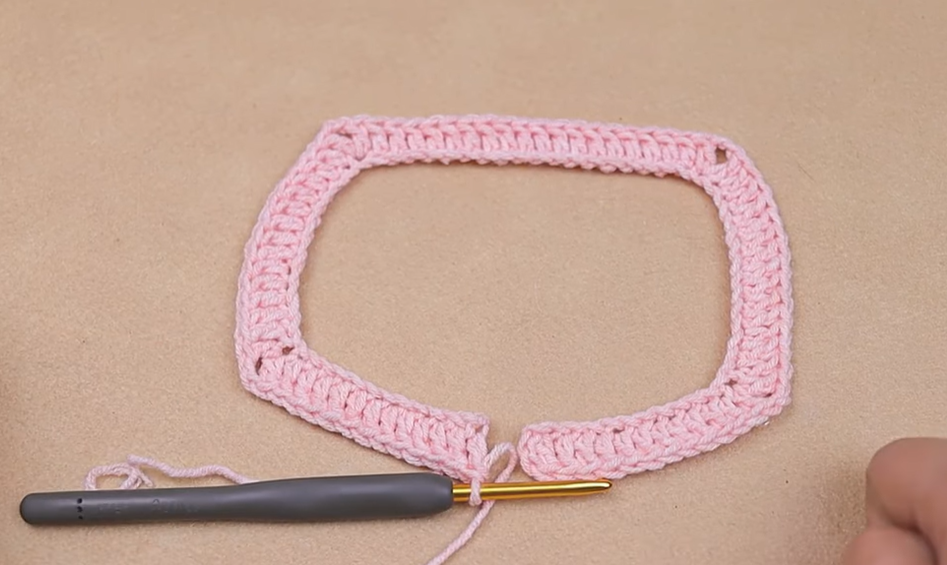
Foundation & Initial Rows (Solid DC)
Row 1 (Foundation): Ch 76. Dc in the 4th Ch from the hook and in each Ch across. (74 Dc). Ch 3 (counts as 1st Dc throughout), turn.
Yoke Shaping & Division
Divide the 74 stitches for the corners: 12 (Back Right) | 1 (Corner) | 12 (Sleeve Right) | 1 (Corner) | 24 (Front) | 1 (Corner) | 12 (Sleeve Left) | 1 (Corner) | 12 (Back Left).
- Row 2: Dc in the first 12 sts. (Dc, Ch 2, Dc) in the next st (corner). Dc in the next 12 sts. (Dc, Ch 2, Dc) in the next st (corner). Continue this pattern around. Ch 3, turn. (82 Dc + 4 Ch-2 sps).
- Row 3: Dc in each Dc to the first Ch-2 corner sp. (Dc, Ch 2, Dc) in the Ch-2 sp. Rep this pattern around. Ch 3, turn. (90 Dc + 4 Ch-2 sps).
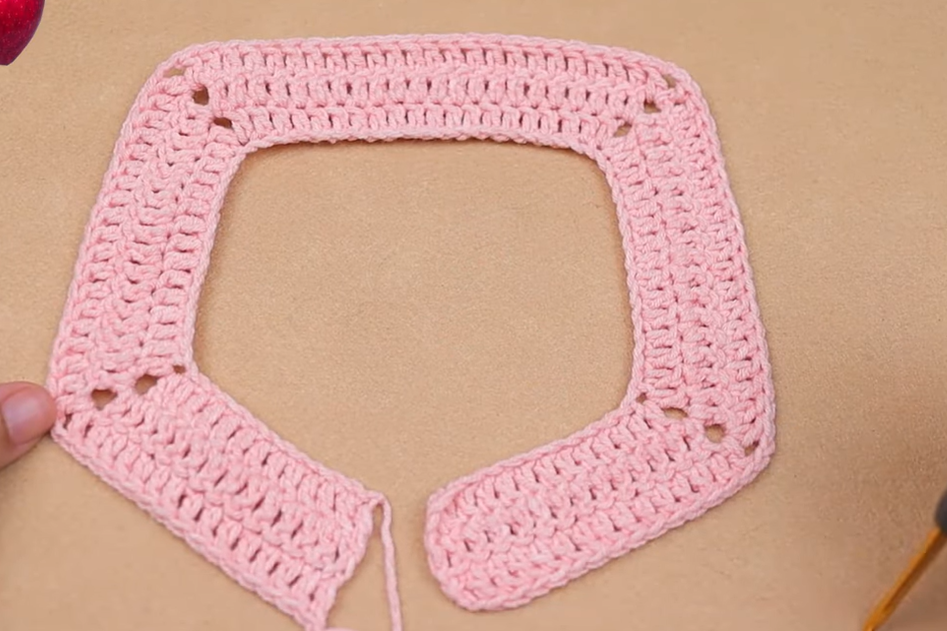
Integrating the Yoke Texture
The yoke appears to alternate a solid row with a simple texture row (like Ch-1 spaces or V-stitches).
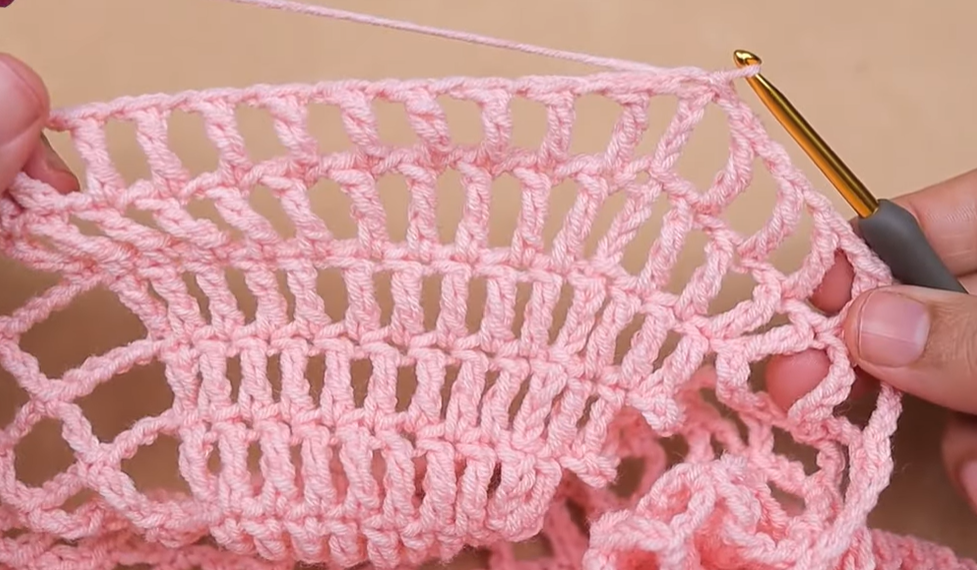
- Row 4 (Texture Row): Dc in the first st. (Ch 1, Sk 1 st, Dc in the next st) until the Ch-2 sp. (Dc, Ch 2, Dc) in the Ch-2 sp. Continue the (Ch 1, Sk 1 st, Dc) pattern across all panels, putting (Dc, Ch 2, Dc) in each corner Ch-2 sp. Ch 3, turn.
- Row 5 (Solid Row): Dc in each Dc and Ch-1 sp across all panels. Put (Dc, Ch 2, Dc) in each corner Ch-2 sp. Ch 3, turn.
Rows 6-8: Repeat Rows 4 and 5. Continue until the yoke measures approximately 5-5.5 inches (12.5-14 cm) from the top.
Joining for Armholes
- Next Row (Solid Finish): Work the established pattern across the Back Panel up to the first Ch-2 sp. Dc in the Ch-2 sp. Ch 2 (underarm chain). Sk all stitches across the Sleeve Panel up to the next Ch-2 sp. Dc in the Ch-2 sp. Dc in all stitches across the Front Panel. Repeat the Ch 2, Sk Sleeve step for the second armhole. Continue the pattern across the Back Panel. Join with Sl St to the beg Ch 3 to form a circle. FO.
🌺 Section 3: The Skirt (Petal Panels)
The skirt is constructed from distinct, wide panels. We need a base row count that is divisible by the number of petals desired. The image shows approximately 10-12 petals. Let’s assume 11 petals for a count divisible by 11.
Base Row & Ribbon Loops
- Round 1 (DC Base): Join yarn in any st. Ch 3, Dc in each st around. Join with Sl St. (Stitch count will be approx. 120-130). We need 110 stitches for 11 petals of 10 stitches each. If your count is high, Hdc or Sc evenly to reduce it to 110.
- Round 2 (Ribbon Loops): Ch 3 (counts as 1st Dc). Dc in the next st. (Ch 1, Sk 1 st, Dc in the next 2 sts). Rep from the parentheses around. Join with Sl St to top of Ch 3. (This creates the waist loops for the ribbon tie).
Creating the Petal Panels
Each petal is worked in rows over 10 stitches and then rejoined.
Setup Row (Foundation for 11 Petals): Ch 1, Sc in the first st. Ch 9 (Petal chain). Sk 9 sts. Rep from * to * 10 more times. Sl St to the beg Sc. (11 Sc, 11 Ch-9 arches).
Work Petal 1 (Repeat 11 times):
- Sl St into the first Ch-9 arch. Ch 3 (counts as 1st Dc), 9 Dc in the same arch. (10 Dc). Ch 3, turn.
- Dc in each Dc across. (10 Dc). Ch 3, turn.
- Dc in each Dc across. (10 Dc). Ch 3, turn.
- Dc in each Dc across. (10 Dc). Ch 3, turn.
- Ribbon Loops: Dc in the first 2 sts. (Ch 1, Sk 1 st, Dc in the next 2 sts). Rep to the end. Ch 3, turn.
- Dc in each Dc and Ch-1 sp across. (10 Dc). Ch 3, turn.
- Decreases & Lace Start: 7. Dc2tog over the first two sts. Dc in the next 6 sts. Dc2tog over the last two sts. (8 Dc). Ch 3, turn. 8. Dc in the first st. (Ch 1, Sk 1 st, Dc in the next st). Rep to the end. (5 Dc, 4 Ch-1 sps). Ch 3, turn. 9. Dc in each Dc and Ch-1 sp across. (8 Dc). Ch 3, turn.
- Final Scallop: 10. Dc2tog over the first two sts. Dc in the next 4 sts. Dc2tog over the last two sts. (6 Dc). Ch 3, turn. 11. Scallop: Sk 1 st, 5 Dc Shell in the next st. Sk 1 st, Sc in the next st. Sk 1 st, 5 Dc Shell in the last st. FO, leaving a long tail for weaving.
Connecting Petals: After the first petal, when you start the next petal, Sl St to the center Sc of the scallop of the previous petal before continuing with the Ch 3 for the next petal row. This ensures the petals are joined slightly at the bottom edge.
✨ Section 4: Edging and Finishing
🎀 Ribbon Accents
- Waist Ribbon: Weave a length of ribbon through the Ch-1 spaces of Round 2 of the Skirt Base. Tie a simple knot and leave the ends long to tie into a bow.
- Petal Ribbons: Cut 11 small lengths of ribbon. Weave one ribbon through the Ch-1 spaces of Row 5 (Ribbon Loops) of each petal. Tie a small, neat bow and trim the ends.
✂️ Edging & Closure
- Neckline & Back Slit: Join yarn at the bottom of the back opening. Ch 1, Sc evenly up the edge, around the entire neckline, and back down the other side of the slit. FO.
- Sleeve Edging: The cap sleeves are the finished yoke edge. Work one round of Sc evenly around the armhole opening for neatness. FO.
- Button Closure:
- Button Band: Use one side of the back slit. Sc evenly up the edge.
- Buttonhole Band: Use the opposite side. Work one row of Sc. In the next row, create the 3 buttonholes (Ch 1, Sk 1 st) evenly spaced. FO.
- Sew Buttons: Sew the 3 buttons onto the solid button band.
Video Tutorial:
💖 Final Assembly
- Weave in all loose yarn ends securely, especially on the petal joins.
Your exquisite Princess Petal Dress is complete! This is a truly unique and beautiful project.
Would you like help calculating the yardage needed if you were to adjust the size of this dress?


