
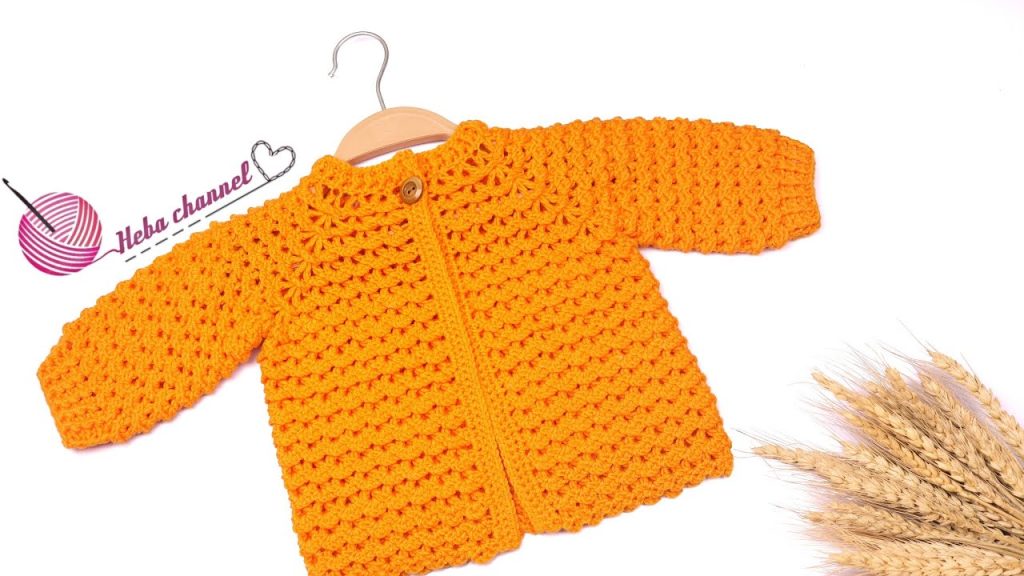
Hello, lovely makers! Get ready to crochet the perfect cozy layer for any little one: the Clementine Sparkle Cardigan. This bright and cheerful cardigan is worked from the top down, making it easy to adjust the size. It features a continuous open shell stitch that creates a delicate, airy fabric perfect for showing off a vibrant yarn color like this stunning orange.
This pattern is designed for an Intermediate skill level, as it involves working raglan increases with a repeating stitch pattern and shaping the front opening. The continuous texture is highly rewarding!
🛍️ Section 1: Materials & Gauge
🧶 Supplies You’ll Need
- Yarn: Approximately 350 – 450 yards of DK weight (Category 3) yarn. The sample uses a vibrant, solid orange/tangerine. A soft, washable acrylic or cotton blend is ideal.
- Hook: 4.0 mm (G/6) crochet hook, or size needed to obtain gauge.
- Buttons: 1 large button (approx. 0.75 – 1 inch / 2 – 2.5 cm) for the neck closure.
- Tools: Stitch markers (essential for marking the raglan corners and front bands!), a tapestry needle, and scissors.
📏 Gauge Check
Work in Double Crochet (DC): 16 DC and 8 rows = 4 inches (10 cm).
- Open Shell Gauge: 4 shell repeats and 4 rows should measure 4 inches (10 cm) wide and 3 inches (7.5 cm) tall.
📝 Key Abbreviations
| Abbreviation | Meaning | Abbreviation | Meaning | |
| Ch | Chain | Dc | Double Crochet | |
| Sl St | Slip Stitch | V-st | V-Stitch (Dc, Ch 1, Dc in the same space) | |
| Sc | Single Crochet | Dc Cl | Dc Cluster (3 Dc in space) | |
| Hdc | Half Double Crochet | Shell | (2 Dc, Ch 1, 2 Dc) in the same space | |
| Sk | Skip | Sp | Space |
Export to Sheets
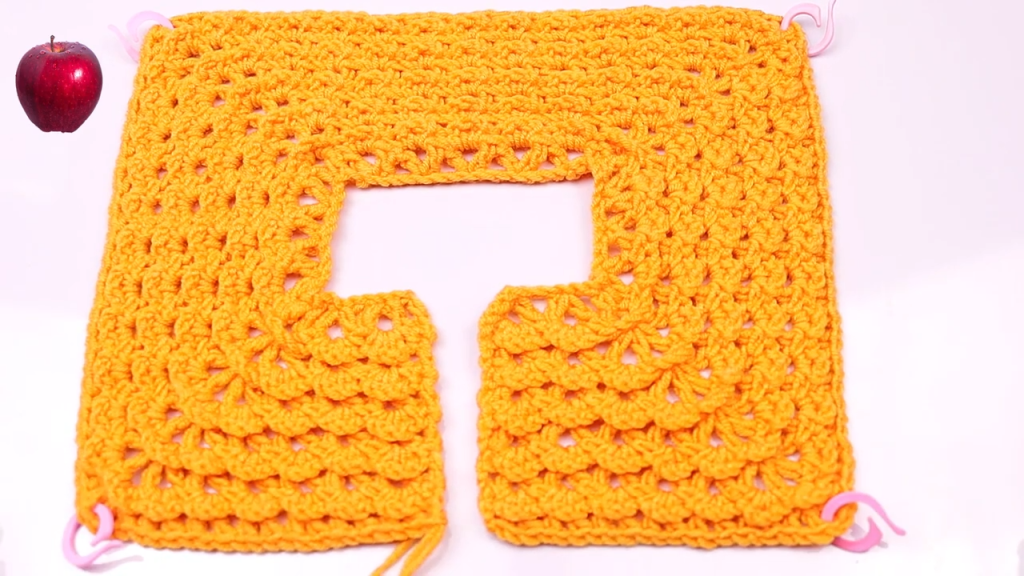
🌸 Section 2: The Yoke (Raglan Construction)
The yoke is worked flat in rows from the neck down, which creates the open front. This size is for 6-12 months.
Foundation & Raglan Setup
- Row 1 (Foundation): Ch 76. Dc in the 4th Ch from the hook and in each Ch across. (74 Dc). Ch 3 (counts as 1st Dc throughout), turn.
- Marking Corners: Divide the 74 stitches for the raglan. Front/Back Panels must be equal, and the Sleeve Panels must be equal. We will divide the Front Panels in half since we are working flat.
- 6 (Front Left) | 1 (Corner) | 12 (Sleeve Right) | 1 (Corner) | 28 (Back) | 1 (Corner) | 12 (Sleeve Left) | 1 (Corner) | 6 (Front Right). Place markers in the corner stitches.
Raglan Increases with Shell Stitch
- Row 2 (Setup Row): Dc in the first 6 sts. (Dc, Ch 2, Dc) in the marked corner st. Dc in the next 12 sts. (Dc, Ch 2, Dc) in the next corner st. Continue this pattern across all 4 corners, working Dc between the corners. Ch 3, turn.
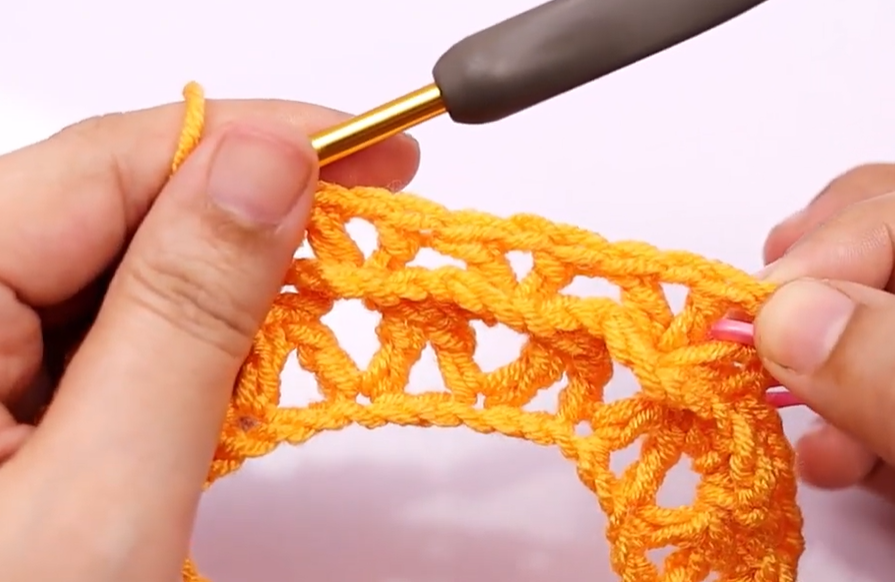
- Row 3 (Shell Row): Work (2 Dc, Ch 1, 2 Dc) Shell into the Ch-2 sp of the corner. The repeating stitch for the panels is the Dc Cl (3 Dc in one space) anchored by a Sc.
- Dc in the first st. Sk 2 sts, Sc in the next st. Sk 2 sts, 3 Dc Cl in the next st. Rep this pattern across the first Front Panel up to the Ch-2 sp.
- Corner 1: Work Shell into the Ch-2 sp.
- Continue the (Sc, 3 Dc Cl) pattern across the Sleeve Panel.
- Corner 2: Work Shell into the Ch-2 sp.
- Repeat pattern for the Back Panel, Corner 3, Sleeve Panel, Corner 4, and the final Front Panel. End with a Dc in the last st. Ch 3, turn.
- Row 4 (Increase/Setup Row): Dc in each Dc, Sc, and Ch-1 sp across all panels. Work (Dc, Ch 2, Dc) into the Ch-1 sp of the corner Shell. Ch 3, turn. (This solid row prepares the next row for the shell placement and creates the increase).
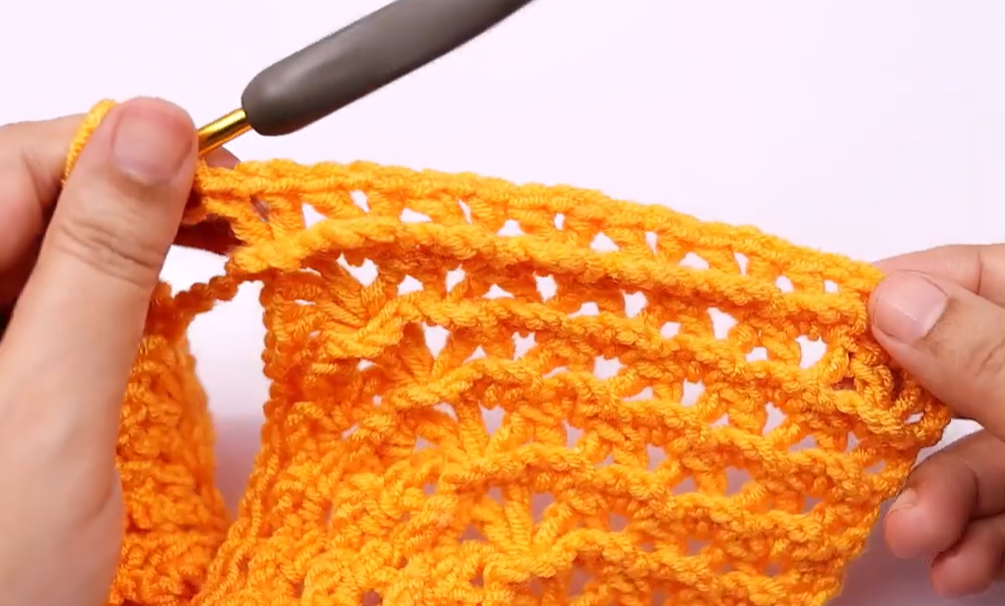
- Row 5: Repeat Row 3 (working the Sc anchor into the center Dc of the previous 3 Dc Cl, and the new 3 Dc Cl into the Sc anchor). Place the Shell in the Ch-2 corner sp.
- Continue alternating Rows 4 and 5 until the yoke measures approximately 5.5 – 6 inches (14 – 15 cm) from the neck, ensuring it fits under the baby’s arms.
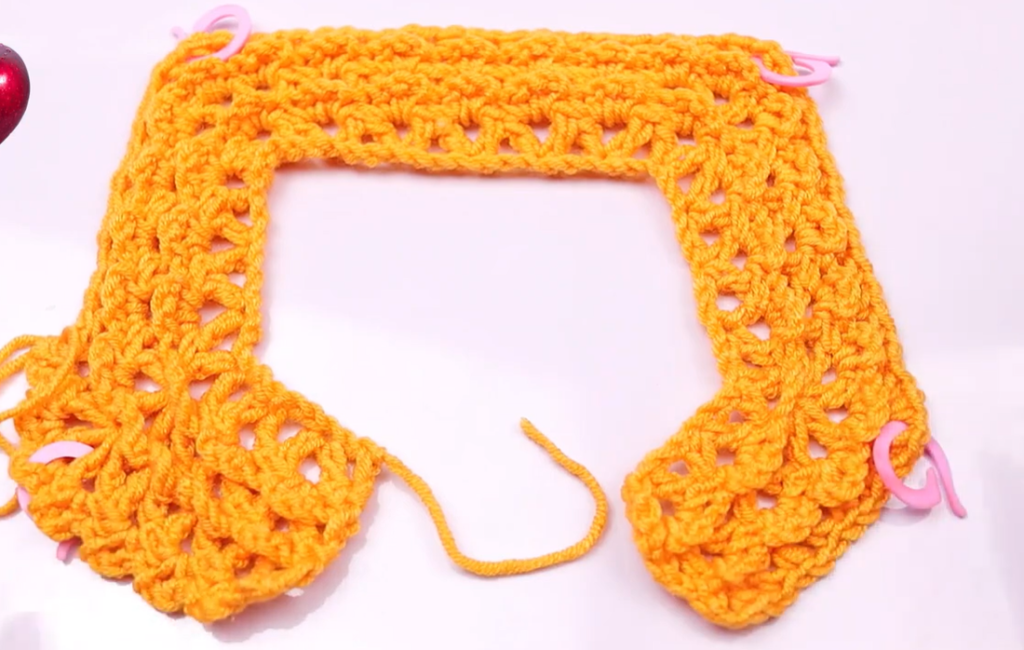
Dividing for Body and Sleeves
- Next Row (Divide): Work the established pattern across the Front Panel up to the first corner Ch-2 sp. Work a Dc Cl into the Ch-2 sp. Ch 2 (underarm chain). Sk all stitches across the entire Sleeve Panel up to the next corner Ch-2 sp. Work a Dc Cl into the Ch-2 sp. Continue the pattern across the Back Panel. Repeat the Ch 2, Sk Sleeve step for the second armhole. Work the final Front Panel. Do NOT join; Ch 3, turn.
🍊 Section 3: Body and Sleeves
The Body is now worked flat in rows across the full width (both front panels and the back).
Body of the Cardigan
- Body Rows: Continue alternating the Shell/Dc Cl Row (Row 3 repeat) and the Solid Row (Row 4 repeat). Work the pattern over the Ch-2 underarm chain (treating the chain as 2 stitches).
- Length: Continue until the body reaches the desired length—approximately 6-8 inches (15-20 cm) from the underarm.
Hem Finish
- Work one final Solid DC Row across the bottom edge. FO.
The Sleeves (Make 2)
- Sleeve Start: Join yarn at the center of the Ch-2 underarm chain. Work the sleeves in the round.
- Sleeve Rounds: Continue the established Shell/Dc Cl pattern in the round. Work evenly around the armhole opening and the Ch-2 underarm.
- Length: Continue until the sleeve reaches the desired length—approximately 7-9 inches (18-23 cm) from the underarm.
- Cuff Finish: Work one final Solid DC Round at the cuff edge. FO.
✨ Section 4: Edging and Finishing
✂️ Edging and Button Closure
- Front/Neckline Edging: Join yarn at the bottom right corner of the cardigan. Ch 1, Sc evenly up the front edge, around the entire neckline, and back down the other front edge. This neatens the entire opening. Do not cut yarn yet.
- Buttonhole Band (Next Row): Ch 1, turn. Sc evenly back down the side you just worked. When you reach the collar bone height (where the button will sit), create the buttonhole: Ch 3, Sk 3 sts, Sc in the next st. Continue Sc to the bottom. FO.
- Button Band: Use the tapestry needle and yarn to stitch two vertical rows of Sc up the opposite front edge (the one without the buttonhole) for structure.
- Sew Button: Sew the large button securely onto the Button Band, aligning it with the buttonhole loop.
Video Tutorial:
💖 Final Assembly
- Weave in all loose yarn ends securely using your tapestry needle.
Your gorgeous Clementine Sparkle Cardigan is complete! It’s a stylish and warm addition to any wardrobe.
Would you like me to suggest a simple hat pattern to match this cheerful cardigan?


