
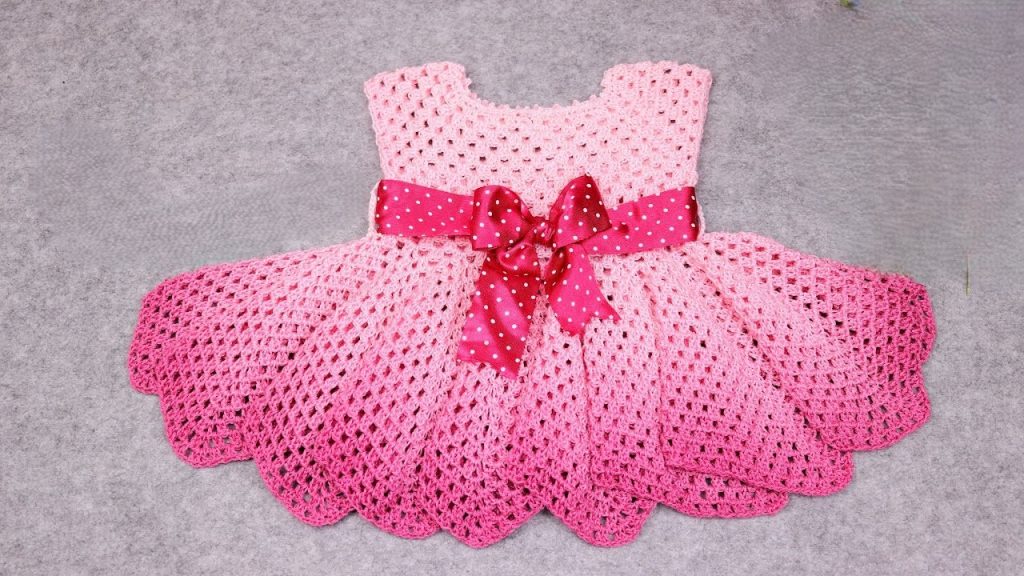
Hello, yarn lovers! Prepare to crochet a dress that captures the magic of a sunset: the Ombré Sunset Dress. This design features a delicate, lacy yoke and a flowing skirt constructed with a continuous Open Shell/Mesh Stitch that creates volume and a beautiful, natural scallop at the hem. We’ll use either ombré yarn or strategically placed color changes to achieve that breathtaking pink gradient.
This pattern is written for an Intermediate skill level. The yoke shaping is classic, and the skirt pattern is a simple, highly repeating stitch, perfect for achieving that lovely drape.
🛍️ Section 1: Materials & Gauge
🧶 Supplies You’ll Need
- Yarn: Approximately 400 – 500 yards of DK weight (Category 3) yarn.
- Option A (Ombré): Use a single yarn cake or skein that naturally transitions from light pink to dark pink.
- Option B (Color Blocks): Use three shades: Light Pink (Yarn A) for the yoke and top skirt, Medium Pink (Yarn B) for the middle skirt, and Dark Pink (Yarn C) for the lower skirt.
- Hook: 4.0 mm (G/6) crochet hook, or size needed to obtain gauge.
- Buttons: 3 small buttons (approx. 0.5 inches / 1.25 cm) for the back neck closure.
- Ribbon: About 1 yard (1 meter) of 1.5-inch wide polka-dot satin ribbon for the waist belt and bow.
- Tools: Stitch markers (essential for the yoke corners!), a tapestry needle, and scissors.
📏 Gauge Check
Work in Double Crochet (DC): 16 DC and 8 rows = 4 inches (10 cm).
- Your yoke sizing depends entirely on your gauge!
📝 Key Abbreviations
| Abbreviation | Meaning | Abbreviation | Meaning | |
| Ch | Chain | Dc | Double Crochet | |
| Sl St | Slip Stitch | V-st | V-Stitch (Dc, Ch 1, Dc in the same space) | |
| Sc | Single Crochet | Dc Cl | Dc Cluster (3 Dc in space) | |
| Hdc | Half Double Crochet | Open Shell | (Dc, Ch 1, Dc) in the same space | |
| Sk | Skip | Sp | Space |
Export to Sheets
🌸 Section 2: The Yoke (Top & Sleeves)
The yoke is worked flat in rows using Light Pink (Yarn A) or the lightest part of the ombré yarn. This size is for 6-12 months. The yoke uses an openwork texture.
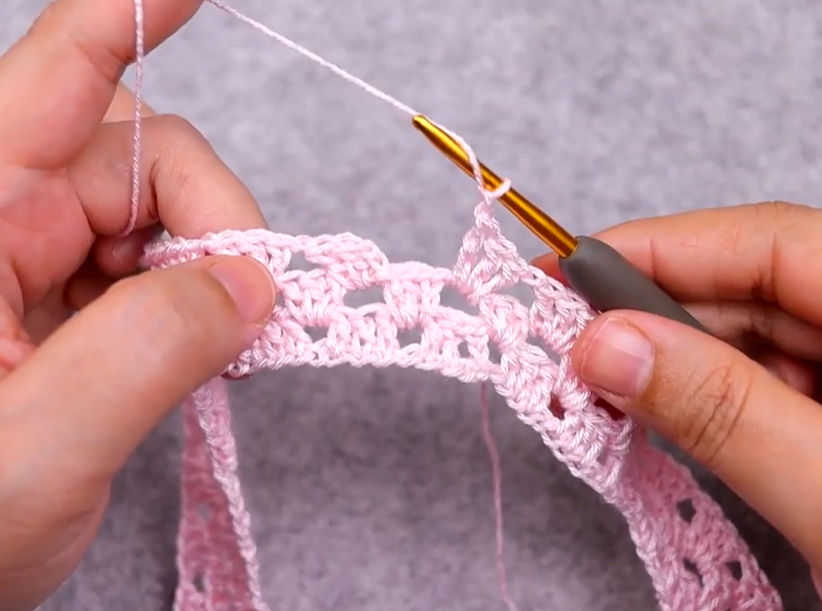
Foundation & Shaping (Lacy V-Stitch)
Row 1 (Foundation): Ch 76. Dc in the 4th Ch from the hook and in each Ch across. (74 Dc). Ch 3 (counts as 1st Dc throughout), turn.
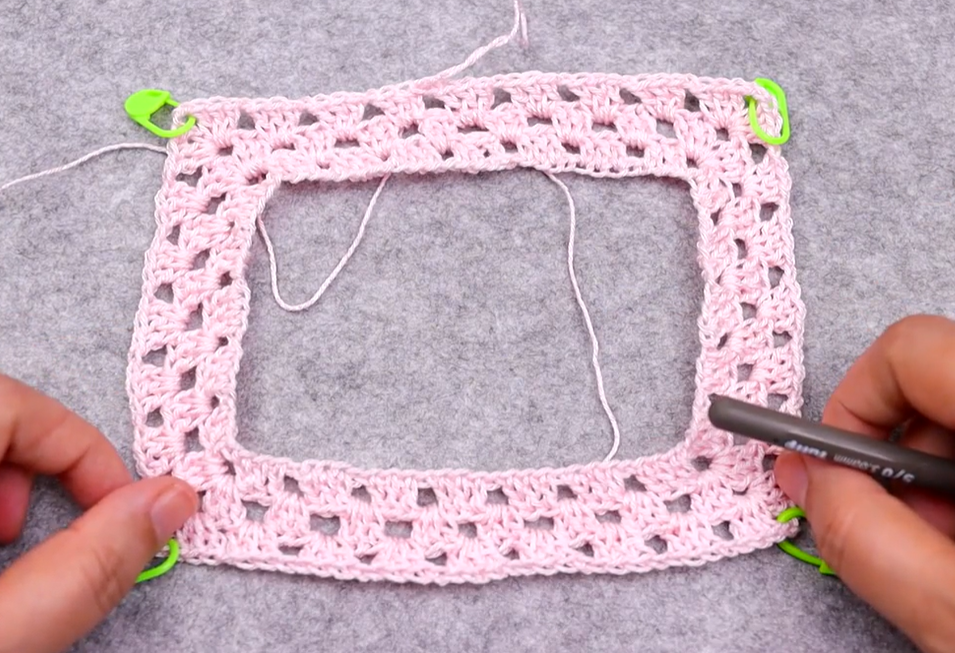
Yoke Shaping & Division
Divide the 74 stitches for the corners: 12 (Back Right) | 1 (Corner) | 12 (Sleeve Right) | 1 (Corner) | 24 (Front) | 1 (Corner) | 12 (Sleeve Left) | 1 (Corner) | 12 (Back Left).
- Row 2 (Open Shell Start): Dc in the first st. Sk 1 st, Open Shell in the next st. Rep up to the corner. (Dc, Ch 2, Dc) in the corner st. Continue the pattern, placing (Dc, Ch 2, Dc) in each corner st. End with Sk 1 st, Dc in the last st. Ch 3, turn.
- Row 3: Work Dc in each Dc, and Dc into the Ch-1 sp of each Open Shell. Work (Dc, Ch 2, Dc) in each Ch-2 corner sp. Ch 3, turn.
- Row 4: Work Open Shell into the center Dc of the previous row’s Open Shell/Dc group. Work (Dc, Ch 2, Dc) in each Ch-2 corner sp. Ch 3, turn.
Rows 5-8: Repeat Rows 3 and 4 (alternating solid and open shell rows) until the yoke measures approximately 5-5.5 inches (12.5-14 cm) from the top.
Joining for Armholes
- Next Row (Solid Finish): Work Dc across the Back Panel up to the first Ch-2 sp. Dc in the Ch-2 sp. Ch 2 (underarm chain). Sk all stitches across the Sleeve Panel up to the next Ch-2 sp. Dc in the Ch-2 sp. Dc in all stitches across the Front Panel. Repeat the Ch 2, Sk Sleeve step for the second armhole. Continue the pattern across the Back Panel. Join with Sl St to the beg Ch 3 to form a circle. (Approx. 110-120 stitches). FO.

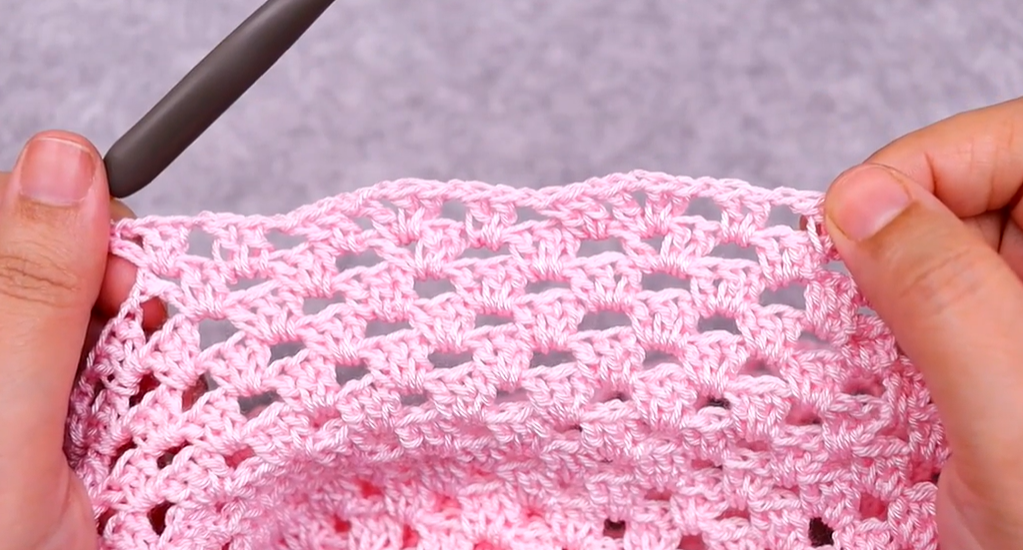
🌅 Section 3: The Skirt (Open Shell Flare)
The skirt is worked in the round, continuing the open shell pattern and increasing frequently to achieve the wide flare.
Skirt Setup & Initial Rounds (Light Pink)
- Round 1 (DC Base): Join yarn. Ch 3 (counts as 1st Dc). Dc in each st around, increasing evenly to a multiple of 4. (Approx. 132-144 stitches). Join with Sl St.
- Round 2 (Open Shell): Ch 3, Dc in the same st. Sk 2 sts, Open Shell in the next st. Rep from * to * around. Join with Sl St to top of Ch 3.
- Round 3 (Increase): Ch 3. 2 Dc in the Ch-1 sp of the Open Shell. Rep around. Join with Sl St. (This increases the stitch count, creating flare).
Rounds 4 – 6: Continue the alternating pattern: Open Shell in the center of the previous 3-Dc group, followed by a 3-Dc increase round.
Color Transition (Medium Pink)
- Change to Yarn B (Medium Pink) or continue with the ombré yarn when the color shifts naturally.
- Rounds 7 – 12: Continue the alternating Open Shell and 3-Dc Increase rounds.
Final Flare & Dark Pink
- Change to Yarn C (Dark Pink) or continue with the ombré yarn when the color shifts naturally.
- Rounds 13 – 18: To maximize flare, increase the shell count:
- Open Shell Round: Work (Dc, Ch 1, Dc) into the center stitch of the previous group.
- Increase Round: Work (Dc, 2 Dc, Dc) in the Ch-1 sp of the Open Shell (4 Dc total per shell).
- Continue until the skirt reaches the desired length, approximately 10-12 inches (25-30 cm) from the waistline.
Final Scallop Hem
- Final Round (Deep Scallop): Work an alternating pattern of Sc and 5-Dc Shells into the final row of stitches to create the deep scallop seen in the image. FO.
🎀 Section 4: Finishing Touches
✨ Ribbon Detail
- Waist Ribbon: Weave the wide, polka-dot satin ribbon through the stitches of the DC Base Round (Round 1 of the skirt). Tie a large, neat bow at the center front.
✂️ Edging & Closure
- Neckline & Back Slit: Join yarn at the bottom of the back opening. Ch 1, Sc evenly up the edge, around the entire neckline, and back down the other side of the slit. FO.
- Sleeve Edging: The cap sleeves are the finished yoke edge. Work one round of Sc evenly around the armhole opening for neatness. FO.
- Button Closure:
- Button Band: Use one side of the back slit. Sc evenly up the edge.
- Buttonhole Band: Use the opposite side. Work one row of Sc. In the next row, create the 3 buttonholes (Ch 1, Sk 1 st) evenly spaced. FO.
- Sew Buttons onto the solid button band.
Video Tutorial:
💖 Final Assembly
- Weave in all loose yarn ends securely, especially where you changed colors.
Your beautiful Ombré Sunset Dress is complete! The gradient effect combined with the huge flare is truly stunning.
Would you like me to find a simple pattern for a coordinating pink headband or bonnet?


