

Hello, texture lovers! Get ready to crochet a dress that’s as cozy as it is cute: the Autumn Ember Dress. This dress features a simple, strap-style construction and an incredibly textured skirt created by a repeating Puff Stitch pattern. The dense texture gives the garment great body and warmth, perfect for a striking color like this deep, earthy orange.
This pattern is designed for an Intermediate skill level. While the construction is very simple (no buttons or complex shaping!), working the Puff Stitch consistently and managing the increases for the skirt flare require attention.
🛍️ Section 1: Materials & Gauge
🧶 Supplies You’ll Need
- Yarn: Approximately 350 – 450 yards of DK weight (Category 3) yarn. The sample uses a rich, solid orange, rust, or amber color. A soft, washable acrylic or wool blend is recommended for the best texture and drape.
- Hook: 4.0 mm (G/6) crochet hook, or size needed to obtain gauge.
- Tools: Stitch markers (for the straps and waistline!), a tapestry needle, and scissors.
📏 Gauge Check
Work in Double Crochet (DC): 16 DC and 8 rows = 4 inches (10 cm).
- Puff Stitch Gauge: 4 puff stitch repeats and 4 rows should measure 4 inches (10 cm) wide and 3 inches (7.5 cm) tall.
📝 Key Abbreviations
| Abbreviation | Meaning | Abbreviation | Meaning | |
| Ch | Chain | Dc | Double Crochet | |
| Sl St | Slip Stitch | Fpdc | Front Post Double Crochet | |
| Sc | Single Crochet | Bpdc | Back Post Double Crochet | |
| Hdc | Half Double Crochet | Ps | Puff Stitch (See Special Stitches) | |
| Sk | Skip | Sp | Space |
Export to Sheets
✨ Section 2: Special Stitches

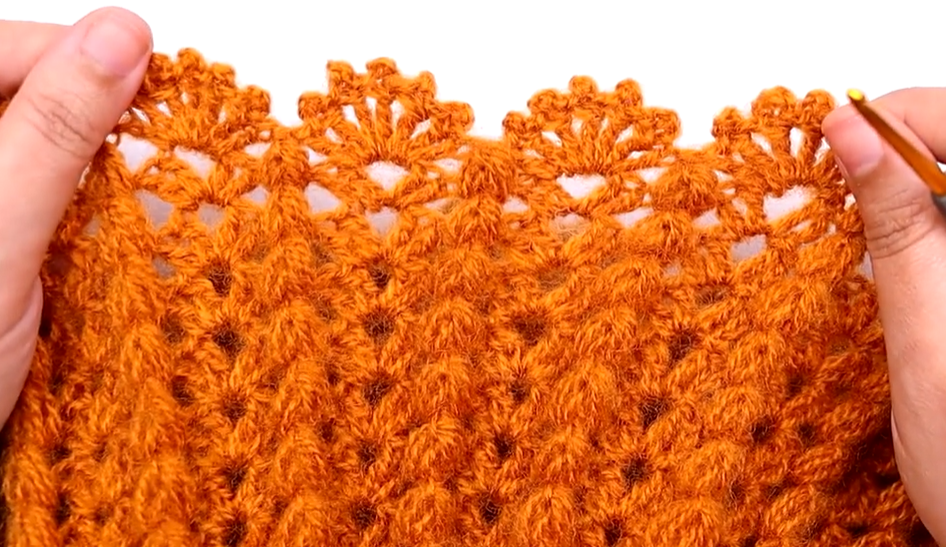
Puff Stitch (Ps)
- Yo, insert hook into the specified stitch/space.
- Yo, pull up a loop (3 loops on hook).
- Yo, insert hook into the same st/sp.
- Yo, pull up a loop (5 loops on hook).
- Yo, insert hook into the same st/sp.
- Yo, pull up a loop (7 loops on hook).
- Yo, pull through all 7 loops on the hook.
- Ch 1 to secure the stitch (this securing chain counts as a stitch/space in the next row).
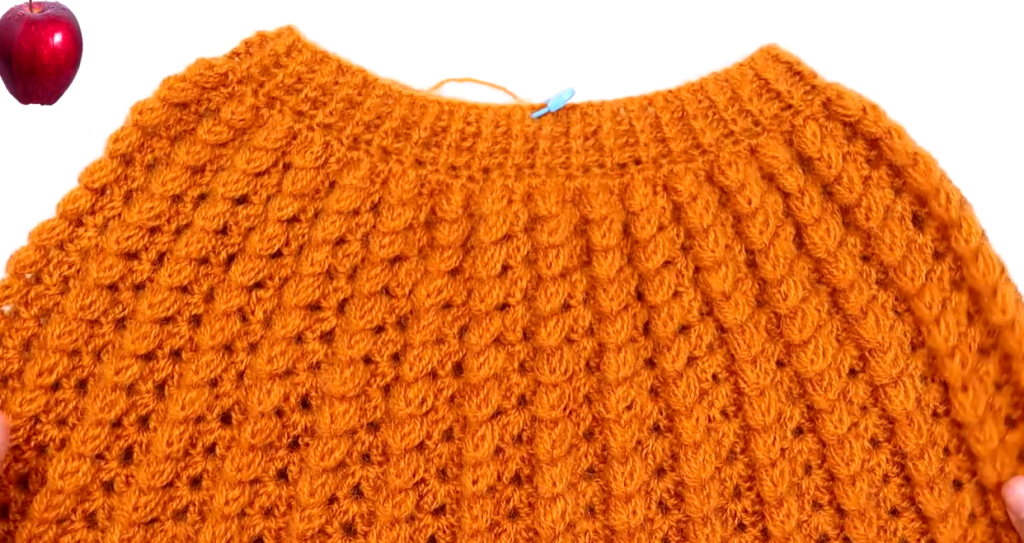
🧡 Section 3: The Bodice (Top-Down)
The bodice is worked in the round and is kept relatively simple and firm to hold the dress shape. This size is for 6-12 months.
Foundation & Bodice Rows
- Foundation Chain: Ch 72. Sl St to the first Ch to form a large ring, taking care not to twist.
- Round 1: Ch 2 (does not count as st). Hdc in each Ch around. Join with Sl St. (72 Hdc).
- Round 2 (Ribbing/Texture): Ch 2. Fpdc around the first st. Bpdc around the next st. Rep (Fpdc, Bpdc) around. Join with Sl St.
- Round 3: Ch 2. Dc in each st around. Join with Sl St. (72 Dc).
- Rounds 4 – 8: Repeat Round 3 (Dc in each st). Continue until the bodice measures approximately 4 – 4.5 inches (10 – 11.5 cm) tall.
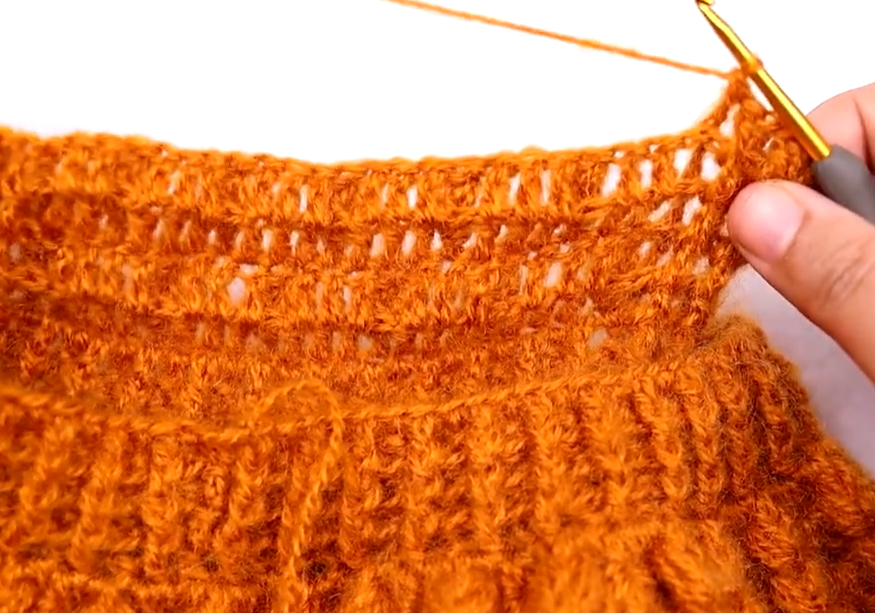
Waist Shaping
- Round 9 (Decrease): Ch 2. Dc in the next 10 sts. Dc2tog over the next 2 sts. Rep from * to * around. Join with Sl St. (66 sts).
- Round 10 (Waist Casing): Ch 1. Sc in each st around. Join with Sl St. (66 Sc).
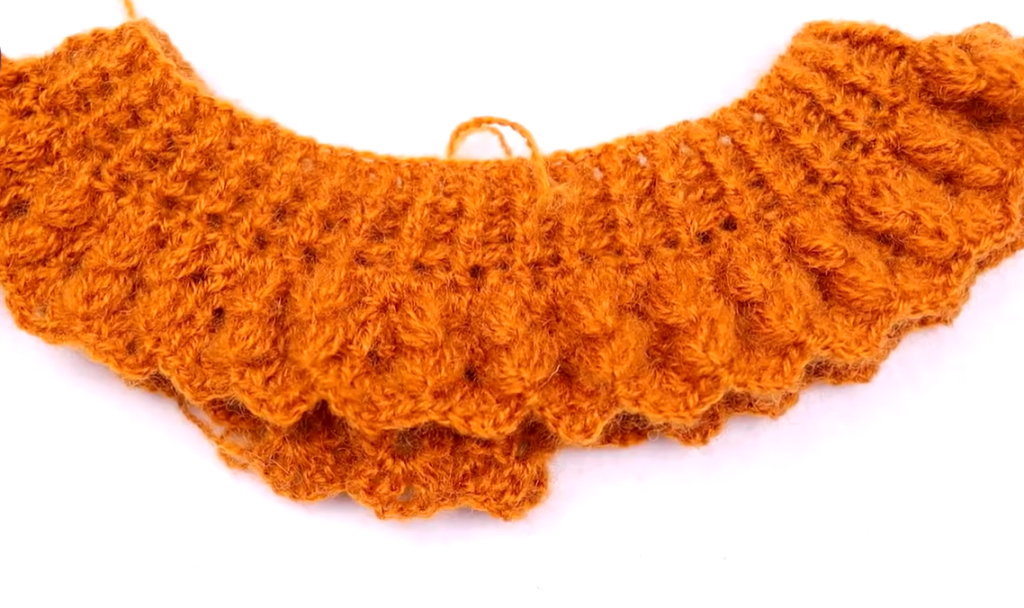
🍂 Section 4: The Skirt (Puff Stitch Texture)
The skirt starts at the waist and is worked in the round with frequent increases to achieve the beautiful volume and drape.
Skirt Start & Puff Stitch Base
- Round 1 (Increase): Ch 3 (counts as 1st Dc). 2 Dc in the next st, Dc in the next 2 sts. Rep from * to * around. Join with Sl St. (88 sts).
- Round 2 (Puff Stitch Row): Ch 1, Sc in the same st. Ps in the next st. Sk 1 st, Sc in the next st, Ps in the next st. Rep from * to * around. Join with Sl St to the first Sc. (44 Ps, 44 Sc).
- Round 3 (Setup Row): Ch 3. Work Dc in the securing Ch-1 of the Ps. Work Dc in the Sc. Rep (Dc in Ps Ch-1, Dc in Sc) around. Join with Sl St. (88 Dc).
Skirt Flare & Puff Stitch Repeats
- Round 4 (Puff Stitch/Increase): Ch 1, Sc in the same st. Ps in the next st. Sk 1 st, Sc in the next st, Ps in the next st. Rep from * to * around. Insert 1 extra Ps/Sc repeat evenly throughout the round (3-4 times) to introduce gentle flare. Join with Sl St. (Approx. 92 sts).
- Round 5 (Setup Row): Rep Round 3.
- Rounds 6 – 12 (Continue Flare): Continue alternating the Puff Stitch Row (Round 4 repeat) and the Setup Row (Round 3 repeat). Introduce 1-2 extra Ps/Sc repeats on the Puff Stitch rows every 3rd or 4th repeat to maintain the flare.
- Length: Continue until the skirt reaches the desired length, approximately 6-8 inches (15-20 cm) from the waistline.
Hem Finish
- End on a Puff Stitch Row. Sl St into the final Ps Ch-1 space. FO. The puff stitch texture creates a natural, dense edge.
🎀 Section 5: Straps and Finishing
✨ The Straps (Make 2)
The straps are worked flat from the back bodice edge and attach to the front.
- Mark Strap Placement: Lay the bodice flat. Place a stitch marker on the back edge, approximately 2 inches (5 cm) from the center back seam on each side. Place a marker on the front edge, approximately 2 inches (5 cm) from the center front on each side.
- Strap 1: Join yarn at the first back marker. Ch 1, Sc in the marked st and Sc in the next 2 sts. (3 Sc). Ch 1, turn.
- Rows 2 – 20: Sc in each st across. Ch 1, turn. (3 Sc). Continue until the strap reaches the front marked position without stretching (approx. 7-8 inches / 18-20 cm). Do not cut yarn.
- Attach: Sl St the end of the strap to the corresponding marked stitch on the front bodice. FO.
- Strap 2: Repeat for the second strap.
✂️ Edging
- Neckline & Armholes: Join yarn and Sc evenly around the raw edges of the neckline and armholes for a neat finish.
Video Tutorial:
💖 Final Assembly
- Weave in all loose yarn ends securely.
Your textured Autumn Ember Dress is complete! The rich color and dense puff stitch texture are perfect for fall and winter wear.
Would you like me to find a coordinating pattern for a pair of textured booties?


