
Hello, my dedicated hookers!
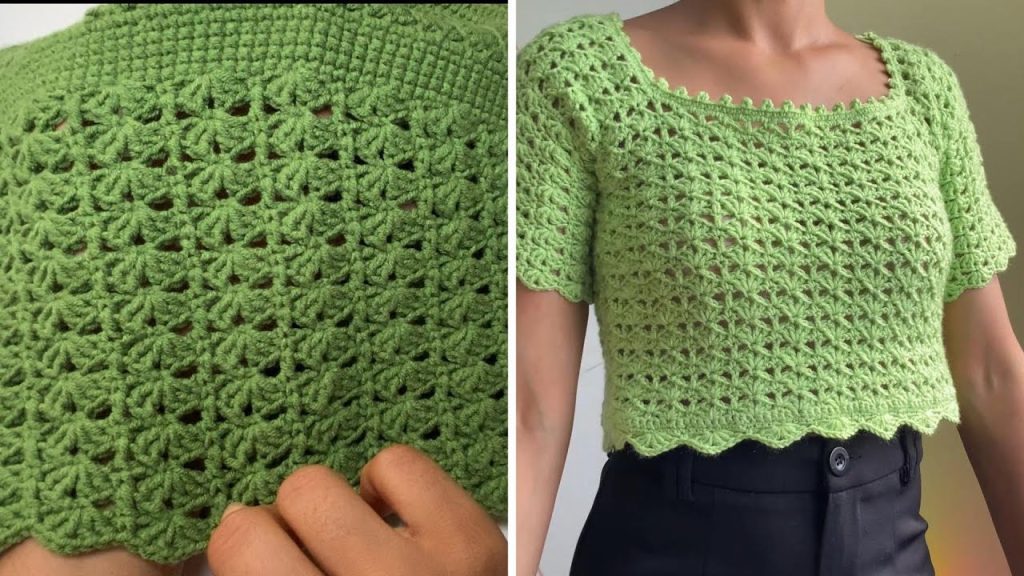
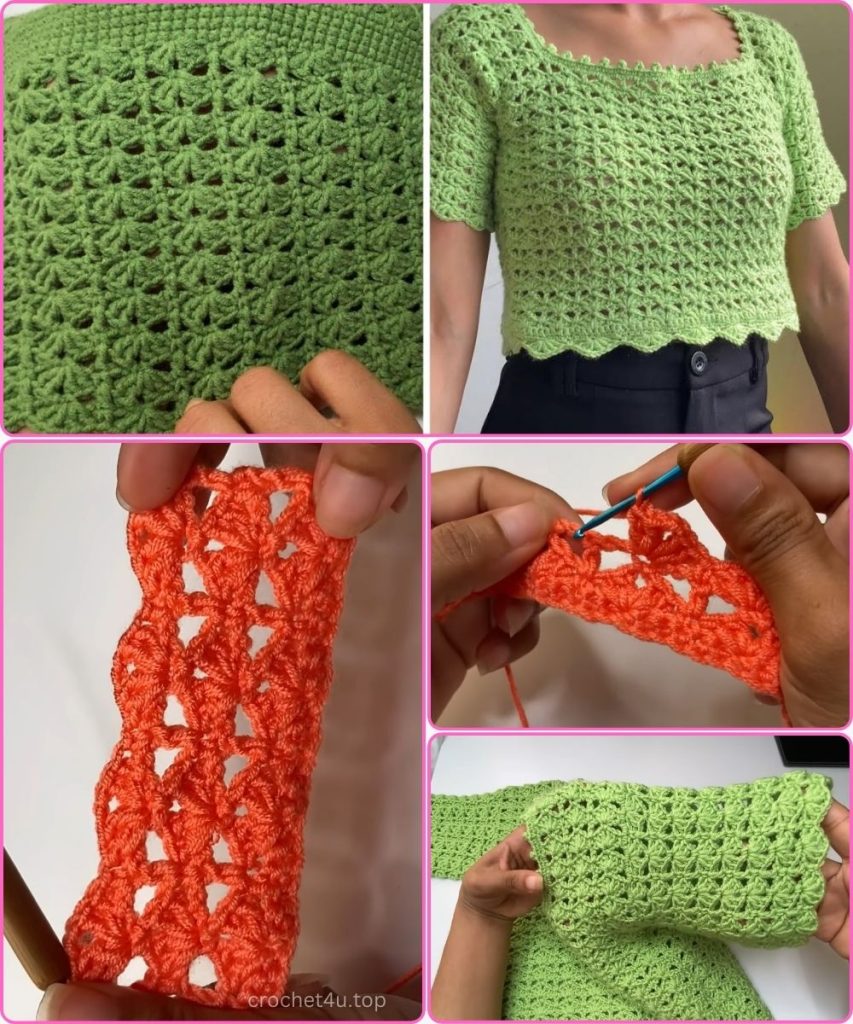
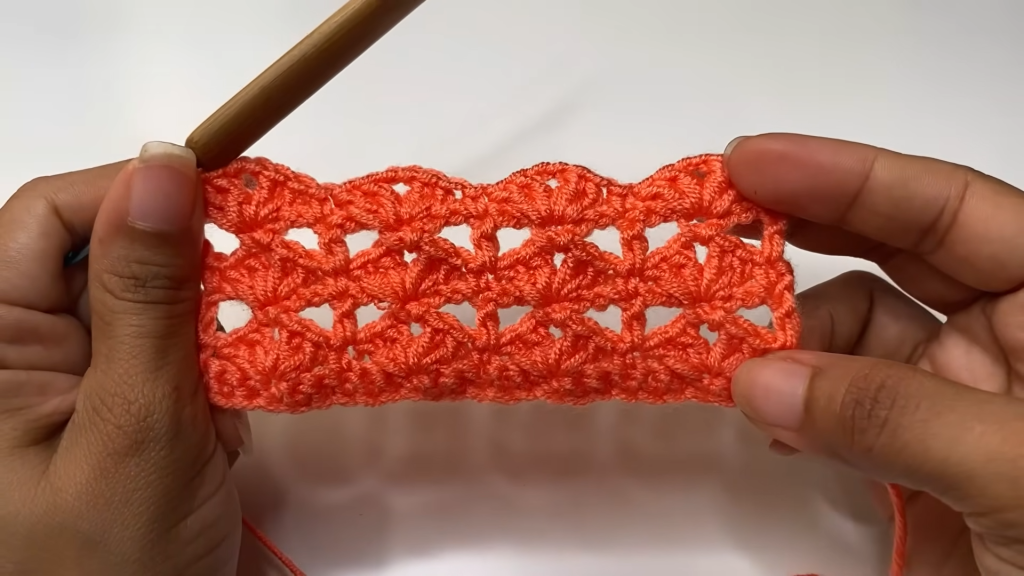
Today, we are diving into a stitch pattern that is an absolute masterpiece of geometry and texture. This beautiful lace, which I call the “Alternating Arches,” creates a striking, open fabric perfect for elegant garments like summer tops, sophisticated cardigans, or even lightweight scarves.
What makes this stitch so fantastic is its rhythm: it alternates between a dense, textural shell motif and an airy, open mesh row. The two patterns work together to give the fabric strength, stability, and incredible visual appeal. Despite its complexity, this pattern is built upon the simplest stitches—Single Crochet (SC), Double Crochet (DC), and Chains—making it accessible to any enthusiastic crocheter.
If you are ready to elevate your crochet wardrobe with a stitch that looks far more challenging than it is, then let’s begin!
🧶 Materials You Will Need
Choosing the right yarn is the first step to success with any lace pattern. For the best result, we want something that highlights the stitch definition and allows for good drape.
- The Yarn:Light Worsted or DK Weight (Weight 3 or 4).
- Recommendation: Bamboo/Cotton Blend or Mercerized Cotton. These fibers are known for their smoothness and drape, ensuring the lace hangs nicely and the shells look crisp, not fuzzy.
- Drape Factor: If you want an airier, softer drape (like the sample blouse), use a hook size slightly larger than recommended on the yarn label.
- The Hook: Size appropriate for your yarn (usually 3.5mm – 4.5mm).
- Tools: Sharp scissors and a tapestry needle for weaving in ends.
📝 Abbreviations & Key Terms (US Terminology)
Make sure you are familiar with these terms before starting:
- Ch: Chain
- St(s): Stitch(es)
- Sk: Skip
- SC: Single Crochet
- DC: Double Crochet
- Ch-sp: Chain space (the opening created by chains in the previous row)
- Shell: The cluster motif of (2 DC, Ch 2, 2 DC) all worked into the same stitch or space.
📏 Pattern Math and Gauge
Achieving the correct width is easy with this pattern’s specific multiple.
- The Multiple: This pattern uses a repeat of 6 stitches, plus 3 for balance.
- Chain Calculation: Ch a multiple of 6, and then add 2 extra chains for the width.
- Example: For a wide swatch, you could choose 6 x 10 = 60 chains. Add 2. You start with 62 chains.
- Foundation Row: The first row of single crochet will result in a stitch count of (Multiple of 6) + 1 (e.g., 61 SCs).
- Gauge: To check your gauge for a garment, complete at least 4 repeats of the pattern over 6 rows. Measure the width of your swatch and adjust your hook size until you are satisfied with the fabric density.
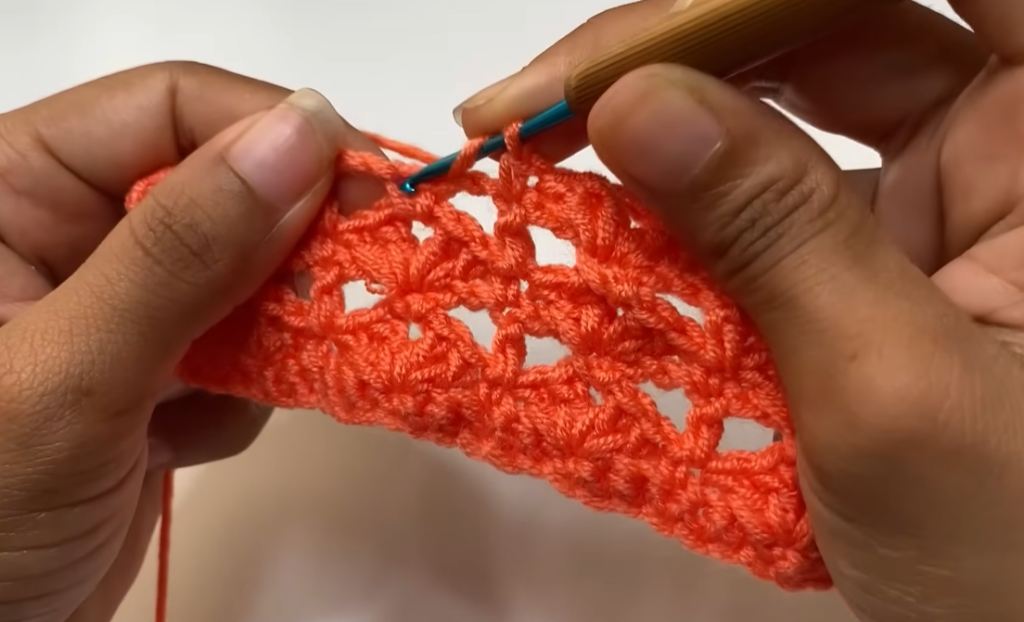
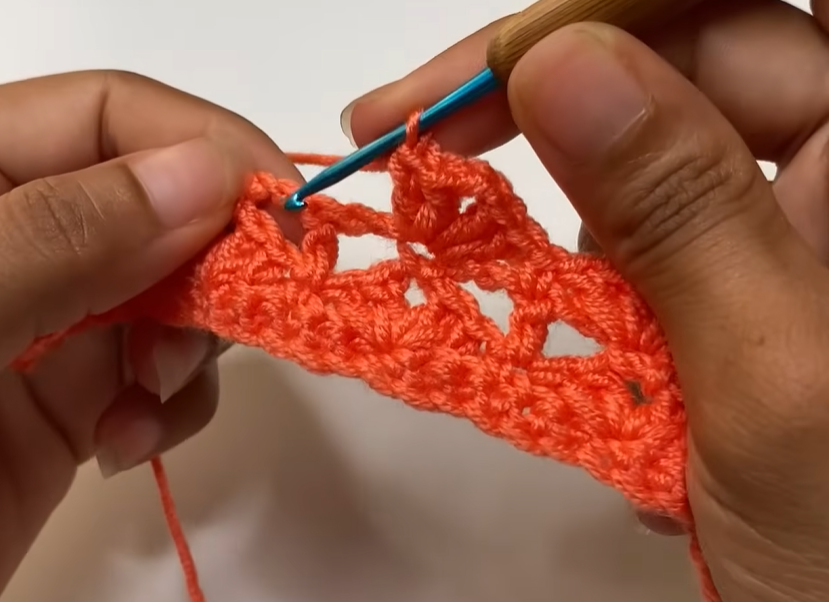
📖 Step-by-Step Stitch Instructions
Phase 1: Foundation and Initial Setup
The sturdy foundation anchors the open shells to come.
- Start: Chain your calculated length (Multiple of 6 + 2).
- Foundation Row (Single Crochet Base):
- Insert hook into the 2nd chain from the hook.
- Make a SC in the back bump of that chain.
- Continue placing 1 SC into the back bump of every chain across.
- Stitch Count Check: You should have (Multiple of 6) + 1 SC stitches.
Row 1: The Shell Row (The Texture)
This row establishes the decorative shell motifs and the spacing.
- Ch 1 and turn your work.
- Make a SC in the very first stitch. (This anchors the edge).
- The Repeat Begins:
- Sk 2 stitches.
- Work a Shell (2 DC, Ch 2, 2 DC) into the next stitch.
- Sk 2 stitches.
- Make a SC in the next stitch.
- Repeat Step 3 all the way across the row.
- End: The row must end with a final SC in the very last stitch.
Row 2: The Grid Row (The Openwork)
This row creates the mesh and sets up the placement for the next row of shells.
- Ch 5 and turn. (Ch 3 counts as the first DC; Ch 2 counts as the space).
- Make a SC into the Ch-2 space at the center of the first Shell motif.
- The Repeat Begins:
- Ch 2.
- Make a DC into the SC stitch between the two Shell motifs.
- Ch 2.
- Make a SC into the Ch-2 space at the center of the next Shell motif.
- Repeat Step 3 all the way across the row.
- End: The row must end with a Ch 2, followed by a DC placed in the final SC stitch of the previous row (which was the edge anchor).
Row 3: The Reset Shell Row (Stacking)
This row is the exact pattern as Row 1, but the placement is shifted: the Shells are now placed into the SCs, and the SCs are placed on top of the DCs.
- Ch 1 and turn.
- Make a SC in the very first stitch (the top of the DC).
- The Repeat Begins:
- Sk the Ch-2 space.
- Work a Shell (2 DC, Ch 2, 2 DC) into the next SC stitch.
- Sk the Ch-2 space.
- Make a SC in the next DC stitch.
- Repeat Step 3 all the way across the row.
- End: The row must end with a final SC placed into the 3rd chain of the starting Ch 5 from the previous row.
Phase 2: The Continuous Repeat
To continue your fabric, you simply repeat the last two rows:
- Repeat Row 2 (Grid Row): Sets up the arch structure.
- Repeat Row 3 (Shell Row): Creates the solid texture.
Continue repeating Row 2 and Row 3 until you reach the desired length for your project.
✨ Troubleshooting and Finishing Tips
- Keeping Edges Straight: The most common challenge in this stitch is keeping the edges even, particularly on the Grid Row (Row 2). Always be meticulous when counting your starting chains (Ch 5) and your ending stitch (DC in the final SC). Missing the final SC placement will cause the work to narrow.
- Tension Consistency: Try to keep the tension on your Ch 2 spaces loose enough. If they are too tight, the fabric will pucker horizontally.
- Shell Placement Check: In the Shell Row (Row 3), the centerpiece of the shell must land in the SC from the previous row, and your anchor SC must land in the DC from the previous row. If they don’t line up this way, stop and count back—you likely missed an end stitch on the row before.
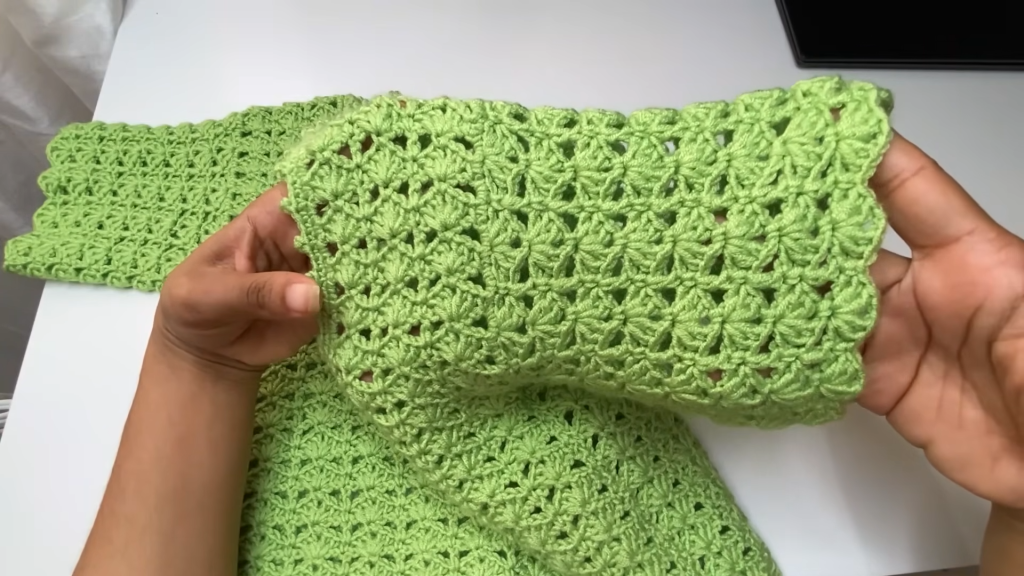
- Final Blocking: As with all lace work, the true beauty of the “Alternating Arches” stitch is revealed after blocking.
- Wet the finished piece gently.
- Pin it out on a blocking mat, gently stretching the fabric so the shell and mesh rows are open and even.
- Allow it to dry completely. This process will square off the entire piece and make the stitch definition incredibly crisp.
Video Tutorial:
👗 Project Inspiration
This stitch is fantastic because it provides visual interest without being distracting. Here are a few ideas for applying this beautiful pattern:
- A Summer Camisole/Top: As shown in the video, this stitch is perfect for the body of a top. It gives enough coverage due to the shell row but is light enough for hot weather.
- A Lightweight Wrap or Shawl: The drape of this pattern makes it ideal for a dramatic shawl that drapes over the shoulders beautifully. Use a soft merino wool or alpaca blend for a luxurious feel.
- A Table Runner: If made with a sturdy cotton yarn, the geometric pattern creates a chic, modern centerpiece for your dining table or console.
Happy crocheting, and enjoy the beautiful fabric you create with the “Alternating Arches” stitch!


