
Hello, crochet enthusiasts!
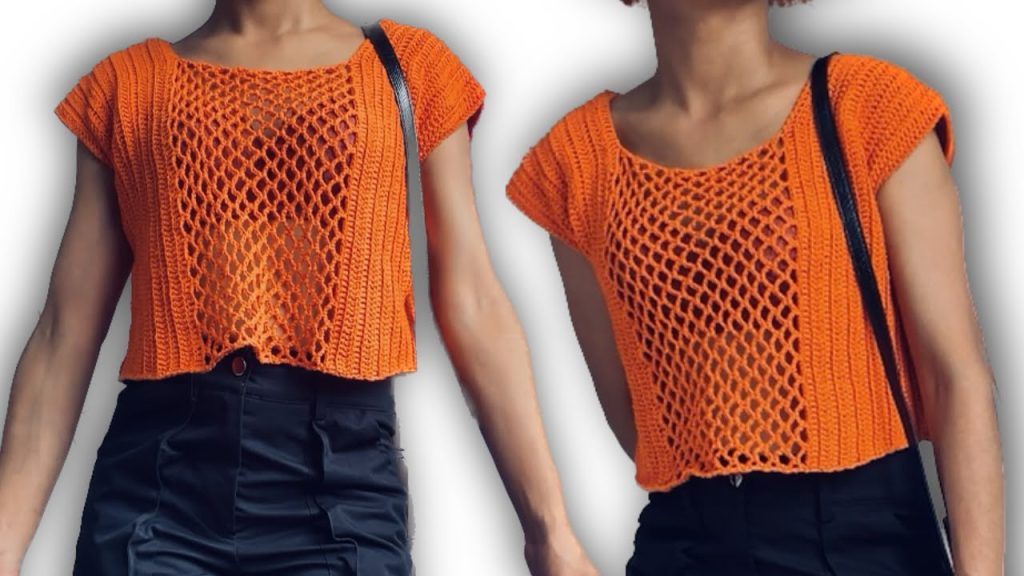
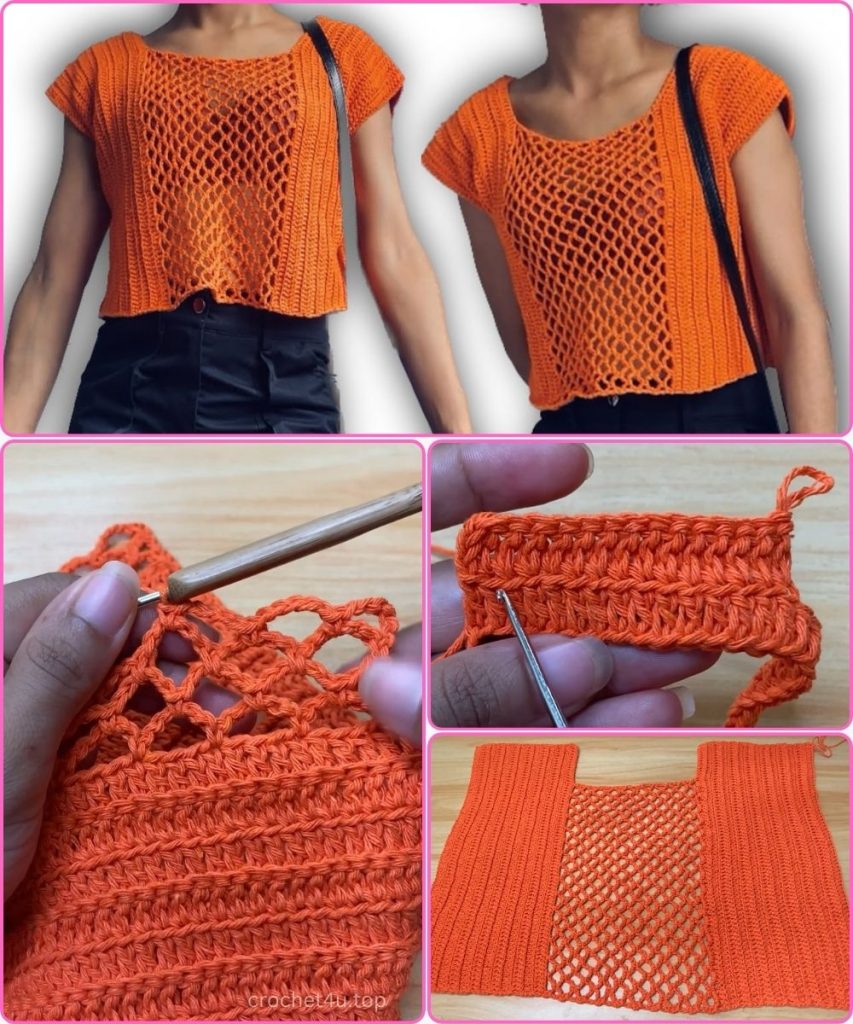
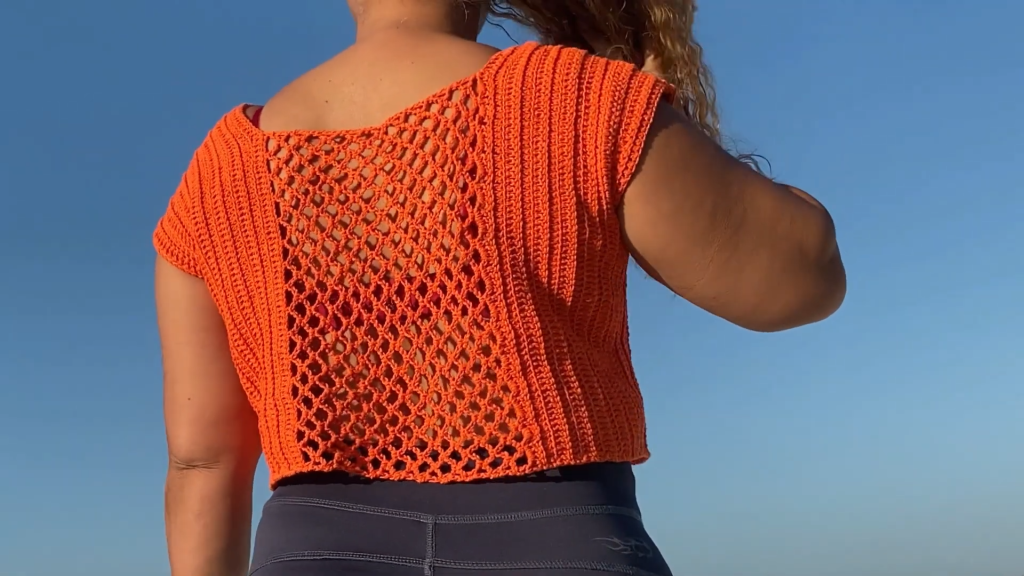
Today, we are diving into an incredibly chic and quick-to-make garment: the “Infinite Lace Trellis” Blouse. This top uses a unique combination of a dense, ribbed shoulder/sleeve section for structure and an airy, open lace pattern for the body, resulting in a beautifully draped and comfortable fit.
What makes this pattern truly remarkable is its construction. We start by working the garment width-wise, creating the shoulder and upper sleeve first, and then build the body downward with our stunning lace stitch. This top is constructed from two identical panels, making the sizing and seaming straightforward.
Get ready to create a stylish, light-as-air blouse that looks far more complicated than it actually is!
🧶 Materials & Sizing Guide
Accurate measurements are the key to a perfectly fitting garment in this construction method.
- The Yarn:Lightweight or DK Weight (Weight 3).
- Recommendation: A smooth, breathable fiber like cotton, linen, or a blend is ideal for achieving the desired drape in the lace section.
- The Hook: A size appropriate for your chosen yarn, typically 3.5mm to 4.0mm.
- Tools:
- Measuring Tape (Absolutely essential!).
- Stitch Markers.
- Tapestry Needle for seaming.
Key Measurements for Custom Fit:
- Desired Total Length (from shoulder/neck): This determines your starting chain length (e.g., 37 cm or 78 chains in the video example).
- Shoulder/Sleeve Width: Measure from the base of your neck, across the shoulder, and down your arm to your desired sleeve length (e.g., 14 cm or 15 rows in the video). This determines how many rows you work for the yoke.
- Armhole Opening: This is the vertical opening left unseamed at the sides (measure the circumference of your upper arm and divide by two).
- Neck Drop: How low you want the neckline to fall on your chest (used when creating the lace body section).
📚 Abbreviations & Stitch Techniques (US Terminology)
- Ch: Chain
- St(s): Stitch(es)
- Sl St: Slip Stitch
- SC: Single Crochet
- DC: Double Crochet
- Sk: Skip
- BLO: Back Loop Only (Used for the ribbed yoke).
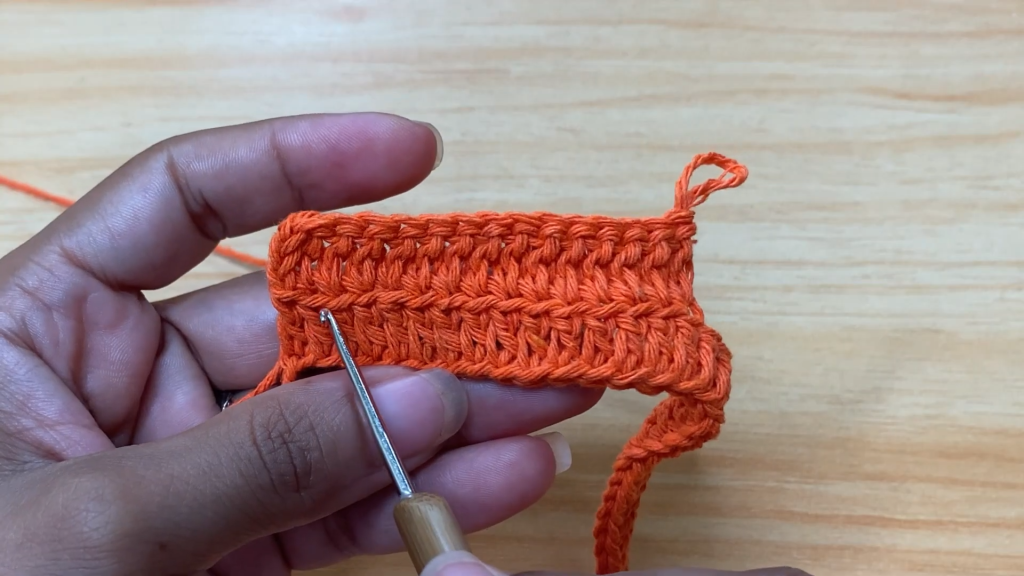
The Yoke Stitch: Horizontal Ribbing (BLO DC)
This technique creates a stretchy, ribbed fabric that runs perpendicular to the length of the garment.
- Row 1 (Foundation): Work a standard row of DC, inserting the hook into the back bump of the foundation chain for a neat edge.
- Subsequent Rows: Work all DC stitches into the Back Loop Only (BLO) of the stitch below.
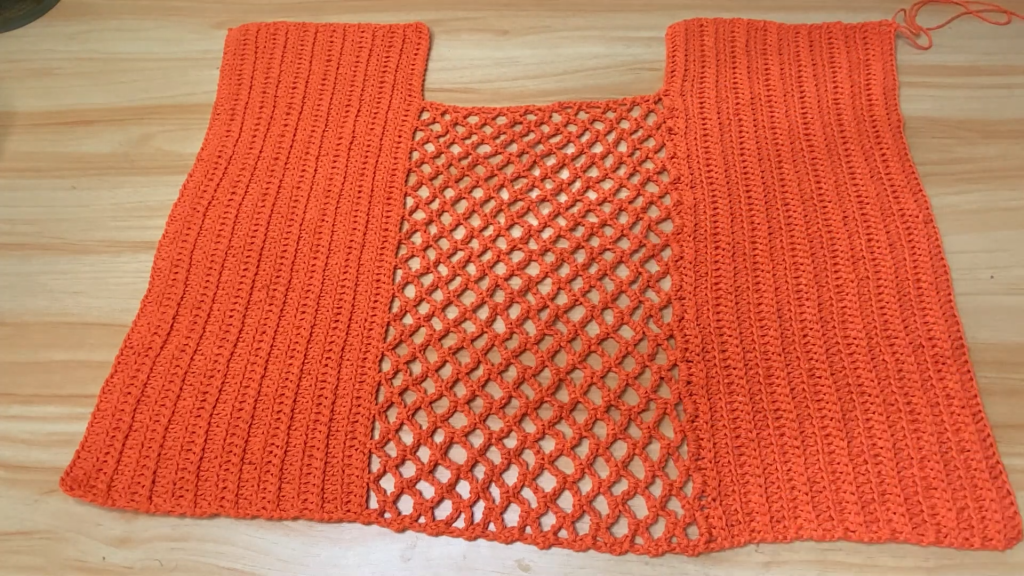
📏 Panel 1: Yoke and Upper Body
The garment is constructed from two identical panels. You begin by creating the ribbed section (which will form the shoulder and upper sleeve) and then transition to the lace body.
Section A: The Ribbed Yoke
- Starting Chain: Chain a length equal to your Desired Total Length (e.g., 78 chains). This chain runs vertically from the sleeve cuff to the hem.
- Ribbed Foundation: Ch 3 (counts as first DC). DC into the 4th chain from the hook, and DC in every chain across. (This should equal your starting chain count minus 3).
- Ribbed Rows: Ch 3, Turn. DC in the BLO of every stitch across the row.
- Repeat: Repeat the BLO DC row until the piece measures your Shoulder/Sleeve Width (e.g., 15 rows or 14 cm in the video). This completes the width of the shoulder and upper sleeve.
Section B: Transition to Lace Body (SC and Chain Arches)
This section is worked horizontally along the row edges of the yoke.

- Marking the Neckline: Now working along the long edge of the piece, place a stitch marker at the point where you want the Neckline Drop to end (e.g., 30 cm from the bottom edge, leaving 7 cm for the neck drop in the video example).
- Transition Row 1:
- Join yarn at the bottom corner. Ch 1. SC in the same spot.
- Ch 5. Sk 3 stitches (or 3 row-end spaces). SC into the next stitch/space.
- Repeat the sequence: [Ch 5, Sk 3 st/spaces, SC in next st/space] up the side of the work until you reach the stitch marker.
- Note: The number of arches you create will depend on your row gauge. The arches should be evenly spaced.
- Transition Row 2:
- Ch 5, Turn. SC into the first Ch-5 loop.
- Repeat: [Ch 5, SC into the next Ch-5 loop] across the row.
- End: Ch 2. DC into the last SC of the previous row (this ensures the turning chain aligns for the next row).
- Transition Row 3 (Repeat of Row 2):
- Ch 5, Turn. SC into the first Ch-5 loop.
- Repeat: [Ch 5, SC into the next Ch-5 loop] across the row.
- End: Ch 5. SC into the top of the turning chain/last stitch.
Section C: The Main Lace Body (Repeating Arches)
- Lace Body: Continue repeating Transition Row 2 and 3 until the lace section measures your desired length (e.g., 16 cm, or 19 rows in the video).
- Total Length Check: The Ribbed Yoke length plus the Lace Body length should match your desired final length.
- Fasten Off.
🔄 Panel 2: The Second Identical Panel
- Repeat Sections A, B, and C exactly as described above to create the second panel.
🪡 Assembly and Finishing
With two identical panels complete, it’s time to join them to form the blouse.
- Shoulder Seams:
- Align the two panels with the wrong sides together (or right sides facing out, depending on your preferred seam finish).
- Use a tapestry needle and a running or whip stitch to seam the top edges of the ribbed yoke section together. This forms the shoulder seam.
- Leave the central, unworked area (the neck opening) open.
- Side Seams (Armhole):
- Measure your Armhole Opening depth (e.g., 13 cm in the video) down from the shoulder seam. Place a stitch marker on both the front and back panels at this point.
- Seam the sides of the garment together from the bottom hem up to the armhole marker.
- Leave the section above the marker open for the armhole. Secure and weave in all ends.
🎯 Final Edging (Lace Infill)
The final step is to fill in the open lace arches of the body with a solid row of DCs, providing structure to the hem.
- Hem Foundation: Join yarn at the bottom edge of the lace section.
- Infill Round:
- Ch 3 (counts as DC).
- In each Ch-5 loop, work 3 DC.
- Work 1 DC into the top of each SC stitch between the loops.
- Continue this pattern around the entire bottom circumference.
- Sl St to the top of the starting Ch 3 to join.
- Optional Edging: You can add 1-2 rounds of SC or the Picot Edging from the previous pattern on the hem, neck, and armholes if desired, but the pattern concludes with the DC infill round for a clean, tailored finish.
Enjoy your gorgeous new “Infinite Lace Trellis” Blouse! The stunning drape of the lace body is sure to make this a favorite in your wardrobe.


