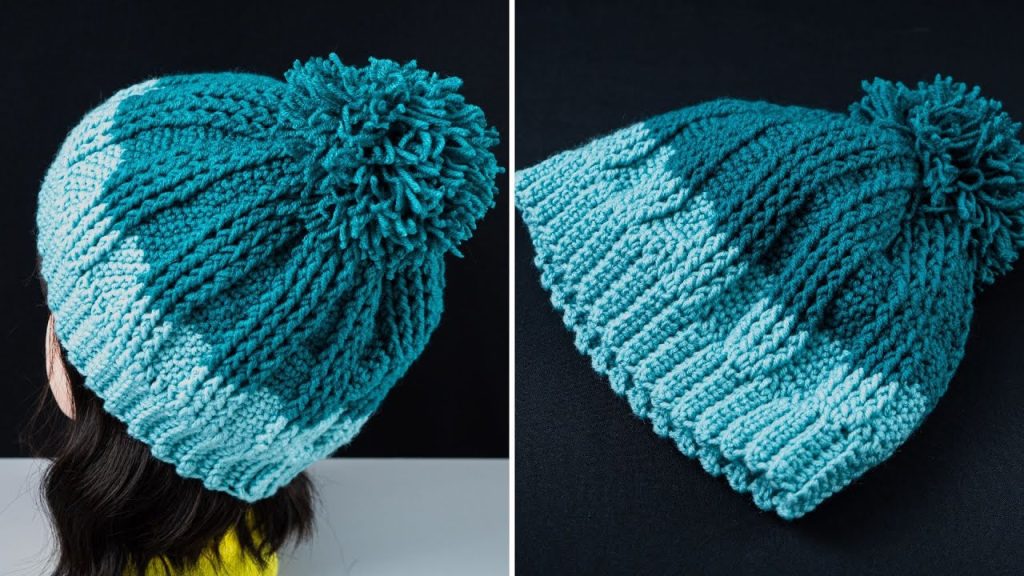
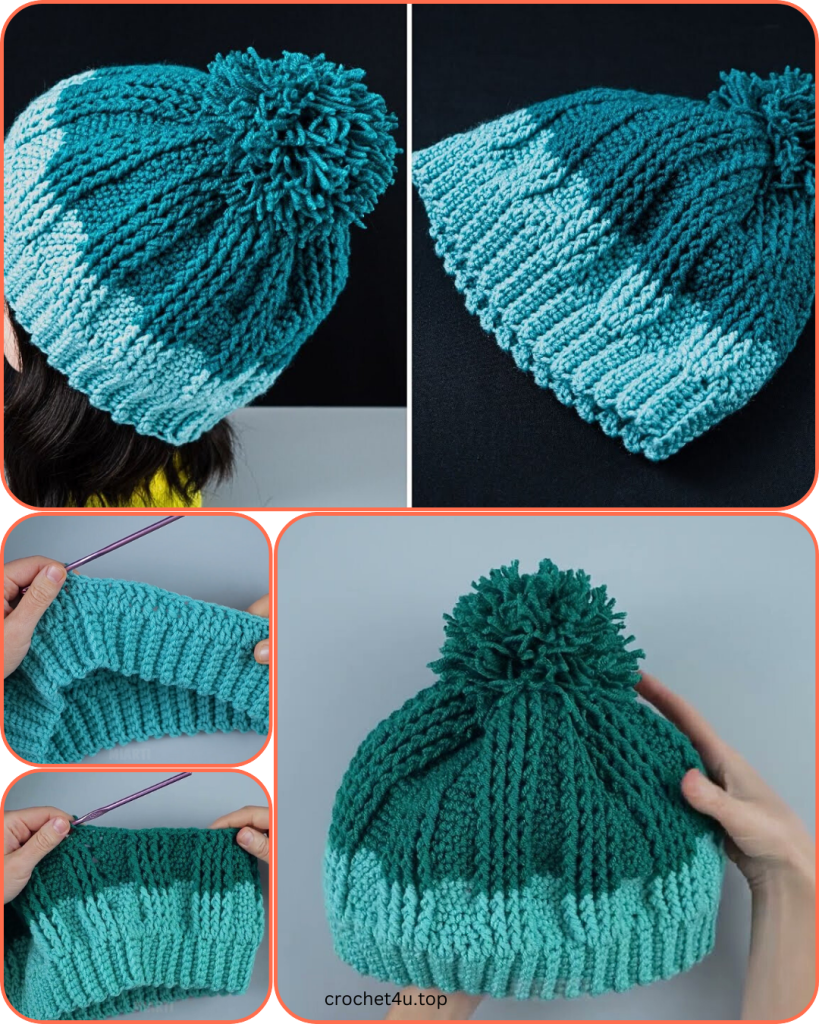
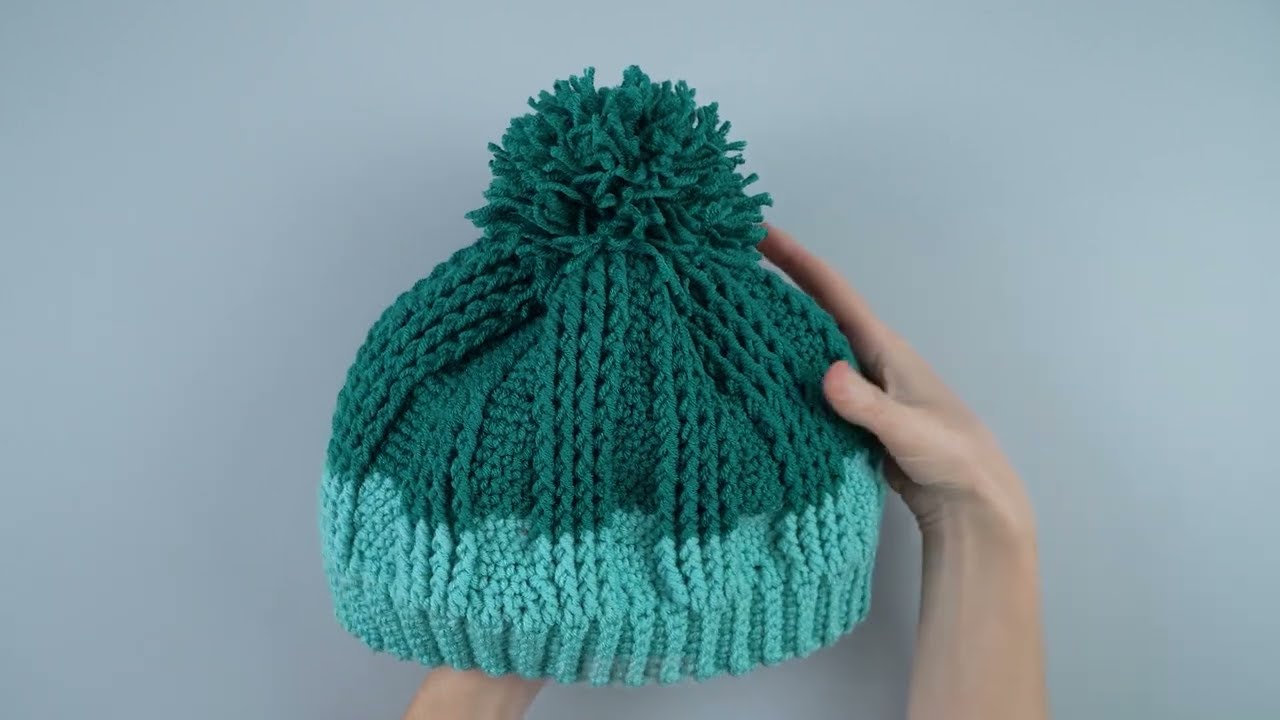
There’s nothing better than a warm, stylish, handmade hat for a chilly day. This pattern will guide you through creating a beautiful two-tone beanie with a chunky pom-pom, perfect for adding a pop of color to your winter wardrobe. The design features a ribbed brim for a snug fit and a striking textured body created with a mix of front-post and back-post stitches. This pattern is written for an average adult size, with notes on how to adjust for a custom fit.
Materials
- Worsted-weight yarn (Category 4): Approx. 150-200 yards in total.
- Color A (lighter shade): Approx. 75-100 yards (used for the brim and lower body).
- Color B (darker shade): Approx. 75-100 yards (used for the upper body and crown).
- Crochet hook: US size I/9 (5.5 mm), or the size needed to obtain gauge.
- Tapestry needle: For weaving in ends.
- Pom-pom maker: This is optional, but it makes creating a fluffy pom-pom much easier. You can also make one by hand.
- Stitch marker: Optional but helpful for marking the beginning of the round.
Gauge
Checking your gauge is crucial for a hat that fits well.
- In half-double crochet (HDC): 4 rows of 5 HDC should measure 1 inch by 1 inch.
Adjust your hook size if your gauge is off. If your swatch is too small, use a larger hook. If it’s too big, use a smaller hook.
Pattern Notes
- The hat is worked from the bottom up.
- The ribbing is created using slip stitches in the back loop only (SLST BLO).
- The body of the hat is worked in continuous rounds using half-double crochet (HDC) and front-post half-double crochet (FPHDC). You will not join with a slip stitch at the end of each round unless otherwise stated.
- The beginning chain of each round does not count as a stitch.
- This pattern is for an adult medium (fits a head circumference of approximately 19-22 inches).
Hat Construction
Part 1: The Ribbed Brim (Using Color A)
- Row 1: Chain 12. Skip the first chain. Slip stitch (SLST) into the back loop only (BLO) of the next 11 chains. (11 stitches)
- Row 2: Chain 1. Turn your work. SLST in the BLO of each of the 11 stitches. (11 stitches)
- Repeat Row 2 until the brim measures approximately 19 inches in length when slightly stretched. For a custom fit, wrap it around your head—it should be snug but comfortable.
- Joining the brim: Fold the brim in half, bringing the short ends together. Slip stitch the ends together to form a tube. Turn the brim so the seam is on the inside.
Part 2: The Hat Body (Transitioning from Color A to B)
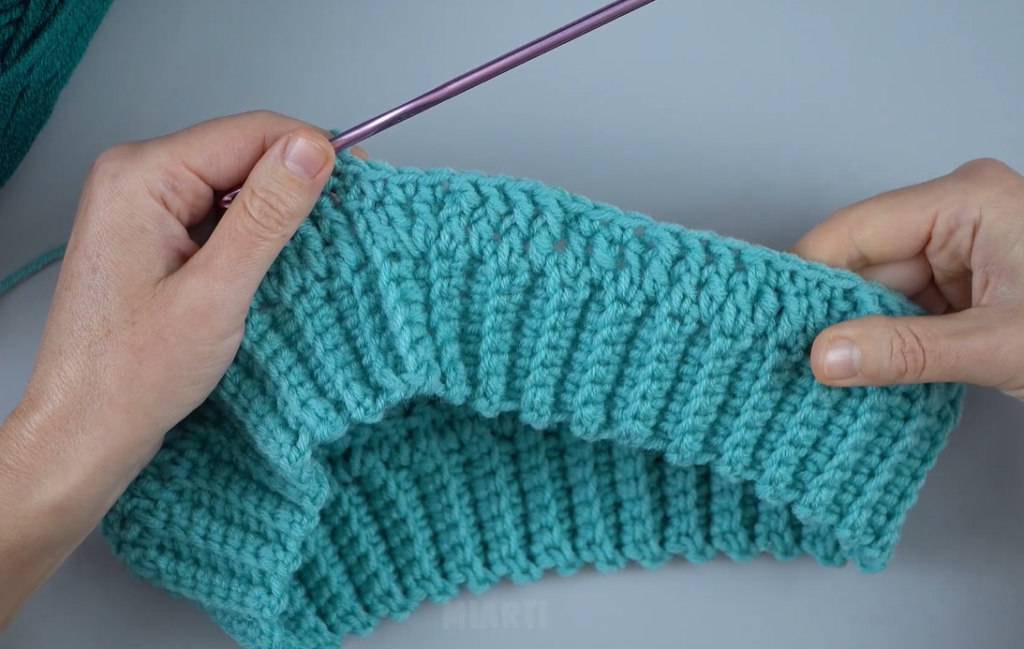
- Round 1 (with Color A): Now we will work around the edge of the brim. Chain 1. Work 80 half-double crochet (HDC) stitches evenly around the top edge of the brim. Join with a slip stitch to the first HDC. Place a stitch marker here to mark the beginning of the round. (80 stitches)
- Round 2: Chain 1. HDC in each stitch around. Do not join at the end of this round. Continue to work in a spiral. (80 stitches)
- Rounds 3-6: Repeat Round 2. (80 stitches)
Now we will introduce the textured pattern and the color change.
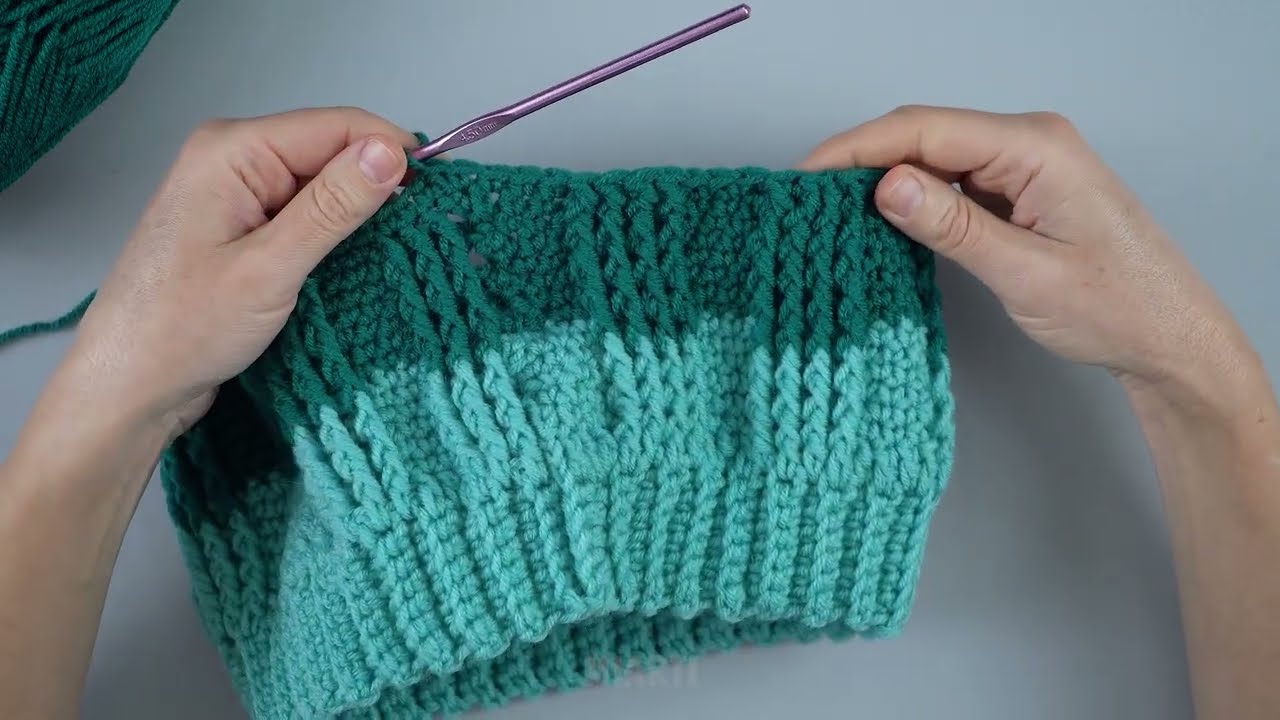
- Round 7: Change to Color B. HDC in the first 4 stitches. *Front-post half-double crochet (FPHDC) into the next 4 stitches, HDC into the next 4 stitches.* Repeat from * to * around. The FPHDC stitches create the raised diagonal lines.
- Rounds 8-12: Repeat Round 7. Continue to work in the pattern, with each FPHDC section stacked on top of the previous one.
- Round 13: We will now shift the pattern to create the V-shape. FPHDC into the first 2 stitches, HDC in the next 4 stitches, FPHDC in the next 4 stitches, HDC in the next 4 stitches. Continue this pattern around, shifting the FPHDC section by two stitches.
Note: You can play around with the placement of the FPHDC and HDC sections to create different patterns. For this design, a simple shift every few rows creates the beautiful diagonal and V-shape.
- Rounds 14-20: Repeat Round 13.
- Rounds 21-25: Repeat Round 13, but continue to shift the FPHDC sections by two stitches every few rows.
The top of your hat should now be forming and the V-pattern should be well-defined. Continue with the pattern until the hat measures approximately 8 inches from the bottom of the brim, or the desired height before decreasing for the crown.
Part 3: Decreasing the Crown
- Round 26: We’ll now start decreasing to shape the top of the hat. This is the last round of the V-pattern.
- Round 27: *HDC in the next 2 stitches, HDC2tog (half-double crochet 2 stitches together).* Repeat from * to * around.
- Round 28: HDC in each stitch around.
- Round 29: *HDC in the next stitch, HDC2tog.* Repeat from * to * around.
- Round 30: HDC2tog around.
- Finishing: Cut a long tail of yarn and thread it onto a tapestry needle. Weave the needle in and out of the remaining stitches, pull tight to cinch the top of the hat closed, and knot the yarn to secure it. Weave in all remaining ends.
Part 4: The Pom-Pom
- Making the Pom-Pom: Using your pom-pom maker and Color B yarn, wrap the yarn around each arm of the maker until it’s very full and dense. Close the maker and cut the yarn along the middle. Use another piece of yarn to tie it securely in the center.
- Attaching the Pom-Pom: Use the long yarn tails from your pom-pom to tie it securely to the top of the beanie. Weave in the ends.
Your two-tone beanie is now complete! Put it on and get ready to face the cold in style.