
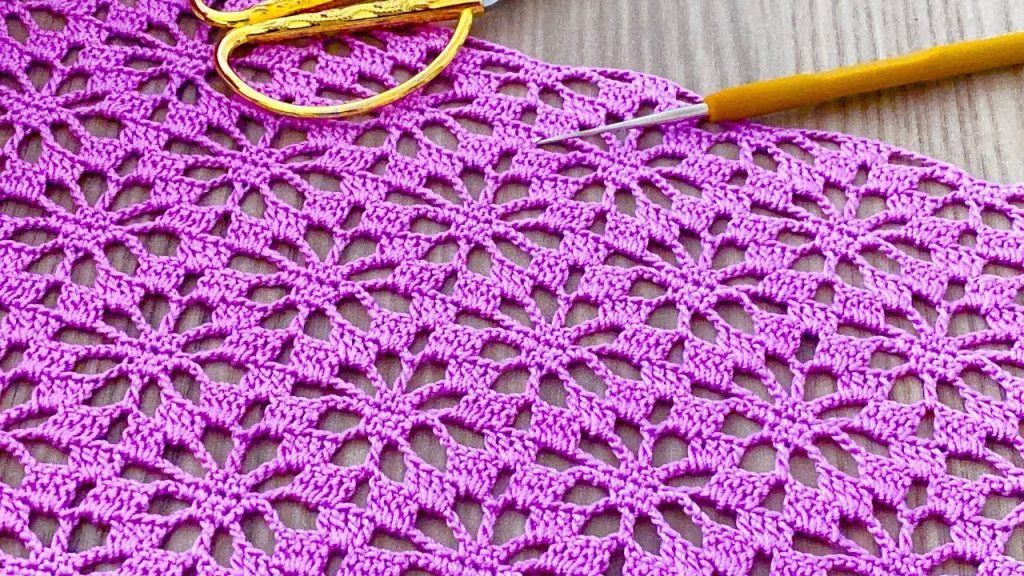
Cast a spell of elegance with this captivating star lace fabric. This pattern creates a continuous, airy textile adorned with repeating 8-pointed star motifs that seamlessly interlock. Perfect for a lightweight scarf, a delicate shawl, or a stunning overlay on a simple garment, this lace works up beautifully in a fine thread, showcasing every intricate detail. The vibrant purple yarn in the sample adds a touch of modern sophistication.
⭐️ Project Overview and Technique Check
| Feature | Detail |
| Skill Level | Intermediate to Advanced Intermediate. Requires precise stitch placement and working with cluster/V-stitches. |
| Stitches Used | Chain (ch), Slip Stitch (sl st), Single Crochet (sc), Double Crochet (dc), Treble Crochet (tr), dc Cluster (dccl). |
| Construction | Worked in rows, building each star motif as you go and connecting to previous rows. |
| Yarn Type | Fine cotton thread is essential for the crisp, open lace structure. |
| Pattern Repeat | The pattern repeats every 2 rows horizontally, and every 2 star motifs vertically. |
Export to Sheets
🧵 Materials Selection & Precision Gauge
Yarn: The Heart of the Stars
- Weight: Crochet Thread Size 10 or a fine Lace Weight (Category 0) yarn. The fine thread is crucial for achieving the delicate, airy appearance and sharp points of the stars.
- Fiber: 100% Mercerized Cotton thread is highly recommended. It provides excellent stitch definition, strength, and blocks beautifully.
- Color: A rich, jewel-toned purple (like the sample), or a classic white/ecru for an heirloom feel.
- Yardage: Approximately 200−300 yards for a scarf, 500−700 yards for a small shawl.
Hook: The Precision Tool
- Size: 1.5 mm to 1.75 mm (Steel Hook US 8 or 7). Choose a hook that allows for tight, consistent tension. This is key to maintaining the geometric integrity of the stars.
Notions & Blocking
- Tapestry Needle: Fine needle for weaving in ends.
- Scissors.
- T-pins and Blocking Board: Essential. Blocking relaxes the fibers, opens up the lace, and defines the star points.
Precision Gauge
Gauge is measured across one complete horizontal repeat of the star motif:
- One horizontal star repeat: Approximately 1.75 inches wide (from star point to star point).
- Vertical repeat: One complete star from tip to tip (top to bottom point) is approximately 1.5 inches tall.
- Your overall fabric should have a light, open drape, but with defined stitches.
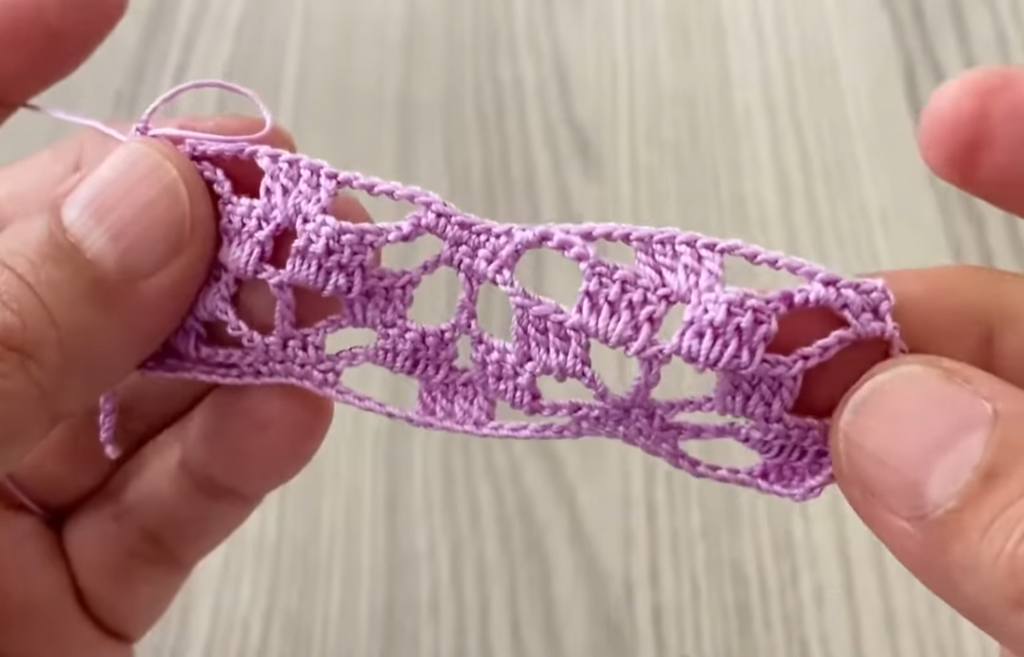
📝 Pattern Instructions: The Foundation Row
This row establishes the first horizontal line of star points and the base for the subsequent rows.
Skill Definition: dc Cluster (dccl) dccl (3 dc together): Yarn over, insert hook into stitch/space, yarn over, pull up loop, yarn over, pull through 2 loops (2 loops on hook). Repeat from * 2 more times in the same stitch/space (4 loops on hook). Yarn over, pull through all 4 loops.
Starting Chain Calculation: The pattern repeats every 8 chains. To find your desired starting width, use the formula: 8×(number of star repeats)+1 ch
- For a sample piece with 10 star repeats across: ch 81.
Row 1 (Initial Star Points – RS): ch 1 (sc in 2nd ch from hook).
- ch 3, dccl into the same ch as the sc.
- ch 3, sc in the 5th ch from the hook (skipping 4 ch). Repeat sequence: ch 3,dccl in same ch as last sc. ch 3,sc in 5th ch from hook. Continue across the row. You will end with a sc in the last ch.
- Turn.
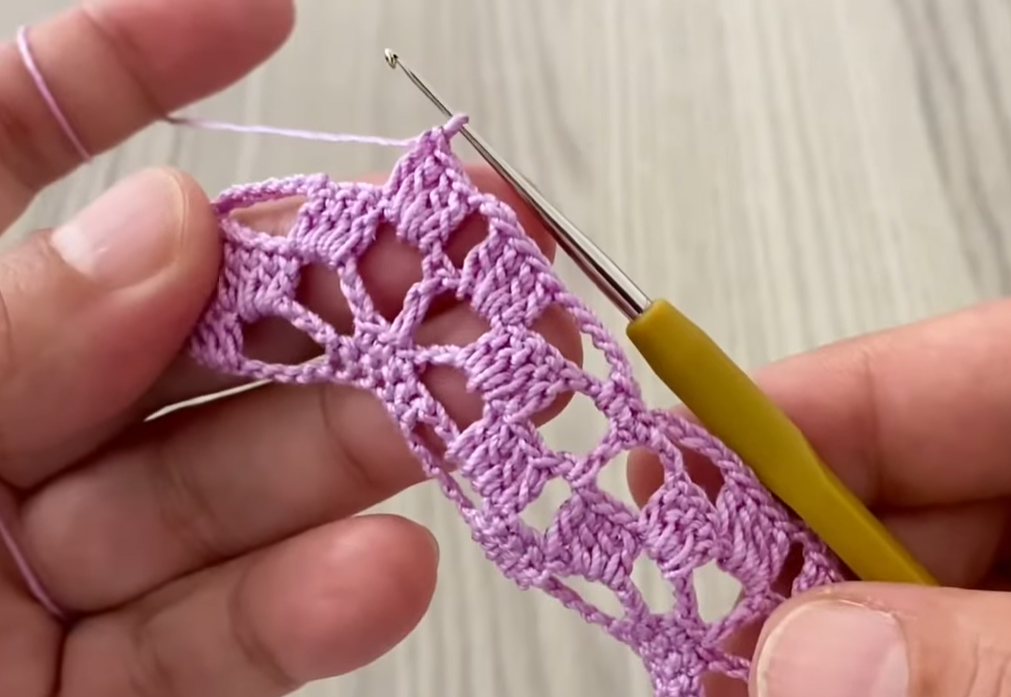
🔗 Pattern Instructions: The Repeating Rows
This section details the two rows that form the continuous star pattern.
Row 2 (Connecting Arches – WS): ch 4 (counts as tr). sc in the top of the first dccl.
- ch 5 (This forms the connecting arch).
- sc in the sc of the previous row. ch 5.
- sc in the top of the next dccl. Repeat across the row. You will end with sc in the top of the last dccl.
- ch 4, tr into the last sc of the previous row.
- Turn.
Row 3 (New Star Points – RS): ch 1 (sc in the first tr).
- ch 3, dccl into the same tr.
- ch 3, sc into the 3rd ch of the next ch 5 arch. Repeat sequence: ch 3,dccl into same ch as last sc. ch 3,sc into 3rd ch of next ch 5 arch. Continue across the row. You will end with sc into the 3rd ch of the last ch 5 arch.
- ch 3, dccl into the same ch.
- ch 3, sc into the 4th ch of the starting ch 4 (the turning chain tr) from Row 2.
- Turn.
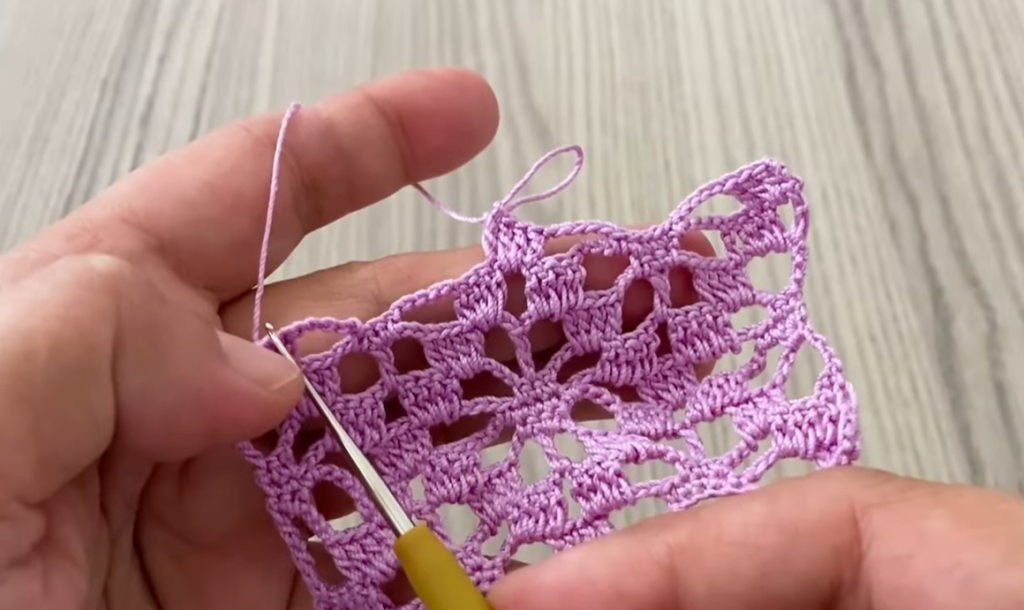
Continue repeating Row 2 and Row 3 until your piece reaches the desired length.
Finishing Edges
For a consistent look, you can end after either a Row 2 or Row 3 repeat.
- If ending after a Row 2: Fasten off. This creates a slightly straighter, more “finished” edge on the last row.
- If ending after a Row 3: Fasten off. This will leave you with a final row of star points.
Video Tutorial:
⚠️ Troubleshooting and Advanced Techniques
| Issue | Cause | Solution |
| Fabric ruffles/curls | Connecting chains (ch 5 in Row 2, ch 3 in Row 3) are too long. | Reduce chain counts by 1 or 2 stitches until the fabric lays flat. |
| Fabric pulls/tightens | Connecting chains are too short, or tension is too tight. | Increase chain counts by 1 or 2 stitches, or use a larger hook. |
| Uneven sides | Inconsistent counting of turning chains at row ends. | Always ensure ch 4 for Row 2 start/end and ch 1 for Row 3 start/end are exact. Use a stitch marker. |
| Creating a wider piece | Want more horizontal stars. | Ensure your initial starting chain adheres to the 8×(number of repeats)+1 ch formula. |
| Joining (for a larger project) | If creating a large blanket or garment. | This pattern is typically worked as a continuous fabric. If joining two pieces side-by-side, use a simple sl st or sc seam after blocking. |
Export to Sheets
🔨 Final Shaping and Heirloom Blocking
Blocking is absolutely critical for this lace to open up and display its full beauty. Without it, the stars will appear less defined.
- Preparation: Weave in all starting and ending yarn tails carefully.
- Soak and Starch (Optional): Submerge your lace in cool water. For a very crisp, traditional finish (ideal for table linens), consider adding a small amount of liquid starch to the water. Gently squeeze out excess water—do NOT twist or wring.
- Tension Pinning: Lay the damp lace on a foam blocking mat. Using rust-proof T-pins:
- Pin the top and bottom edges straight.
- Carefully pin out the tip of each star point (both the dccl points and the sc points that form the star). Pull gently to open up the connecting chains.
- Dry: Allow the piece to dry completely flat. This can take 12−48 hours, especially if using starch.
Your Twinkling Star Lace fabric is now complete! What beautiful project will this elegant and airy textile become?


