
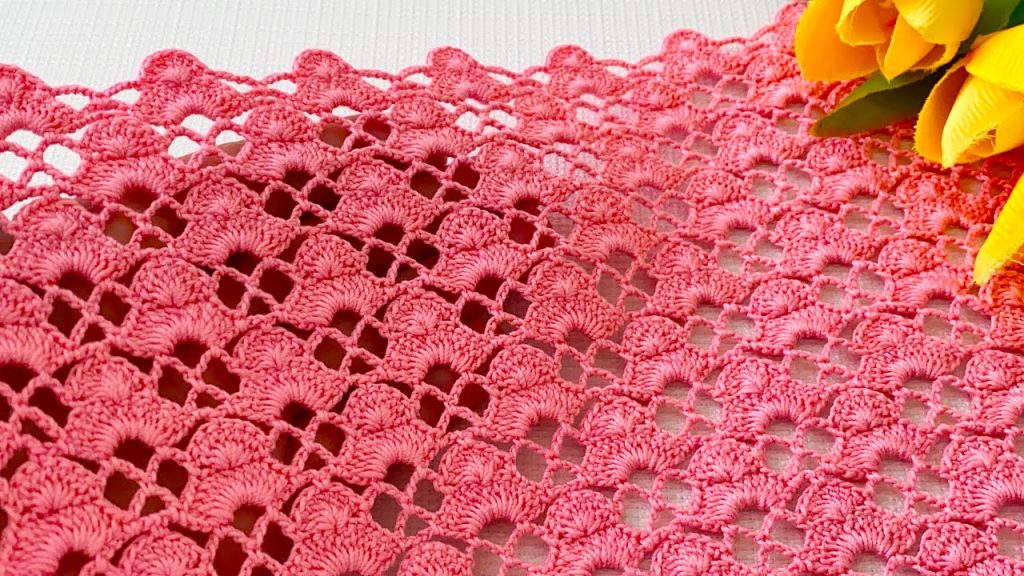
Gaze upon the starry beauty of this exquisite crochet doily motif! Featuring a stunning, layered starburst center that transitions into a delicate web of lace and a scalloped border, this pattern is a delight to crochet. The beautiful blue yarn (likely a cotton blend) gives it an airy, refreshing look. Perfect for single placemats or joining into a larger runner or cloth.
⭐️ Project Blueprint and Technique Check
| Feature | Detail |
| Skill Level | Intermediate to Advanced Intermediate. Requires mastery of stitch placement and counting in the round. |
| Stitches Used | Chain (ch), Slip Stitch (sl st), Single Crochet (sc), Double Crochet (dc), Treble Crochet (tr), dc Cluster. |
| Construction | Worked continuously in the round, building layers of texture and netting. |
| Yarn Type | Fine cotton thread is ideal for the crisp lace structure. |
| Final Product | A round motif with a scalloped edge. |
Export to Sheets
🧵 Materials Selection & Precision Gauge
Yarn: Choosing Your Cloud
- Weight: Crochet Thread Size 10 or a fine Lace Weight (Category 0) yarn. The fine thread is essential for the structure and intricate detail of the lattice work.
- Fiber: 100% Mercerized Cotton thread is highly recommended, as it blocks well and gives a clean stitch definition. The sample appears to use a slightly thicker thread than a typical Size 10, or perhaps a Fingering Weight (Category 1) for a slightly larger, softer result.
- Color: A soft blue or periwinkle (like the sample), or a color-matched thread for a seamless finish.
- Yardage: Approximately 60 to 80 yards per motif.

Hook: The Detailer
- Size: 1.75 mm to 2.0 mm (Steel Hook US 7 or 6). Use a hook that results in firm stitches that hold their shape before blocking.
Notions & Blocking
- Tapestry Needle: Fine needle for weaving in ends.
- T-pins and Blocking Board: Essential. Blocking opens up the netting and defines the scalloped edge.
Precision Gauge
The finished motif should measure approximately 7 to 8 inches in diameter after blocking. Consistency in the height of your dc and tr stitches is key for the circular shape.
🌸 Pattern Instructions: The Starburst Center
The pattern begins with a solid central motif that will form the layers of the flower.

Round 1 (Center Ring): ch 6, sl st to the first ch to form a ring. ch 3 (counts as dc), 15 dc into the ring. sl st to the top of the starting ch 3 to join. (16 dc)
Round 2 (Small Loops): ch 1 (sc in the first dc). ch 3, sc in the 2nd dc from the hook. Repeat the sequence ch 3,sc in 2nd dc 7 times more. sl st to the first sc to join. (8 ch 3 loops)
Round 3 (Cluster Layer): sl st into the first ch 3 loop. ch 3 (counts as dc). Work 3 dc in the same loop. ch 2. Work 4 dc into the next ch 3 loop. ch 2. Repeat this sequence \mathbf{4 \text{ dc}, \text{ch 2}} 6 times more. sl st to the top of the starting ch 3 to join. (8 dc clusters)
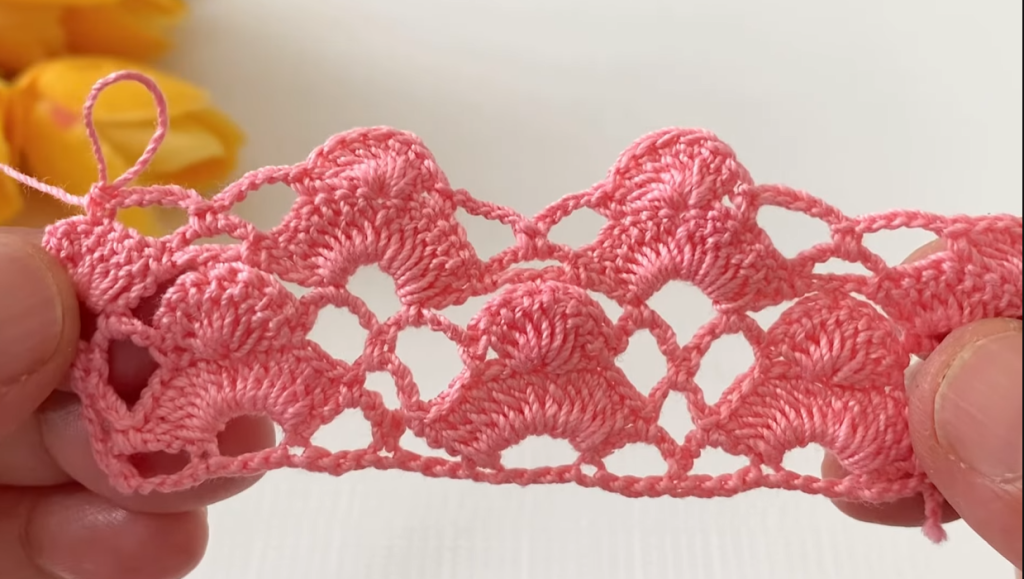
🕸 Pattern Instructions: Lattice Netting
This section transitions to open lace, using tr stitches for height and ch arches to expand the circle.
Round 4 (Expanding Arches): ch 1 (sc in the sl st join). ch 5. sc into the center of the next 4 dc cluster. ch 5. sc into the next ch 2 space. Repeat the sequence ch 5,sc in cluster, ch 5,sc in ch 2 space 3 times more. sl st to the first sc to join. (16 ch 5 loops)
Round 5 (Tall Netting): sl st into the first 3 ch. ch 4 (counts as tr). 3 tr in the same ch 5 loop. ch 5. 4 tr in the next ch 5 loop. ch 5. Repeat this sequence \mathbf{4 \text{ tr}, \text{ch 5}} 14 times more. sl st to the top of the starting ch 4 to join. (16 4-tr groups)
Round 6 (Flower Heads): ch 1 (sc in the sl st join).
- sc in the next 2 tr. ch 3. sc in the next tr. (This creates a slight shaping).
- In the next ch 5 loop, work 4 dc,ch 2,4 dc (This creates the outer solid petal).
- sc in the 1st tr of the next group. sc in the next 2 tr. ch 3. sc in the last tr. (This secures the arch). Repeat across the round, alternating between the sc/ch 3/sc arch and the 4 dc/ch 2/4 dc petal. sl st to the first sc to join.
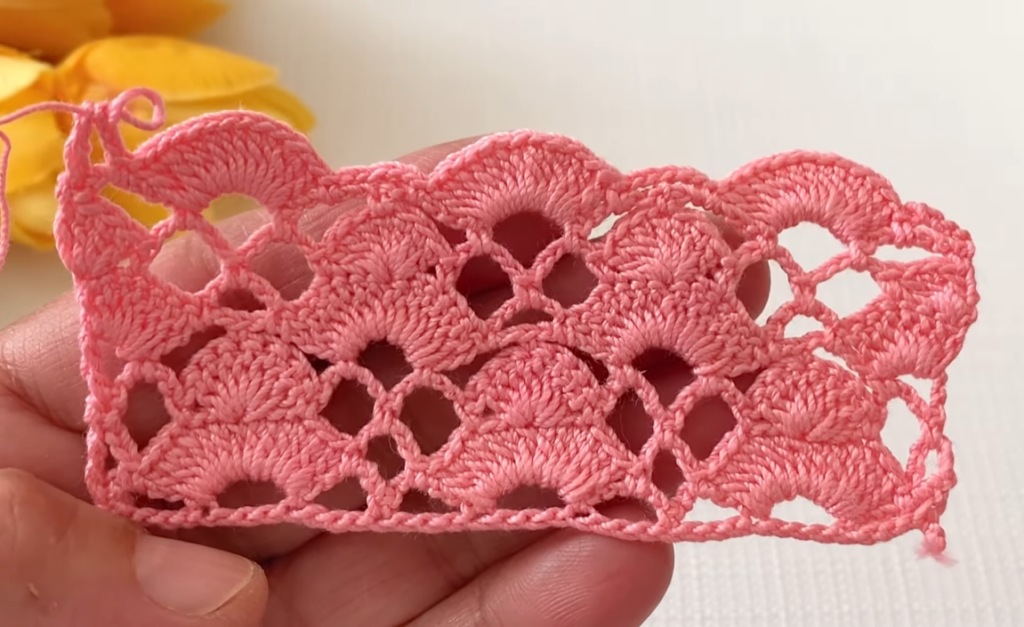
🌊 Pattern Instructions: The Scalloped Edge
This round creates the wide, open scalloped border seen in the image.
Round 7 (Large Scallops): ch 3 (counts as dc). 4 dc in the next ch 3 space.
- ch 3, sc in the ch 2 space of the outer solid petal. ch 3.
- 5 dc into the next ch 3 space. Repeat this sequence ch 3,sc,ch 3, 5 dc across the round. sl st to the top of the starting ch 3 to join.
Round 8 (Picot Final Edge): sl st to the center dc of the 5 dc group. ch 1 (sc in same dc).
- ch 5, sc in the sc below. ch 5.
- sc in the center dc of the next 5 dc group. Repeat this sequence ch 5,sc,ch 5, sc in center dc across the round. sl st to the first sc to join.
Fasten off and weave in the end.
Video Tutorial:
🔨 Finishing and Legacy Blocking
Blocking is essential to define the layers and open the netting of this complex doily.
- Weave: Weave in all loose ends.
- Soak: Submerge the motif in cool water (with a small amount of liquid starch, if desired, for a crisp finish). Gently squeeze out excess water.
- Tension Pinning: Lay the damp motif on a blocking board. Use T-pins:
- Pin the center point of every ch 5 arch on the final edge. Pull gently to ensure the circle is flat and the netting is open.
- Pin out the center of the outer solid petals (where the ch 2 was) to define their shape.
- Dry: Allow the piece to dry completely flat for 12−24 hours.
Your Celestial Cascade Doily is finished! What size hook and thread did you decide to use for your version?


