
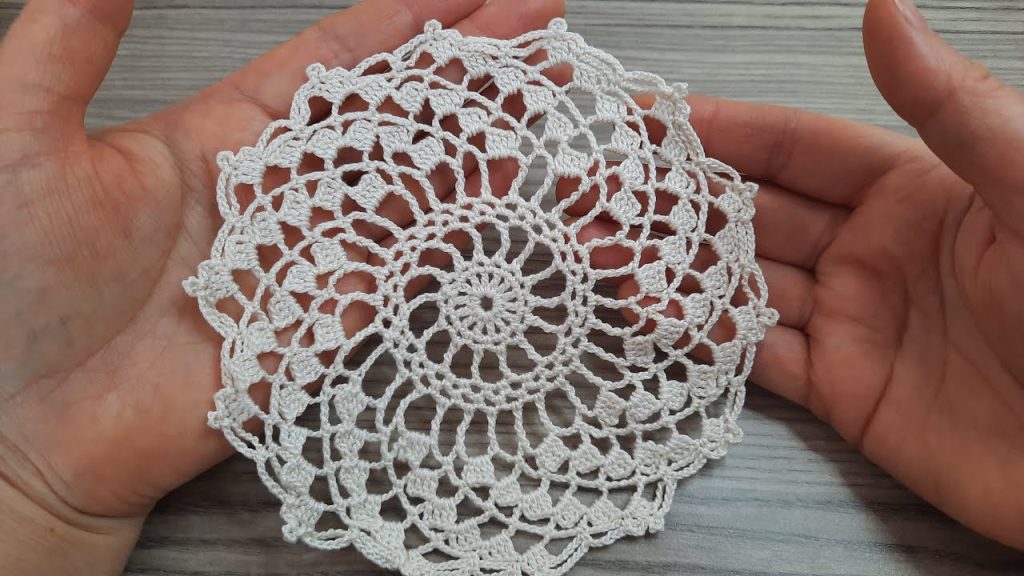
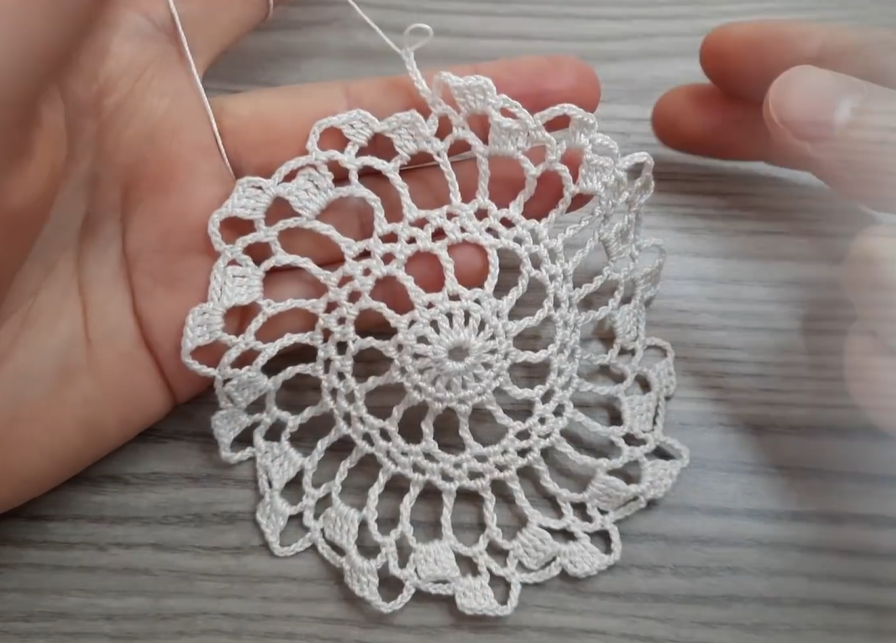
Welcome back to the hook! If you love the look of classic, delicate lace, this project is for you. We’re recreating a charming, miniature doily that is perfect as a coaster, a holiday ornament, or a little accent piece. This pattern starts solid and quickly expands into an intricate, yet easily memorized, sequence of mesh and texture rounds before finishing with a decorative picot border.
🧶 Project Overview & Materials
- Finished Size: Approximately 5-6 inches (12-15 cm) in diameter, depending on your tension and materials.
- Skill Level: Intermediate. Basic stitches, working in the round, and creating picots are required.
- Yarn: Crochet Thread (Size 10 or 20 is ideal) or a Fingering Weight/Light Sport Yarn for a larger, softer coaster. The sample image looks like size 10 cotton thread.
- Hook: A steel hook appropriate for your thread. For Size 10 Thread, a 1.5 mm to 1.75 mm hook is usually a good fit. For sport yarn, use a 3.0 mm hook.
- Notions: Tapestry needle for weaving ends, scissors, and blocking supplies (pins, blocking mat/board, starch or water).
📖 Stitches & Abbreviations
- ch: chain
- sl st: slip stitch
- sc: single crochet
- dc: double crochet
- tr: treble crochet (or triple crochet)
- sk: skip
- st(s): stitch(es)
- sp: space
- Picot: ch 3, sl st into the first ch made.
- Shell: 3 dc in the indicated stitch or space.
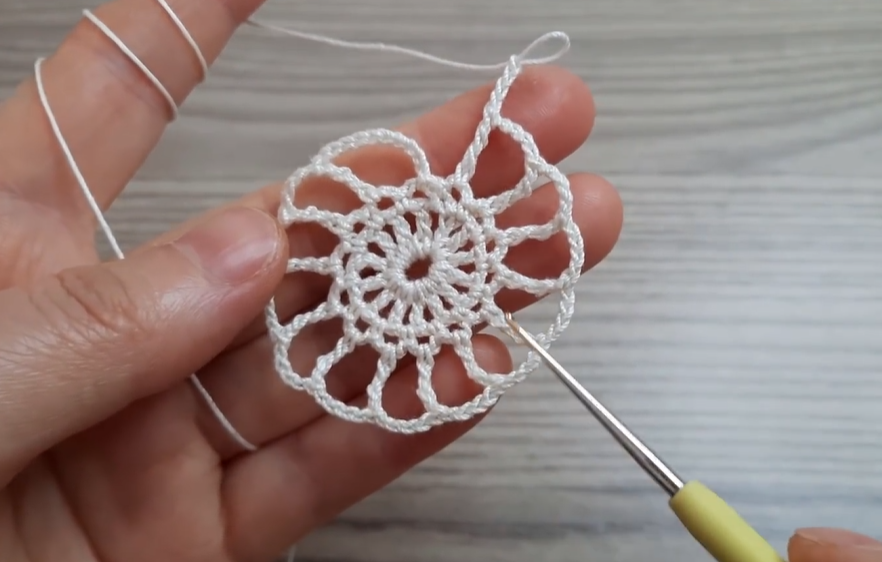
🌻 The Doily Pattern: Working in Rounds
The doily is worked in continuous rounds, joining each round with a slip stitch to the top of the starting chain.
Center Foundation
Round 1:
- Ch 4, sl st into the first ch to form a ring.
- Ch 3 (counts as 1st dc), 11 dc into the ring. (12 dc)
- Sl st to the top of the starting ch 3 to join.
Round 2:
- Ch 3 (counts as 1st dc), dc in the same st.
- 2 dc in every st around. (24 dc)
- Sl st to the top of the starting ch 3 to join.
Round 3: Solid Base
- Ch 3 (counts as 1st dc).
- Dc in the next st, 2 dc in the following st. Repeat from * around. (36 dc)
- Sl st to the top of the starting ch 3 to join.
Filet Mesh and Texture Section
Round 4: First Mesh Round (Filet)
- Ch 5 (counts as dc, ch 2).
- Sk 1 st, dc in the next st, ch 2. Repeat from * around.
- Sk the last st. Sl st to the 3rd ch of the starting ch 5 to join. (18 ch-2 spaces)
Round 5: Heart/Shell Foundation
- Ch 3 (counts as 1st dc). 2 dc in the ch-2 sp.
- Dc in the next dc, 2 dc in the next ch-2 sp. Repeat from * around. (54 dc)
- Sl st to the top of the starting ch 3 to join.
Round 6: Textured/Heart Round This round creates the small “heart” or shell clusters that are prominent in the design.
- Ch 1, sc in the same st.
- Ch 3, sk 2 sts, Shell (3 dc) in the next st.
- Ch 3, sk 2 sts, sc in the next st. Repeat from * around.
- After the final ch 3, sl st to the first sc to join. (9 Shells and 9 sc)
Round 7: Second Mesh Round (Filet)
- Sl st into the first ch-3 sp. Ch 5 (counts as dc, ch 2).
- Dc in the first dc of the next Shell. Ch 2.
- Dc in the third dc of the same Shell. Ch 2.
- Dc in the next ch-3 sp, ch 2.
- Dc in the first dc of the next Shell, ch 2.
- Dc in the third dc of the same Shell, ch 2. Repeat from * around.
- Sl st to the 3rd ch of the starting ch 5 to join. (27 ch-2 spaces)
Round 8: Texture Support Round This round builds up the foundation for the next textured row.
- Ch 3 (counts as 1st dc), dc in the next ch-2 sp.
- Dc in the next dc, dc in the next ch-2 sp. Repeat from * around. (54 dc)
- Sl st to the top of the starting ch 3 to join.
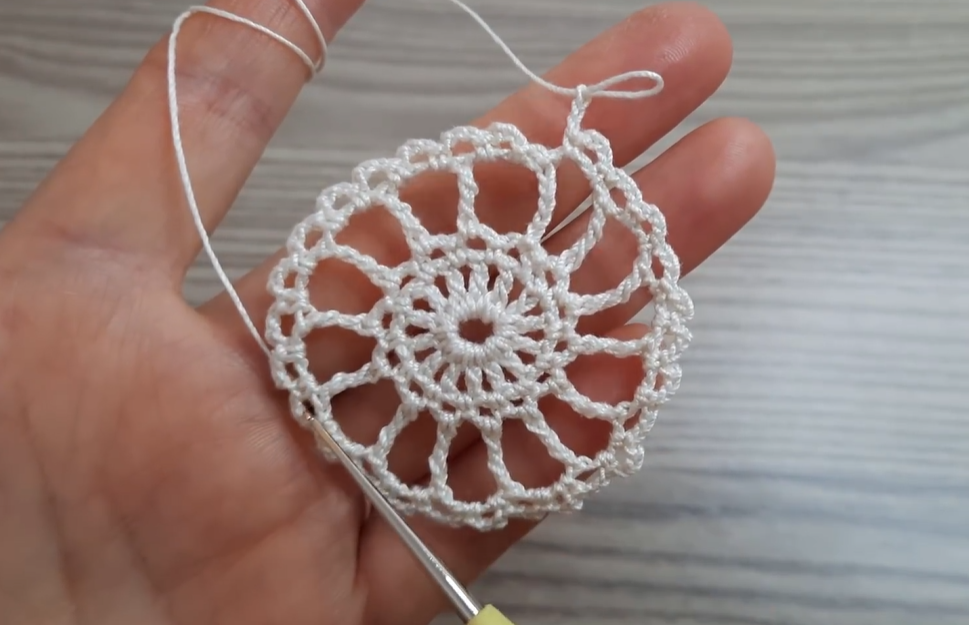
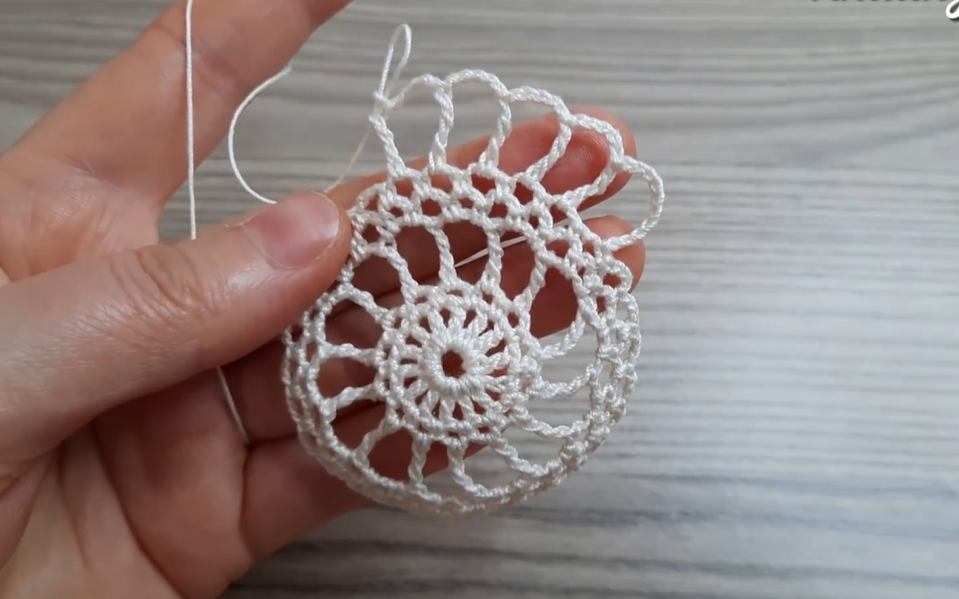
Outer Lace Detail
Round 9: Large Fan Shells This row creates the larger, more open texture visible just before the final border.
- Ch 1, sc in the same st.
- Ch 4, sk 2 sts, (dc, ch 1) 5 times in the next st, dc in the same st (creating a 6-dc fan/shell).
- Ch 4, sk 2 sts, sc in the next st. Repeat from * around.
- After the final ch 4, sl st to the first sc to join. (9 large shells)
Round 10: Final Connecting Mesh
- Sl st into the first ch-4 sp. Ch 1, sc in the same sp.
- Ch 3, sc in the next ch-1 sp of the shell. Repeat from * 4 more times (5 small ch-3 loops across the top of the shell).
- Ch 3, sc in the next ch-4 sp (the large ch-4 sp before the sc).
- Ch 3, sc in the next ch-4 sp (the large ch-4 sp after the sc).
- Repeat from step 2 around.
- Sl st to the first sc to join.
🏵️ The Edging: Picots and Treble Clusters
This final round creates the beautiful, scalloped edge with picots.
Round 11: Picot Border
- Ch 1, sc in the same sc.
- Ch 3, sc in the next ch-3 sp. Repeat from * 2 more times (3 small ch-3 loops).
- Picot (ch 3, sl st in the first ch).
- Sc in the next ch-3 sp.
- Cluster of Tr: (Yarn over twice, insert hook into the next ch-3 sp and pull up a loop, yarn over, pull through 2 loops twice – leave the last loop on hook) 4 times. Yarn over, pull through all 5 loops on hook. (This creates a tr-cluster).
- Picot.
- Sc in the next ch-3 sp.
- Ch 3, sc in the next ch-3 sp. Repeat from * 2 more times.
- Sc in the next sc. (This connects the border between the large fans).
- Repeat from step 2 around.
- Sl st to the first sc to join.
Fasten off and weave in all ends securely.
Video Tutorial:
✨ Finishing Touches: Blocking
Blocking is absolutely essential for lace doilies! It opens up the mesh stitches and allows the delicate picots and shells to lay flat and perfectly defined.
- Wet the Doily: Submerge the doily in lukewarm water (with a mild detergent or sizing agent if desired) and gently squeeze out the excess.
- Pin to Shape: Place the wet doily on a foam or cork blocking board. Start by pinning the center, then carefully stretch and pin each of the tr-clusters and picot scallops to the desired outer diameter. Ensure the shape is perfectly circular.
- Dry: Allow the doily to dry completely, which can take 12-24 hours depending on humidity.
- Enjoy! Carefully unpin your finished, perfectly shaped lace doily.
What a wonderful little piece of lace! Will you be using this as a coaster, or maybe joining several for a runner?


