
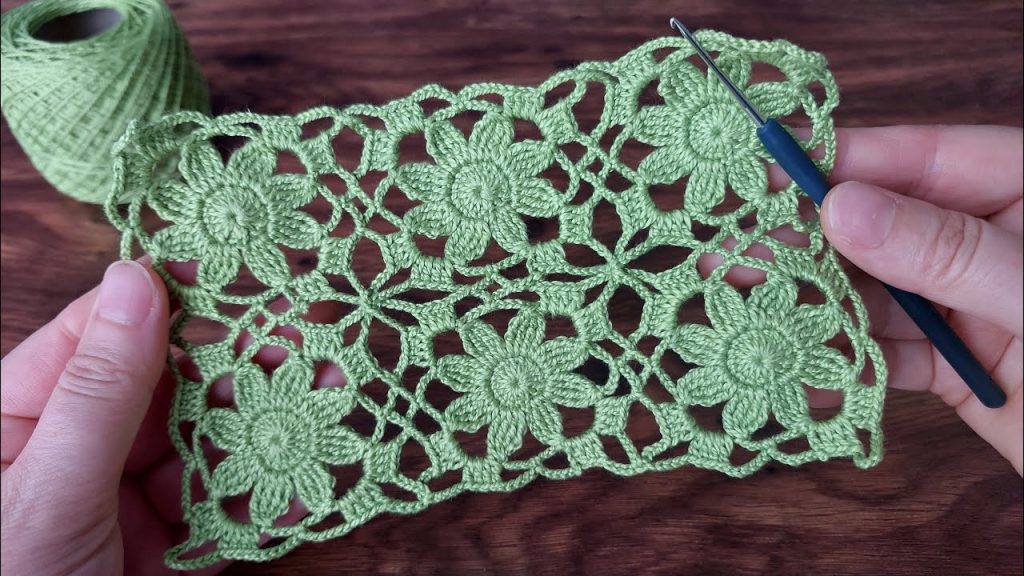
Welcome, fellow hookers! Today, we’re diving into a stunning crochet lace motif that features beautiful, repeating floral medallions. This design, inspired by the image you shared, is surprisingly manageable once you get the hang of the repeating steps. It creates a light, airy, and very elegant fabric, perfect for a spring shawl or a delicate table accent. Get ready to create a garden of gorgeous stitches!
📋 Pattern Overview: What We’re Making
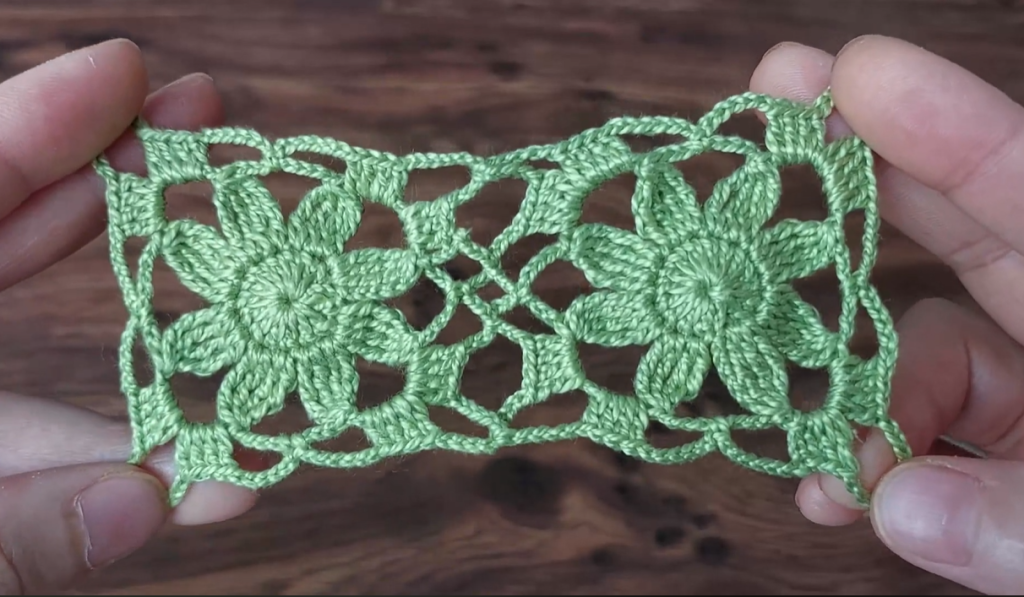
This pattern is worked in rows and uses common crochet stitches to create a repeating two-row floral motif. The key is in placing the double crochets (dc) and picots to form the petals, and using chains (ch) to create the delicate connecting mesh.
⚙️ Materials and Gauge
- Yarn: A fine to light worsted weight cotton or cotton blend yarn will give you the best stitch definition for this lace. The sample in the image appears to use a sport or fingering weight yarn.
- Hook: A hook appropriate for your yarn. For the look in the image, try a hook that is slightly larger than recommended for your chosen yarn to keep the lace open and flowy. I recommend a 3.0 mm to 4.0 mm hook if using sport weight yarn.
- Notions: Tapestry needle for weaving in ends, scissors.
💡 Stitches and Abbreviations
- ch: chain
- sl st: slip stitch
- sc: single crochet
- dc: double crochet
- tr: treble crochet (or triple crochet)
- sk: skip
- sp: space
- Picot: ch 3, sl st into the first ch made.
- V-Stitch (V-st): (dc, ch 2, dc) in indicated stitch or space.
🌸 The Floral Lace Swatch Pattern
We will create a swatch that is three full floral medallions wide. You can adjust the starting chain to make your project wider (the pattern repeat is a multiple of 14, plus 3).
Starting Chain
Ch 45 (for 3 motifs: 3×14=42, plus 3).
Row 1: Foundation Mesh

- Ch 3 (counts as first dc), dc in the 4th ch from hook.
- Ch 3, sk 3 ch, sc in next ch. Repeat from * to * 2 more times (3 ch-3 loops total).
- Ch 3, sk 3 ch, V-st (dc, ch 2, dc) in next ch. This V-st forms the center of the first flower base.
- Ch 3, sk 3 ch, sc in next ch. Repeat from * to * 2 more times (3 ch-3 loops total).
- Ch 3, sk 3 ch, V-st in next ch. (Center of second flower base).
- Ch 3, sk 3 ch, sc in next ch. Repeat from * to * 2 more times (3 ch-3 loops total).
- Ch 3, sk 3 ch, V-st in next ch. (Center of third flower base).
- Ch 3, sk 3 ch, dc in the last ch.
- Turn.
Count check: You should have 3 V-sts and 10 ch-3 loops.
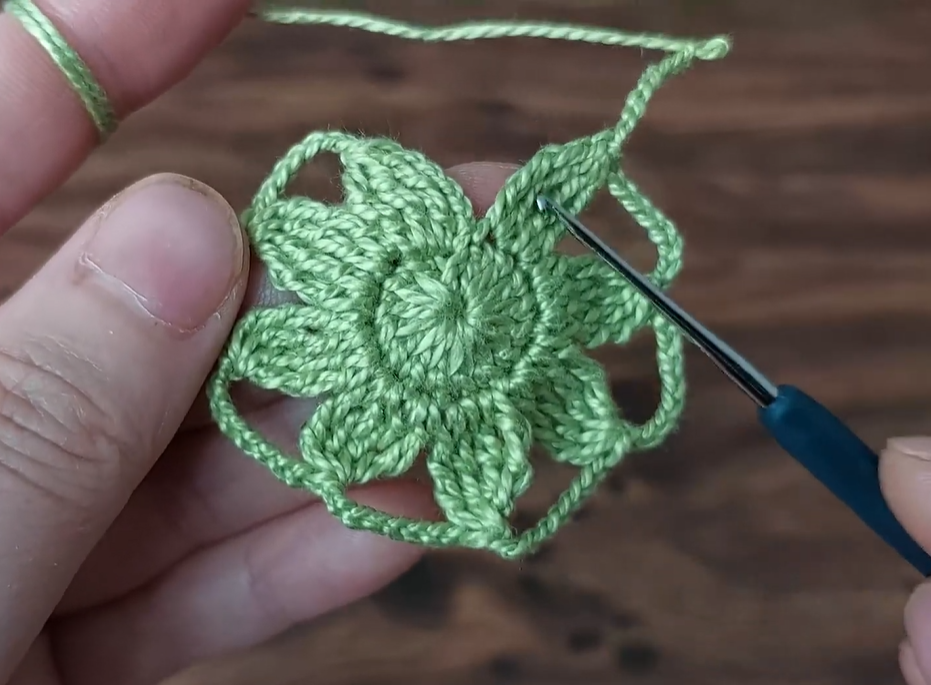
Row 2: Forming the Flowers
This row works the petals into the V-stitches from the previous row.
- Ch 3 (counts as first dc). Dc in the first dc. (This forms the starting edge post).
- Ch 3, sc in the first ch-3 sp.
- Ch 3, sc in next ch-3 sp. Repeat from * to * 1 more time. (This creates 2 small ch-3 loops).
- Ch 3, Petal Group in the ch-2 sp of the next V-st:
- [(dc, Picot) 5 times, dc] in the V-st ch-2 sp. (This creates a 6-dc, 5-picot flower center).
- Ch 3, sc in next ch-3 sp. Repeat from * to * 3 times. (This creates 3 small ch-3 loops between flowers).
- Ch 3, Petal Group in the ch-2 sp of the next V-st:
- [(dc, Picot) 5 times, dc] in the V-st ch-2 sp.
- Ch 3, sc in next ch-3 sp. Repeat from * to * 3 times.
- Ch 3, Petal Group in the ch-2 sp of the next V-st:
- [(dc, Picot) 5 times, dc] in the V-st ch-2 sp.
- Ch 3, sc in the next ch-3 sp.
- Ch 3, sc in the last ch-3 sp.
- Ch 3, (dc, dc) into the top of the turning ch-3.
- Turn.
Count check: You should have 3 Petal Groups (flowers).
Row 3: Linking and Building the Next Mesh
This row establishes the mesh and the new V-stitches for the next row of flowers.
- Ch 6 (counts as tr, ch 2).
- Tr in the second dc of the previous row’s 2-dc cluster. (This forms a corner V-st: tr, ch 2, tr).
- Ch 3, sc in the next ch-3 sp. Repeat from * to * 1 more time.
- Ch 3, sc in the 3rd Picot of the Petal Group. (This centers the link on the flower).
- Ch 3, sc in the next ch-3 sp.
- Ch 3, sc in next ch-3 sp. Repeat from * to * 1 more time.
- Ch 3, V-st (dc, ch 2, dc) in the second ch-3 sp between the flowers. (This is the new center for the next flower).
- Ch 3, sc in the next ch-3 sp. Repeat from * to * 1 more time.
- Ch 3, sc in the 3rd Picot of the next Petal Group.
- Ch 3, sc in the next ch-3 sp.
- Ch 3, sc in next ch-3 sp. Repeat from * to * 1 more time.
- Ch 3, V-st in the second ch-3 sp between the next flowers.
- Ch 3, sc in the next ch-3 sp. Repeat from * to * 1 more time.
- Ch 3, sc in the 3rd Picot of the last Petal Group.
- Ch 3, sc in the next ch-3 sp.
- Ch 3, tr in the last dc.
- Ch 2, tr in the top of the turning ch-3.
- Turn.
Count check: You should have 2 central V-sts, 2 sc connections into the picots, and a tr/ch 2/tr group at the beginning and end.
Row 4: Working the Next Row of Flowers
The flowers in this row will sit between the flowers of Row 2.

- Ch 3 (counts as dc). (dc, ch 2, dc) in the ch-2 sp of the tr/ch 2/tr group.
- Ch 3, sc in the first ch-3 sp.
- Ch 3, sc in next ch-3 sp. Repeat from * to * 1 more time.
- Ch 3, Petal Group in the ch-2 sp of the next V-st:
- [(dc, Picot) 5 times, dc] in the V-st ch-2 sp.
- Ch 3, sc in next ch-3 sp. Repeat from * to * 3 times.
- Ch 3, Petal Group in the ch-2 sp of the next V-st:
- [(dc, Picot) 5 times, dc] in the V-st ch-2 sp.
- Ch 3, sc in next ch-3 sp. Repeat from * to * 3 times.
- Ch 3, (dc, ch 2, dc) in the ch-2 sp of the tr/ch 2/tr group.
- Dc in the third ch of the turning ch-6.
- Turn.
Count check: You should have 2 full Petal Groups (flowers) and 2 half-flowers (the tr/ch 2/tr groups on the edges).
Video Tutorial:
🔁 Repeating the Pattern
To continue the pattern, you will now alternate between Row 3 and Row 4.
- Next Row: Repeat Row 3 to establish the connecting mesh and V-stitches for the next row of flowers.
- Following Row: Repeat Row 2 to work the next row of flowers into the V-stitches and half-V-stitches established in the previous row.
Repeat Row 3 and Row 2 until your piece reaches the desired length, ending with a Row 2 repeat.
🖼️ Edging Suggestions
The pattern naturally creates a beautiful, scalloped edge. You can finish your piece with a simple edging to match, as seen in the image.
- Last Row Edging: After your final Row 2 (the flower row), do not turn.
- Simple Scallop: Ch 1, sc in the first stitch, ch 5, sk 3 stitches, sc in the next stitch. Repeat around the entire piece, working (sc, ch 3, sc) into each corner. Join with a sl st to the first sc. Fasten off and weave in ends.
Happy crocheting! What kind of project do you think you’ll make with this beautiful lace?


