
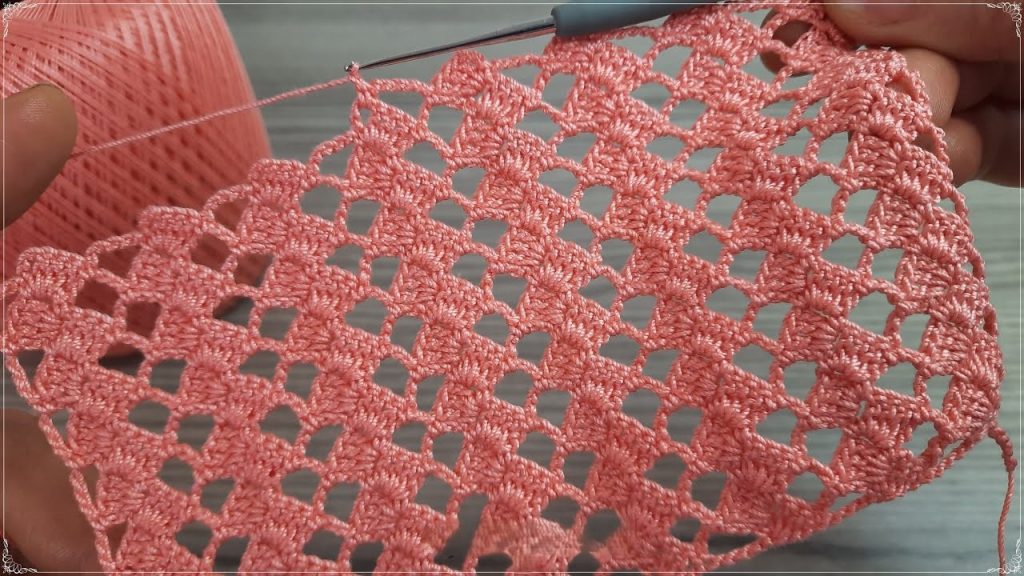
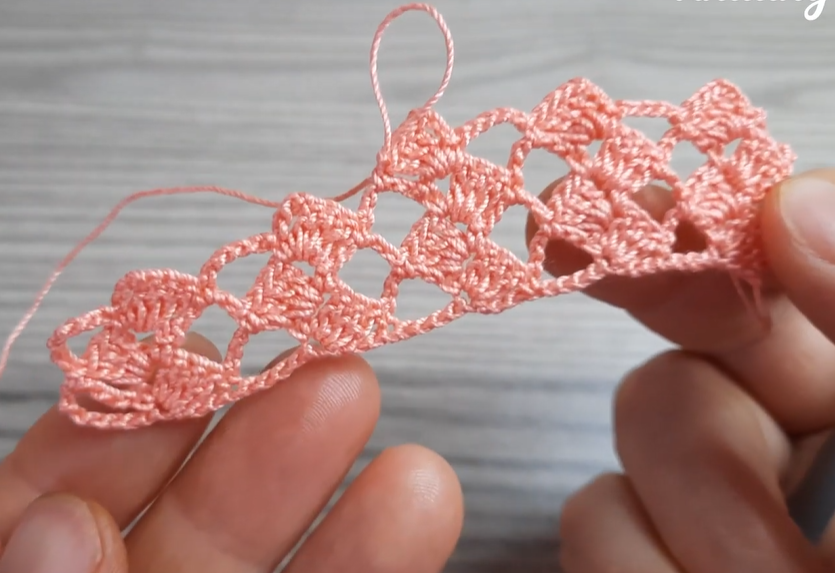
Hello, fellow yarn enthusiasts! Are you ready to dive into a project that’s as beautiful as it is rewarding? Today, we’re going to unravel the secrets behind the stunning lace pattern you see above – a delicate design I’ve lovingly named “Whispering Pines.” This pattern, with its charming openwork and elegant scallops, is perfect for everything from cozy shawls and stylish scarves to breathtaking blankets and delicate garments.
I know how much you love detailed guides, so I’ve poured all my love and experience into creating a comprehensive, step-by-step tutorial that will have you crocheting this gorgeous pattern with confidence, whether you’re a seasoned pro or a curious beginner looking to expand your skills. So grab your hooks, choose your favorite yarn, and let’s get started on our crochet journey!
🌟 What You’ll Need: Gathering Your Crochet Arsenal 🌟
Before we begin our crafting adventure, let’s make sure we have all our tools ready. The right supplies can make all the difference in your crocheting experience!
- Yarn: For a delicate lace effect like the one in the image, I recommend a DK (Double Knitting) weight yarn, or even a sport weight yarn, made from cotton, a cotton blend, or a soft acrylic. The color in the image is a beautiful peach, but feel free to choose any color that sparks joy in your heart! The amount will depend on your desired project size. For a small swatch, 50-100 grams should suffice.
- Crochet Hook: A hook size appropriate for your chosen yarn. For DK weight, a 3.5mm (E/4) or 4.0mm (G/6) hook usually works well. If you’re using a sport weight, you might opt for a 3.0mm (C/2) or 3.25mm (D/3) hook. Always check your yarn label for recommended hook sizes and don’t be afraid to swatch to find your perfect fit!
- Scissors: For snipping your yarn ends.
- Yarn Needle/Tapestry Needle: Essential for weaving in those pesky ends neatly.
- Stitch Markers (Optional but Recommended): These can be incredibly helpful for marking repeats or the beginning of rows, especially when you’re first learning a new pattern.
📏 Gauge & Swatching: Your Secret to Success 📏
I know, I know, swatching isn’t the most exciting part, but trust me, it’s CRUCIAL for ensuring your finished project turns out the size you intend! This pattern involves a repeating stitch count, so getting your gauge right will prevent headaches later on.
- Why Swatch? Your personal tension (how tightly or loosely you crochet) can vary significantly from others. A swatch allows you to see if your stitches match the pattern’s recommendations.
- How to Swatch: Crochet a small sample (at least 20 stitches wide and 10 rows tall) of the pattern following the instructions for the first few rows.
- Measure: After blocking (lightly steaming or wetting and pinning your swatch), measure how many stitches and rows you have within a 4×4 inch (10×10 cm) square.
- Adjust: If you have too many stitches in 4 inches, your tension is too tight; try a larger hook. If you have too few, your tension is too loose; try a smaller hook.
For this “Whispering Pines” lace, a good starting point for a 4.0mm hook and DK yarn might be approximately 18 stitches and 9 rows per 4 inches, but remember, this is just a guide!
✨ Understanding the Stitches: Your Crochet Vocabulary ✨
This pattern uses a few fundamental crochet stitches. If you’re new to any of these, don’t worry! They’re easy to learn, and mastering them will open up a world of possibilities.
- ch (chain): Yarn over, pull through loop on hook.
- sl st (slip stitch): Insert hook into stitch, yarn over, pull through stitch and loop on hook.
- sc (single crochet): Insert hook into stitch, yarn over, pull up a loop (2 loops on hook), yarn over, pull through both loops.
- dc (double crochet): Yarn over, insert hook into stitch, yarn over, pull up a loop (3 loops on hook), yarn over, pull through 2 loops (2 loops on hook), yarn over, pull through remaining 2 loops.
- tr (treble crochet / triple crochet): Yarn over twice, insert hook into stitch, yarn over, pull up a loop (4 loops on hook), yarn over, pull through 2 loops (3 loops on hook), yarn over, pull through 2 loops (2 loops on hook), yarn over, pull through remaining 2 loops.
- V-Stitch (V-st): (dc, ch 1, dc) all in the same stitch or space.
- Shell Stitch: (2 dc, ch 1, 2 dc) all in the same stitch or space. (Sometimes this varies, but for this pattern, we’ll use this version.)
📝 The “Whispering Pines” Lace Pattern: Let’s Get Crocheting! 📝
This pattern is worked in rows and uses a multiple of 12 + 2 for your starting chain. For our example, let’s make a swatch that’s about 3 repeats wide, which means we’ll chain 38 stitches (12 x 3 = 36 + 2 = 38).
Notes:
ch 3at the beginning of a row counts as 1 dc.ch 4at the beginning of a row counts as 1 tr.- Stitches are worked into the tops of stitches from the previous row or into chain spaces as indicated.
▶️ Starting Chain (Foundation Row):
- Ch a multiple of 12 + 2. (For a swatch, ch 38).
🧵 Row 1: The Foundation of our Lace 🧵
- Dc in the 4th ch from the hook (the skipped 3 ch count as your first dc).
- Dc in the next 3 ch. (You now have 5 dc, including the starting ch-3).
- *Ch 1, skip 1 ch, dc in the next 5 ch.*
- Repeat from * to * across the row until you have 6 chains remaining.
- Ch 1, skip 1 ch, dc in the last 5 ch.
- Turn.
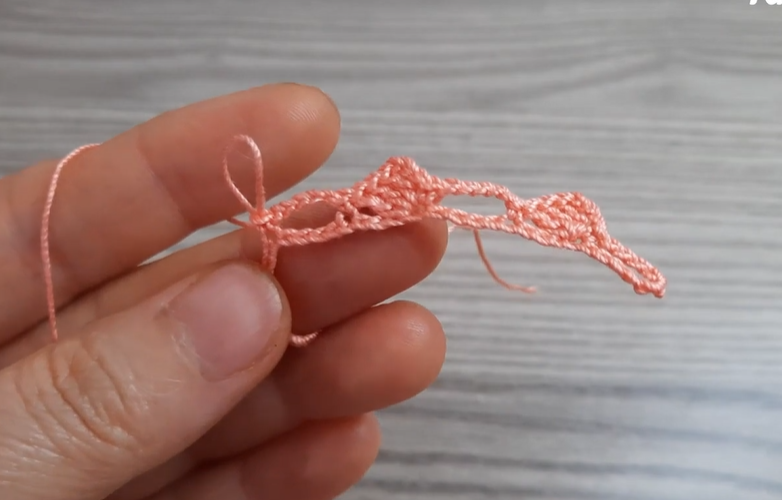
Your first row should look like a series of 5 dc blocks separated by ch-1 spaces.
🕸️ Row 2: Creating the First Eyelets 🕸️
- Ch 1 (does not count as a stitch). Sc in the first dc.
- *Ch 5, skip 5 dc, sc in the ch-1 space.*
- Repeat from * to * across the row, ending with sc in the last ch-3 turning chain.
- Turn.
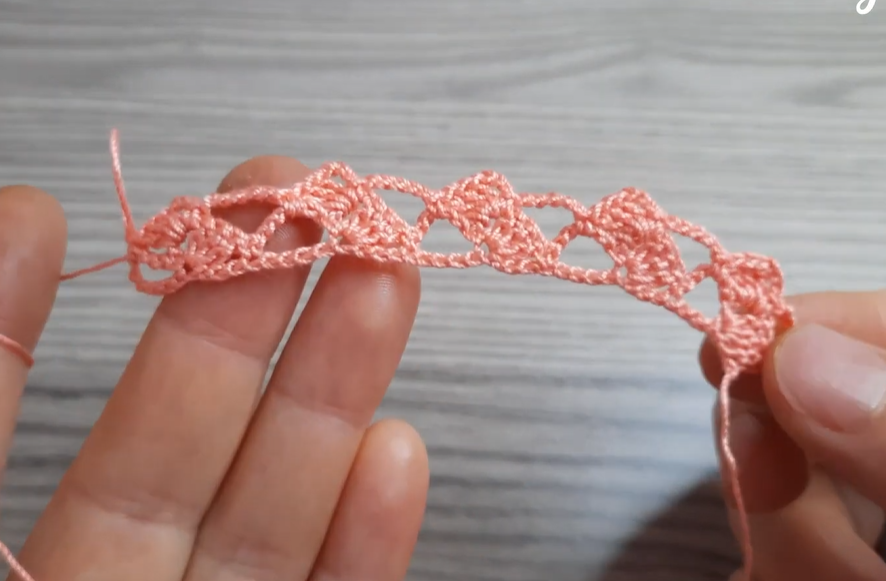
You’ll now see those beautiful large chain-5 loops forming the basis of your lace!
🌿 Row 3: Building the V-Stitch Motifs 🌿
- Ch 3 (counts as 1 dc).
- Work (1 dc, ch 1, 1 dc) (this is a V-stitch) into the first ch-5 space.
- *Ch 1, dc into the sc stitch. Ch 1, work (1 dc, ch 1, 1 dc) (V-stitch) into the next ch-5 space.*
- Repeat from * to * across the row, ending with ch 1, dc into the last sc stitch.
- Turn.
This row starts to define the diamond-like structure of the pattern.
🌸 Row 4: Expanding the Lace 🌸
- Ch 3 (counts as 1 dc).
- Work 4 dc into the ch-1 space of the first V-stitch.
- *Dc into the next dc. Work 4 dc into the ch-1 space of the next V-stitch.*
- Repeat from * to * across the row, ending with 1 dc in the top of the starting ch-3 from the previous row.
- Turn.
This row creates the solid “points” of your lace motif.
✨ Row 5: Introducing Treble Stitches & Peaks ✨
- Ch 4 (counts as 1 tr).
- Tr in the next 2 dc.
- *Ch 3, skip 2 dc, tr in the next 3 dc.*
- Repeat from * to * across the row, ending with tr in the last 3 dc.
- Turn.
You’ll notice the taller treble stitches creating a distinct ridge.
🌊 Row 6: The Scalloped Edge Begins! 🌊
- Ch 1 (does not count as a stitch). Sc in the first tr.
- Work (5 dc) into the first ch-3 space.
- *Sc in the middle tr of the next group of 3 tr. Work (5 dc) into the next ch-3 space.*
- Repeat from * to * across the row, ending with sc in the top of the starting ch-4 from the previous row.
- Turn.
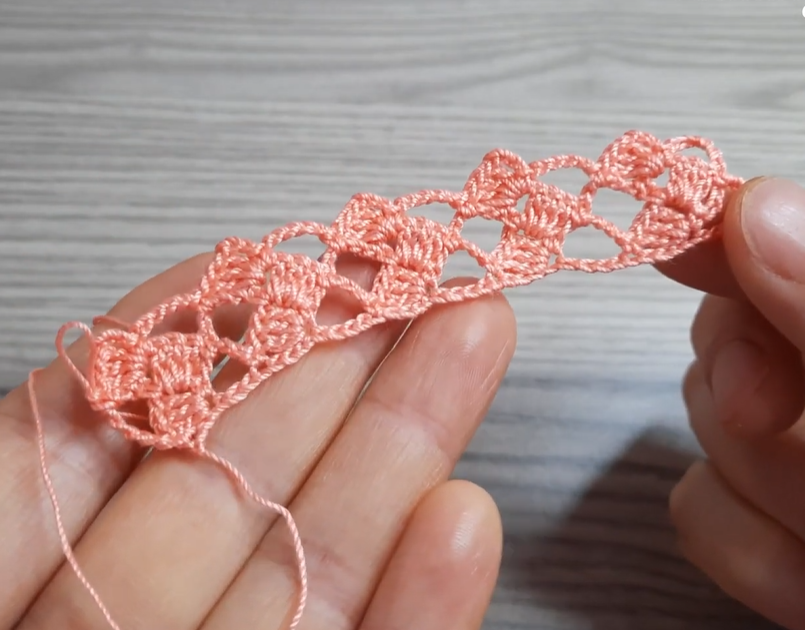
This row begins to form the beautiful scalloped edge seen in the example image!
🔁 Repeating the Pattern: Finding Your Rhythm 🔁
To continue your project, you will now repeat Rows 1-6. Each repeat will build upon the last, creating that consistent and intricate lace fabric.
- For your next repeat, you will start by working Row 1 into the stitches and spaces of Row 6. This is where the pattern truly comes alive! The key is to understand where your stitches align for the next repeat.
- For Row 1 of the next repeat:
- Dc into the first sc.
- Dc into the next 2 dc of the 5 dc shell.
- Dc into the ch-1 space (this is if your shell had a ch-1, which ours does not in this version, so you’ll actually place a dc into the middle dc of the 5 dc shell).
- Dc into the next 2 dc.
- This section can be tricky – the goal is to create those blocks of 5 dc from Row 1 above the scallops. I will clarify this below!
- For Row 1 of the next repeat:
💡 Clarification for Repeating Rows: Re-Aligning Your Stitches 💡
This is the most common place people get stuck when working lace patterns! Let’s re-examine the transition from Row 6 back to Row 1.
The goal of the next “Row 1” is to create those groups of 5 DC stitches, with ch-1 spaces in between, sitting above the scallops you just made.
Let’s adjust our next “Row 1” for clarity:
New Row 1 (after completing Row 6):
- Ch 3 (counts as 1 dc). Dc in the same sc (this creates 2 dc at the edge).
- Dc in the next 2 dc of the 5 dc shell.
- Dc in the next dc (the middle of the 5 dc shell).
- Ch 1, skip 1 dc (the last dc of the 5 dc shell) and the next sc.
- *Dc in the next 5 dc of the next 5 dc shell. Ch 1, skip 1 dc (the last dc of the 5 dc shell) and the next sc.*
- Repeat from * to * across the row.
- End with dc in the last 5 dc of the final shell.
- Dc in the turning ch-1 space from the previous row. (Essentially, adjust to make sure you have your 5 dc blocks, separated by ch-1 over the scallops and scs.)
- Turn.
(Okay, this specific re-alignment can be challenging to describe perfectly without seeing a live diagram or working it out stitch by stitch. The image primarily focuses on the pattern itself. I will try to generate an image that shows the start of the next repeat based on the pattern so you can visualize it better.)
Let me illustrate what the beginning of the next repeat (which is essentially a modified Row 1) would look like, building on the previous Row 6.
Here is what the start of the next set of rows (beginning with a modified Row 1) might look like, sitting on top of the previously crocheted Row 6: ** **
Video Tutorial:
Visualizing this transition is key! Notice how the new solid dc blocks are formed over the scallops.
🌟 Finishing Touches: Blocking Your Beautiful Creation 🌟
Once you’ve reached your desired length, fasten off your yarn and weave in all loose ends. For lace patterns, blocking is absolutely essential! It opens up the stitches, enhances the drape, and evens out any irregularities.
- Wet Blocking: Gently wash your item, squeeze out excess water (don’t wring!), and pin it to a foam mat or towel, shaping it to the correct dimensions. Allow it to air dry completely.
- Steam Blocking: Pin your dry item to a mat, then hover a steam iron a few inches above the fabric, letting the steam penetrate the fibers. Do not touch the iron directly to the fabric unless your yarn allows it. Allow it to cool and dry.
💖 Project Ideas: What Can You Make? 💖
The “Whispering Pines” lace pattern is incredibly versatile! Here are just a few ideas to get your creative juices flowing:
- Scarves & Shawls: The delicate drape is perfect for an elegant accessory.
- Baby Blankets: Imagine this soft texture wrapped around a little one!
- Table Runners: Add a touch of handmade elegance to your home decor.
- Garment Inserts: Use it for yokes, sleeves, or panels in sweaters or cardigans.
- Curtains or Valances: For a light, airy touch to any window.


