

This pattern will guide you in creating a pair of cozy, ribbed crochet slippers. The simple construction, made from just two pieces, makes this a quick and satisfying project, even for a beginner. The ribbed texture is created using a simple back loop only stitch, providing both warmth and a snug fit. This pattern is written for a women’s US size 7-8 but can be easily adjusted to fit any foot.
Materials
- Yarn: Approximately 150-200 yards of worsted weight (Category 4) yarn in a solid color. The example uses a vibrant purple.
- Hook: A 5.0 mm (H/8) crochet hook.
- Accessories: A yarn needle for weaving in ends, scissors, and a stitch marker (optional).
Stitches Used (US Terms)
- ch: Chain
- sl st: Slip Stitch
- sc: Single Crochet
- hdc: Half Double Crochet
- hdc blo: Half Double Crochet Back Loop Only
- dec: Decrease (sc2tog)
- inc: Increase (2 sc in the same stitch)
Part 1: The Sole and Heel Piece (Make 2)
This piece is worked in rows to create the ribbed texture and forms the sole and part of the upper.
Initial Chain: Ch 30.
Row 1: Hdc in the 2nd ch from the hook and in each ch across. Ch 1, turn. (29 hdc)
Row 2: Hdc blo in each st across. Ch 1, turn. (29 hdc)
Row 3 – 25: Repeat Row 2. Continue repeating until your piece measures approximately 7-8 inches long. This will be the sole of the slipper.
Adjusting the length: To make the slipper longer or shorter, simply add or subtract rows. Each row adds a small amount of length.
Creating the Heel:
- At the end of Row 25, you will now begin to shape the heel. Do not turn.
- Row 26: Sc in the first 10 sts. dec (sc2tog) in the next st. Sc in the next 7 sts. dec in the next st. Sc in the last 10 sts. Ch 1, turn.
- Row 27: Sc in each st across. Ch 1, turn.
- Row 28: Sc in the first 8 sts. dec in the next st. Sc in the next 7 sts. dec in the next st. Sc in the last 8 sts. Ch 1, turn.
- Row 29: Sc in each st across. Fasten off, leaving a long tail for sewing.
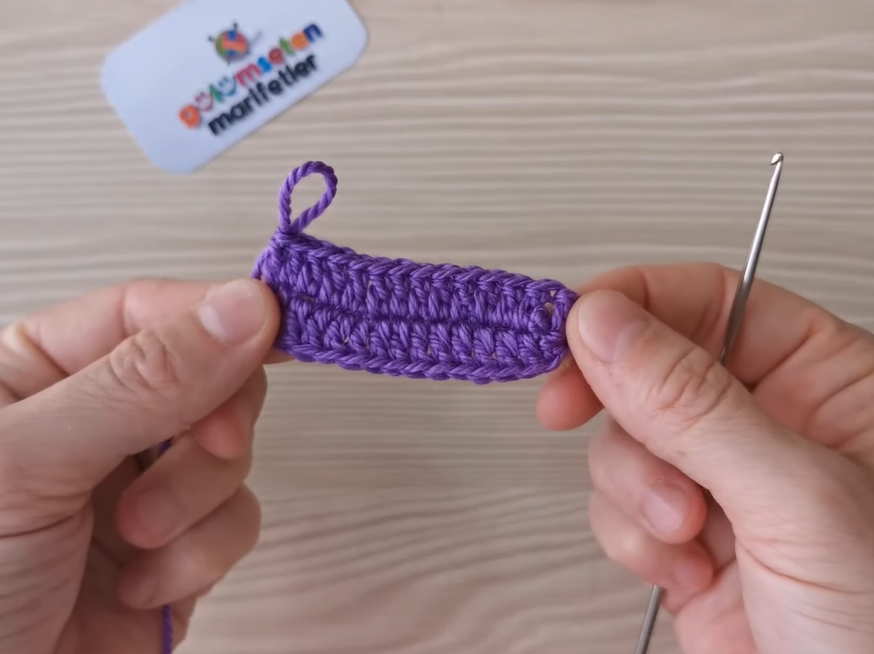
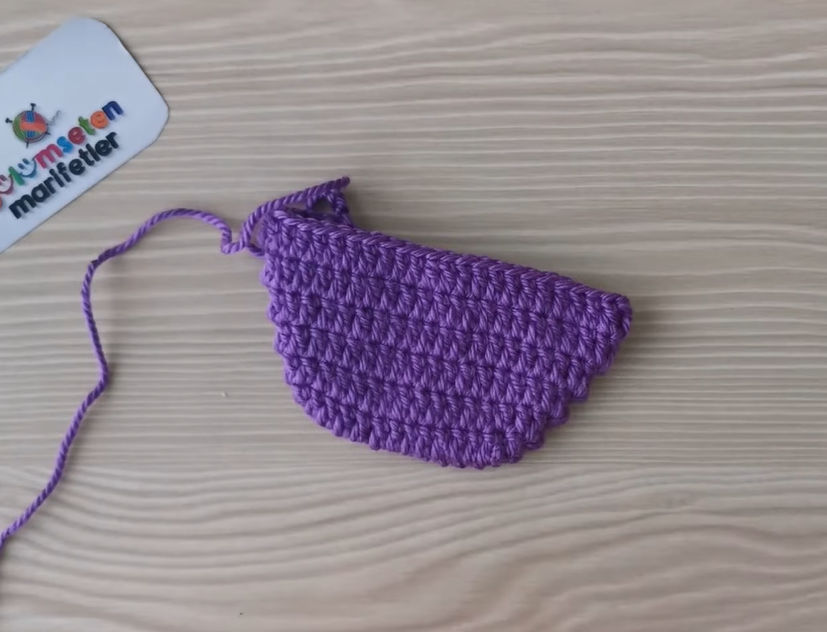
Part 2: The Toe Piece (Make 2)
This piece is worked in a wedge shape and forms the top of the slipper’s toe.
Initial Chain: Ch 10.
Row 1: Sc in the 2nd ch from the hook and in each ch across. Ch 1, turn. (9 sc)
Row 2: Inc in the first st. Sc in the next 7 sts. Inc in the last st. Ch 1, turn. (11 sc)
Row 3: Sc in each st across. Ch 1, turn. (11 sc)
Row 4: Inc in the first st. Sc in the next 9 sts. Inc in the last st. Ch 1, turn. (13 sc)
Row 5: Sc in each st across. Ch 1, turn. (13 sc)
Row 6: Inc in the first st. Sc in the next 11 sts. Inc in the last st. Ch 1, turn. (15 sc)
Row 7: Sc in each st across. Ch 1, turn. (15 sc)
Row 8: Inc in the first st. Sc in the next 13 sts. Inc in the last st. Ch 1, turn. (17 sc)
Row 9: Sc in each st across. Ch 1, turn. (17 sc)
Row 10: Inc in the first st. Sc in the next 15 sts. Inc in the last st. Ch 1, turn. (19 sc)
Row 11: Sc in each st across. Fasten off, leaving a long tail for sewing.
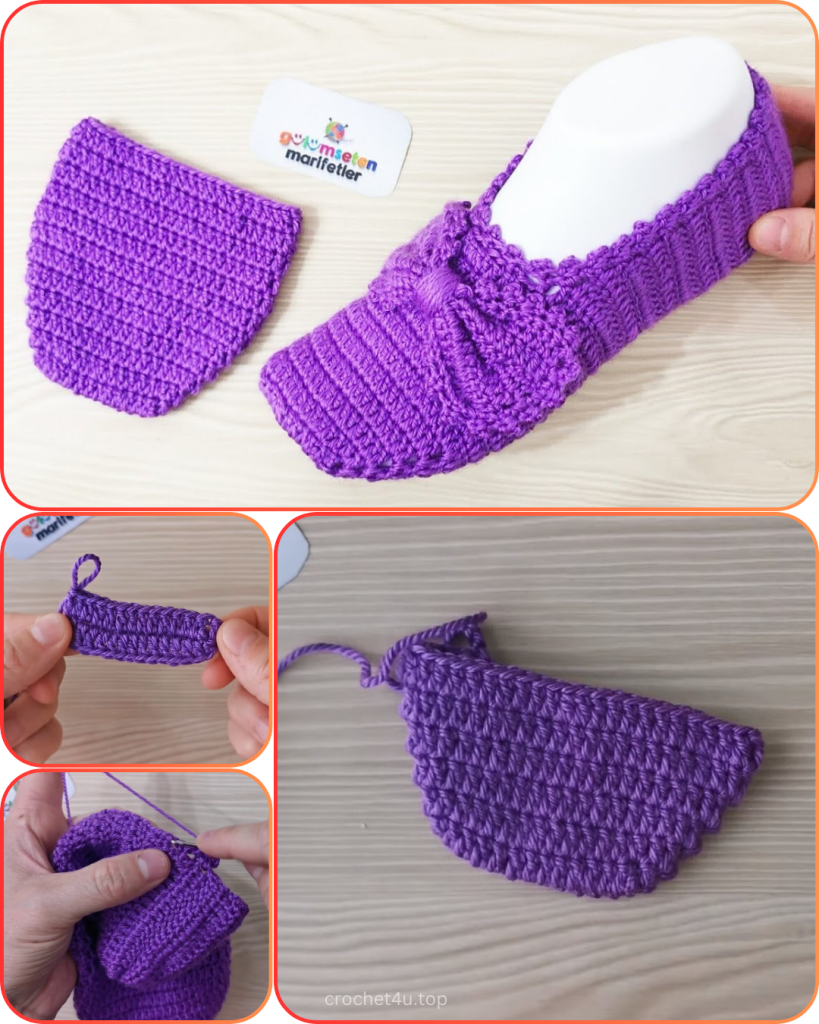
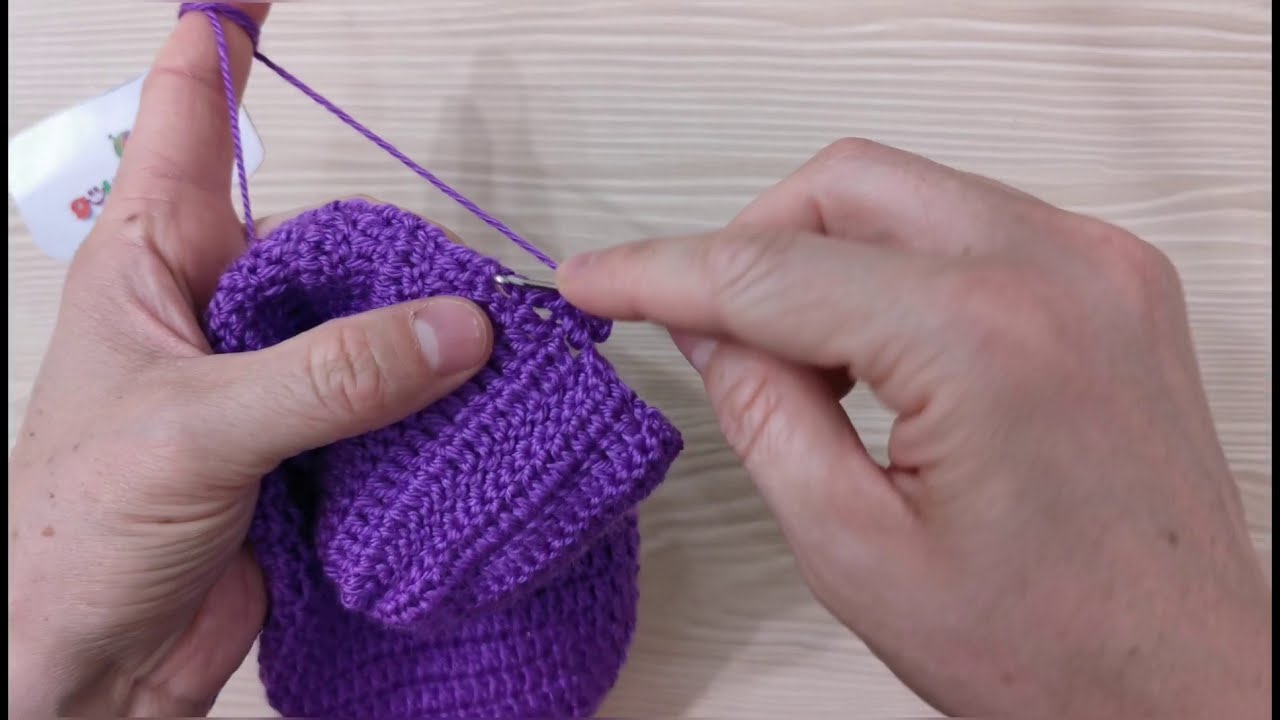
Part 3: Assembly
Now you’ll sew the two pieces together to form the slipper.
Step 1: Fold the sole and heel piece in half lengthwise, with the ribbed side facing out. Sew the heel seam together using the long tail you left. Use a whip stitch or mattress stitch for a clean finish.
Step 2: Locate the center of the short end of the toe piece. Match this up to the center of the heel piece. Pin or use a stitch marker to hold it in place.
Step 3: Begin sewing the toe piece to the sole/heel piece. Work your way down from the center, using a whip stitch to sew the two pieces together. Continue until you reach the end of the toe piece on both sides.
Step 4: Weave in all remaining ends. Repeat the process for the second slipper.
Video Tutorial:
Final Touches
For a comfortable and warm slipper, you can add a layer of felt or fleece to the inside of the sole. This also provides extra durability.
These slippers are a wonderful gift for a loved one or a treat for yourself. The simplicity of the pattern and the satisfying result make them a project you’ll want to make again and again in every color!


