
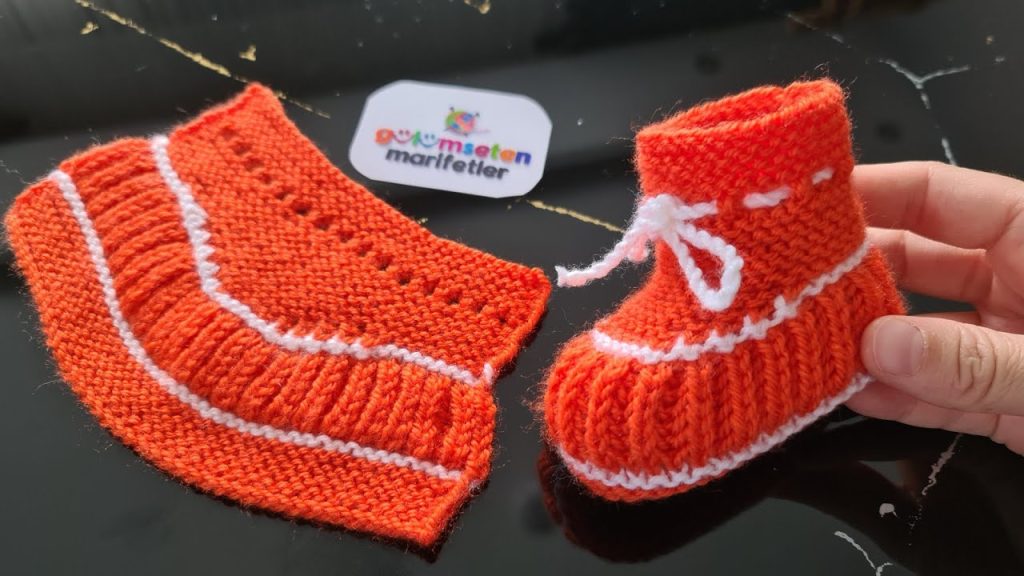
There is something truly special about creating a handmade item for a new baby, and when that item is as adorable as these “Darling Ruffles” Baby Booties, the joy is doubled. Inspired by the charm of classic children’s clothing, these booties feature a delicate combination of textures: a snug ribbed ankle, a lacy eyelet row for the tie, and a delightful ruffled “skirt” around the foot. The little pop of a contrasting color adds a touch of playful personality.
This project is not only beautiful but also a fantastic way to practice a variety of knitting techniques, including ribbing, simple lace, and increasing to create a ruffle. The booties are worked flat and then seamed, which makes them a perfect project for knitters of all skill levels, especially those looking to grow their skills. So grab your yarn and needles, and let’s knit something truly darling!
Pattern Details
- Skill Level: Intermediate
- Size: 0-6 Months
- Finished Measurements (approximate): 3.5 inches (9 cm) sole length
- Gauge: 24 stitches and 32 rows in stockinette stitch = 4 inches (10 cm).
Materials
- Yarn: Approximately 50 yards of DK (weight 3) yarn. A soft, machine-washable wool or acrylic blend is perfect.
- Contrasting Yarn (CC): A small amount of white or another contrasting color for the stripes and ties.
- Needles: One pair of straight knitting needles, size US 3 (3.25 mm), OR size needed to obtain gauge.
- Notions:
- Yarn needle for seaming and weaving in ends
- Scissors
- Stitch markers (optional)
Abbreviations (US Terms)
- CO: Cast on
- BO: Bind off
- k: knit
- p: purl
- k2tog: knit two together
- yo: yarn over
- kfb: knit front and back (increase)
- st(s): stitch(es)
- sl st: slip stitch
- […]: Repeat instructions within brackets as specified
- (…): The number of stitches at the end of the row
Pattern Notes
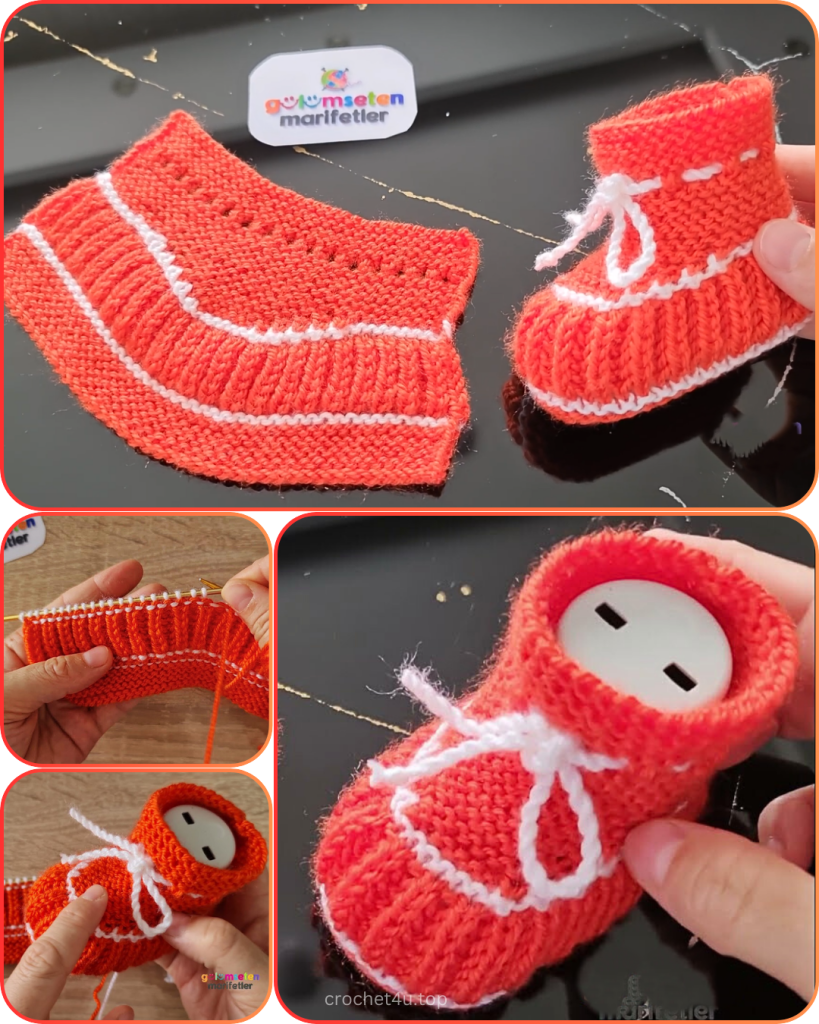
- The bootie is worked flat, beginning with the ankle cuff.
- A contrasting color is used for the stripe and the ties. You can either carry the yarn up the side of your work or cut and rejoin for a cleaner finish.
- The ruffle is created by knitting an increase row that doubles the number of stitches, giving it a playful flare.
- The finished bootie is seamed to create the final shape.
The Pattern
Make 2 booties.
Ankle Cuff and Eyelet Row
Using Main Color (MC): Row 1 (WS): CO 30 sts. Row 2 (RS): [K1, p1] to end. Row 3 (WS): [P1, k1] to end. Repeat Rows 2 and 3 until the piece measures 1.5 inches (4 cm) from the cast-on edge, ending with a WS row.

Change to Contrasting Color (CC): Eyelet Row (RS): K1, [yo, k2tog] to end. Next Row (WS): K across.
Change back to MC: Next Row (RS): K across.
Ruffle Section
The next few rows will create the ruffle.
Ruffle Increase Row (WS): P across, increasing in every other stitch by purling into the front and back of the stitch (pfb). (60 sts)
Next Row (RS): K across. Next Row (WS): P across.
Repeat the last two rows (stockinette stitch) until the ruffle measures 1 inch (2.5 cm) from the eyelet row, ending with a WS row.
Foot and Sole
You will now work on the top of the foot and decrease for the toe.
Row 1 (RS): K30, BO the next 10 sts, k to end. (20 sts remaining) Row 2 (WS): P across. Row 3 (RS): K across.
Repeat Rows 2 and 3 until the foot portion measures 3 inches (7.5 cm) from the beginning of the ruffle, ending with a WS row.
Decrease for the Toe: Next Row (RS): K1, k2tog, k to last 3 sts, k2tog, k1. Next Row (WS): P across.
Repeat the last two rows until 10 stitches remain. Cut yarn, leaving a long tail for seaming.
Video Tutorial:
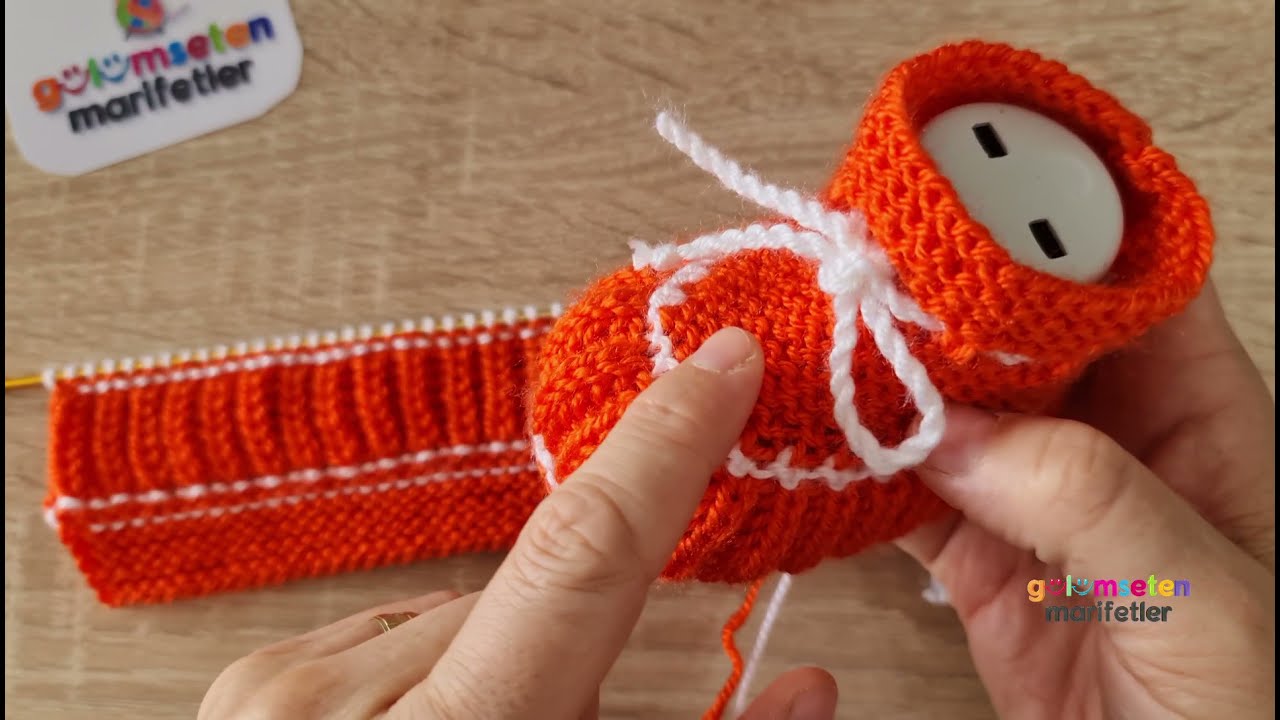
Finishing
- Seam the Toe: Fold the piece in half lengthwise with the wrong side facing out. Thread the long tail onto your yarn needle. Using a mattress stitch or simple whipstitch, seam the toe section closed.
- Seam the Sole: Continue seaming down the side of the bootie, from the toe to the heel.
- Seam the Ankle: Seam the sides of the ankle cuff together to form a tube.
- Create the Ties: Using your contrasting yarn, create a simple I-cord or a twisted cord about 12 inches (30 cm) long. Thread it through the eyelet row and knot the ends.
- Weave in Ends: Neatly weave in all remaining loose ends.
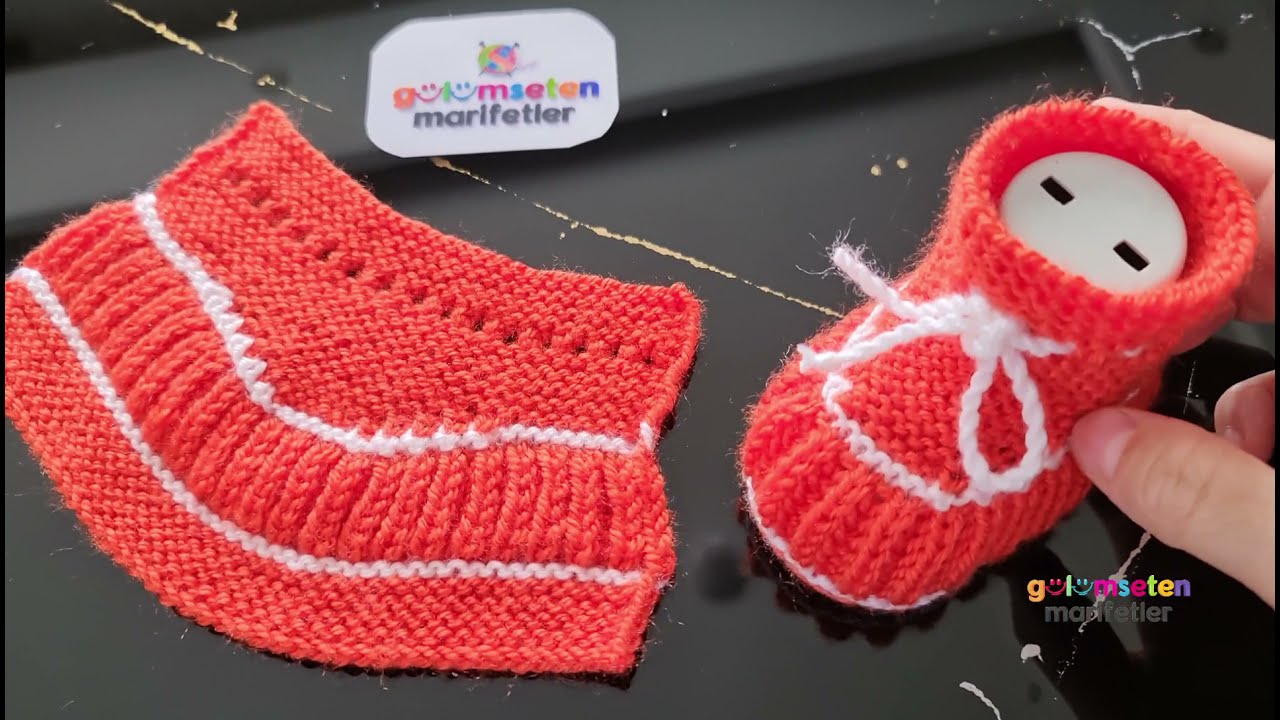
Congratulations! Your first “Darling Ruffles” bootie is complete. Now all you have to do is make the second one.
I would love to see your finished projects! Share a picture on social media and tag me or use the hashtag #DarlingRuffles so I can see your beautiful work. Happy knitting!


